
Learn about the basics of painting reflections in acrylic paint.
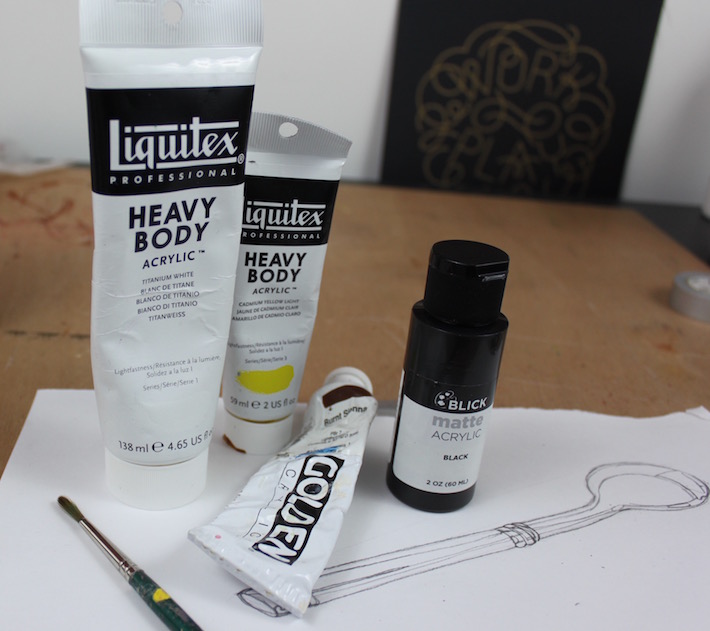
Tools for this tutorial:
 When painting reflections, I find it helpful to use acrylic paint. I like this material because it can be easily thinned with water, and it also layers nicely. When it’s time to add highlights or thin shadows, you can apply the paint on top of other colors if necessary.
 I’m painting a spoon on a wood surface, so my acrylic colors are minimal: black, white, yellow and burnt sienna. I’ve also included my favorite liner brush. It helps make the tiny, fine marks you see in reflections.
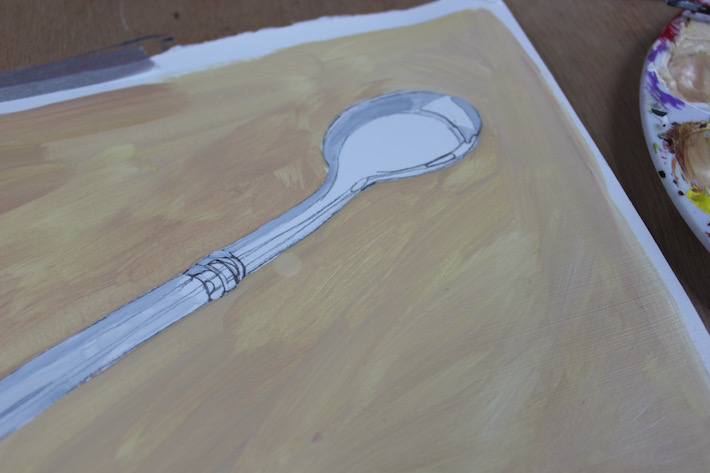
Step 1: Start with a detailed drawing.
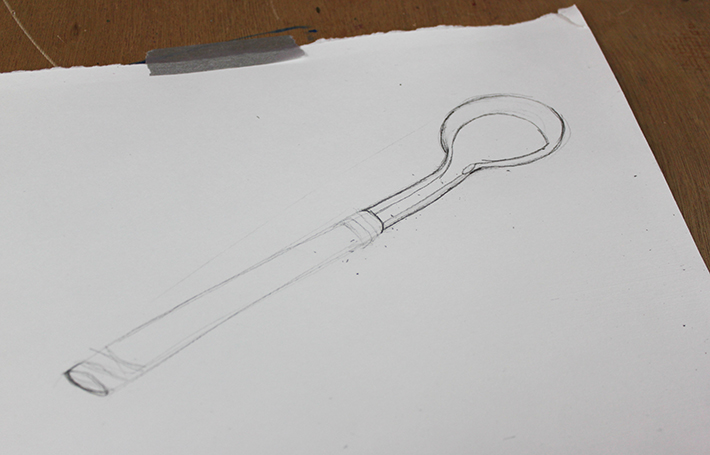 My most successful paintings have come from a carefully planned drawing. Since there are so many small details when creating reflections, it’s best to have them all down on paper or canvas beforehand. A pencil is much more forgiving than paint! Think of this as your “roadmap” that we’ll use to the finished painting.
Begin with a general outline of the subject. Then, go section by section and record the shapes you see — every glimmer and shadow. Some reflections will be inside of reflections!
My most successful paintings have come from a carefully planned drawing. Since there are so many small details when creating reflections, it’s best to have them all down on paper or canvas beforehand. A pencil is much more forgiving than paint! Think of this as your “roadmap” that we’ll use to the finished painting.
Begin with a general outline of the subject. Then, go section by section and record the shapes you see — every glimmer and shadow. Some reflections will be inside of reflections!
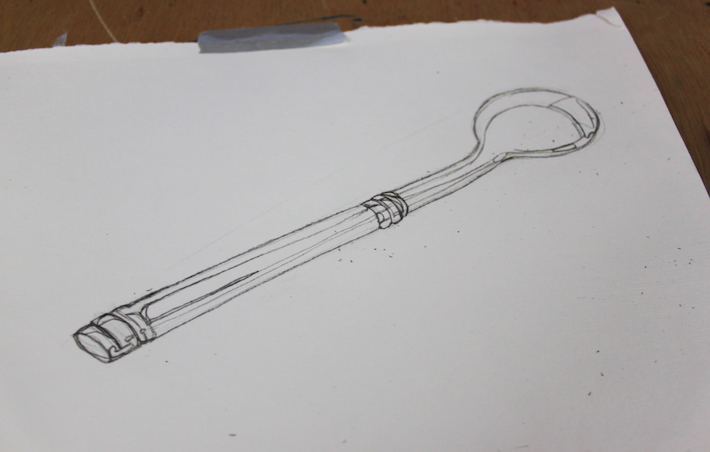 Tip: I break things up into smaller bits to avoid feeling overwhelmed. The head of the spoon, for instance, is one section, while the handle is another. Focus on drawing what you can see in that area before moving on to a different section
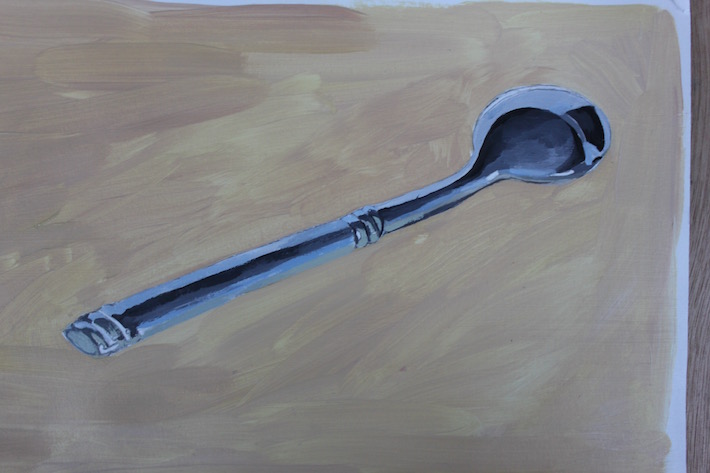
Step 2: Start painting in shapes.
 The hardest part is over! As long as you’ve carefully drawn your subject, noting every shape, we’re now just filling in the blanks. Again, start at one section of your painting and work from there. I find that it’s easier to work on each small shape individually, painting its color and tone before tackling the next one. Before long, the little contour forms will begin to look cohesive. Save your highlights and fine shadows (the ones you see on the edge of the object) for later.
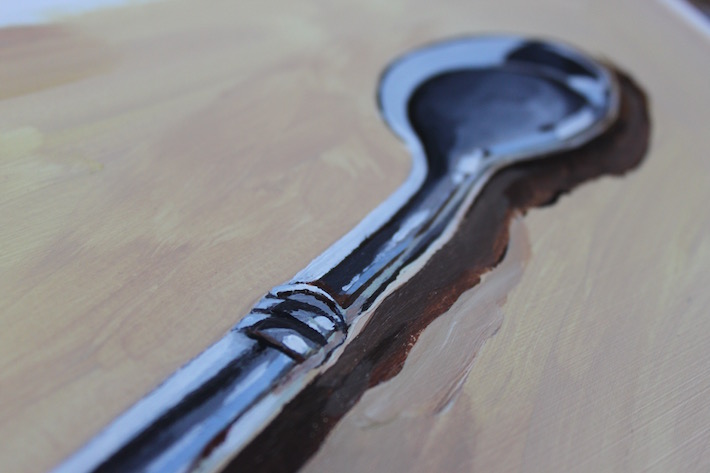
 Notice the colors and lighting that surround your object. Are they warm lights? Cool lights? What kind of walls or tables? All of this will affect your color mixing.
Since my spoon sits on a wooden surface, its edges have a brownish-yellow tint to them. As the reflections gather in the middle of the utensil, though, they appear cooler and are affected by the white light that bounces off of them.
Notice the colors and lighting that surround your object. Are they warm lights? Cool lights? What kind of walls or tables? All of this will affect your color mixing.
Since my spoon sits on a wooden surface, its edges have a brownish-yellow tint to them. As the reflections gather in the middle of the utensil, though, they appear cooler and are affected by the white light that bounces off of them.
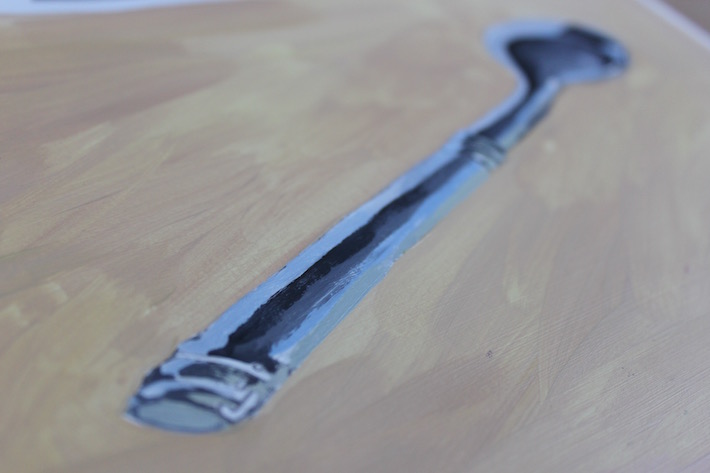
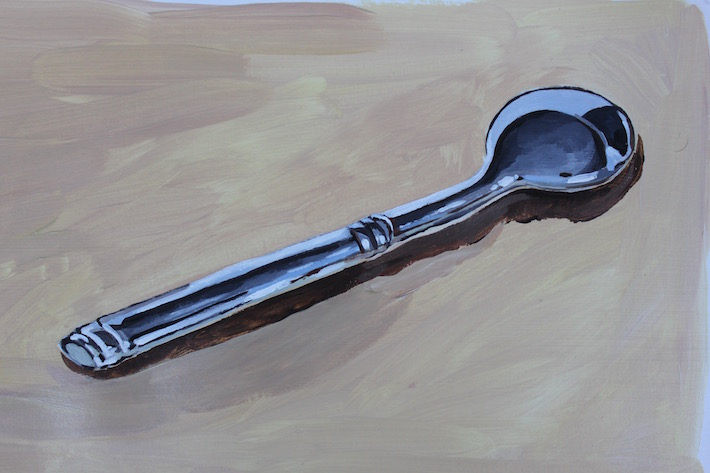
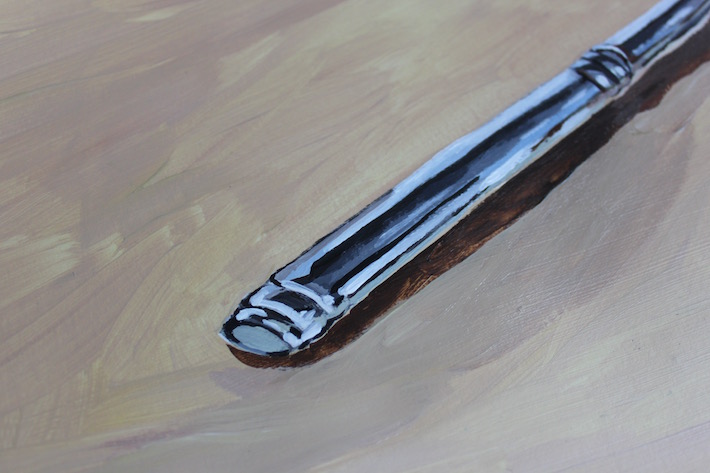
Step 3: Finish with the highlights and fine shadows.
 Now is the time to refine your painting. Dip the thinnest brush you have into the darkest darks and apply them to the deep ridges and edges of your object. This will make the other colors pop and give structure to the overall piece — it will look like everything is coming into focus!
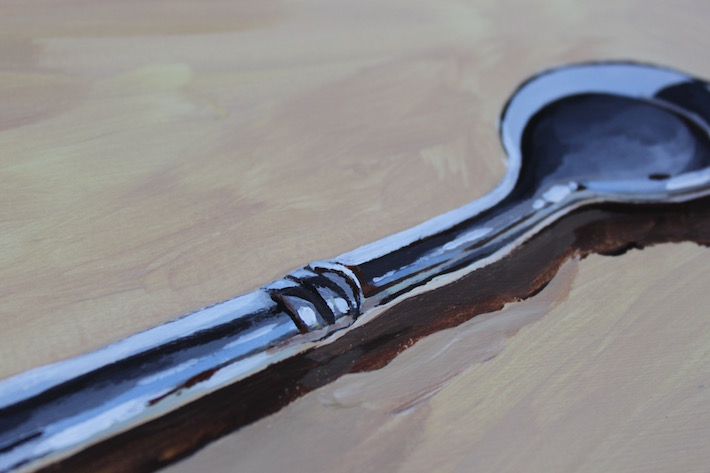
Afterward, dip your brush into white and/or very light pigment. Then paint them on the glimmers and highlights. It will give your object the feeling of a roundedness and dimension.
Now is the time to refine your painting. Dip the thinnest brush you have into the darkest darks and apply them to the deep ridges and edges of your object. This will make the other colors pop and give structure to the overall piece — it will look like everything is coming into focus!
Afterward, dip your brush into white and/or very light pigment. Then paint them on the glimmers and highlights. It will give your object the feeling of a roundedness and dimension.
 Use the highlights and shadows sparingly — they may distract otherwise.
Share tips, start a discussion or ask one of our experts or other students a question.
No Responses to “Paint Complex Reflective Objects in Just 3 Steps”