
Painting shadows can sometimes feel like an afterthought, or they can feel totally daunting. Well, not anymore! Today, I’ll shed some light on how to tackle this important aspect of painting.
Learn how to paint shadows in this step-by-step tutorial
Painting shadows is a great way to imply form and depth in your artwork.
Tools for this tutorial
The easiest way to capture a shadow is to paint something that won’t move. Pick your favorite object — this will be your reference for this exercise — and then establish a light source. Placing a lamp close to your subject is ideal, and it ensures you’ll have strong shadows to paint.
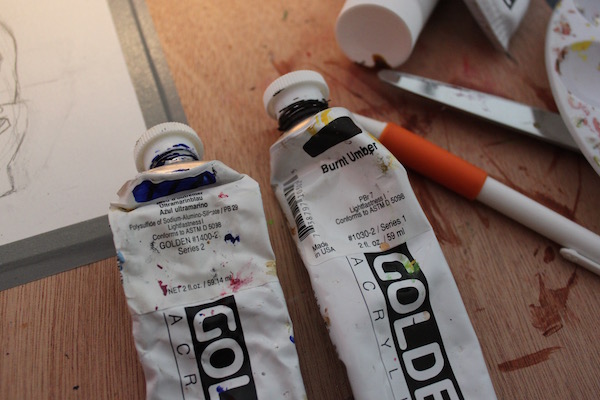
For paint, I’m using my favorite acrylic paints as well as brushes. I enjoy painting on specially-prepared pieces of paper, and I’ve created one for this tutorial. If you prefer canvas or wood, however, feel free to paint on that.
1. Create a sketch.
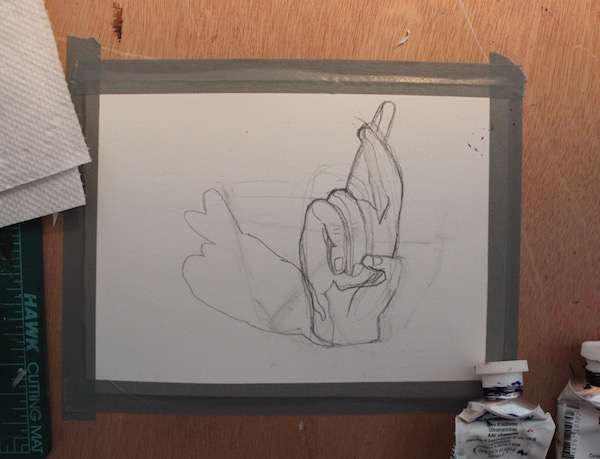
I can’t express enough the importance of sketching. Perfecting your drawing before you apply paint is a must, as it’s much more difficult to correct a painted mistake than it is to erase pencil lead. Don’t worry about the pencil lines showing through. As you’ll see later, the paint will completely cover it.
I like a “paint by numbers” approach for my drawings, meaning that I block out shapes that I will eventually fill in. Remember, to make your object appear three-dimensional, the form of the shadows is key. Carefully look at your subject. Where do the shadows fall? What is shaded and what isn’t? How do the shadows relate to the highlights?
<!–Practice painting shadows!

Join this Bluprint class to paint vibrant flowers. In Lesson 6, you’ll practice painting realistic, luminous shadows, using sunflowers as an example.
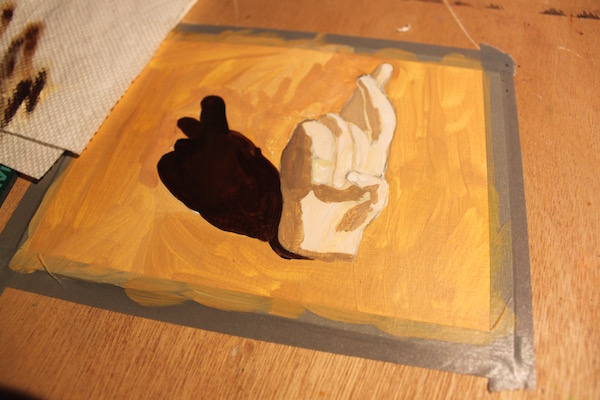
2. Establish the overall tones.
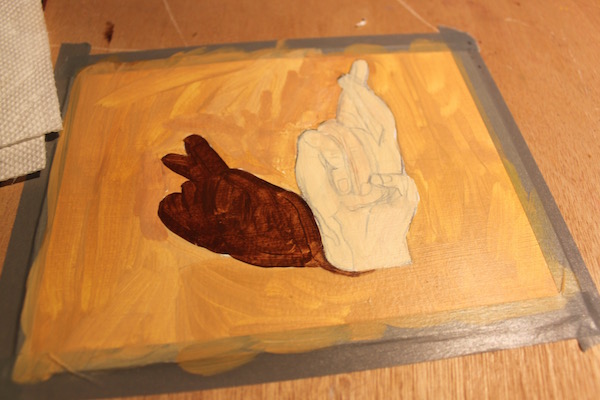
Once your drawing looks great, it’s time to start painting. Before we work in the shadows, we’ll apply overall tones to the composition. Start by laying down colors that are medium in tone — not too dark, not too light — until you’ve covered your surface. This creates a good base to add shadows and highlights on.
3. Start adding darker shades.
Start adding darker pigments to the areas meant to be in shadow. Don’t go too dark too soon, or else your color will appear flat. Instead, gradually build your layers of dark shades to create a more complex and multifaceted color.
In addition to the shadows, also add any highlights you see. This will make the shaded areas appear even darker.
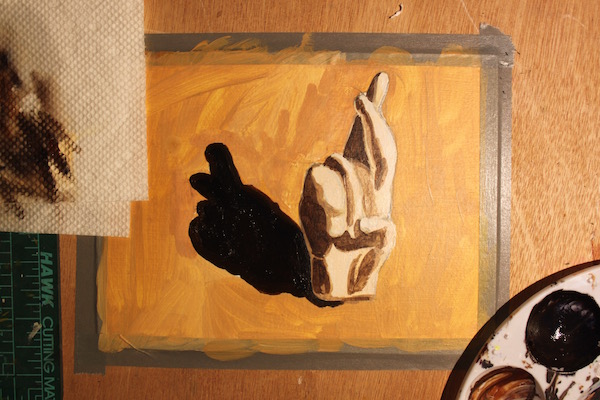
Tip: Don’t use black in your shadows! Instead, mix burnt umber and ultramarine blue for a brilliantly dark hue. Adjust the ratios of either pigment to make the color feel warm or cool.
4. Diffuse the edges of the shadows.
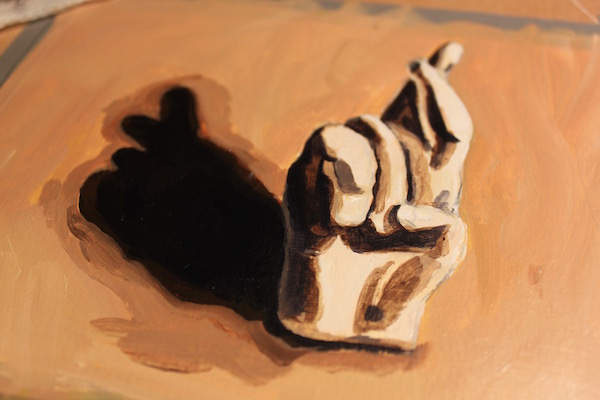
Depending on the light source, some shadows will look more “crisp” than others, but every shadow has the same characteristics: The area closest to where the object and surface meet will produce the deepest shadow. From there, the shade gets lighter until it fades into the surface. Diffuse the shadow’s edges by mixing a “transition” paint — something that’s slightly darker than your ground but not as dark as your shadow. Paint this at the edge of all your shadows.
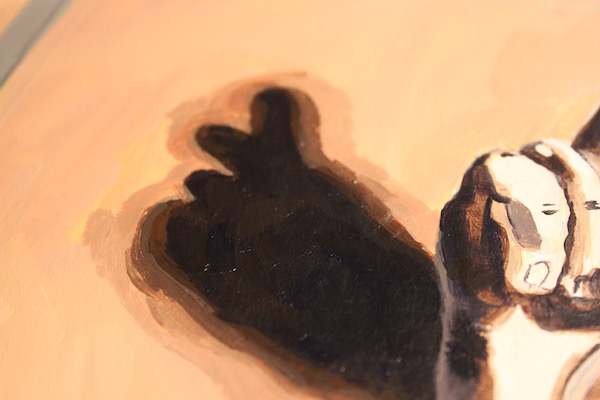
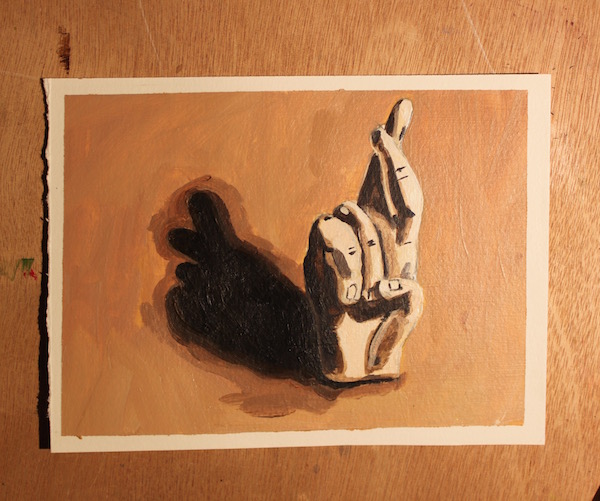
5. Finish your shadows by adding the darkest hue.
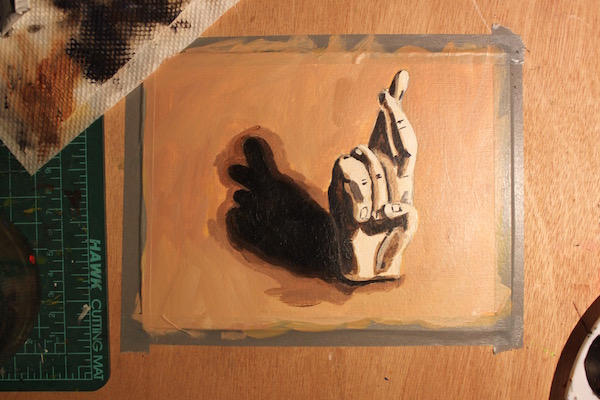
The darkest parts of the shadow will be the center of the shadow and the part that’s closest to the object. The farther away from the object, the less intense the shadow, and it’ll eventually blend in with the rest of the non-shaded parts.
Once you’re confident about your shadow depth, add the darkest pigment to both your form and the surface it’s sitting on.
<!–Practice painting shadows!
Join this Bluprint class to paint vibrant flowers. In Lesson 6, you’ll practice painting realistic, luminous shadows, using sunflowers as an example.
Share tips, start a discussion or ask one of our experts or other students a question.
No Responses to “Out of the Dark: A FREE Painting Shadows Step-By-Step Tutorial”