
Paper quilling is a great way to add some unexpected texture to your scrapbooking and card making projects. Interested in learning this fun paper craft technique? Follow along with this simple step-by-step tutorial and you’ll be busy paper quilling in no time!
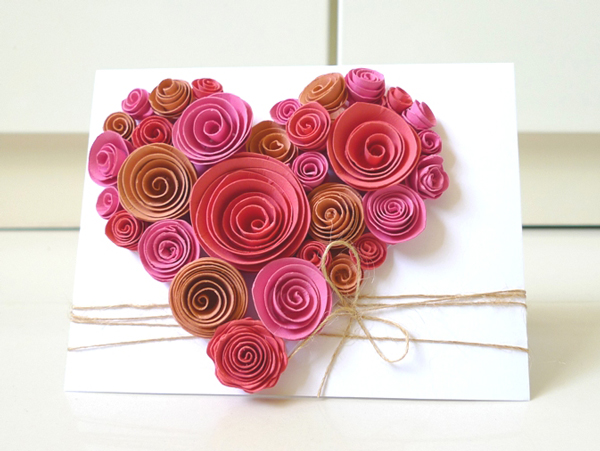
Photo via My Paper Crafting
Note: If you’re totally new to paper quilling, first check out our paper quilling tips for beginners.
How to paper quill
Materials you’ll need:
- Paper quilling pens like the ones seen above, or a toothpick
- Cardstock
- Glue
- Card or scrapbook page
- Pair of tweezers
Step 1:
Cut your card stock into strips in a uniform length and width and attach to quilling pen or toothpick.
Step 2:
Rotate the paper around the quilling needle until you’ve achieved the size you would like. For further instruction on how to quill unique shapes, check out quilling shapes tutorial over on Little Circles.
Step 3:
Lastly, glue your quilled shapes onto whatever paper craft project you’re working on.
How to use your paper quilled designs
1. Don’t believe the myth that you cannot quill in scrapbooking
Some scrapbookers shy away from paper quilling, concerned it won’t work because of its 3-D effect. However, now with die-cutting machines that create 3-D embellishments and gems and jewels that accessorize those pages, scrapbook pages are now better suited for 3-D. Give it a try!
2. Make or purchase templates for your shapes before you begin
Just as you should read through an entire recipe before you start cooking, plan out your paper quilling project from start to finish before you begin. Make or purchase the templates you’ll be using ahead of your scrapbooking night with the girls to ensure you aren’t missing crucial components. The template above is a great tool for keeping quilled circles consistent.
3. Quilling paper letters
One of my favorite projects I have seen is quilling letters! This is perfect for any birthday card or even an introductory scrapbook page for a new baby!
To embellish letters like these, cut out letters spelling out the word you desire, quill all the shapes you desire, and then glue the quilled shapes onto the letters.
4. Creating decor to accent your scrapbooking content
This quilled grapes on the vine piece by Natasha Molotkova of the blog All Things Paper is so inspiring! I just love does how the colors she used just burst off the page. This quill craft combines the use of regular cutout shapes (the leaves) and the beauty of the grapes and a few leaves that have been quilled out. Making the grapes is as simple as combining a few of the circle templates together and the leaves just work as a few pieces bent into the shape of the leaves as you glue the inside of the leaf that has been quilled.
Share tips, start a discussion or ask one of our experts or other students a question.
No Responses to “Quill Away! Inspiring Paper Quilling Projects to Try”