
Pushed, not struck, the length and other features of paring chisels deliver control and power for precise trimming and fitting.
Anatomy with a purpose
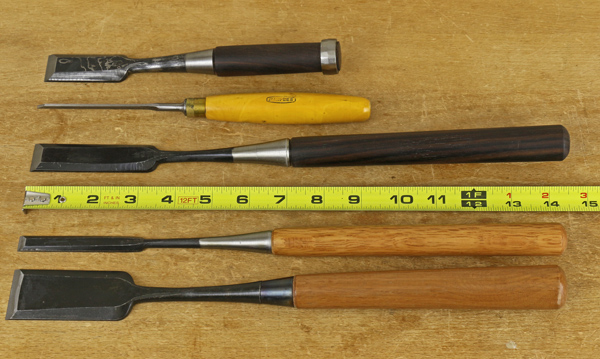
The key feature of a paring chisel is its length of 14-15″, versus 9-11″ for a typical bench chisel. The photo below shows, from top to bottom, a Japanese bench chisel, a Western bench chisel, and three Japanese paring chisels. A Western-style paring chisel has a similar overall length as the Japanese-style but the blade is longer and the handle is correspondingly shorter.
This length gives the user exceptional control. Think of steering a bicycle with your hands gripping the handlebars spaced closely together near the center. That might work if you were just lifting and dropping the bike. That’s analogous to striking a bench chisel. Now move your hands widely apart on the handlebars and you’ve got controlled, variable power to steer the bike precisely. That’s the feeling of using a paring chisel.
The handle has a rounded end that is comfortable in the palm of your hand — it is not designed to withstand mallet blows. The blade tapers in thickness toward the edge, which enhances sensitive feedback to the user’s hands. The blade is not designed to withstand twisting or rough prying maneuvers. By the way, do not confuse a paring chisel with a slick, which is beefier and used more powerfully in work such as timber framing and boat building.
A paring chisel must be exquisitely sharp to do its job well. Accordingly, the type of steel is chosen by a quality maker to take a very fine edge since toughness under impact is not a priority. The edge is generally sharpened at a lower bevel angle than a bench chisel, such as 25 degrees, to minimize resistance in the cut.
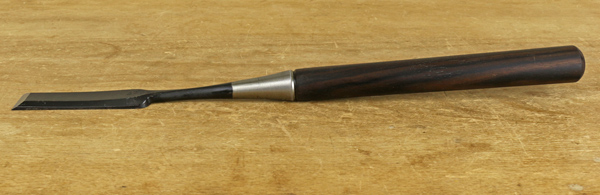
There are also special paring chisels designs, notably the cranked neck chisel, which has its handle elevated above the distal section of the blade for clearance in paring the bottoms of grooves and similarly restricted work. I have slightly bent the soft steel neck of my Japanese paring chisels just enough to allow the handle to clear the wood surface for regular paring work, as can be noted in the top photo.
Technique – it’s all about feel
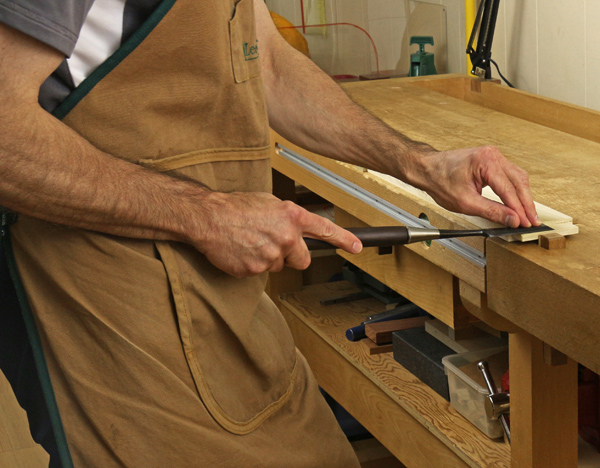
Hold a paring chisel with your dominant hand at end of handle and the fingers of your other hand on top of the blade as I am doing in the photo below. Japanese style chisels have a slight concavity on the top surface of the blade that increases the purchase of your fingers there. Raise the handle just to where you sense the edge will start to bite into the wood. If your chisel is very sharp —and it should be — this will be a very low angle, as seen in the second photo below.
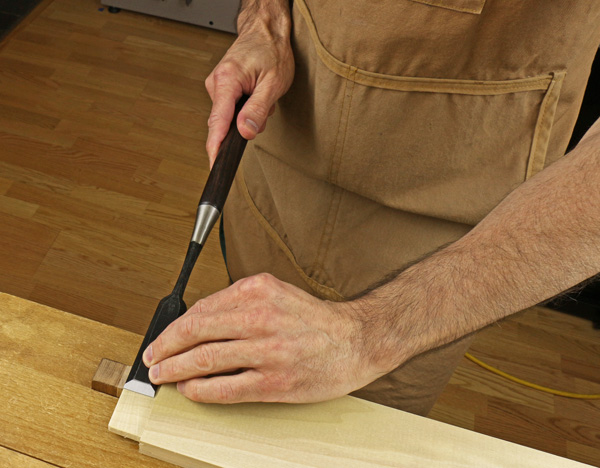
There’s more than just sensitive control to using a paring chisel. The other part of the equation is force. Here again, the long handle is the key. In the photo below, note how I have brought my forearm in tightly toward my hip and my right hand is partly behind the rounded end of the chisel handle. I’ve also firmed my shoulders and core muscles. This all transmits firm directional force to the cutting edge even as my left hand gives guidance and feedback.
Direction matters
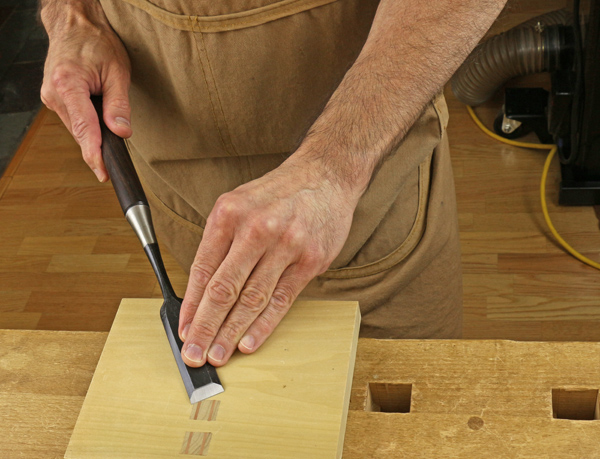
For some work, such as paring tenon cheeks across the grain, as I am doing in the photo just above, a straight-ahead push will work well enough. Accurate work can be done by regulating the cutting depth by adjusting the angle of the handle to take thin shavings and prevent the edge from diving in too deep.
For work along the grain, try as much as possible to work with the grain. Patiently take thin shavings to produce a smooth, accurately pared surface. Working against the grain makes it very difficult to keep the edge from cutting in deeper than you want it to.
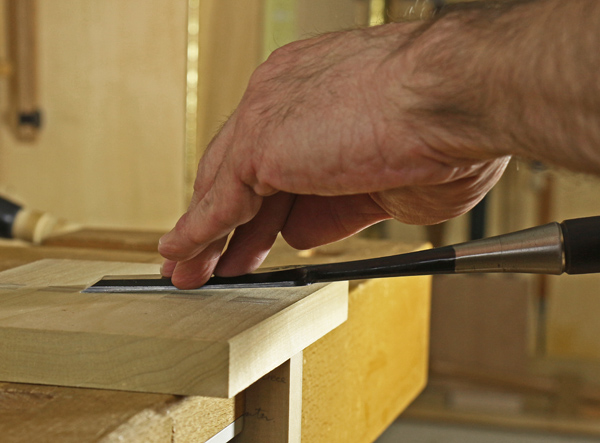
Very often, it helps to pare with a skewed approach as I am doing in the photo below. The chisel is advanced at an angle to its length to create a slicing cut. In this case, I am pushing the chisel in approximately the direction my left hand fingers are pointing. This spreads the cutting resistance over a greater length of edge and has the effect of stiffening the cutting edge. It is particularly helpful in paring end grain, as I am doing here.
Recommendations for buying paring chisels
Unlike bench chisels, most woodworkers do not need a full range of paring chisels in ¼” or smaller
increments. I suggest have at least a 1″ chisel with which you can pare joints, trim assembled dovetail excess, trim pegs, and so forth. Then, buy more as you find necessary. I prefer fine quality Japanese chisels, which have superb steel. I find that my 7/16″, 1″, and 1 1/2″ sizes cover most of my furniture making needs.
Share tips, start a discussion or ask one of our experts or other students a question.
No Responses to “What You Need to Know About Working With Paring Chisels”