

Create a pie that feeds your stomach and your eyes. Once the dough is made, there are simple ways to give those edges some TLC and shape a fancy crust that you (and your guests) will want to share on social media ASAP.
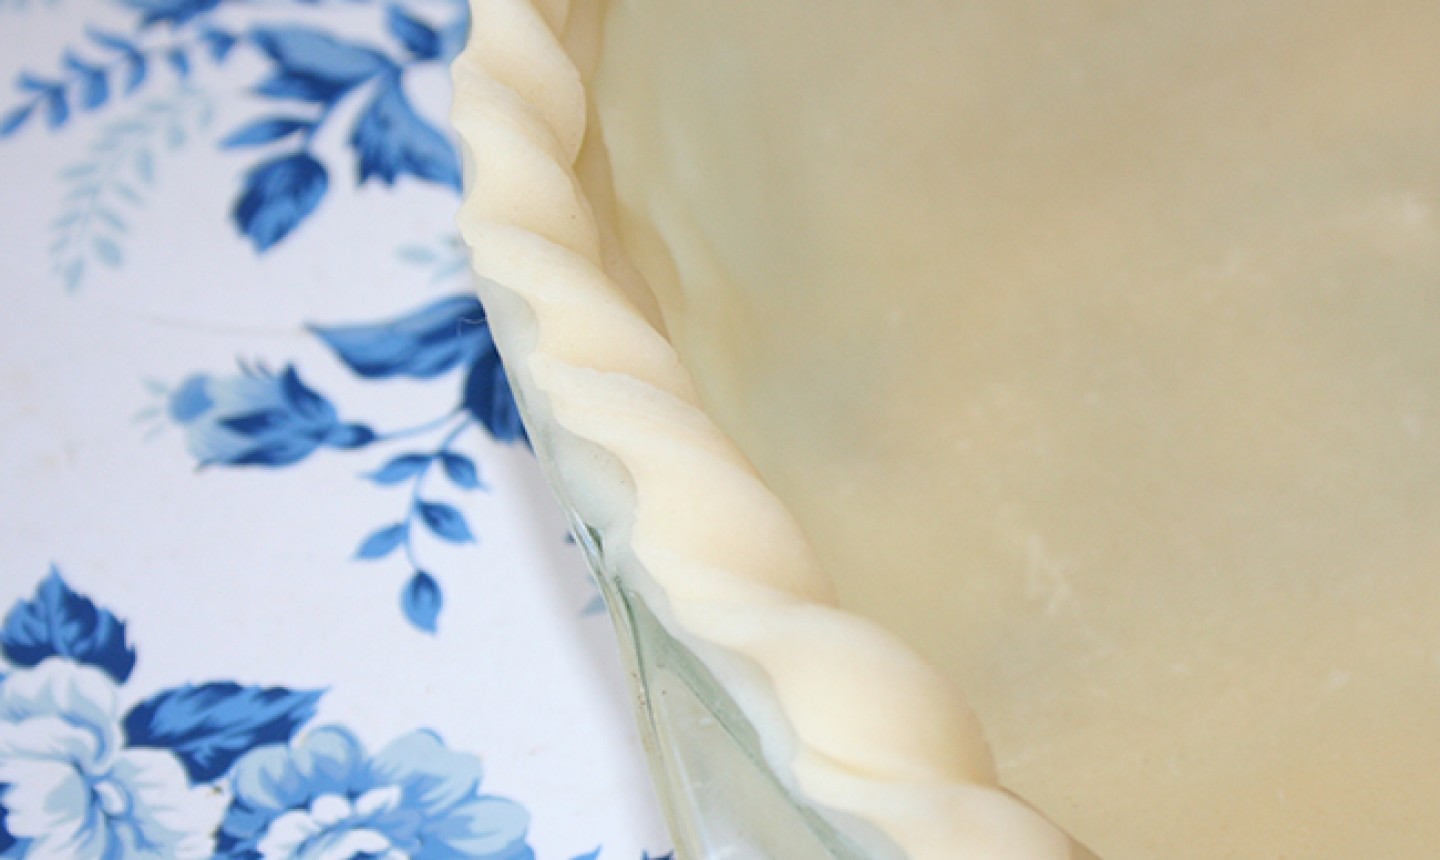
1. Fluting
Fluting is one of the most basic methods for prettying up a pie crust. Simply pinch your thumb and forefinger together on the outside edge of the crust. Then, using your index finger from your other hand, press the dough in the center of your fingers. The dough will spread and be shaped by your fingers on the outside. Easy peasy!
Good to Know Depending on how tightly you hold your fingers outside the crust, you’ll get a more rounded or more pointed look to your fluting. Experiment until you find the design you like.
2. Pie Crust Cut-Outs
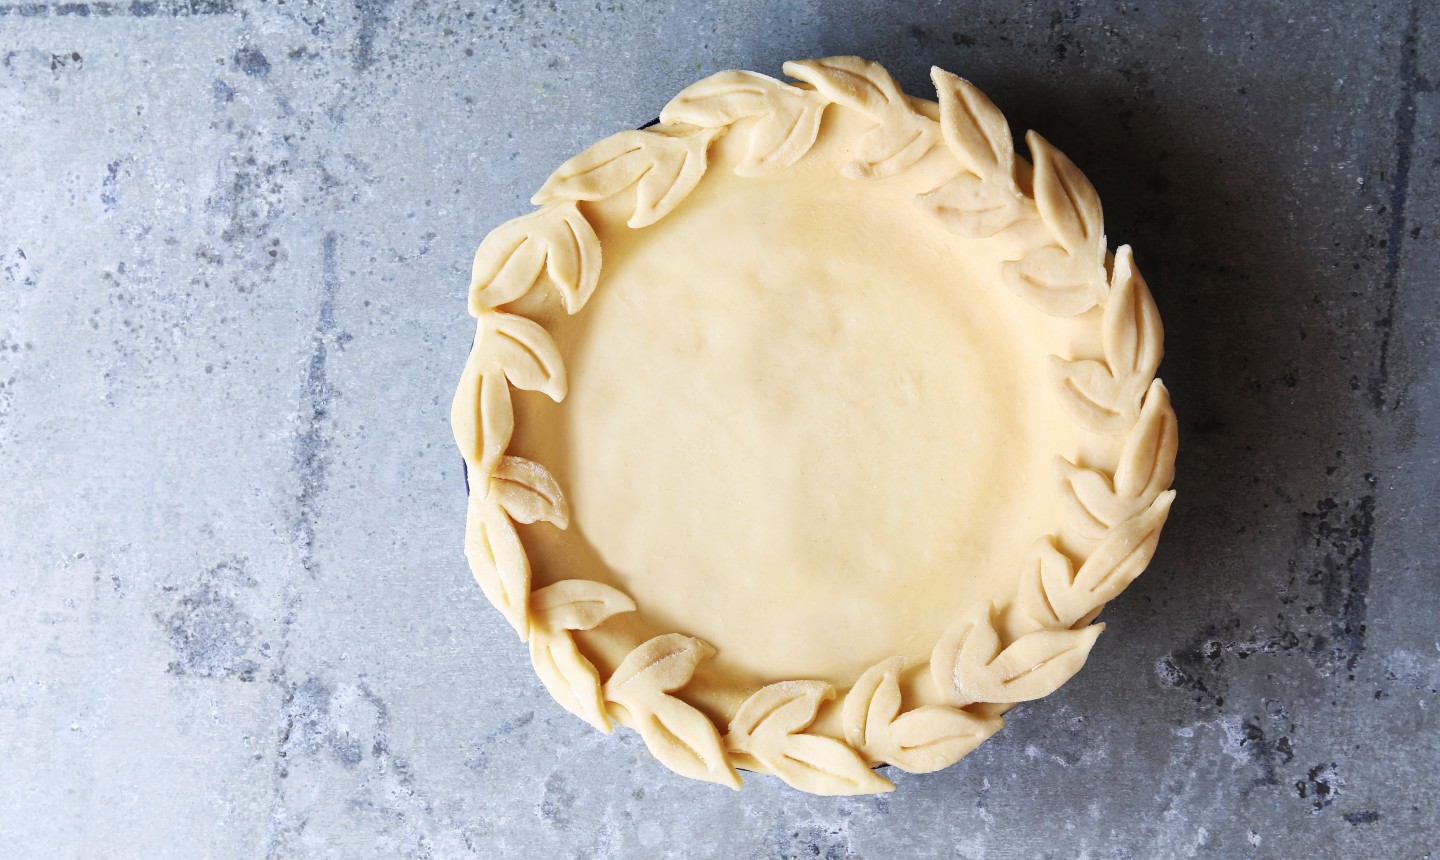
Cookie cutters (or fondant cutters) are your BFFs when making beautiful pie crust edges. All you have to do is cut out a series of shapes from your excess dough and lay them around the edge. Just keep an eye on your pie while it bakes — these cut-outs can brown too quickly and burn, so you may want to wrap the edges in tin foil before putting in the oven.
3. Fork Chevrons
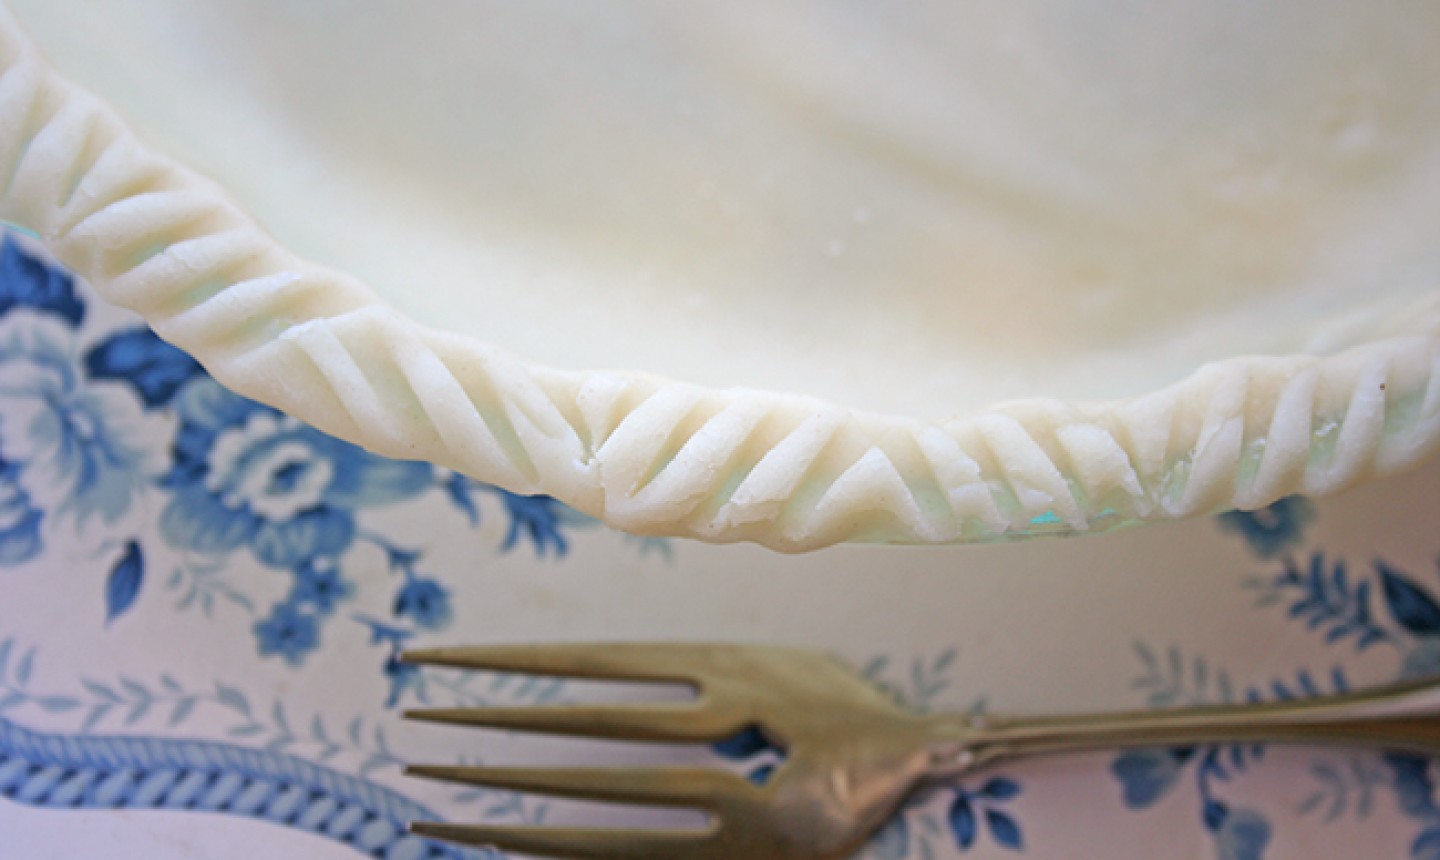
Using a fork to score the edges of pie crust is a common — but cute! — design. And if you work methodically, you can create a new, totally trendy look. To create a chevron edge, align the tines of a fork at a 45-degree angle and press. Then align the tines in the opposite direction and press again. Repeat this pattern until you work all the way around the perimeter.
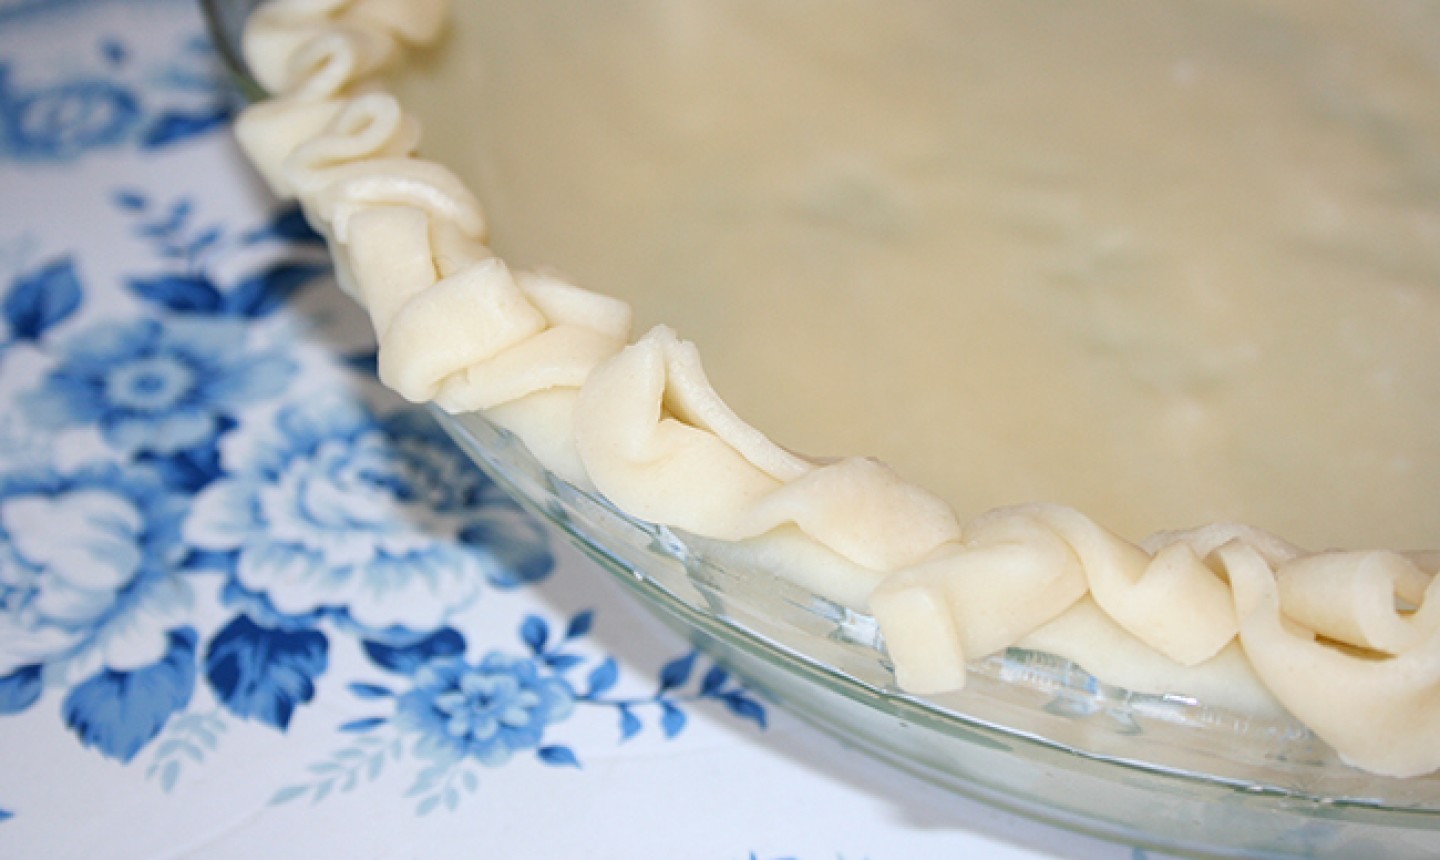
4. Braided Edge
A braided edge will get an “OMG” reaction, and nobody needs to know how easy it is to make. For the simplest version, cut out two long strips of pie dough and alternately overlap each to form a braid. (You can also make more complex braids by incorporating more dough strips.) Once the strips are joined, place the braid around the pie and smooth the two ends together for a seamless effect.
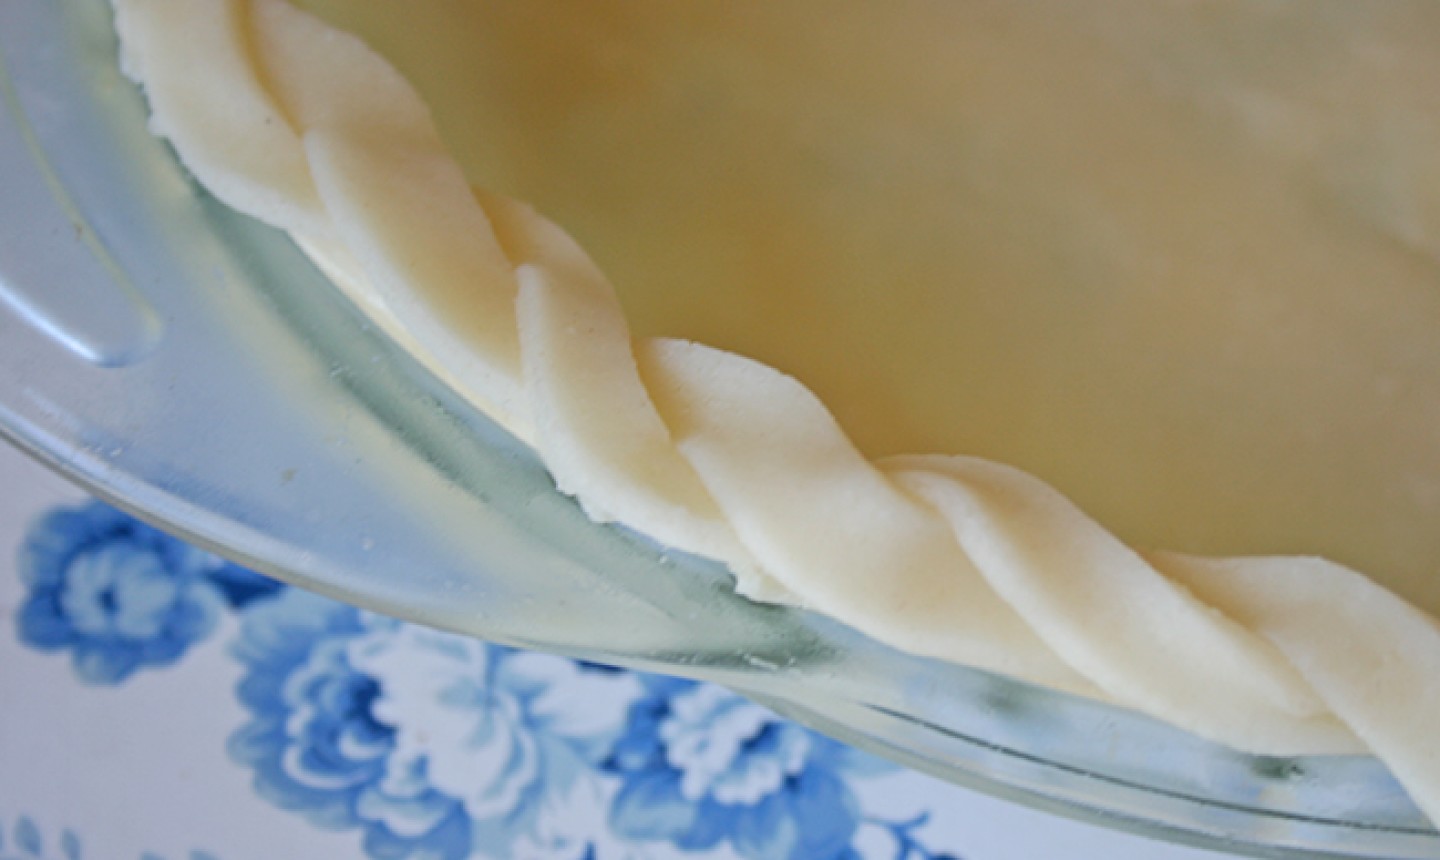
5. Twirled Edge
A twirled edge is another way to add elegance and texture to your dessert. Start by cutting two long strips of dough. Stack one on top of the other (this adds stability so your twist won’t wilt during baking), then twirl the dough as you wrap it around your pie.
6. Lattice Edge
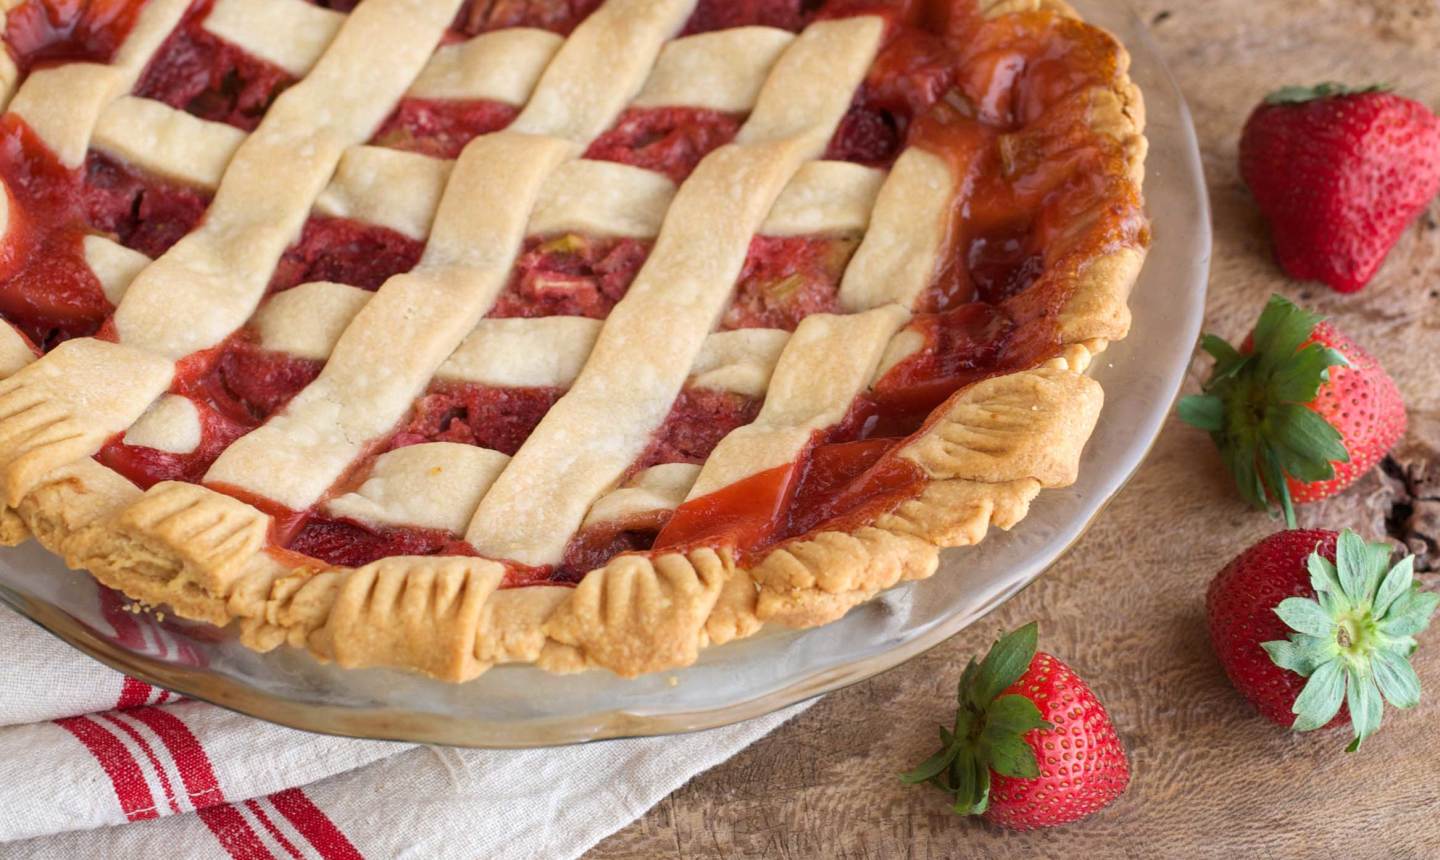
Lattice isn’t just for the pie top — it looks lovely extended to the edges, too. There are a few ways to do this, but the simplest is to make a lattice pie top and have each strip drape over the edges of your pie. The dessert above uses this method and combines it with traditional fork indents for a gorgeous finished design.
7. Free-Form Decoration
If your leftover pie dough amounts to odds and ends, simply cut them into little strips and arrange in squiggles along your pie. It’s an easy, creative and one-of-a-kind design that makes your pie as unique as you.
8. Dough Beads
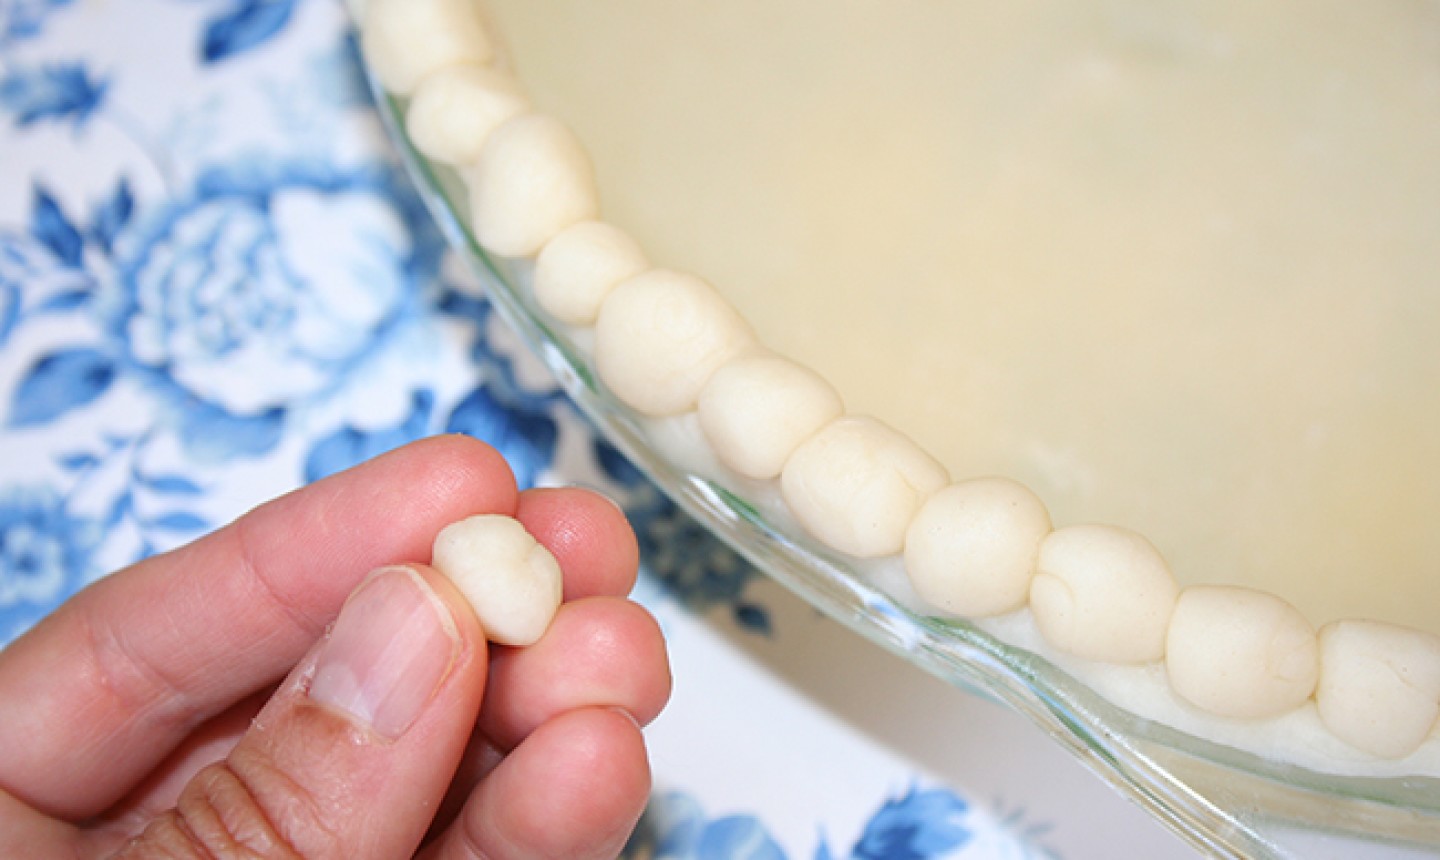
For a preppy finish, roll your leftover dough into tiny balls and line the pie. For the best results, moisten the edges of dough and the bottoms of each ball with water or an egg wash to help ’em stick.
9. Spirals
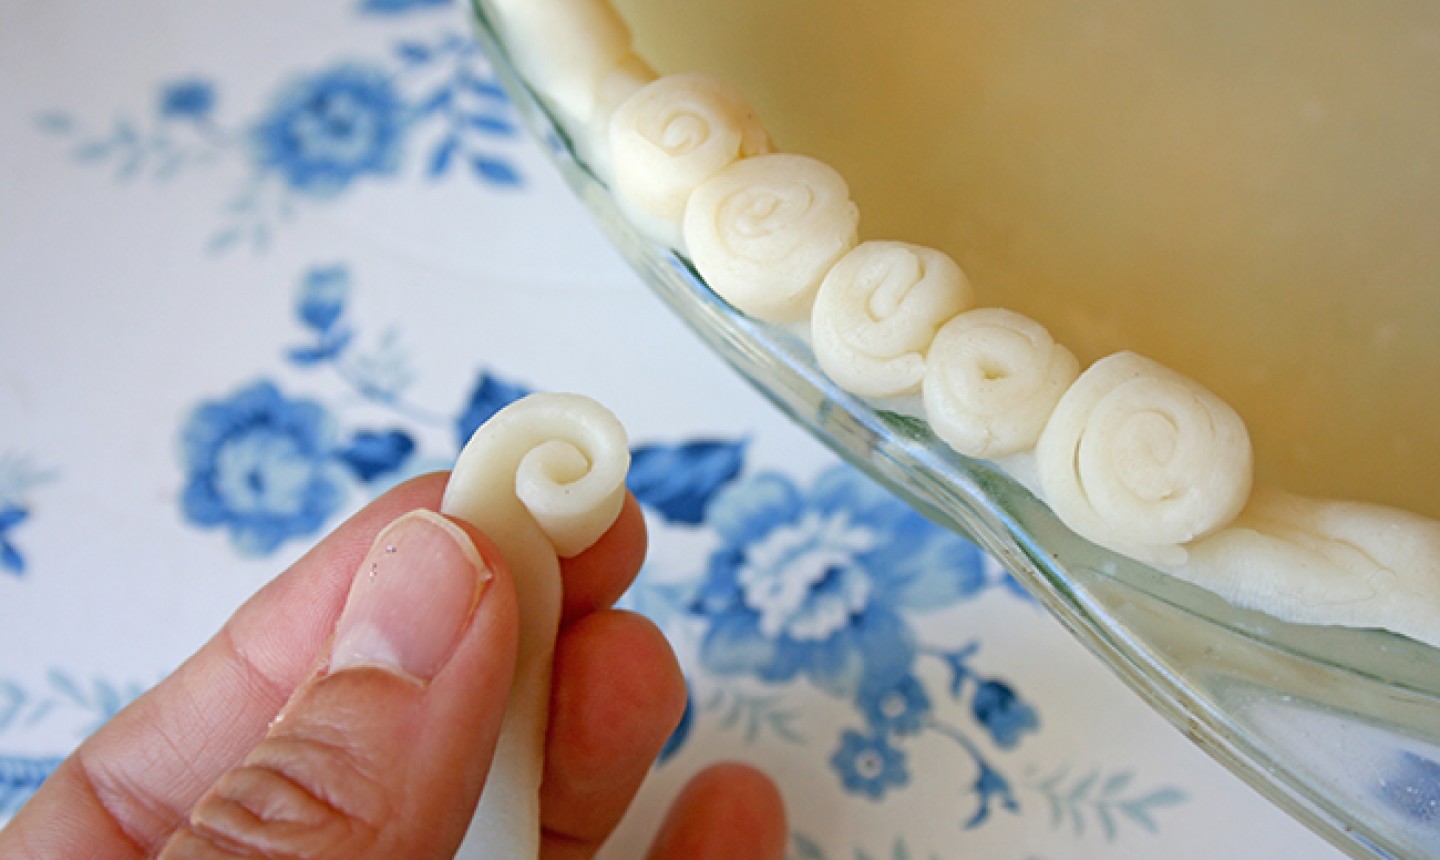
Experiment with molding different shapes, like these little spirals. Just like with the beads, these will stick better if moistened before baking.
10. Rustic Edges
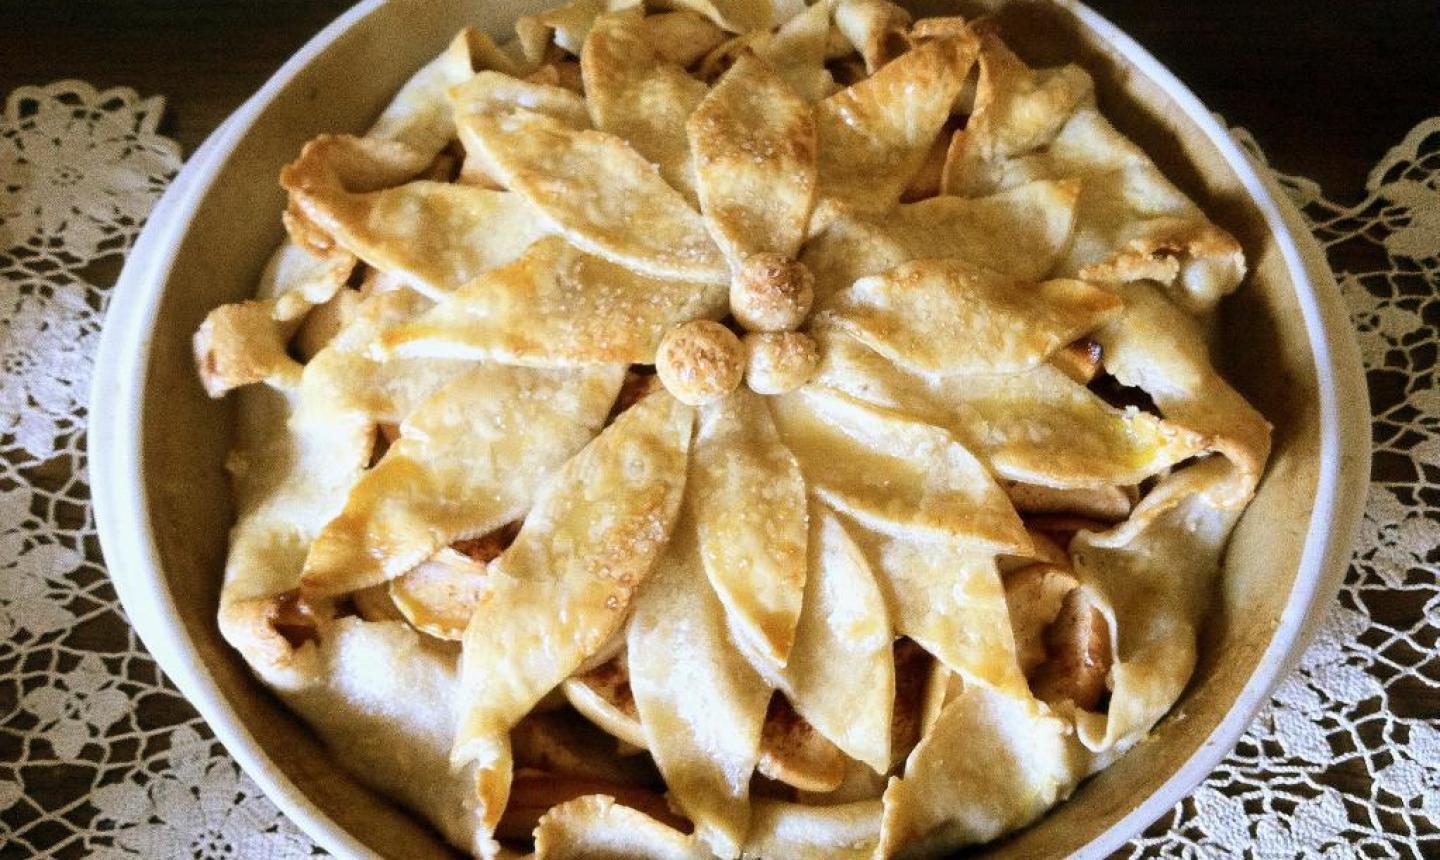
Photo via Craftsy member lalilillianna
Rustic does not equal messy, and this gorgeous pie is proof. Its free-form edges get that shabby-chic effect by combining a loosely gathered crust with an ornate topper, so don’t shy away from mixing methods when you have a vision in mind.
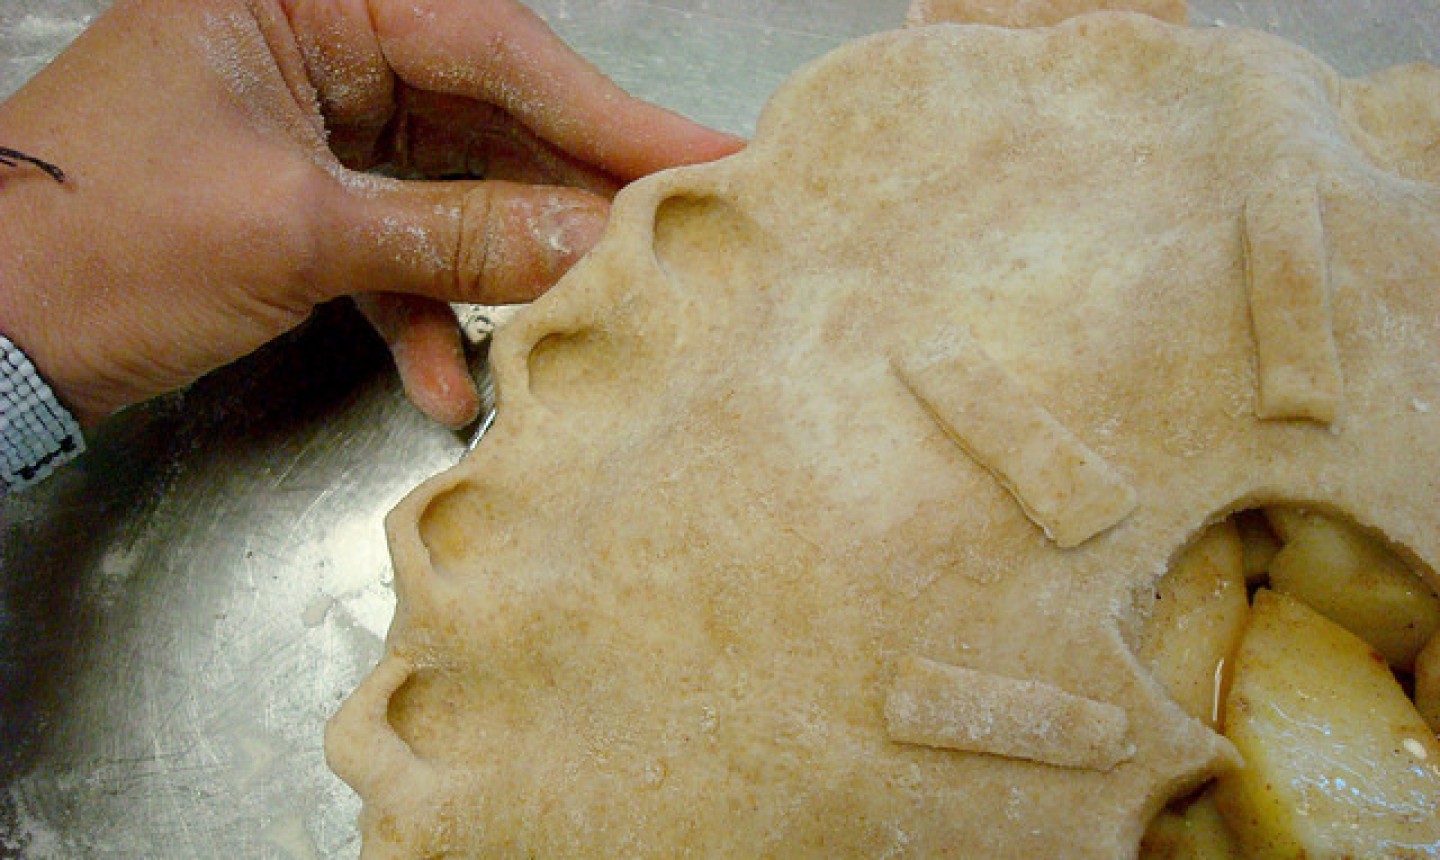
11. Dough Stripes
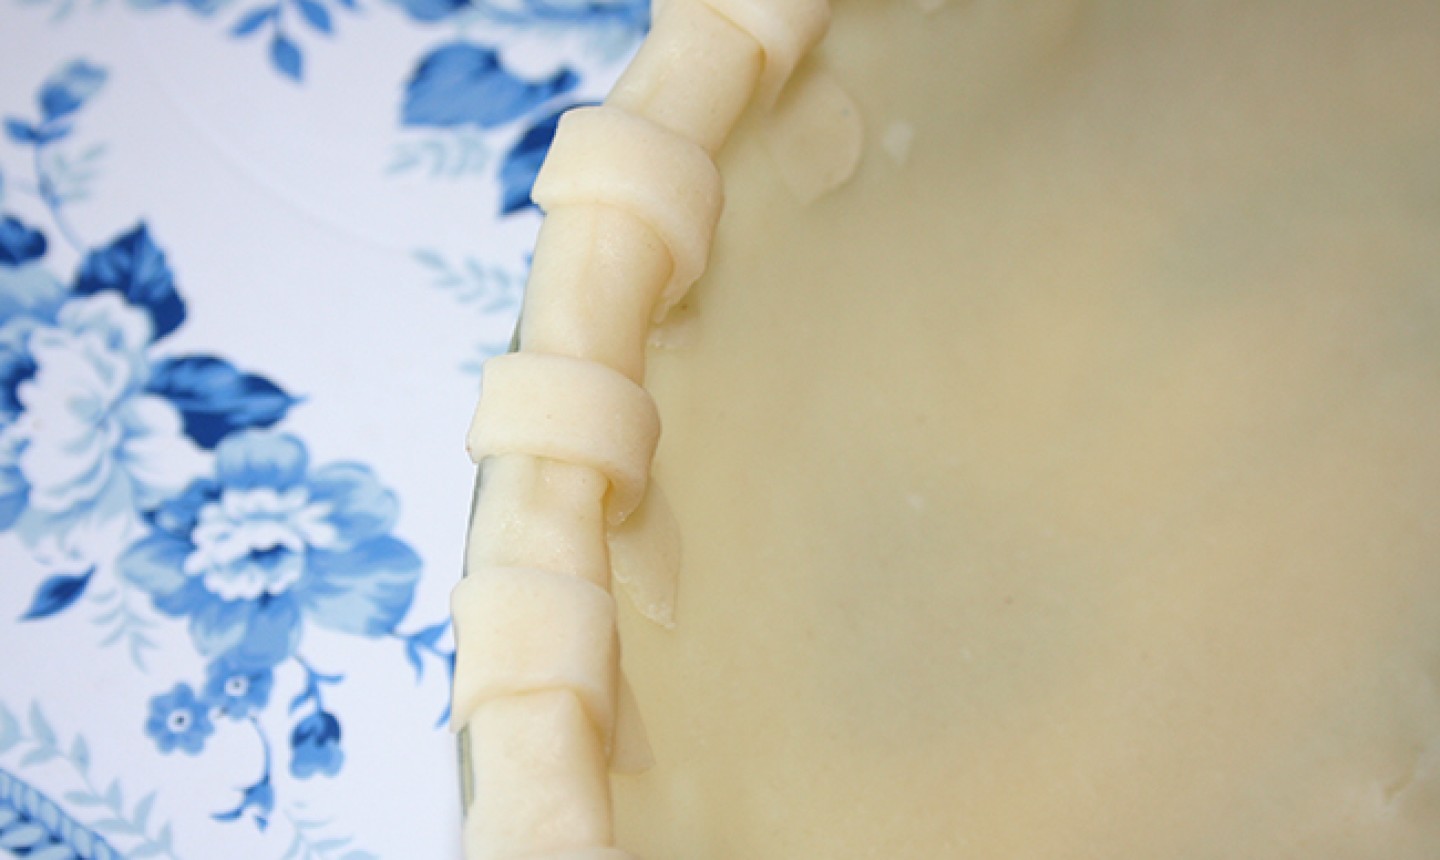
To create a simple-but-striking pie crust pattern, reserve a small amount of pie dough that you can roll out and cut into 2″ strips. Place these pieces at regular intervals around the crust, then press the edges under the outside of the crust to hide them and get a polished design. (Because you’ll be filling the pie, you don’t need to worry about concealing the inner edges.)
12. Sprinkle Edges
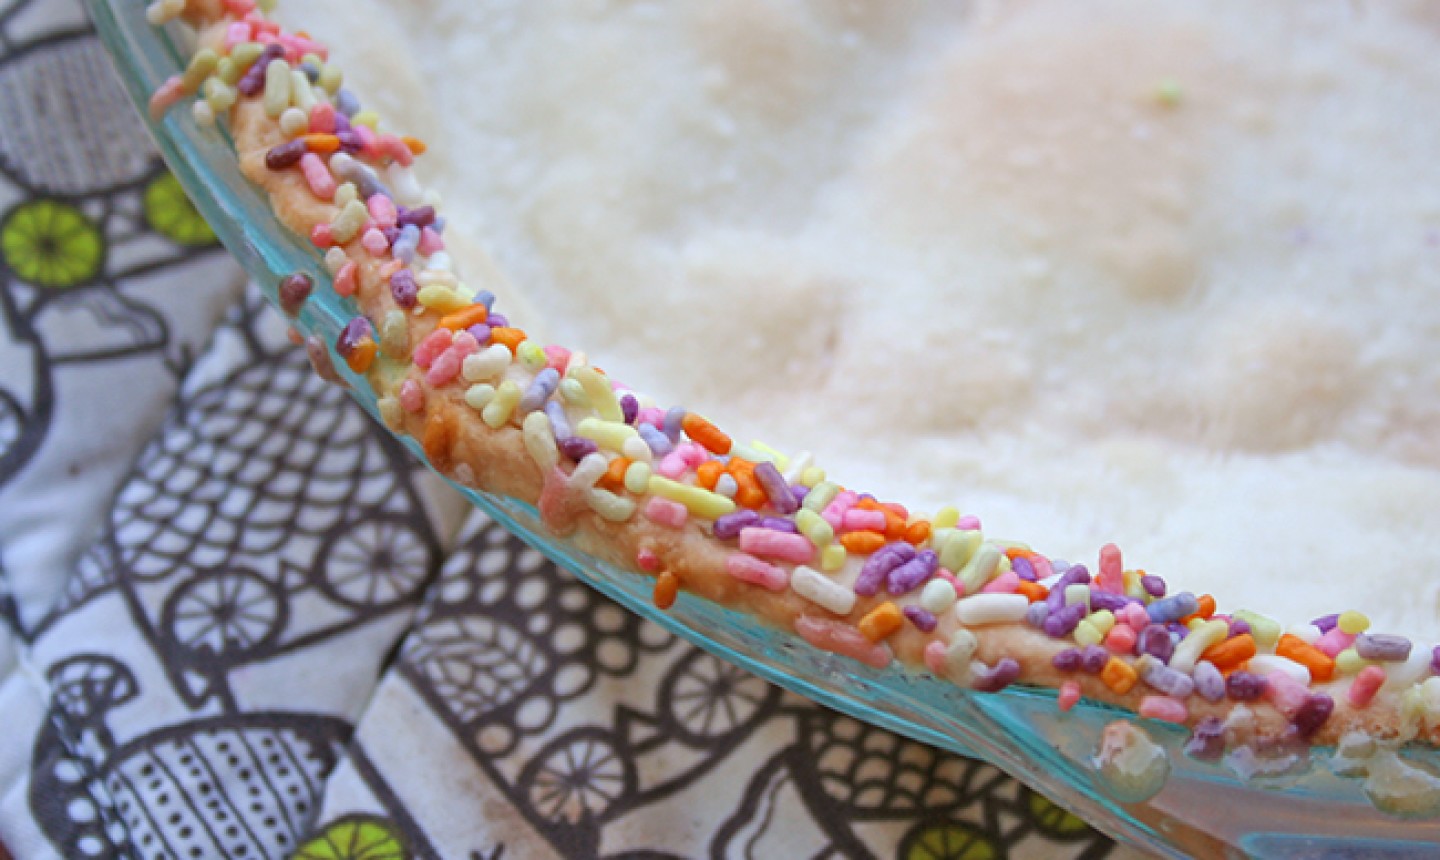
This one’s a bit outside the box, but if you’re making a sweet pie adding sprinkles can be a fun embellishment. Use water or an egg wash to moisten the dough, then carefully line the edges. (Emphasis on carefully — you don’t want to get sprinkles all over your pie.) This is also an easy way to decorate nontraditional crusts, like a cookie crumb pie crust.
Pro Tip: Because sprinkles can melt during extended baking times, this edge tends to work best with pie shells that are blind baked before being filled, as the bake time tends to be more brief.
Share tips, start a discussion or ask one of our experts or other students a question.
Already a member? Sign in
No Responses to “12 Easy Ways to Make Instagram-Worthy Pie Crust Edges”