
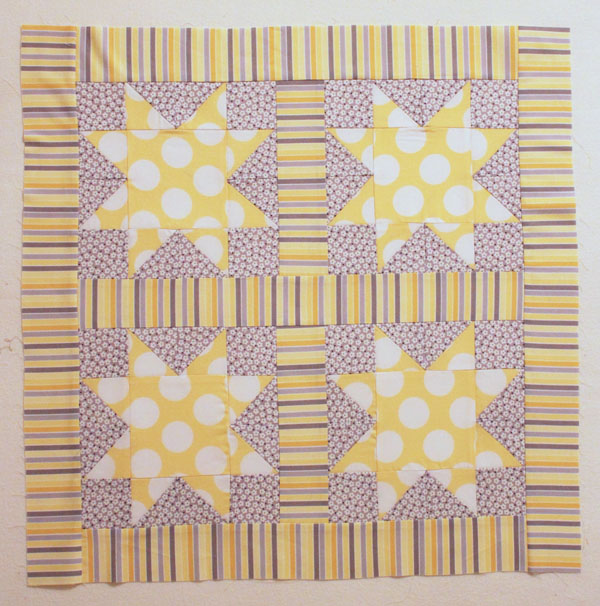
Regardless of the quilt pattern you’re using, basic quilt construction techniques stay the same. Here, you’ll learn the basics of quilt construction while making a sawtooth star mini quilt, with some quick quilting tips to help the quilting process go even faster!
Quilt construction is done in three steps. First you prepare your supplies, then you make the blocks, then you put the quilt together. These steps will vary slightly with the pattern you choose, but the main concepts stay the same.
Prepare your supplies
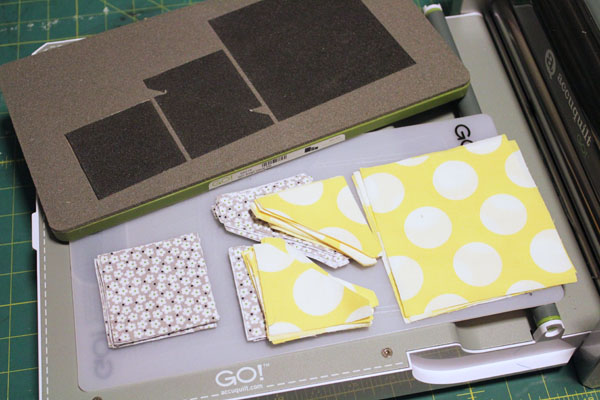
Preparing the supplies for your quilt includes selecting your fabrics, and cutting the pieces you’ll need for the quilt. Having all your pieces cut and ready to go when you begin quilting makes piecing your quilt go much faster. 1. Start by selecting your fabrics. You’ll need .1/2 yard of 3 fabrics (this will give you extra fabric to piece for a backing, if you like).
I used a large yellow dot fabric for my stars, a small grey and white daisy print for my background, and a stripe for my sashing and borders. 2. Cut your fabric. I used the Accuquilt GO! value die to cut all the pieces for my blocks. You’ll need: Yellow dot 4 – 4.5″ squares 32 – half-square triangles Grey and white daisy 16 – 2.5″ squares 32 – half-square triangles Stripe 2 – 2.5″ x 8.5″ strips 3 – 2.5″ x 19″ strips 2 – 2.5″ x 23″ strips
Piecing the blocks
Most quilts are made up of blocks. The blocks may all be the same, they may all be different or there may be several sets of blocks. Each block is made of multiple pieces that need to be put together. For most quilts, you will either start with the smallest parts, or start from the center. Laying all your pieces out may help you visualize where to begin when piecing your blocks. You want to keep putting smaller pieces together to make larger pieces until you have built the entire block.
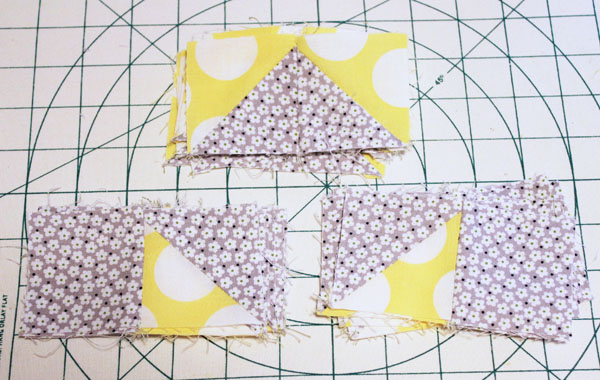
1. For this quilt, we start by piecing the triangles. Pair one dot and one daisy, right-sides-together, and stitch along the angled edge. This edge is cut on the bias, and therefore has the potential to stretch a lot. Be careful not to stretch the fabric as you guide it under the presser foot.
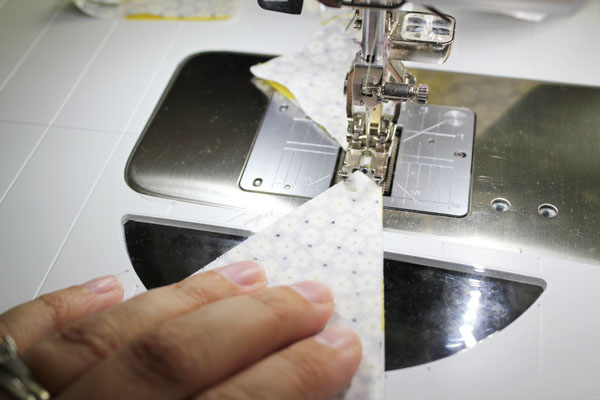
Quick quilting tip: Chain piece to make it go faster! To chain piece, don’t cut your thread between each piece. Stitch from one end of the piece to the other, then gently guide the next piece under the presser foot. The two pieces should not overlap — there should be about .1/4″ of thread holding the pieces together. Repeat this process, adding more pieces, until all the pieces have been pieced. Cut your thread, remove your chain, then cut apart the pieces by cutting the threads between each.
2. After stitching, press the fabric open. In almost all cases, you’ll press the seam towards the dark fabric.
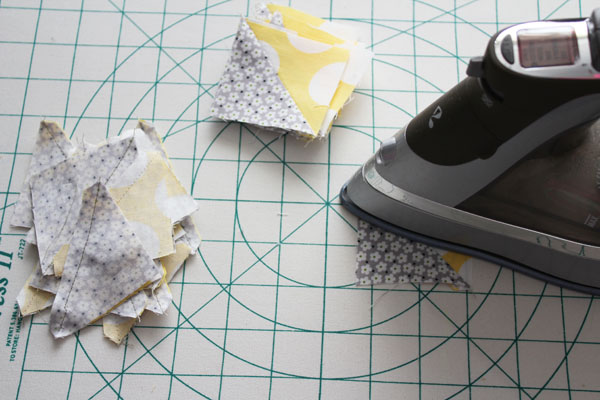
3. Now start piecing the units into pairs. Make 16 pairs of triangles, with the grey sides touching and the yellow in the top corners. Pair the remaining 16 triangles with the 16 2.5″ squares. Eight should have the triangles facing one direction, eight should have the triangles facing the other direction.
You can chain piece these units together, then press them all open, again pressing towards the dark. For the units with two triangles, there isn’t a single dark side, so just pick a side to press towards.
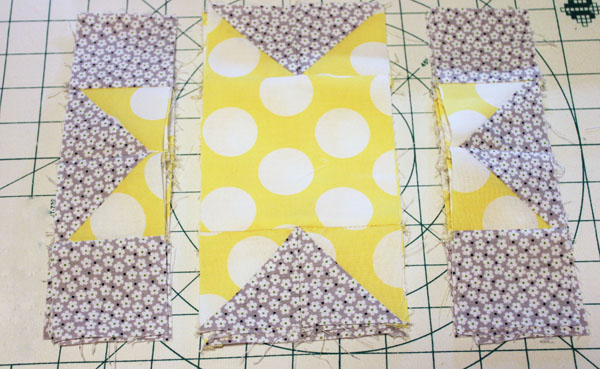
4. Stitch the double-triangle units to opposite sides of the 4.5″ squares. Pair the triangle-square units. Again, you can chain piece these – stitch 4 triangle units to one side of each large square, then pair and stitch the triangle-square units, then cut the four large squares from the end of your chain, and stitch the triangle units to the opposite side.
Getting all this stitching done during a single sitting, instead of getting up to press after every set of stitches, makes for quick quilting!
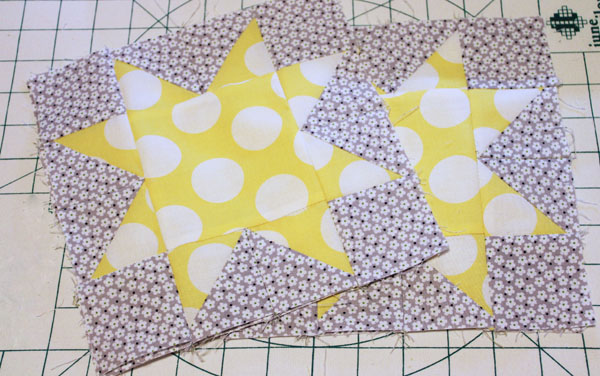
5. Stitch the sides onto the center, finishing the quilt block!
Put the quilt together
Putting the quilt together is similar to making your blocks — just on a larger scale. You may want to lay out all your pieces so you can visualize how it will look when it is complete and determine placement if not all your blocks are the same. For a quilt with sashings, use the sashings to join the blocks. For a quilt without sashings, you can piece the blocks directly to one another.

1. Use the two 8.5″ sashing pieces to join pairs of blocks. Press seams towards the sashing.
2. Use one 19″sashing piece to join the two pairs. Add the other 19″ pieces to the top and bottom. Press towards sashing.
3. Add the final pieces to either side of your quilt top.
Finishing touches
Once your quilt top is complete, you can add your own finishing touches. If your quilt is smaller than you anticipated, you can add additional borders to make the quilt larger. You’ll also want to quilt it and bind it to make it a quilt you can use.
Thank you! This is exactly the kind of quilting project I'm looking for to use up my sewing 'scraps'.