
Do you ever get bored with the traditional binding on your quilt? Or are you experimenting with art quilts and want to put a little zip in your edges but don’t know how?
Why not have some fun with the edges and think outside the box? If you are working with smaller quilts, think about straying away from traditional binding and trying something different.
For smaller projects such as art quilts, postcards, pillows, table runners and wall hangings, a fun and different binding adds that extra zing to your quilting and really gives people something to talk about. Plus you get to use your creativity and see what you can come up with!
I’ve collected a few fun edges used to finish quilts. With all of these, the quilt was first quilted and then squared up. Instead of putting the regular binding on, a small tight zigzag stitch was done around the entire edge of the quilt to prevent fraying and hold the quilting secure. Then we had some fun!
In the quilt below, a heavy ribbon was applied to the edges, 1/4″ in from the edge of the quilt. With this type of edging or binding, you can’t do the traditional fold over and back at the corners, instead it is an easing of the ribbon with one small fold to allow it to take the corner without causing the quilt to buckle. Hand basting the corner as you are coming to it is a good tip. A few hand stitches to hold the fold down after you are done stitching it, and you are ready to go.
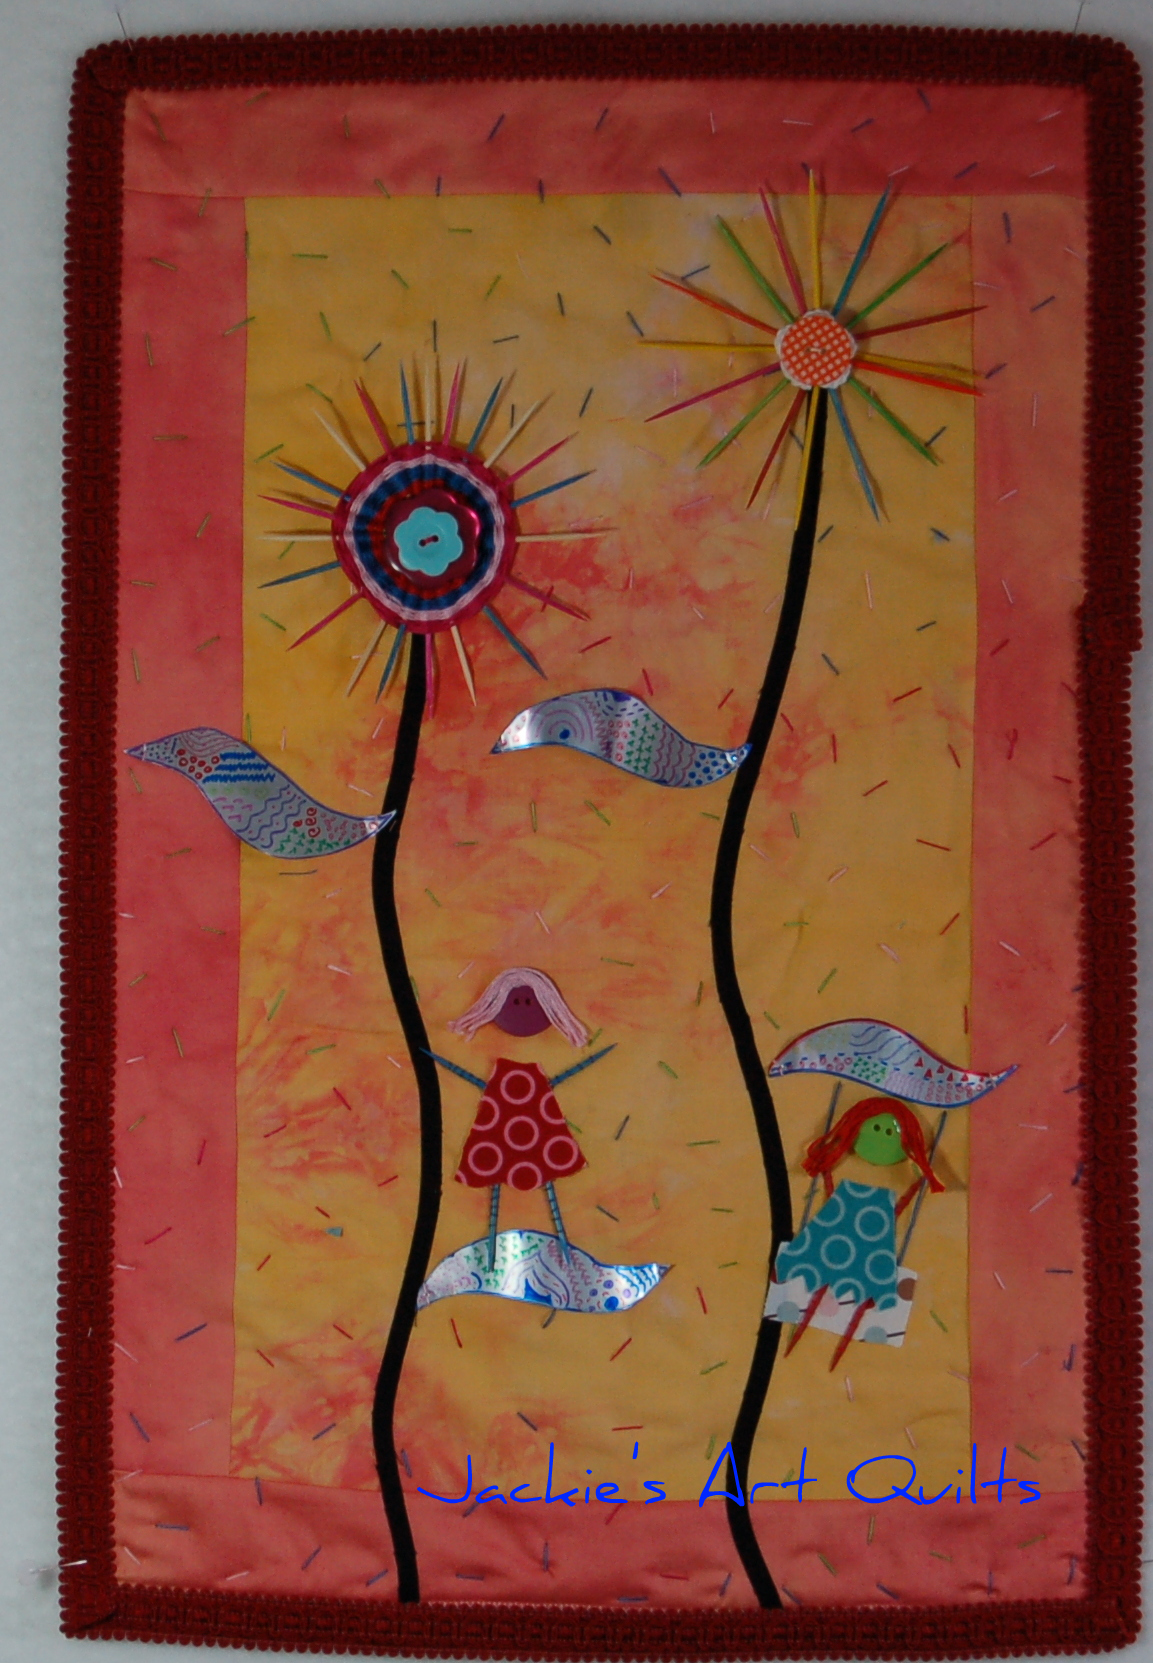
The quilt pictured below uses zipper tape. This is a nice tie in with the quilt as colored tape is also used as the stem and leaves of the flowers. Note that each side was hand stitched to the quilt and done separately using different colors of the zipper tape. The ends were folded under and stitched down to give the appearance of mitered corners. This is a great way to use different colors in your edges.

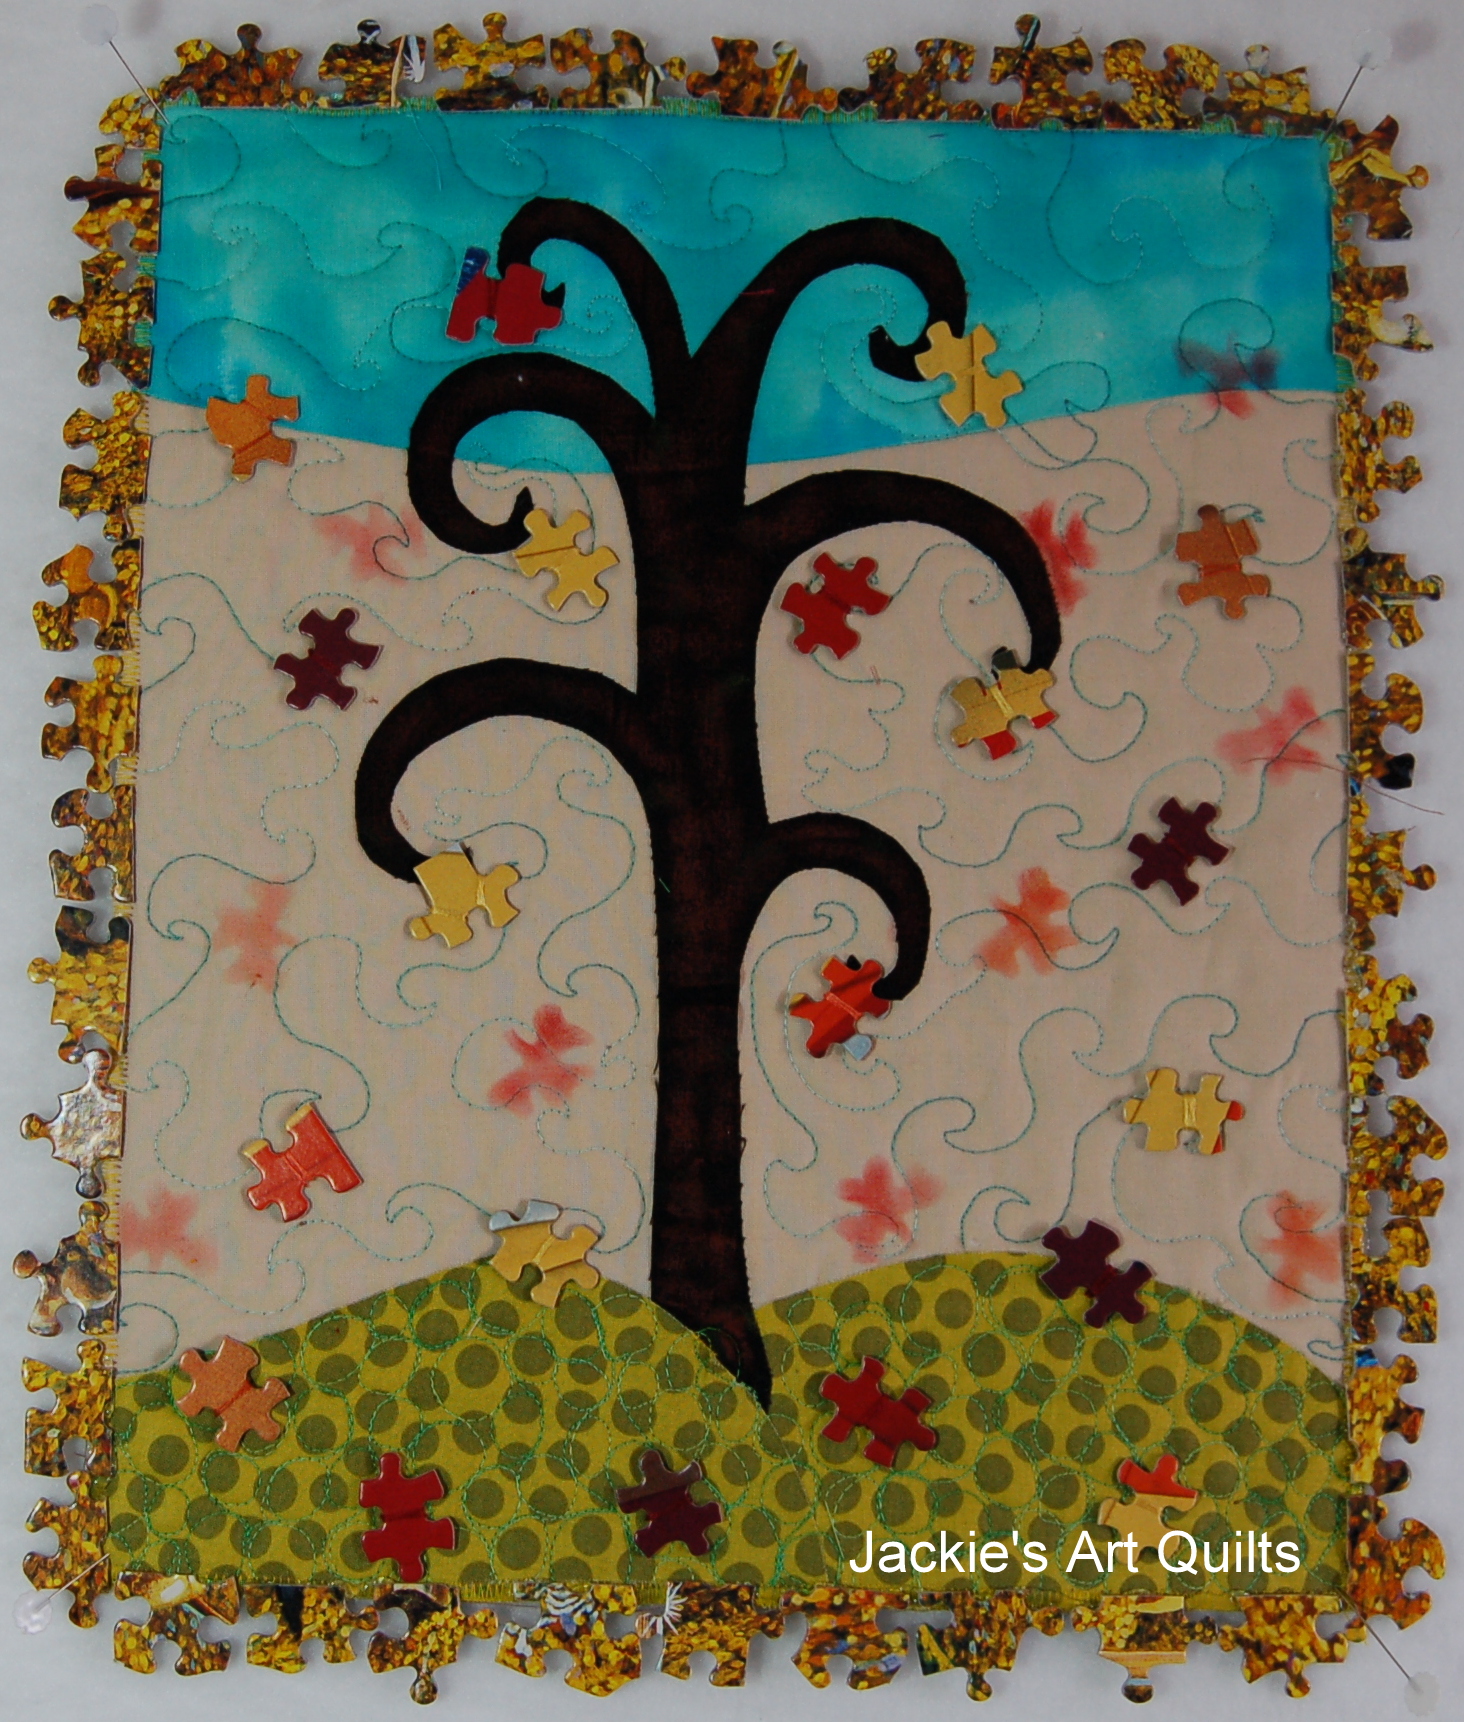
Here is where we really lost our marbles, or puzzle pieces! Once again the focus of the quilt was brought to the edge of it by using similar elements. The “leaves” or fall-colored puzzle pieces were reflected in the binding of the quilt. The puzzle pieces were stitched down using embroidery floss. A tip is to lay out the pieces first to ensure they fit nicely along each edge and then stitch down by circling the embroidery floss around an edge of the puzzle piece and through the quilt.
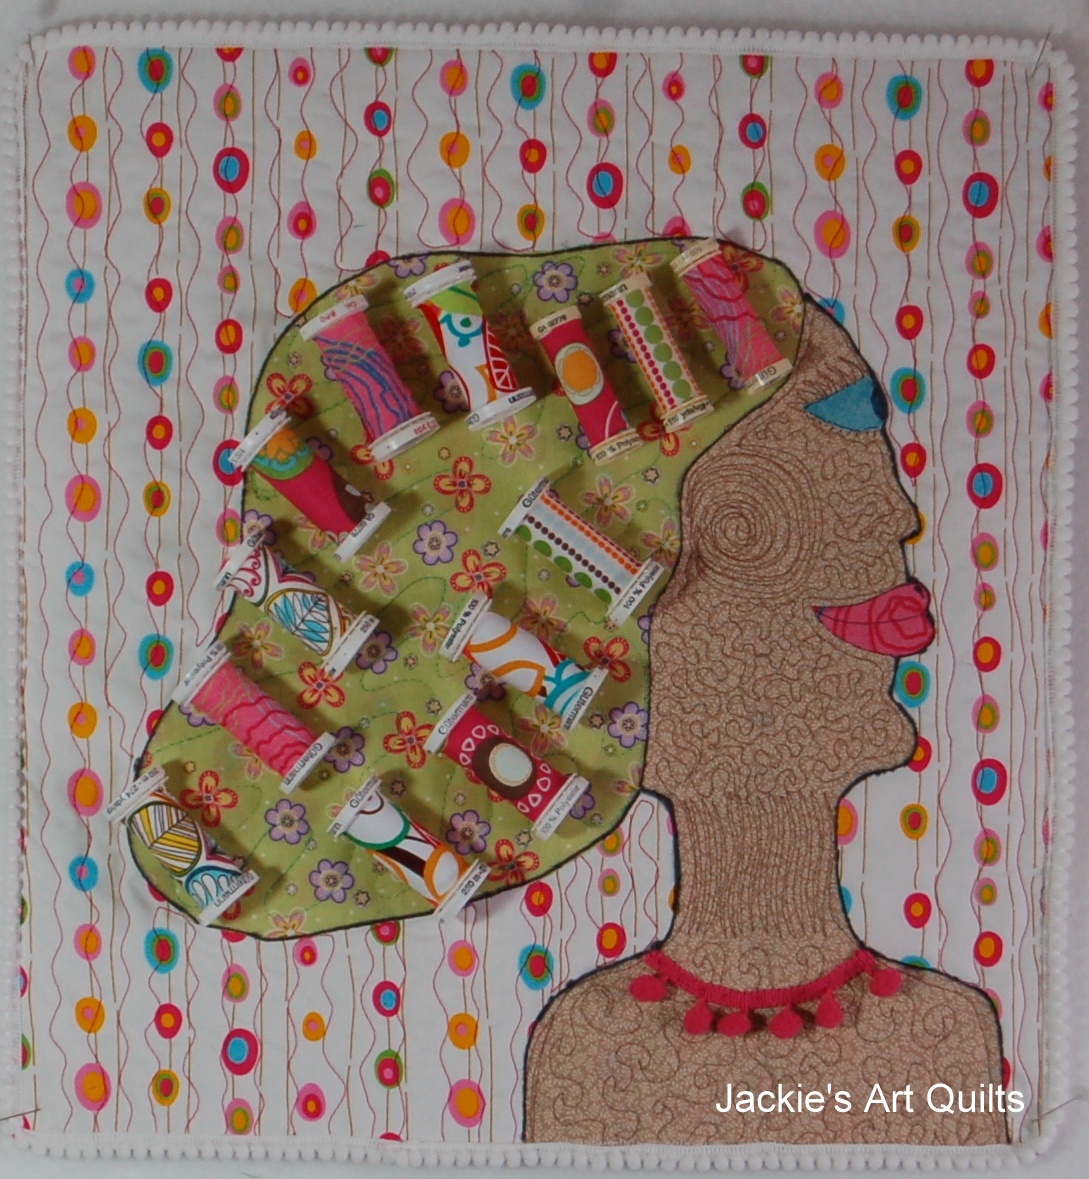
This lady is definitely living on the wild side and to add to the festivity is the mini pompom border that is used. In this quilt, the circles of the background were reflected in the circles of the pompom border. Machine stitching along the edges of the pompom border secured this to the quilt, easing gently around the corners. To finish off the pompom border, as it met the start point, it was brought underneath and hand stitched down and trimmed.
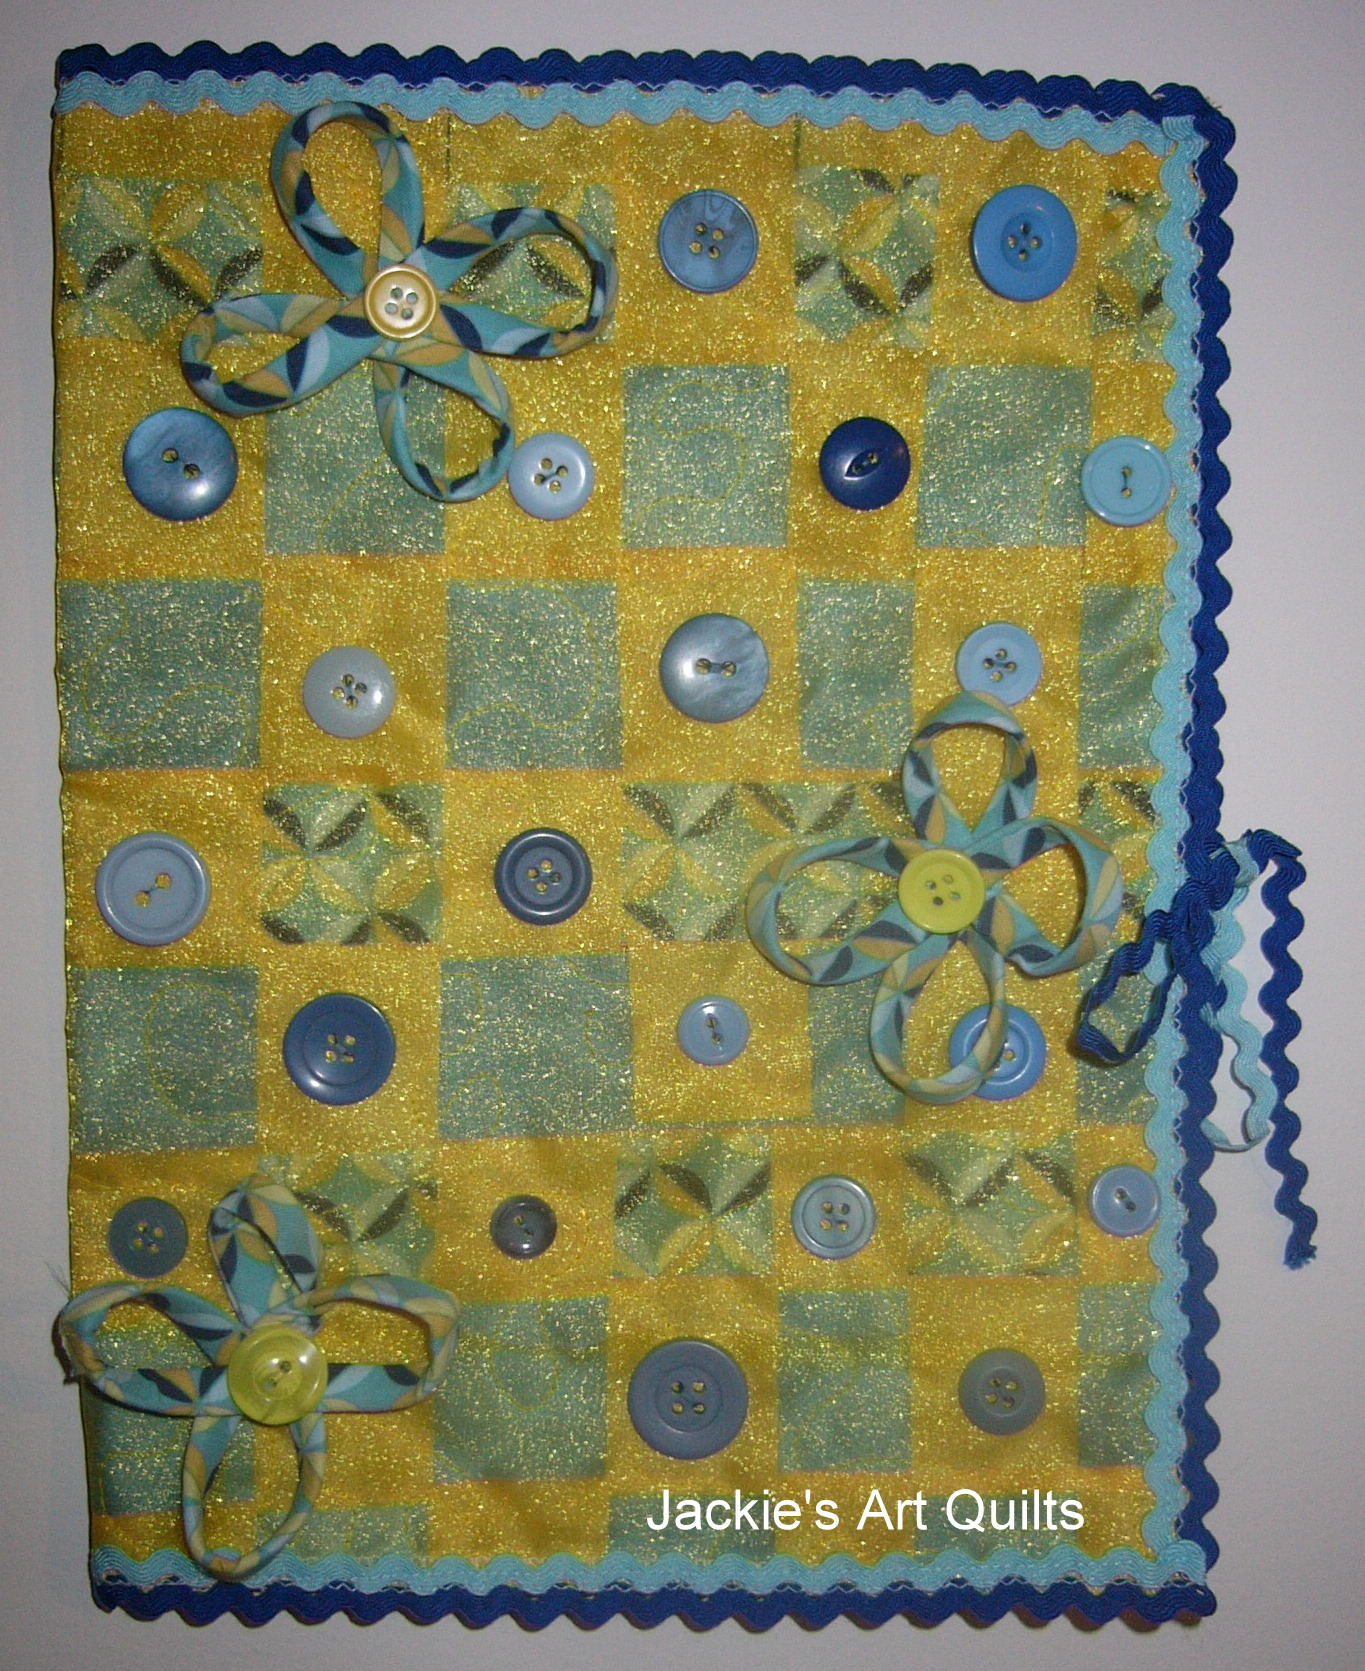
When all else fails, use rickrack. This is one of the greatest embellishments out there. With its curves and rope like character it is extremely versatile. The quilted journal cover below boasts a double length of rickrack to make up the binding on this cover.
Turn UFOs into treasured projects! Finish your quilts with fun, quick and easy binding techniques in Craftsy’s Finishing School: Edges & Bindings class. Add trims, scalloped edges, prairie points & ruffles!
Share tips, start a discussion or ask one of our experts or other students a question.
No Responses to “Creative Edging Ideas for Adventurous Quilters”