
Have you ever tried adding letters and words to quilts? A quilt with words is a huge trend lately — not only does it create unlimited options and fun messages for our patchwork, but many of the techniques for adding letters to quilts are not difficult at all! With a few basic techniques and very little practice, you can put messages in your patchwork as well.
Recently, I joined Sarah Fielke’s class Word Play: Personalize Your Quilts and learned so much about adding lettering to quilts. She covers several techniques (both appliqué and piecing) and makes the steps so easy to follow. Sarah also shares great examples of finished quilts and offers lettering plans for the entire alphabet in the class materials. What I enjoyed most about the class is that Sarah teaches HOW to create letters, so you can make your own in any style you choose!
Today, I’ll share a tutorial and tips for making a quilt with words.
Choosing fabrics
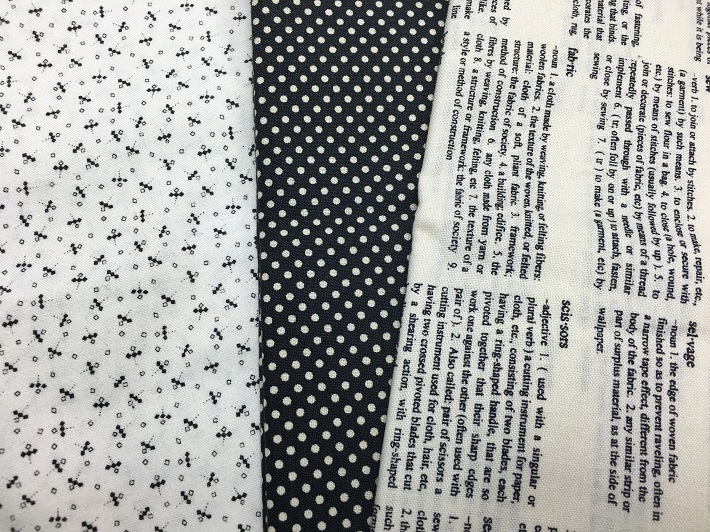
The first important thing to consider in a quilt with words is the fabric you use. In Word Play, Sarah discusses the importance of a strong contrast between the letters and the background fabrics. Also important to remember? When using many little pieces, there can be pitfalls to large or directional prints.
When I chose my fabrics (shown above), while I loved the print on the right, I went with the print on the left for my background because it didn’t have a directional pattern.
Cutting the strips
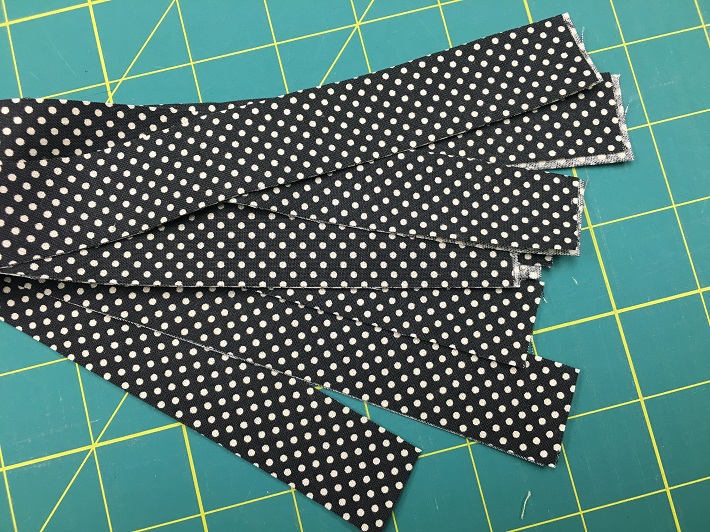
I then cut lots of 1″ strips from my letter fabric. Sarah gives exact cutting instructions on the alphabet templates provided in the class, but I chose to use her “freehand” method, which is sewing strips together without a pattern. I simplified mine compared to hers, but that’s what makes this course so great…she teaches you how to do that!
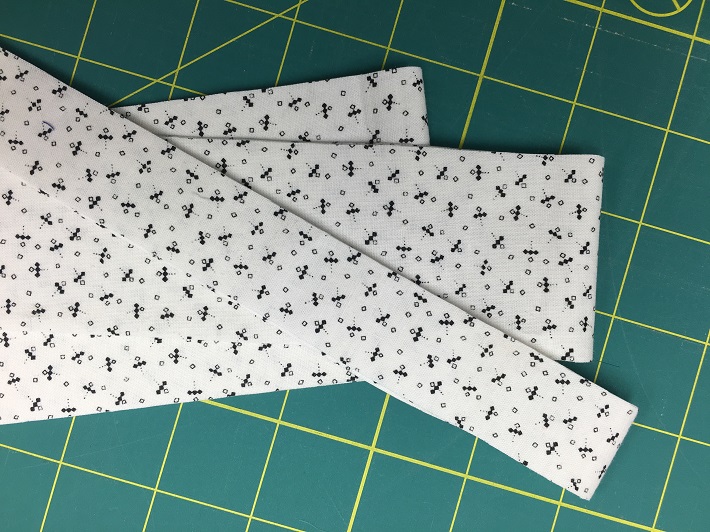
Then, I cut various widths of strips from my background fabric. I chose 1″ – 3″ strips and trimmed as needed. I knew I wanted to keep my quilt small, so I started with small strips. Wider strips would create bigger letters.
Arranging the strips
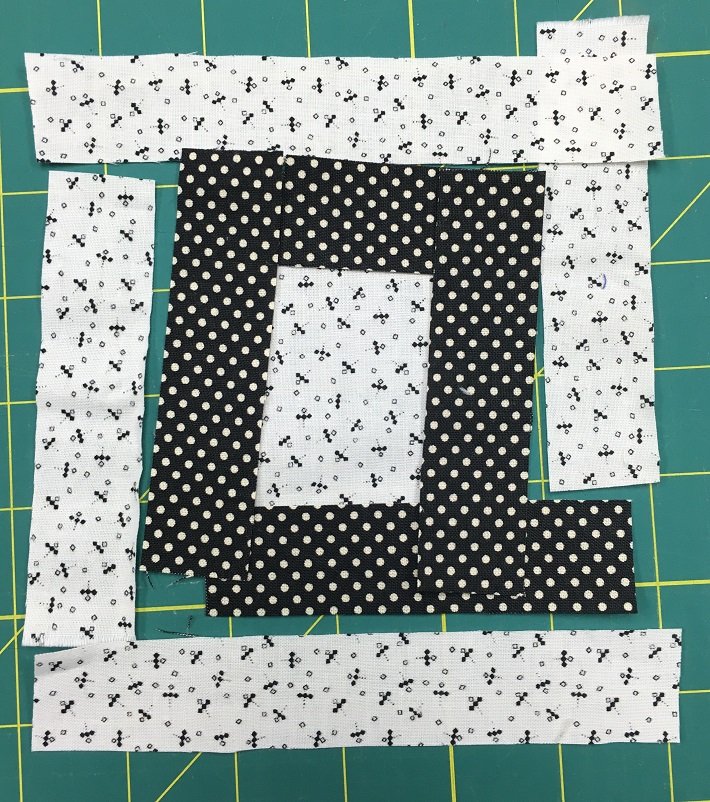
I then cut my strips into approximate lengths and laid them out in the general shape of the letter Q. This Q is a bit stylized and simplified because that’s what I prefer — not to mention it was easier this way!
 Once the strips are cut and arranged, I began sewing from the center of the block. Trimming as needed before adding the next strip as shown above. The top strip of the Q is sewn to the center background. Then the side strip is added to the right, followed by the side strip on the left. Continue adding strips until the letter is sewn together.
Putting it all together
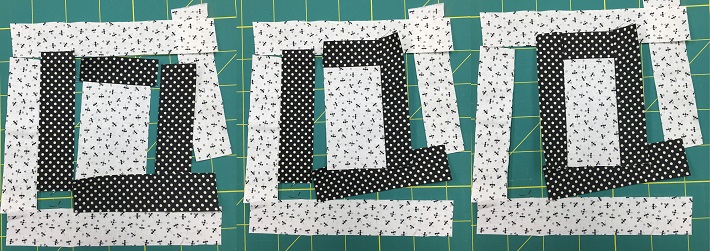
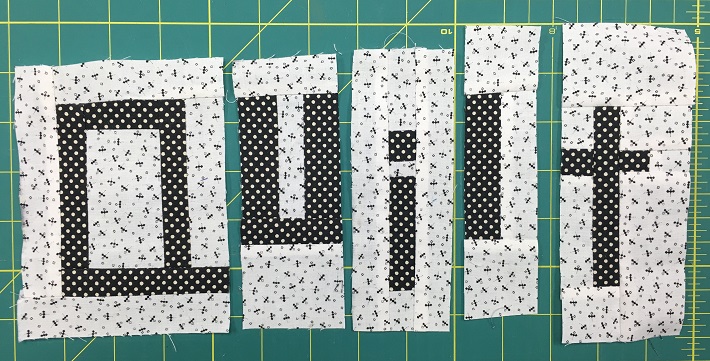 Next, I pieced several more letters and began lining them up to spell out my word. You can see that they are different sizes and shapes, and they don’t line up perfectly. That’s not a problem! I like the carefree look of that, but you can certainly line yours up in straight row before sewing. Once the letters are sewn together, you can trim the edges even with a rotary cutter and ruler.
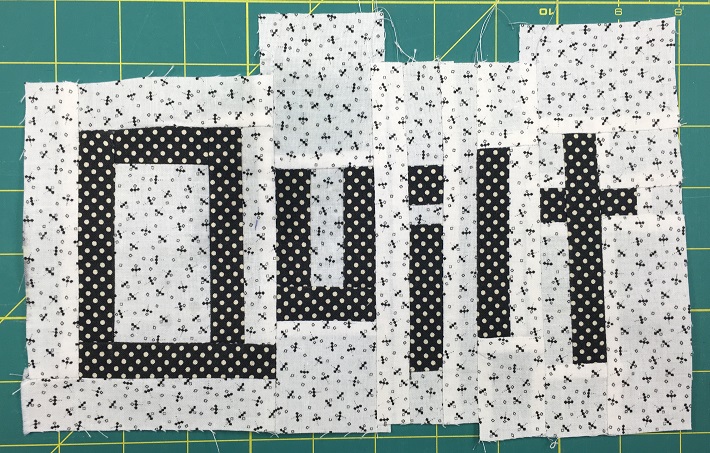
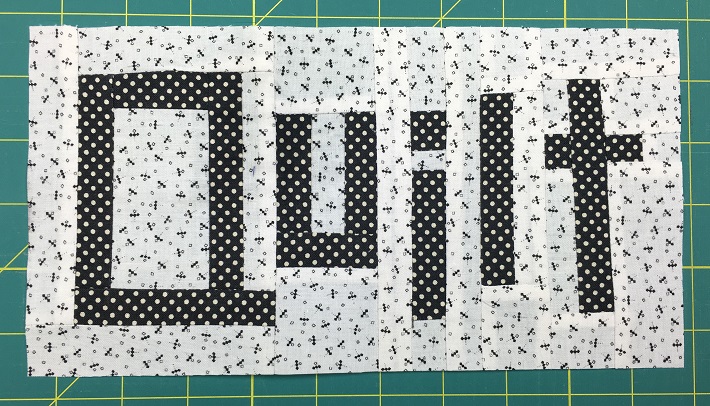
It took me less than an hour to sew the letters for this word. It’s that easy and fast, once you learn the steps. For this method, no two letters will ever be the same, kind of like your handwriting! You can make an entire quilt from the words, add the words to quilt borders, pillows, wall hangings, etc. The possibilities are endless.
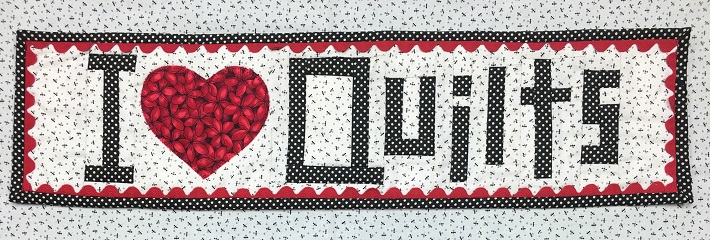
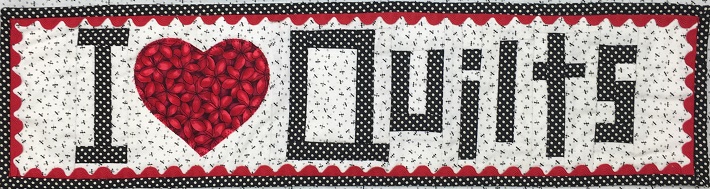
I chose make mine into a small wall hanging that measures 5′ x 21″. I made it in one evening and plan to proudly display it in my sewing room. Fun dots and some bright rickrack make it playful. The heart is simply machine appliquéd with a zig-zag stitch.
Share tips, start a discussion or ask one of our experts or other students a question.
No Responses to “The Best Tips for Making a Unique Quilt With Words”