
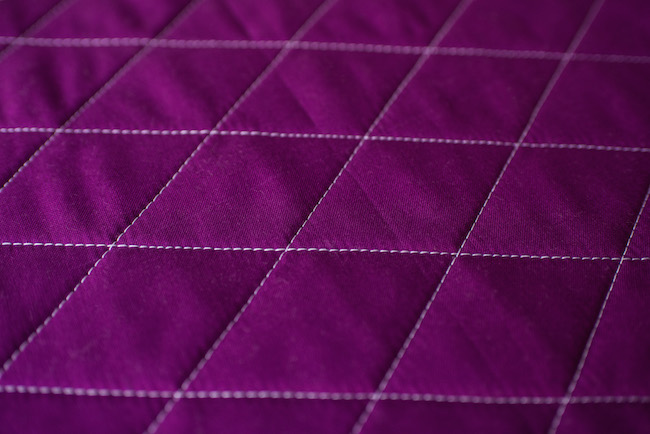
When free-motion quilting a lot of background fabric, you might not know how to fill in the negative space. Sometimes it can be helpful to break up the solid background into what’s called a “grid” for your free-motion quilting designs to rest inside.
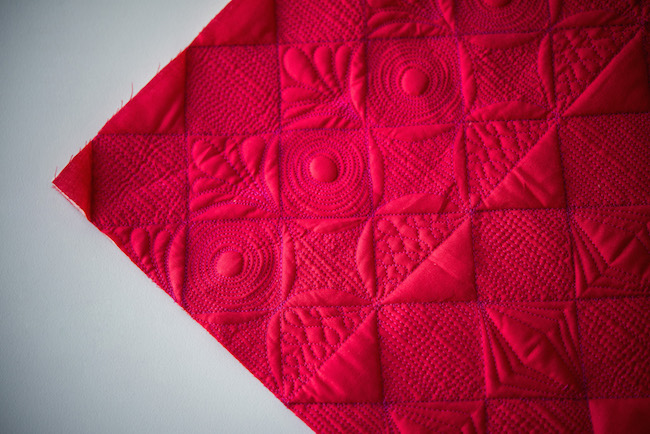
Quilting grids can come in many basic shapes.
Within each of those shapes, you can change the angles slightly to get different effects. Having these smaller shapes to quilt inside can really give you more confidence to try out advanced free-motion designs, because you can focus on one small piece at a time, rather than worrying about filling a massive space!
How to create the grid
To make the quilting grids, you’ll either want to use a longarm machine with a quilting ruler, to get your lines as straight as possible, or use a domestic machine with your walking foot to quilt straight lines.
Using a wash-away fabric marker is a great way to mark the lines for quilting, and you can sew right on top of them if you’ve got it pre-marked!
Here are 8 types of grids to inspire your quilting designs!
Square and rectangles
Diamonds
Triangle
Once you’ve finished quilting your basic grid, it’s time to have some fun and experiment with free-motion quilting designs!
Remember, you can always sub-divide your square grid into triangle shapes with your quilting designs to change it up, or you can soften a geometric pattern by adding swirls, feathers, and wavy lines. Try quilting an entire row of your grid in the same pattern, and you’ll become confident in drawing those designs.
Are you ready to dive headfirst into grid quilting?
Check out the new class “Quilting on the Grid,” where free-motion maven Christina Cameli teaches you how to use grids to your advantage as you explore new possibilities in free-motion quilting designs. We’ll also be back to share some great free-motion filler designs you can use to fill in specific shapes on your quilt (like diamonds, squares and triangles).
Share tips, start a discussion or ask one of our experts or other students a question.
No Responses to “8 Simple Grids to Inspire Your Quilting”