You don’t need a longarm quilting machine to finish your quilt — stitch it with an embroidery machine instead! By quilting in the hoop, you can create quilts block by block, in long strips or stitch ’em whole. And with all the options your embroidery machine has, you can make quilts as simple or complex as you want.
The Different Methods
Here are a few ways to get the job done, with various options for hooping up.
1. Embroider, Then Quilt Block By Block
With this method, you stitch the embroidery design first, then add the backing and batting before completing the quilting stitches. There are two ways to hoop your quilt sandwich:
Hoop the batting as a sandwich of fabric, batting and stabilizer. When the embroidery stitches are complete, secure the backing to the back of the hoop with pins and complete the quilting stitches.
Hoop the fabric and stabilizer and complete the embroidery stitches. Then, secure the batting and backing to the back of the hoop with pins and complete the quilting stitches. (This works particularly well with appliqué.)
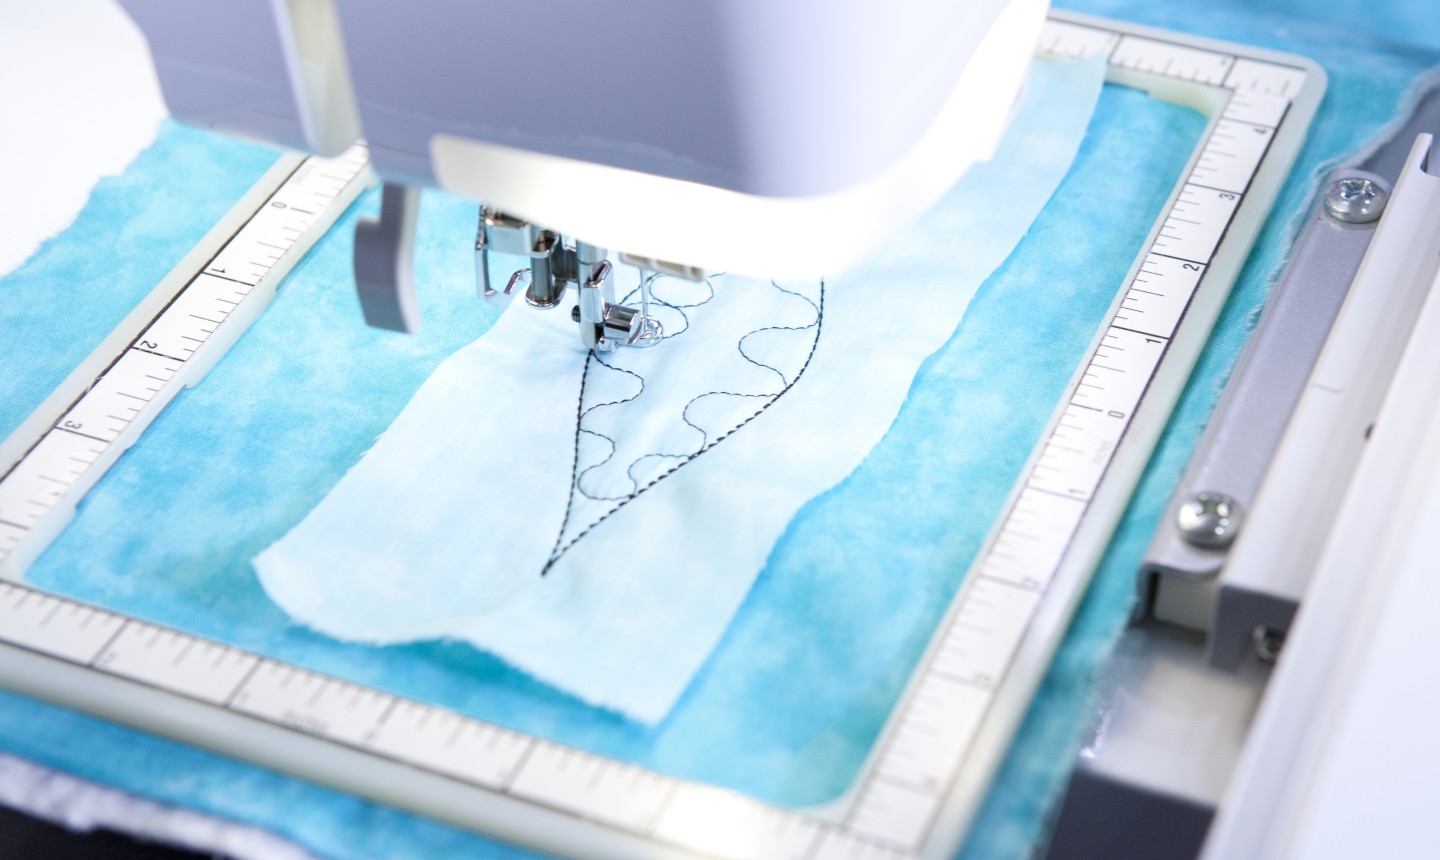
2. Embroider and Quilt in a Single Step
In this method, you complete the embroidery and quilting stitches on the quilt sandwich at the same time. Like with the other methods, you work in pieces at a time, covering a specific block or strip, and join the backing, batting and top together as you stitch your embroidery designs.
3. Quilt Blocks or Small Quilts
The third method involves quilting blocks or small quilts that have already been pieced together and embroidered. This is a great technique for using orphan blocks and completing unfinished projects, especially quilted table runners, baby quilts and other small projects. All you need is a simple quilting design made with a running stitch.
Tips for Quilting in the Hoop
Typically, quilting in the hoop can be done with supplies you already have on hand. But there are some things to keep in mind to make your project a success.
1. Pay Attention to Thread Tension
When quilting in the hoop, thread tension is key to ensuring stitches look as pretty on the back as on the front. Here’s a hack: do all the embroidery on the block first, then add the batting and backing so you can adjust the tension on the machine to be balanced on the top and bobbin threads. (Psst: If you’re using a multi-needle machine, remember the quilting step uses just one color, so the tension only has to be adjusted on one needle.)
2. Trim the Threads By Hand
The type of thread you use is a personal preference. Just make sure you turn off the thread cutter and trim your threads manually to make the back of your block nice and neat.
3. Use the Right Hoop
While some projects are as small as 6″ x 6″, for most you’ll need a large embroidery hoop. Make sure yours is approximately 175 mm x 200 mm or more before you begin.
4. Choose the Appropriate Stabilizer and Batting
Real talk: the stabilizer and batting you choose makes all the difference in the softness of a quilt. For this type of quilting, we usually recommend a very thin mesh-like stabilizer, like Sulky Soft ‘n Sheer. We also recommend using a lightweight cotton batting, like Dream Cotton Request Weight Batting. You could also use a unique product from HoopSisters called Battilizer, which combines stabilizer and batting into one.
Share tips, start a discussion or ask one of our experts or other students a question.
Get exclusive premium content! Sign up for a membership now!
This site uses cookies and other technologies to track your use of the site that will allow us and our service providers and partners to enhance your experience and deliver relevant content to you. By agreeing to or closing this notice, you understand and agree to such use and data collection. For more information about our privacy practices and your choices, please visit our privacy policy and cookie notice.

Just retired and want to learn all about embroidery for my Babylock Alliance.
This is an important technique. It would be helpful if a class were offered. This site should be a content leader.
Where is this class?
Need help with quilting in the hoop
are there classes on this?