
Do you have a pair of jeans or pants that are perfectly good — except for a pesky broken zipper? It’s not worth abandoning the whole garment! There is a way to revive your pants by replacing the zipper.
I will admit that replacing a broken zipper is a fiddly task, but it’s so worthwhile to bring a favorite garment back to life. After all, you are doing something good for the earth by keeping those jeans out of the landfill.
Find out how to replace a broken zipper in pants or jeans with this step-by-step tutorial
Step 1: Detach Waistband
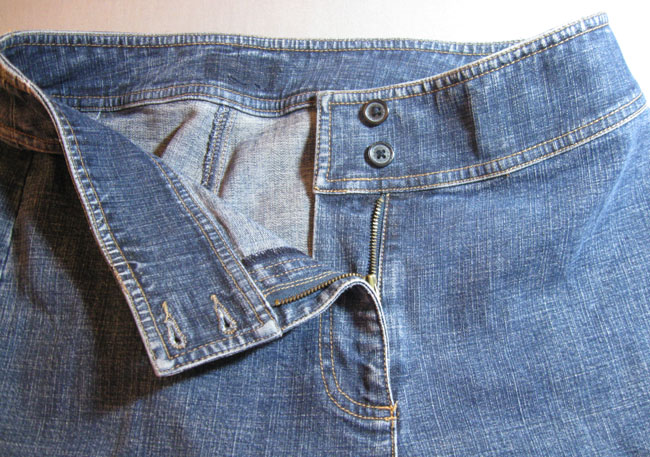
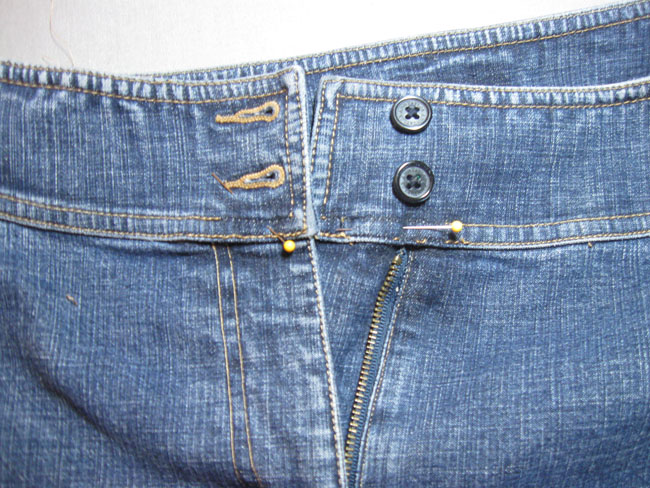
First, take a good look at your pants or jeans. Examine how the fly is assembled and sewn, as you will be deconstructing it and then sewing it back together, with a fresh new zipper. It doesn’t hurt to snap a few pictures of the fly, both inside and out, to refer to when you are reassembling it. Also on most pants or jeans, there are creases, pressing lines, and even wear marks that serve as a road map to getting it back to original shape, so take a look at those marks.
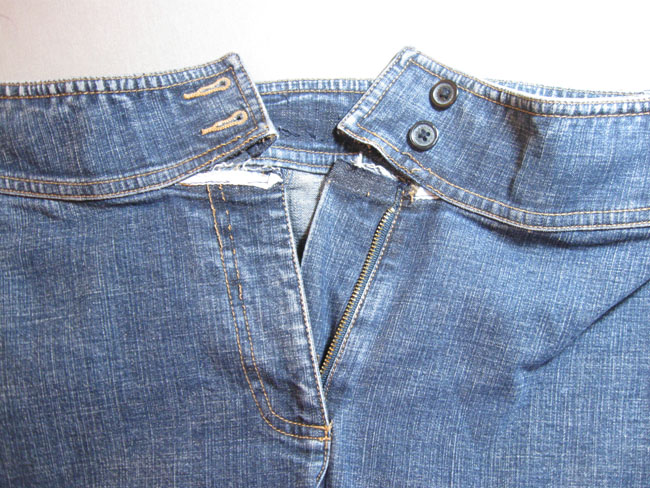
Once you have a good view of how the pants are constructed, unpick the stitching that holds the waistband onto the pants on either size of the zipper. Go at least an inch beyond the working area on either side, as this will make the whole operation more accessible.
Step 2: Remove the zipper and fly shield
Next, you’ll remove the actual zipper from the pants.
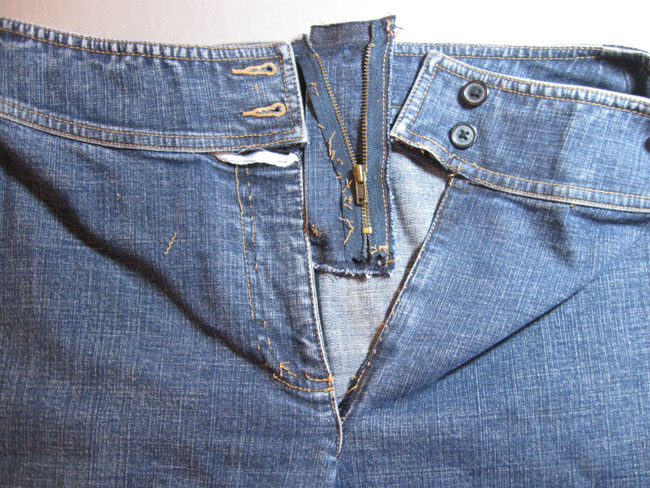
Start with the side with the fly shield (the one that is underneath and hidden when the pants are worn). Detach the fly shield — it will likely be sewn in two spots: at the edge of the fly shield, which connects it to the pants fly facing; and also close to the zipper teeth to keep the zipper in the right spot. This might make more sense as you read through the rest of the tutorial and see it being put back together.
Also unpick the stitching at the bottom of the fly shield, which connects the bottom of the fly shield to the pants front. On jeans, there will be some bar tacks there — they’re stubborn, but they hold the fly shield down at the bottom of the zipper, so they need to be unpicked to get at the whole thing. Don’t worry about removing the zipper tape from the fly shield; that can be done just prior to adding the new zipper.
Next, unpick the zipper tape from the other side of the pants front. The zipper tape will be attached to the upper side fly facing with stitches that don’t show on the outside.
Once you have the fly shield removed, then remove any loose thread bits that remain. Whew!
Step 3: Add the new zipper to the fly shield
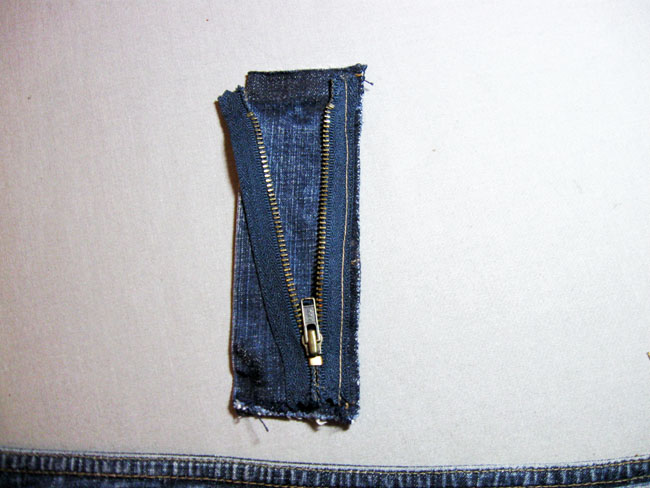
The fly shield should now be detached yet still have the old zipper sewn on near the edge. Take a close look and see where the zipper tape is placed in relation to that edge (probably quite close!).
With your new zipper at the ready, unpick the last row of stitching that is holding the old zipper on the fly shield
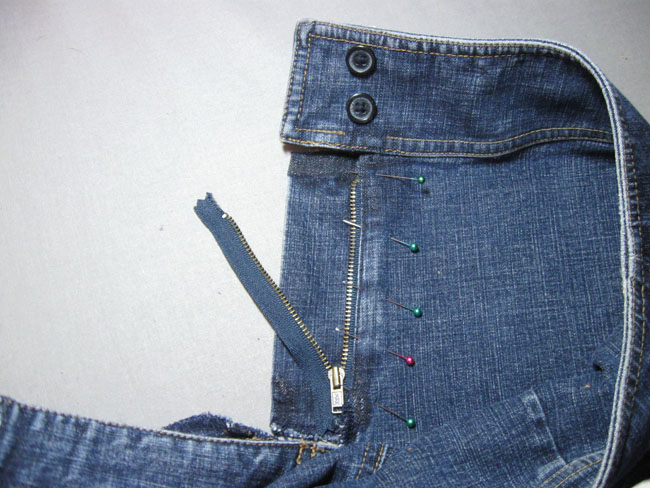
Then place the new zipper on the fly shield, making sure to align it at the top and bottom, just like the old one. This is important, so that the top of the zipper will land right under the waistband as it did originally. You can even put a pin at the placement of the top and bottom of the zipper on the fly shield as you remove the old one so that you place the new one in just the right spot.
Stitch the new zipper onto the fly shield at the edge of the tape to secure it. In the next step, you will attach it to the pants, so there will be another row of stitching between that row and the zipper teeth.
Step 4: Reattach fly shield with new zipper
Now that the zipper is sewn onto the fly shield, you can reattach the fly shield with the zipper to the pants front.
In this example (and on most jeans) the fly shield creates an extension of the pants front that will line up with the edge of the waistband. Line up the top edge of the fly shield with the upper edge of the pants front. Usually you can see a trace of the line of stitching that you removed, so use that as a guide.
Snug the zipper teeth up to the edge of the pants front and, using a zipper foot, stitch though all layers of the pants front, which will attach the zipper and fly shield to the pants front on that side. You may have to move the zipper slider out of the way in order to sew close to the edge.
Step 5: Mark placement on other side
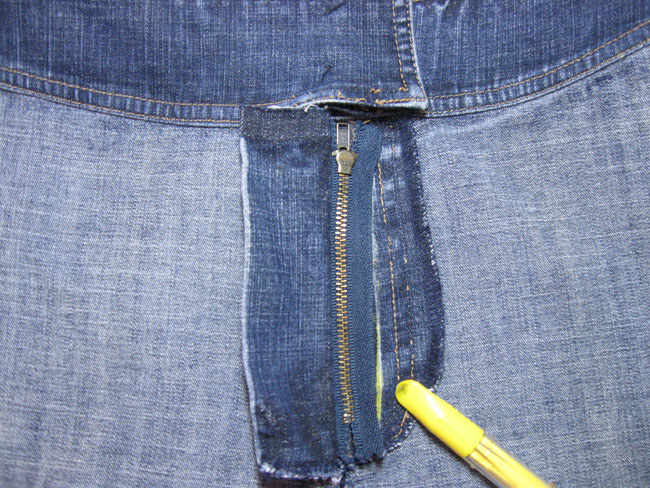
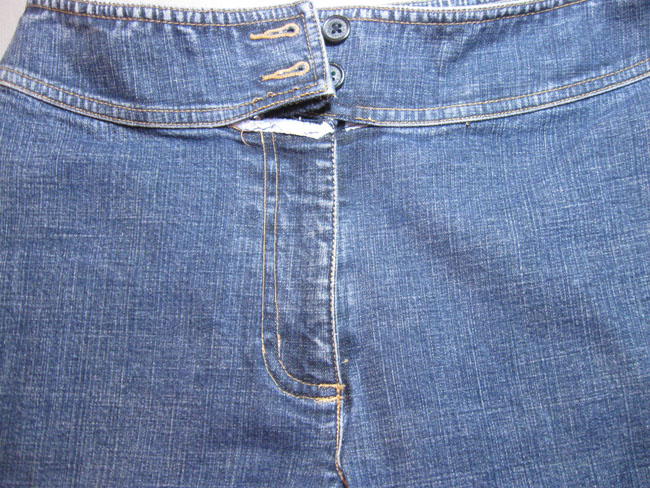
Now that the zipper is attached to the underneath side of the pants front, zip up the zipper and button the waistband (or pin it). Turn the pants inside out so you can see the inside. Smooth out the zipper area.
You can now see where the other side of the zipper tape should land on the upper side of the pants front. In the photo above, the fly shield is pulled out of the way to expose the zipper.
Use chalk or another marker to draw a line where the zipper tape will land on the fly facing. You will stitch though only one layer, so don’t pin it down through all layers now.
Step 6: Sew zipper to front fly facing
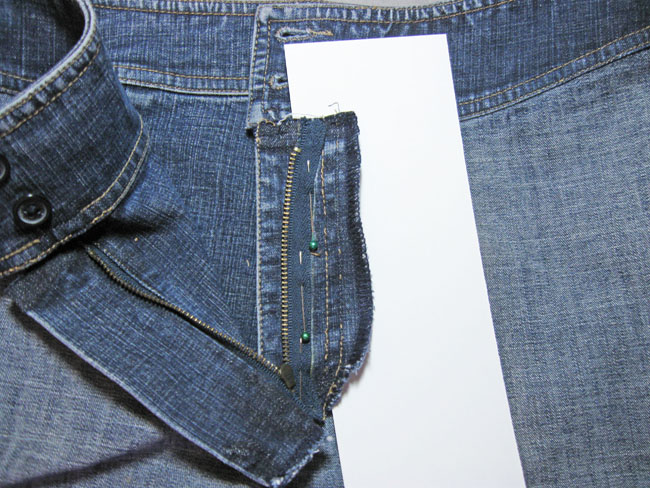
Now that the placement line is marked on the front fly facing, pin the zipper tape down and stitch only through that layer, not through the front of the pants. The white paper here shows that my pins are just through the fly facing layer — not through the pants front.
Stitch along the zipper tape to secure it. On these jeans there were two rows of stitching holding the zipper tape on. Jeans take a lot of wear, so it it seemed like a good idea to do two rows — after all, it would be no fun to do this whole operation again if the stitching came out!
Step 7: Sew fly topstitching on pants front
With the zipper unzipped all the way down, stitch the fly topstitching on the pants front. Make sure that the fly shield is away from the pants front and you are only stitching through the one side of the pants. Stop near the bottom, where the curve begins.
On all jeans and most pants, the fly shield from the other side will be caught into the bottom of the topstitching, so note where that point was originally and stop just before that point. This is done so that the fly shield always covers the bottom of the zipper, for wearing comfort and also to add strength to this stress point on a pair of pants.
Step 8: Complete the fly topstitching
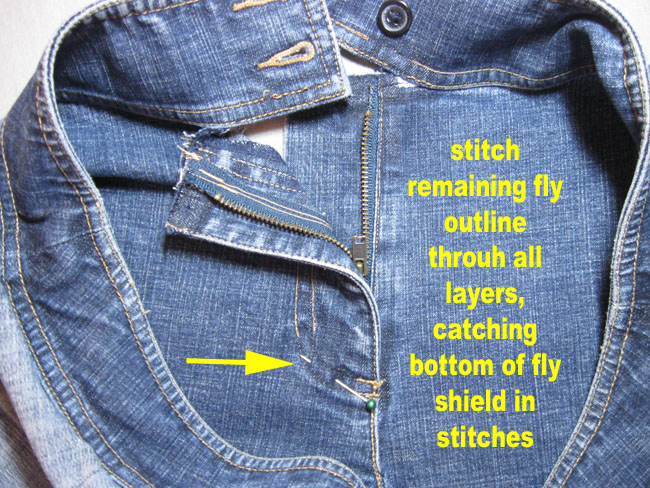
Zip up the zipper, place the fly shield in position under the top layer, and then do the remaining topstitching of the fly, catching the bottom of the fly shield as you go. On most jeans there are wear marks or some indication of where the topstitching was previously.
Complete the topstitching all the way to the center front. On pants, be sure to backstitch at the bottom of the fly, and on jeans there are usually some bar tacks at the very end.
I found it helpful to do some test bar tacks on a scrap of fabric to determine stitch length and width of the zigzag stitch before doing it on the actual jeans. On these jeans, I had to unpick a bit of the center front seam below the fly, so that needed to be stitched back together with topstitching as well.Step 9: Reattach the waistband
Final stretch! Pin the pants to the waistband and reattach. With jeans, the pants fronts are usually inserted into the waistband and topstitched to secure. On a pair of pants without topstitching, you will probably be sewing the waistband back to the pants front and then enclosing the waistband by stitching in the ditch or hand sewing the waistband facing closed.
Share tips, start a discussion or ask one of our experts or other students a question.
No Responses to “Jeans 911: How to Replace a Broken Zipper”