
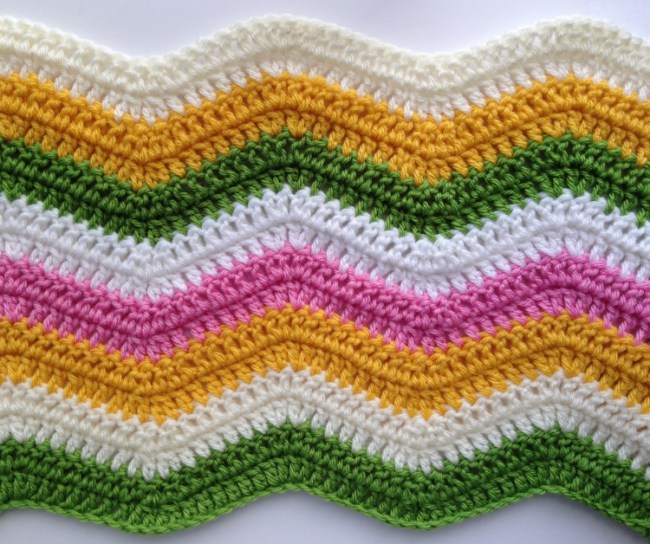
This six-stitch repeat ripple crochet pattern really sings when made in fresh, bright and contrasting colors
My favorite ripple crochet pattern
The sample in the photo above is from my daisy ripple pillow that I made a while ago but that I still absolutely love. The full, free pattern and tutorials is available on my blog. I’m also going to use it to demonstrate how the crochet ripple pattern works in this post. Plus, I’ll show you how to adjust the pattern to be bigger for blankets and afghans of any size.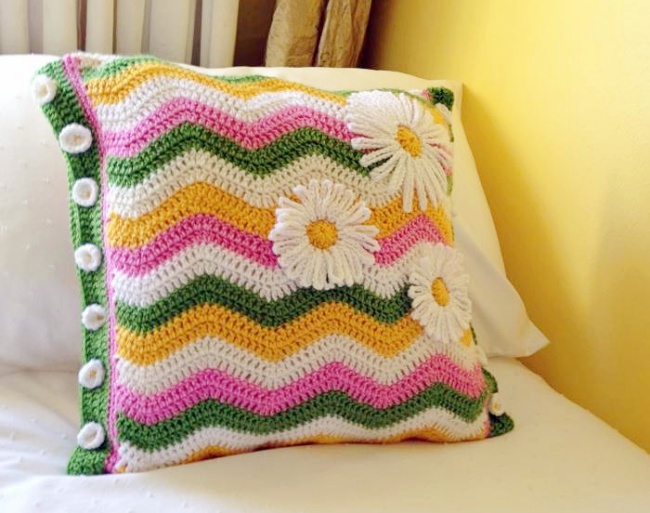 The basic pattern I use involves making six stitches between the peaks and troughs that form the ripple, giving it a more gentle wave than other patterns. It was adapted from the Neat Ripple pattern by Lucy of Attic24, who also has a full blanket tutorial on her blog.
Let’s take a look at the pattern in detail.
Then I’ll go through some crucial hints and tips to make sure you get beautiful results. This pattern will produce a pillow cover to fit a 16″ square pillow.Foundation chain:
Make 67 chains. This is 3 multiples of 18 chains for the main pattern repeat, plus 13 chains for the start and end sections.Row 1:
These first stitches start the row, to get ready for the first pattern repeat:- Dc into the 4th chain from the hook.
- Dc into each of the next 2 chains.
- Dc2tog into the next chain.
- *Dc2tog into the next chain.
- Dc into each of the next 6 chains.
- 2 dcs into each of the next 2 chains.
- Dc into each of the next 6 chains.
- Dc2tog into the next chain.*
- Dc2tog into the next ch.
- Dc into each of the next 2 chs.
- 2 dc into the final ch.

Row 2:
This time you work in the opposite direction, so you complete the “end” first:- Turn your work and ch 3. (In subsequent rows, join your next color and ch 3 to start.)
- 2 dc into the base of your turning chains (or for color changes, starting chains).
- Dc into each of the next 2 stitches.
- Dc2tog into the next stitch.
- *Dc2tog into the next stitch.
- Dc into each of the next 6 stitches.
- 2 dc into each of the next 2 stitches.
- Dc into each of the next 6 stitches.
- Dc2tog into the next stitch.*
- Dc2tog into the next stitch.
- Dc into each of the next 2 stitches.
- 2 dc into the final stitch.
Continuing the ripple pattern
You can change color at the end of Row 2 and then repeat Row 2 as many times as you like, with as many color combinations as you like. I like to work two rows in the same color and then change, but you can change color as frequently or infrequently as you like. The only downside to a lot of color changes is you need to deal with all the tail ends!Troubleshooting the ripple crochet pattern
Getting out of line
The pattern looks easy, and it is — it’s just rows of double crochet stitches. But you do have to count and make sure that the peaks and troughs line up as you go along. You can see in the photo below that I’ve marked the dc2tog that form the troughs and the dc increases that form the peaks.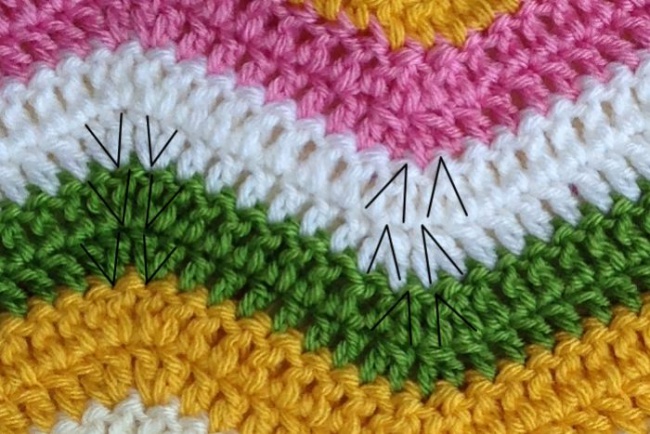 To keep your peaks lining up, you must make your first increase in the second stitch of the dc increase in the row below. The second increase must happen in the first stitch of the second dc increase in the row below.
Similarly, your decreases should also align. For your first dc2tog, the first stitch is the one before the dc2tog in the row below. The second dc2tog starts in the dc2tog of the row below.
Top tip: If you are struggling, use stitch markers to mark the middle stitches of the increases at the peaks and to mark the dc2tog stitches at the troughs.
To keep your peaks lining up, you must make your first increase in the second stitch of the dc increase in the row below. The second increase must happen in the first stitch of the second dc increase in the row below.
Similarly, your decreases should also align. For your first dc2tog, the first stitch is the one before the dc2tog in the row below. The second dc2tog starts in the dc2tog of the row below.
Top tip: If you are struggling, use stitch markers to mark the middle stitches of the increases at the peaks and to mark the dc2tog stitches at the troughs.
Keeping a straight edge
 Once you get it right, the ripple pattern does produce a lovely, crisp, straight edge. In addition to making sure your peaks and troughs are aligned, you need to make sure you start and finish in the middle of a peak.
The pattern above sets you up for success here. But if you look at the whole sample again, you will see there are three troughs (marked with arrows) but four peaks (two in the middle and one at either edge).
Once you get it right, the ripple pattern does produce a lovely, crisp, straight edge. In addition to making sure your peaks and troughs are aligned, you need to make sure you start and finish in the middle of a peak.
The pattern above sets you up for success here. But if you look at the whole sample again, you will see there are three troughs (marked with arrows) but four peaks (two in the middle and one at either edge).
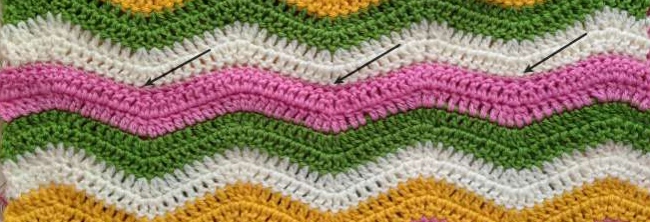 Top tip: To keep a straight edge, you must have one more peak than you have troughs. This compensates for the increases you do at each edge, keeping the stitch count of each row consistent.
Taking your crochet ripple pattern to new heights
Or rather new widths… If you want to use the six-stitch variation of the ripple pattern to make a larger project — such as a baby blanket or throw — use this formula for your foundation row:A multiple of 18 stitches + 13
The 18 stitches are for one pattern repeat. The extra 13 stitches include 5 for the start, 5 for the end and 3 stitches for turning in Row 1.
If you make a pillow cover with the ripple pattern above, you can use this as the perfect gauge swatch to work out how many pattern repeats you need for larger or smaller pillows.
As a rough guide, in case you don’t want to do that much math, a starting chain of 211 chains (11 pattern repeats plus 13) will give you a blanket that’s approximately 44″ wide — suitable for a twin or single bed.
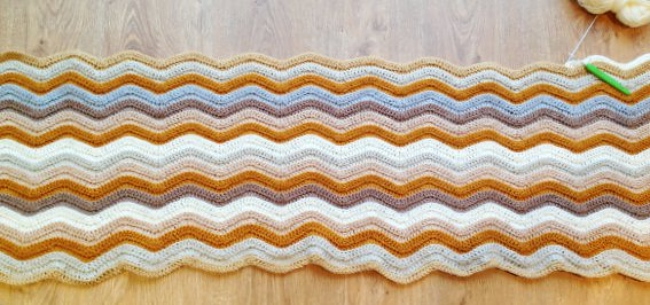
My seascape ripple blanket using lovely sandy beach colors in a twin bed size.
For a full king-size bed cover, you would need a foundation chain of 355 chains (19 pattern repeats plus 13) to give you a blanket approximately 75″ wide. Obviously these suggested foundation chains are for guidance only; the final size of your blanket will depend on the yarn use and your stitch tension.
The length of your ripple blanket is determined by the number of rows you complete, so this is far easier to adjust as you go along.
Share tips, start a discussion or ask one of our experts or other students a question.
No Responses to “The No-Fail Formula for Perfect Crochet Ripples”