
Here is a super reliable method for making mortises with a plunge router using templates that you can make to suit almost any job.
The strong points of the method are:
- Repeatable sizing of the mortise.
- Precise location of the mortise on the work piece.
- The template jig offers excellent support for the router, even on narrow work, such as frame and panel construction.
How it works
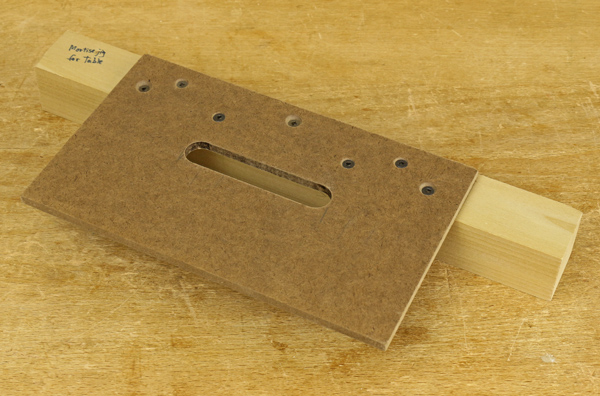
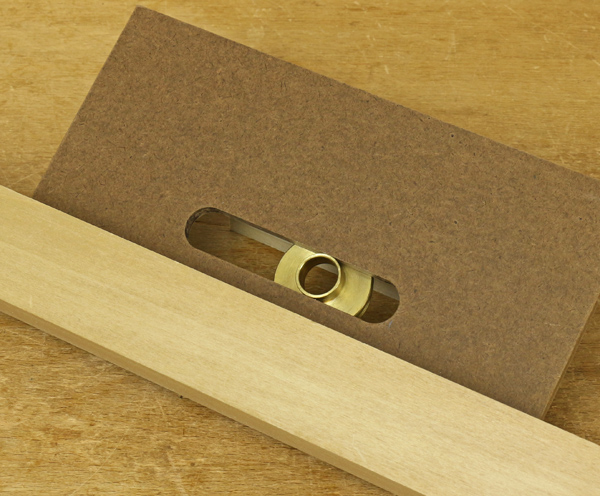
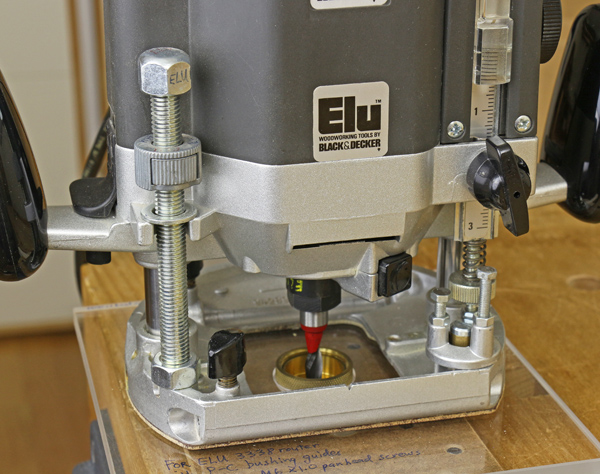
Let’s look at the anatomy of the jig and how it works with a router guide bushing. Seen below, the jig consists of a robust fence attached to 1/4″ MDF, which has a slot that is parallel to the fence at a specified distance from it. As seen in the underside view in the next photo, the width of the slot snugly matches the outside diameter of a short guide bushing. The length of the slot is specified by the desired length of the mortise.
The jig is clamped to the work piece or, as shown below, the setup is placed in a bench vise. The plunge router has been fitted with a base to hold the bushing, through which the spiral upcut bit passes. The router is moved along the length of the slot in successive passes to cut the mortise.
Making the template jig
It is exacting but not difficult to make the template jig. Start by milling the fence approximately 1 1/2″ square in section, taking special care that the two sides of the fence are straight and parallel, and that the top of the fence, which will attach to the MDF, is square to the sides. For the jig shown above, which will produce a 3″ long mortise, I used a 12″ long fence to give plenty of area for attaching clamps or for a vise to grip.
Screw the fence to a piece of 1/4″ MDF, about 5″ x 8″, leaving the fence slightly proud on its outside to serve as a guide when forming the slot. In this example, I want to make a 5/16″ wide mortise and have chosen a 5/8″ O.D. (outside diameter) bushing. This is a standard bushing guide, sometimes referred to as a Porter-Cable bushing, with a length slightly less than 1/4″ so as not to protrude past the thickness of the template.
It is easiest to make the slot using a straight router bit with a diameter exactly equal to the O.D. of the bushing. Cut the slot on a router table with the jig upside down and its fence riding against the table’s fence.
The length and position of the slot can be figured out with a diagram or by using these formulas:
Slot length = Mortise length + (Bushing O.D. – Cutting diameter of bit)
Note: The cutting diameter of the bit equals the width of the mortise. For example, I made the slot 3 1/4″ long to make a 5/16″ x 2 15/16″ mortise using a 5/8″ bushing.
The distance of the slot from the inside face of the fence depends on the desired distance of the mortise from the reference edge of the work piece:
Slot to fence = Distance of mortise from reference edge of workpiece – [(Bushing O.D. – Cutting diameter of bit)/2]
Note: The second term in this formula is called the “offset.” For example, I made the slot 17/32″ from the fence so the mortise will be 11/16″ from the reference edge of the work piece, against which the fence is placed in use.
The end of the MDF can be used to take a short test cut to gauge the placement of the slot from the fence. Use end stops on the router table fence to accurately cut the slot length.
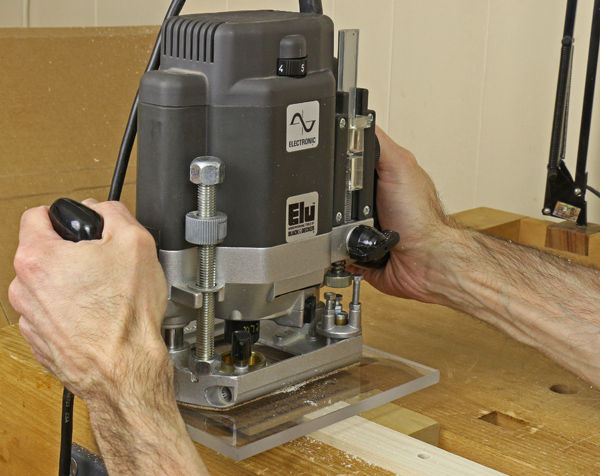
Using the jig
Your careful work in making the jig now pays off! You can make mortises quickly and every one will be identically sized and placed.
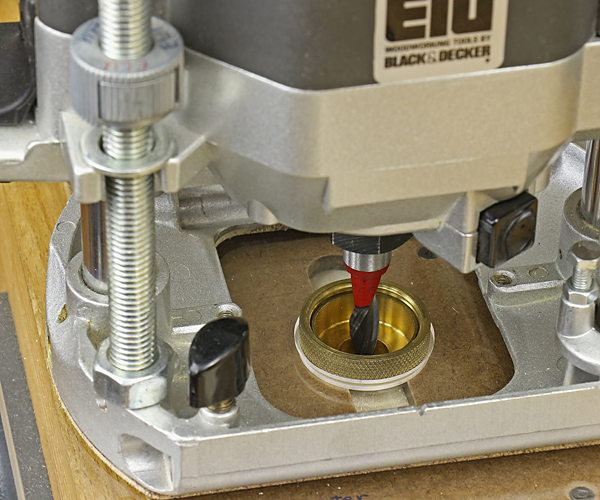
Attach the appropriate base plate to your plunge router to fit the bushing, which should be centered on the collet. Chuck the bit. “Router Mortising: Plunge Routers and Bits” explains the specific type of bits to use.
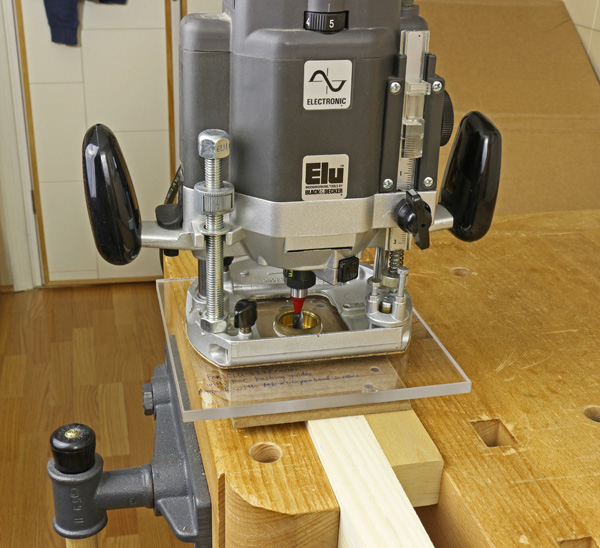
Set the depth of the mortise. The photo above shows the plunge stop against the lowest turret screw and the depth gauge zeroed. “Router Mortising With a Simple Jig” gives a step-by-step explanation of how to set the depth of the mortise. By the way, now is a good time to also reread the safety section in that post.
Set the jig on the work piece and clamp the pair in the vise. The jig provides broad support for the router base to prevent tipping. You can use layout lines to determine the linear placement of the jig on the work piece or you can attach an end stop on the fence of the jig for repeatable placement on successive work pieces.
The mortise is cut in shallow passes as described in an earlier post. To reduce chip clogging with this jig, I prefer to take a full depth plunge cut at each end of the mortise before routing the interior. I also usually stop midway in the process to vacuum out chips.
The result
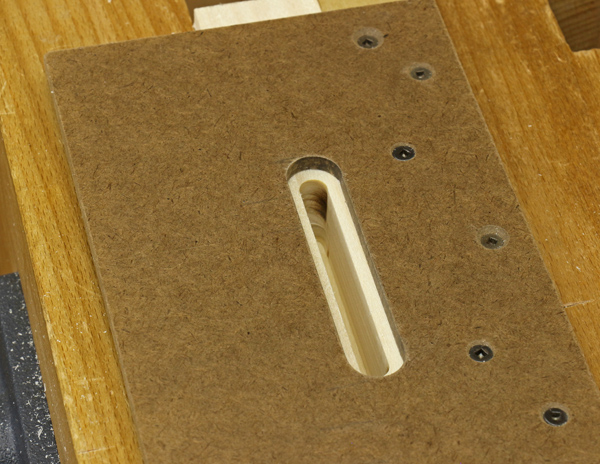
Here, the router has been lifted away to show the relationship of the completed mortise to the template. The next photo shows a wonderfully clean, accurate mortise produced with this method. The mild burning at the ends is typical but is not at all functionally significant.

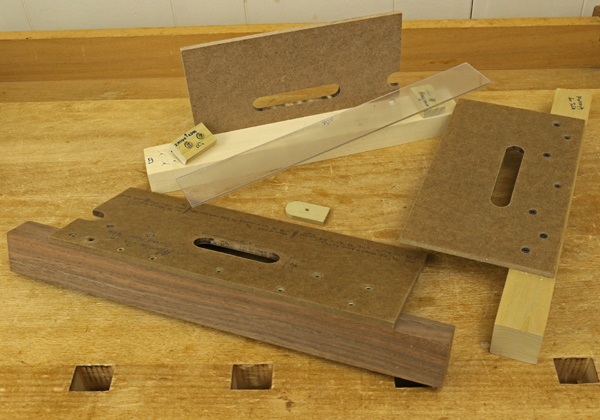
After several projects you will accumulate jigs and then probably find they can be used in other projects, sometimes with slight alterations. Below, note the acrylic fence shim and end stops among the jigs. The small wooden plug with a rounded end is used to shorten a slot.

Learn essential router techniques, cut clean profiles and shape identical workpieces efficiently in Craftsy’s Handheld Router Techniques & Tips class.
Share tips, start a discussion or ask one of our experts or other students a question.
No Responses to “Router Mortising With Shop-Made Templates”