
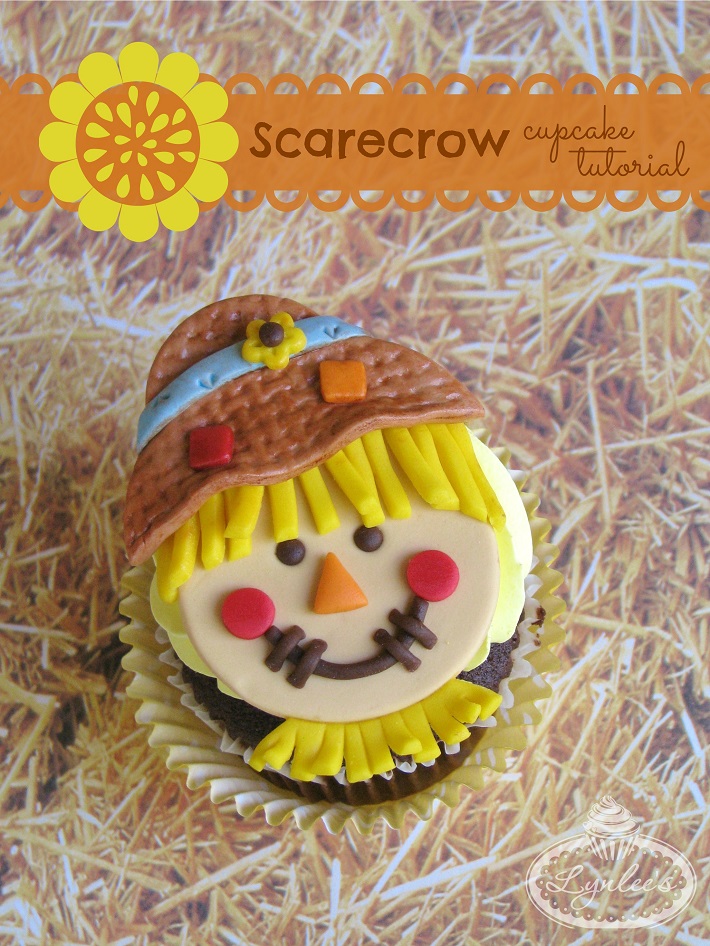
Now that Halloween is behind us, get in the autumnal mood with adorable scarecrow cupcakes that will fit in at any fall feast.
Harvest your decorating skills and follow this tutorial to make sweet scarecrow cupcakes that are far from scary!
What you need:
- Ivory, tan, brown, orange, yellow, red and light blue fondant
- Fondant rolling pin with 1/8″ guide rings
- 1¼”, 1 7/8″ and 2¼” circle cutters
- Mini flower cutter
- Mini square cutter
- Round decorating tips Nos. 7 and 12
- Small ball tool
- Water or edible glue and brush
- Knife tool
- Rolling pastry cutter
- Precision knife
- Basketweave impression mat
- Vegetable shortening
- Brown soft gel paste
- Water or vodka for paint and brush
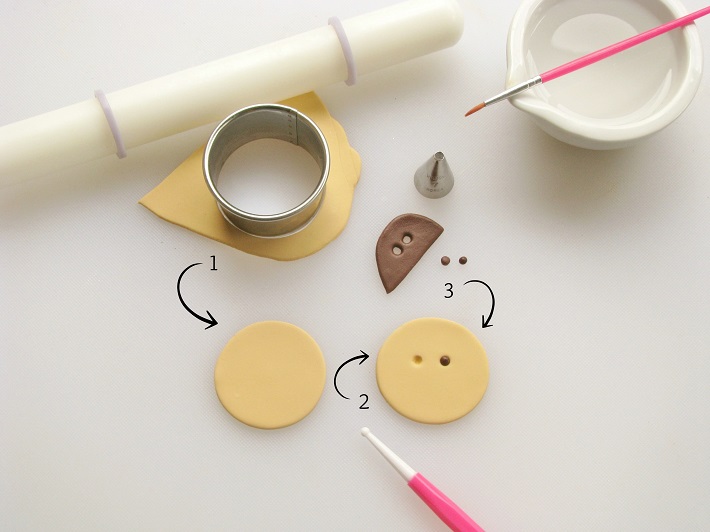
Step 1:
Roll out ivory fondant with the rolling pin and 1/8″ guide rings. With the 1-7/8″ round cutter, punch out a circle for the scarecrow’s face.
Step 2:
With the small ball tool, make two round indentations for the scarecrow’s eyes. Use round decorating tip No. 7 as a guide for the size.
Step 3:
Roll out brown fondant with the rolling pin and 1/8″ guide rings. Cut out two circles with round decorating tip No. 7 and glue them inside the eye cavities in the scarecrow’s face.
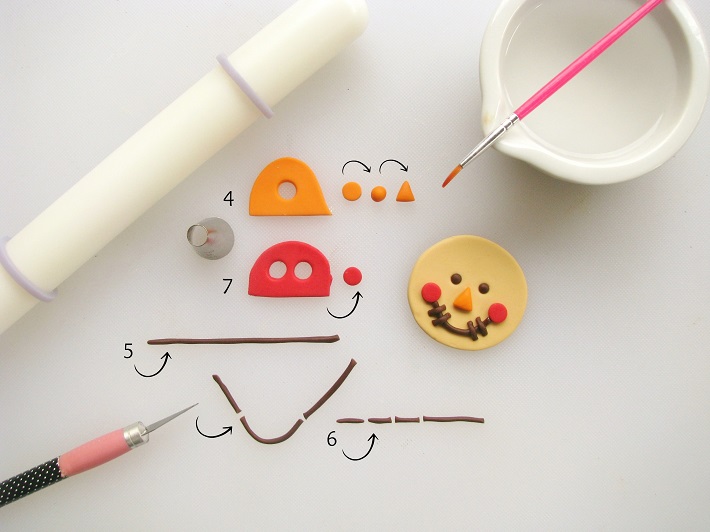
Step 4:
Roll out orange fondant with the rolling pin and 1/8″ guide rings and cut out a circle with the No. 12 decorating tip. Roll the circle into a ball, then shape it into a triangle with your fingers. Glue it into place for the scarecrow’s nose.
Step 5:
Use your fingers to roll brown fondant into a thin rope for the scarecrow’s mouth. Roll it thin and as evenly as possible. Measure it on the scarecrow’s face and use the precision knife to trim it to size. Glue it in place.
Step 6:
Roll out additional brown fondant in the same manner as the mouth, but roll it a bit thinner. With the precision knife, cut smaller pieces to lay perpendicular over the mouth. Glue the pieces in place.
Step 7:
Roll out red fondant with the rolling pin and 1/8″ guide rings and use round decorating tip No. 12 to cut out two circles. Glue them to the two ends of the mouth by the cheeks.
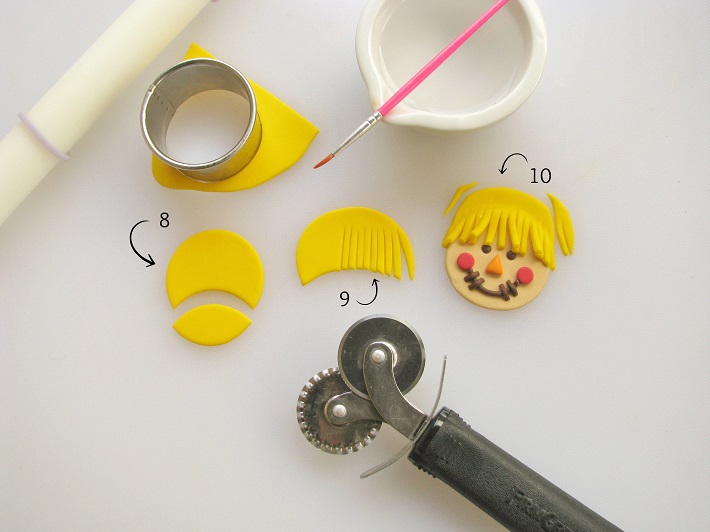
Step 8:
Roll out yellow fondant with the rolling pin and 1/8″ guide rings. Cut out a circle with the 1 7/8″ round cutter, then use the same cutter to trim the bottom off.
Step 9:
With the rolling pastry cutter, trim vertical lines to make the straw hair, but be sure not to cut all the way up to make sure the fondant stays intact.
Step 10:
Adjust the straw over the scarecrow, pressing it down over the head and strategically adjusting the straw pieces. Glue it in place, then trim off the sides.
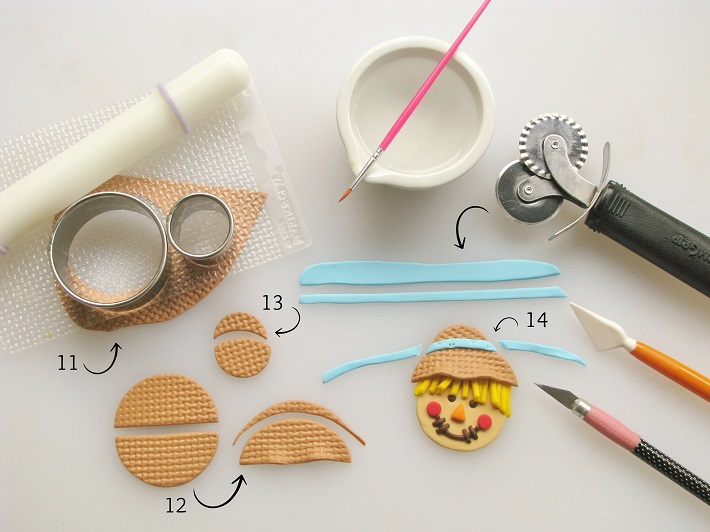
Step 11:
Roll out tan fondant thicker than usual and spread a bit of vegetable shortening over the surface. Place the basketweave impression mat over the fondant and roll the rolling pin over it to impress the pattern in the fondant. Cut out one circle with the 2¼” round cutter and one with the 1¼” round cutter.
Step 12:
Cut the larger circle in half with the rolling pastry cutter. Pull the two ends apart a bit to stretch it out, then use the pastry cutter to trim off the top to narrow it a bit. Use the ball tool to lift a couple of spots on the bottom. Place the piece over the scarecrow’s head and glue it in place.
Step 13:
Utilize the 1¼” round cutter to trim a large portion off the bottom. Glue the top portion as the top of the hat to the scarecrow’s head.
Step 14:
Roll out light blue fondant with the rolling pin and 1/8″ guide rings. Trim off a thin strip with the rolling pastry cutter. Place it over the hat, covering the section where the two hat pieces meet. Glue it in place, then trim off the sides with the precision knife. Use the knife tool to make little indentations on the blue trim.
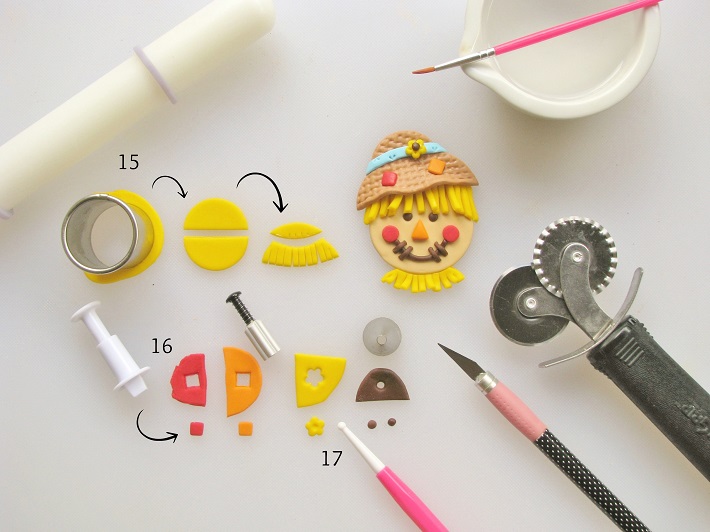
Step 15:
Roll out yellow fondant with the rolling pin and 1/8″ guide rings, and cut out a circle with the 1¼” round cutter. Cut the circle in half with the rolling cutter, then use the precision knife to cut vertical lines on the top portion of the circle. Use the round cutter to trim the top off, then glue it to the bottom of the scarecrow’s head and lift up the straw pieces.
Step 16:
Roll out red and orange fondant with the rolling pin and 1/8″ guide rings, and cut out two small squares (one of each color) with the mini square cutter or with a precision knife. Flatten them out a bit with your fingers, then glue them to the hat to create little patches.
Step 17:
Roll out more yellow fondant with the rolling pin and 1/8″ guide rings and cut out a small flower with a mini flower cutter. Indent the center with the small ball tool and use the knife tool to make little indentations around each petal. Roll out brown fondant and cut out a circle with round decorating tip No. 7. Roll it into a ball, then glue it to the center of the flower. Glue the flower to the scarecrow’s hat. Allow the scarecrow topper to dry overnight.
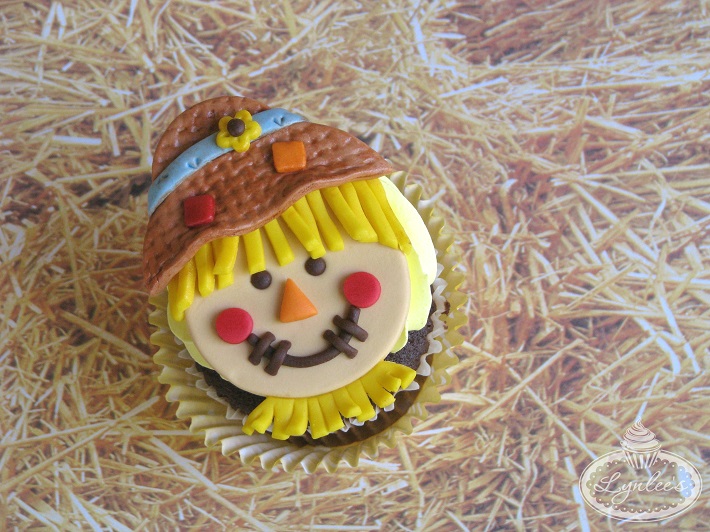
Step 18:
Once the topper is fairly dry, you can paint over the hat with a mixture of brown gel paste and water or vodka to give it more weathered look. Complement your scarecrow cupcakes with pumpkin, sunflower and crow designs to create a fun fall assortment!
Share tips, start a discussion or ask one of our experts or other students a question.
No Responses to “Festive Scarecrow Cupcakes for Every Fall Fête”