
Do you have a lovely silk fabric in your stash that you would like to turn into an elegant blouse? You might have adapted a top pattern to create a cowl with a knit, but this method will work on woven and knit fabrics — and the best part — it doesn’t need a neckline closure so no need to stress over buttonholes on your delicate fabric. Note if it is a fitted blouse you may need to put a zipper in the side seam.
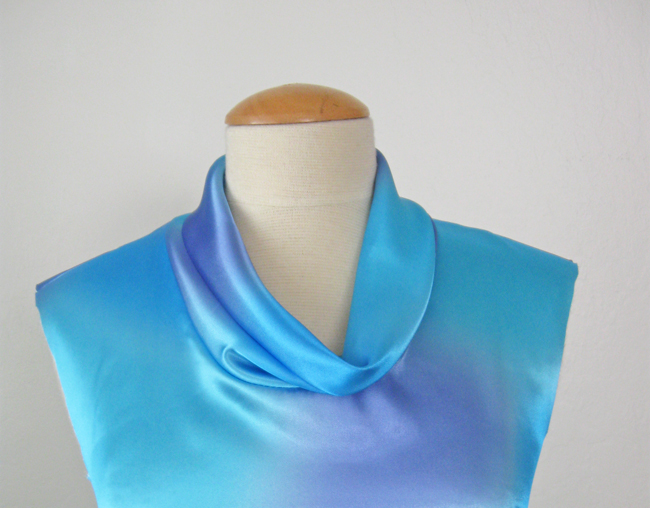
Create a cowl collar blouse in a woven fabric by adapting a blouse sloper and designing the cowl collar
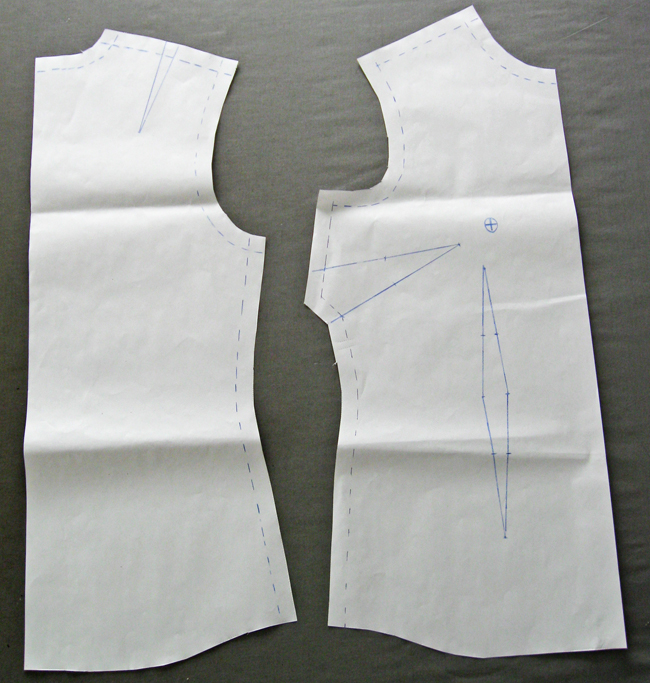
We will start with a blouse sloper, which is the front and back blouse pattern pieces. This example includes the seam allowances, however you can create the same pattern without seam allowances and then add the seam allowances when you have finished creating your cowl neckline adjustments.
Step 1: Design your cowl neckline
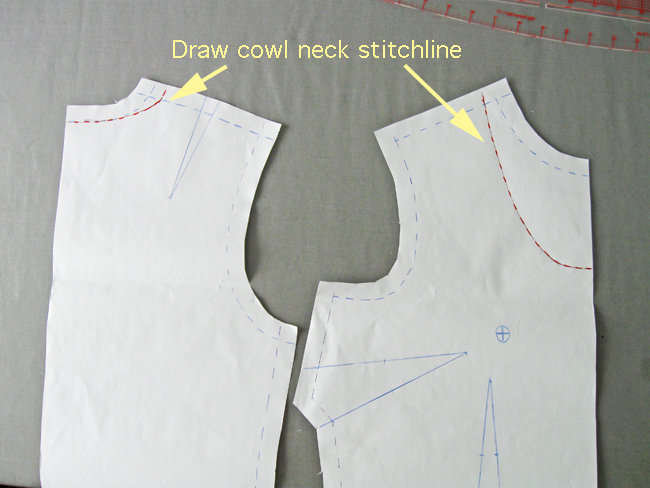
Use your French curve ruler to draw a new stitch line on your front and back blouse sloper pattern pieces.
For the back neckline, move the stitch line at the shoulder outward away from the neck about 1/2 inch. Do the same on the front pattern piece at the shoulder. For the bottom of the neckline, determine the lowest point, usually about 4 inches above the bust point, and mark that spot. Draw a straight horizontal line about 1/4 inch wide at the center front, which creates a smooth transition, and then continue with a graceful curve up to the shoulder seam.
The French curve ruler is very helpful but if you don’t have one, you can use a coffee mug or anything round to get nice smooth curves when designing patterns.
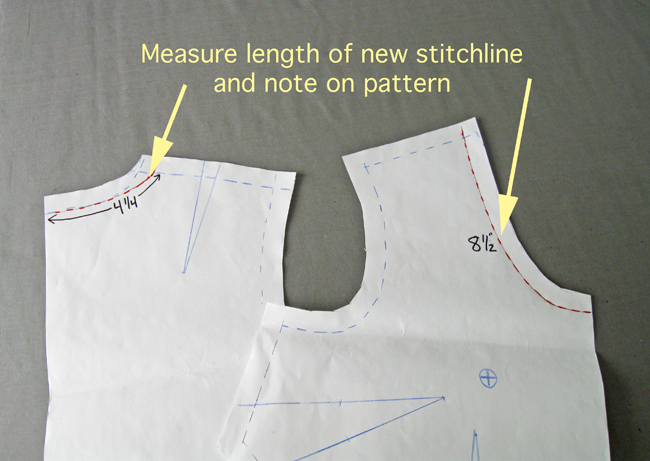
Step 2: Measure the new cowl stitch line
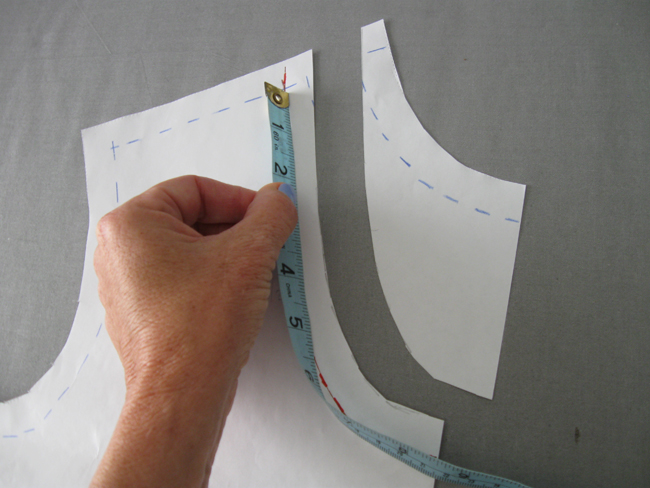
Measure the length of your cowl neckline on the pattern pieces. To to this, hold the measuring tape on its side as shown and curve it along the stitch line. If you have difficulty holding the tape the length of the whole measure, measure in sections and add up to get the whole length. Measure the neckline on both the front and back pattern pieces and write them on your pattern.
Step 3: Create the cowl pattern piece
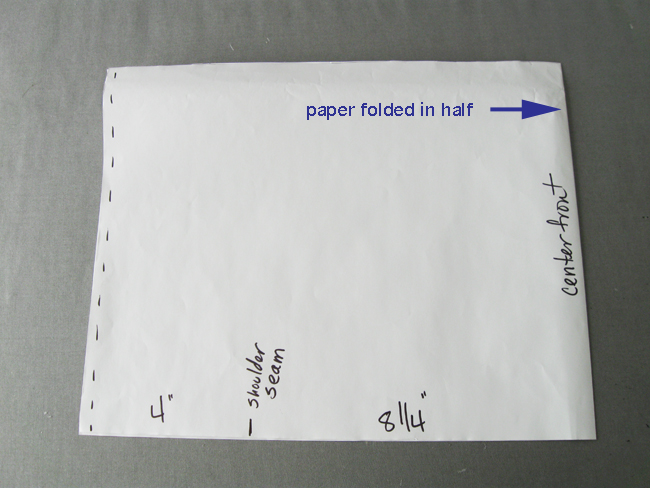
Determine your finished width of the cowl neckline. I find that a finished width of 5 inches is a nice size, it will fold, drape and be easy to wear. To create a 5-inch wide cowl, the width measurement of your pattern piece will be 10 inches wide (seam allowances added later) and then the length measurement will be the twice the sum of the numbers you came up with when you measured the neckline on your pattern pieces.
So start with a large piece of paper or pattern tissue, fold the paper in half and mark the center front, which is the fold. At a right angle to the center front, mark the distance measured on your front neckline, minus 1/4″. We remove a quarter inch because the cowl piece is cut on the bias and stretches a little bit to fit in that seam. So our pattern front neckline measures 8 1/2 inches and our cowl pattern piece for that section measures 8 1/4″. Mark that point which is the shoulder seam — you will use this as a pattern marking notch when sewing on the cowl collar.
Continue from that point using the measurement taken from the back pattern piece, again subtracting 1/4 inch. This is your center back marking.
Step 4: Add the bias grainline
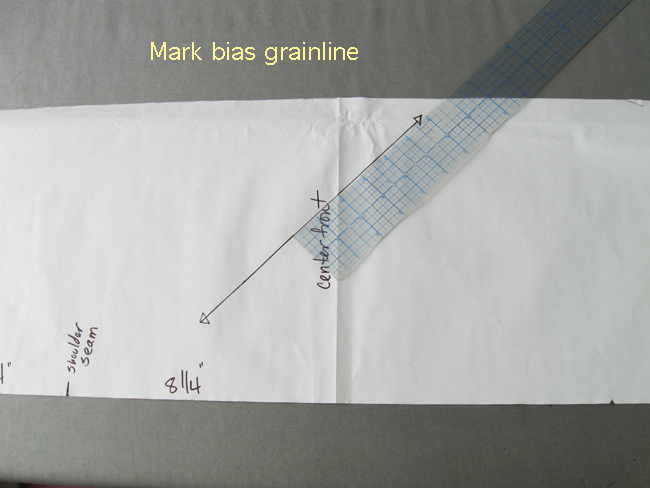
The cowl collar is cut on the bias, which is what gives it drape and allows it to be sewn into the neckline. Unfold the collar pattern piece and mark the bias grain line by placing your ruler at a 45-degree angle to the center front fold line. Be sure to have the shoulder and center back notches marked on the other half of your pattern piece.
Step 5: Sew it all together
Your pattern is now ready. The rest of the blouse can be sewn up as originally designed, including sleeves or waist darts.
To sew up the cowl collar portion of your blouse, first mark the center point on the front and back blouse pieces. Sew the front and back together at the shoulder seams.
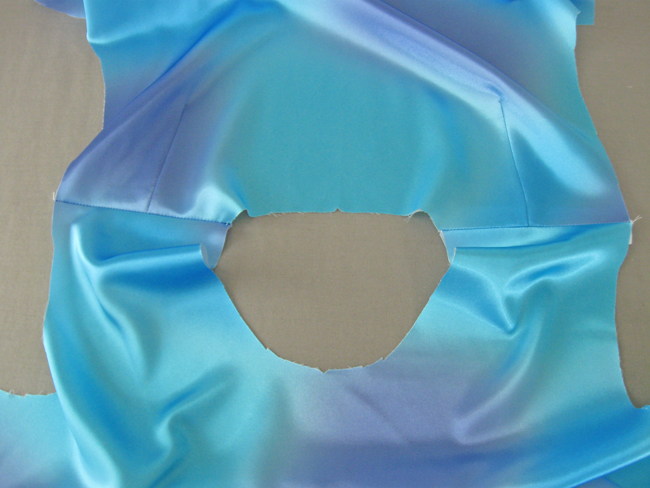
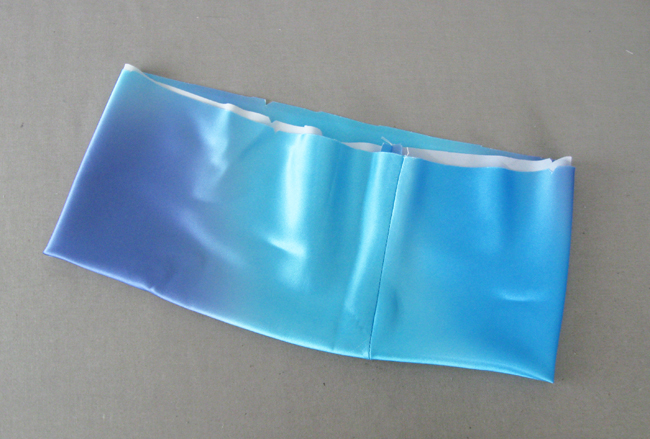
Sew the cowl collar together to create a tube and then fold in half with right side out.
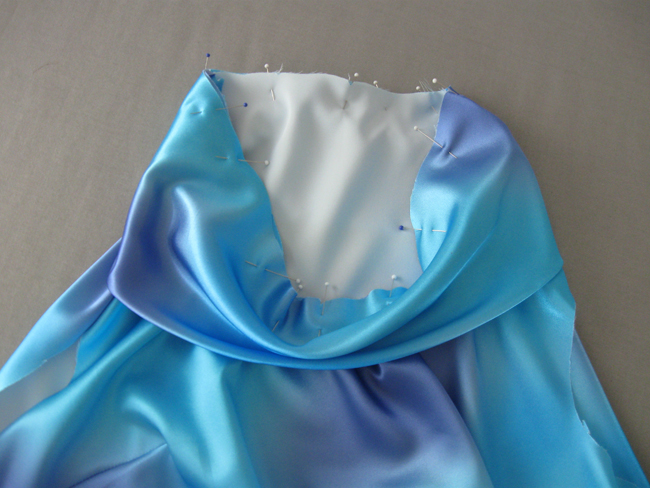
Pin the collar onto the blouse neckline, matching center back, shoulder seams and center front. Stitch the collar onto the blouse and then continue with sewing the rest of your blouse.
You might also enjoy our post on how to make a cowl neckline.
Share tips, start a discussion or ask one of our experts or other students a question.
No Responses to “Add an Elegant Cowl to Your Blouses With Ease”