
If you’ve ever sewn a button-up shirt with a curved hemline, you know it can sometimes be a little tricky. The hem allowance is usually very narrow, and the fabric tends to want to pucker and bunch at the hip curve as you’re stitching. If you have trouble with this issue (I know I do!) you’ll be happy to know there’s a much easier way.
The secret to getting a clean finish on a curved hemline is bias tape!
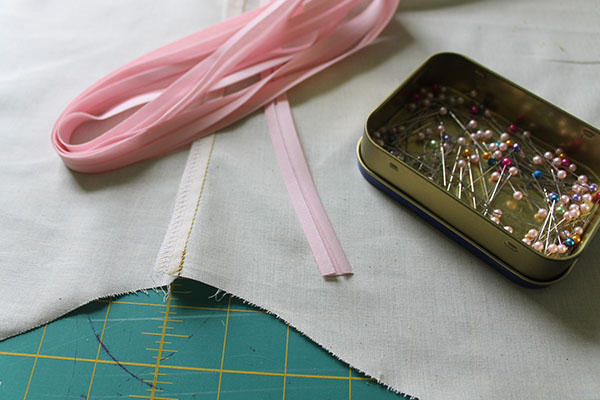
For this method of hemming you’ll need some single fold bias tape, either store bought or custom made. Follow the instructions included with your sewing pattern for the construction of the shirt until you get to the bottom hem, then give this method a try!
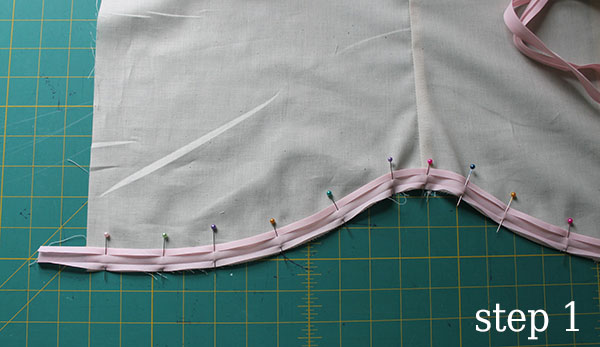
Step 1:
Working on the outside of your shirt, unfold one edge of your bias tape and pin it to the bottom hem. Make sure to leave an inch of bias tape free from the center front so you can tuck it in for a clean finish later.
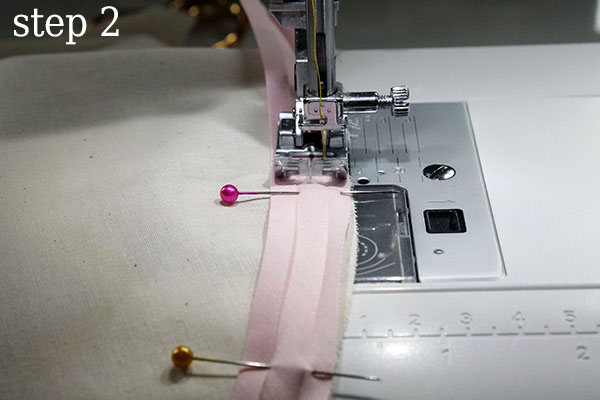
Step 2:
Sew the bias tape to your shirt using the “ditch” of the bottom fold as your guide. Work carefully around the curves, allowing the bias tape to bend naturally into shape.
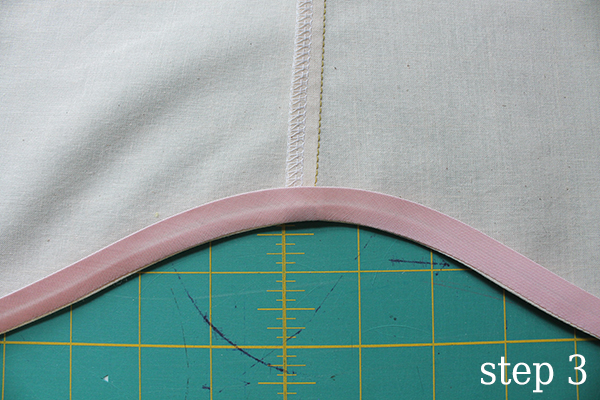
Step 3:
Turn the bias tape to the inside (wrong side) of your shirt so the raw edges are concealed. Press the bias tape down flat and smooth, paying special attention to the curved portions of the hemline.
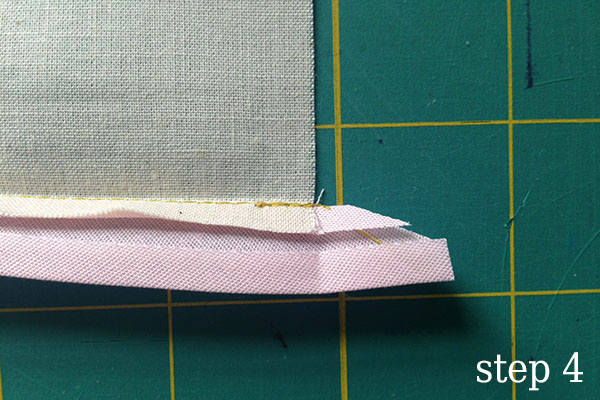
Step 4:
Now we’re going to tuck the free hanging portion of the bias tape into the hem for a clean finish at the center front. I like to trim the edge at an angle so it folds in neatly. You’ll see how this is helpful in the next step…
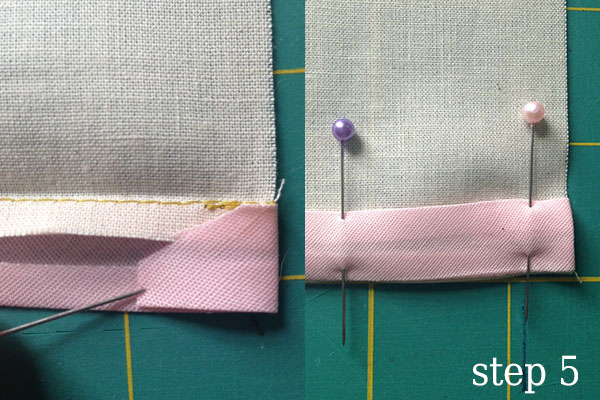
Step 5:
Press the free hanging edge of the bias tape away from the center front and into the hem. Next, fold the bias tape back up (as you did in step 3), press well, and pin everything in place.
Once you have everything pressed, tucked, and pinned into place, it should look like the photo above. So far so good? Almost done!
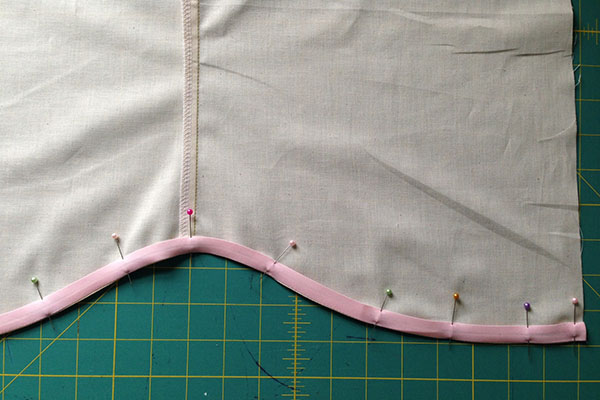
Step 6:
For a really neat, clean finish on both the outside and the inside of my shirt, I like to stitch the bias tape down from the inside. If your thread tension is good, and your thread color matches well, the stitching should be nearly invisible on the outside.
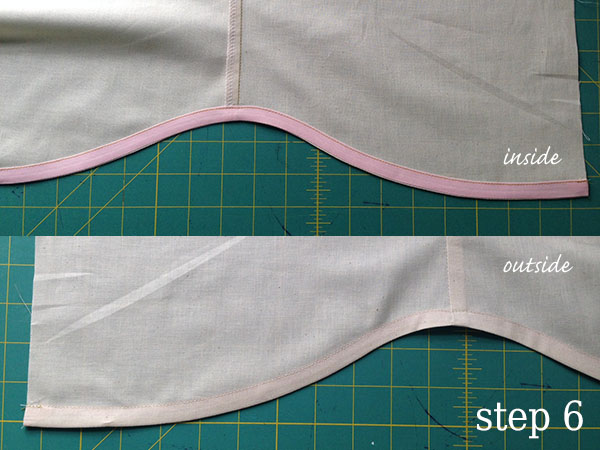
Here’s a close-up:
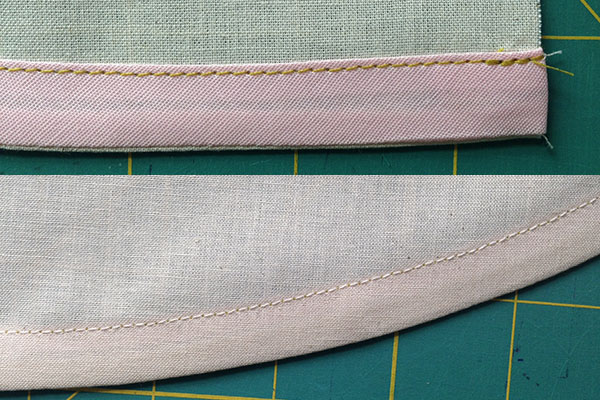
Here you can see I’ve stitched the bias tape to my shirt hem from the inside of the shirt, which allows me to stitch very close to the edge. For this tutorial I’ve used a green top thread so you can see it better, but I used a bobbin thread that matches my fabric. The result is a nearly invisible line of stitching on the outside of the shirt (which is technically the bobbin side of the stitch) and a really clean and professional looking top stitch on the inside of my shirt.
Now give everything a nice press on the outside and you’re finished! This method is really quite simple when you get the hang of it, and it takes me less time to complete than doing a traditional hem on shirt with a curved edge. I get a a smooth, even hemline with no pulling or puckering at the hip. It’s great!
Learn more quick sewing techniques for flawlessly finished pieces with the Craftsy online sewing class Sew Better, Sew Faster: Advanced Industry Techniques with instructor Janet Pray, president of the American Sewing Expo!
Have you tried using bias tape on a curved hemline before? Do you find it easier?
Share tips, start a discussion or ask one of our experts or other students a question.
No Responses to “Sewing Curved Shirt Hems: It's Easy as a Summer Breeze With Bias Tape”