
Lace can glam up any garment, whether as a trim or as the main fabric. But like many types of trim and fabric, lace requires a bit of special attention when you are sewing with it.
Here are some tips and tricks to make sewing lace headache-free:
Right side vs. wrong side:
Many types of lace don’t have a right side or a wrong side since they look the same on both. Other types of lace might have a smooth side and bumpy side, but who’s to say which one is “right”? Choose whichever side works best for your sewing project.
If you are cutting multiple lengths of lace, be sure to mark whatever side you choose for continuity once you start sewing. You could use small stickers from an office supply store or tailor’s chalk. Just make sure it will come out of the lace when you’re done sewing.
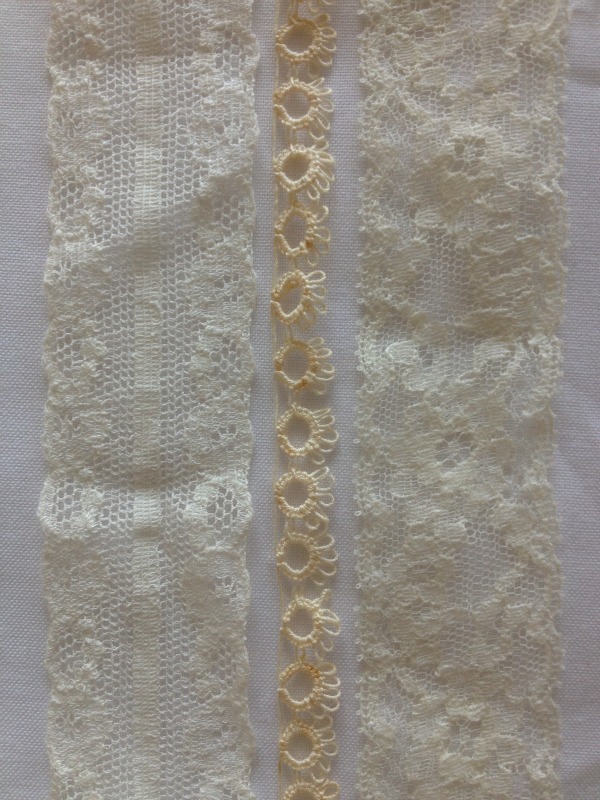
Types of lace trim:
There are many different types of lace trim. Some of the most common types used in garment construction are insertion, edging, beading, and entredeux.
- Insertion lace has two straight sides (Learn more about lace insertion in our blog post on Three French Sewing Techniques.)
- Edging lace has one straight side and one scalloped side.
- Beading lace has openings for weaving ribbon through.
- Entredeux lace is an embroidered trim.
Prepping lace:
Lace can be stiffly starched when you bring it home from the store. To soften the lace, soak it in a hand-washing detergent, like Eucalan, and dry flat.
Be sure to take care in laundering your finished garment, as well.
Gathering lace:
Cut a length of lace two to three times the desired length. Sew basting stitches (by hand or by machine) along one edge and pull gently to gather. The gathered lace can be sewn onto the garment the same way as flat lace.
Sewing by machine:
One thing that can make lace frustrating to sew is the open weave, which means it can easily be sucked down into the feed dogs on your sewing machine.
One way to avoid this problem is to first sew a seam down the middle of a scrap of “easy” fabric, like a sturdy cotton or lightweight canvas. Then, leaving the needle down, lift the presser foot and place your lace underneath and sew as usual. This should prevent the lace from tangling with the feed dogs.
Lining and underlining:
Most lace will be too sheer or too delicate to be worn alone and will require a lining or underlining. Adding a lining or underlining can be a great opportunity to play with color on your garment. You can match the color of the lining to the lace or your skin tone, go for a pop of color underneath a neutral lace, or tone down brightly colored lace with something a bit staider. To learn more, see our blog post on how to sew lining and underlining.
Finishing:
Lace does not ravel, so you should be able to carefully cut the lace and not worry about finishing any raw edges.
Share tips, start a discussion or ask one of our experts or other students a question.
No Responses to “A Bit of Frippery: Sewing Lace”