
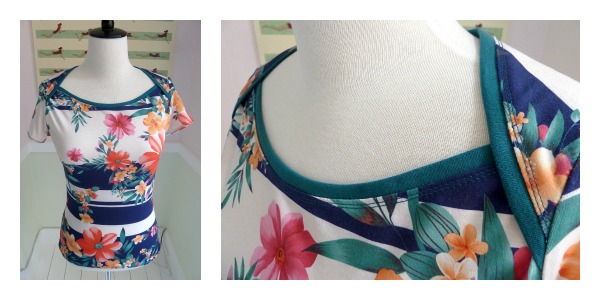
I’ve often found it tricky to track down sewing patterns that meet two all-important requirements for me: comfort and style. Enter the Bronte Knit Top from Jennifer Lauren, a vintage take on the modern and versatile top.
Follow along as I show you how to sew this neckline!
Bronte’s defining feature is its flattering neckline with a lapped shoulder detail. The back bodice sweeps over the front shoulders, creating a 40s-style shrug sleeve that can be left plain or decorated with buttons or other notions. Despite its interesting neckline, this pattern is surprisingly fast and easy to sew up. I’m sharing a few construction pointers to help any reluctant beginners.
Get the Bronte Knit Top pattern here.
Constructing the neckline
Step 1:
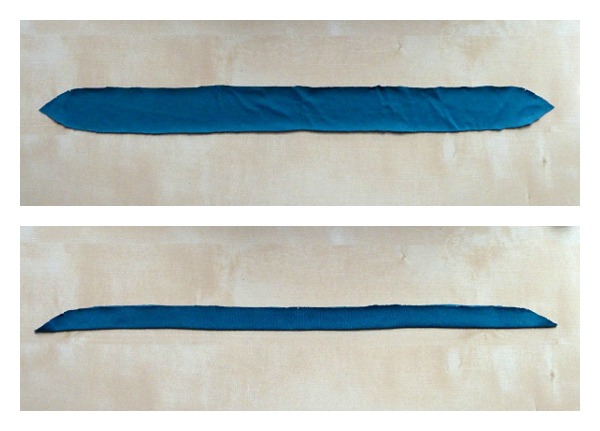
Take the front neckline binding and press it in half with wrong sides together, making sure you notch the center, as well as the center of the front bodice neckline. Place the binding on the front bodice neckline with raw edges together and line up center notches. Pin it in place. 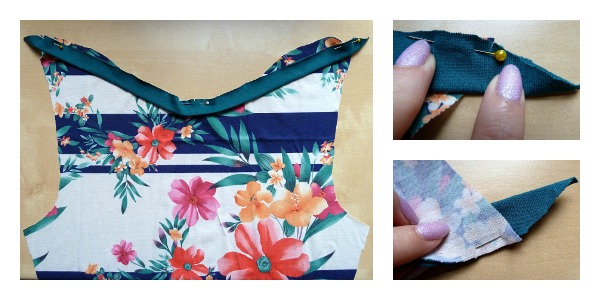
Step 2:
Slowly stretch one side of the binding towards the tip of the bodice neckline. Match the tip of the bodice to the notch on the binding and pin in place. Repeat this for the other side. You’ll now notice that the binding overlaps the bodice on both sides. Don’t worry, this isn’t a mistake, it will actually help with the construction.
Step 3:
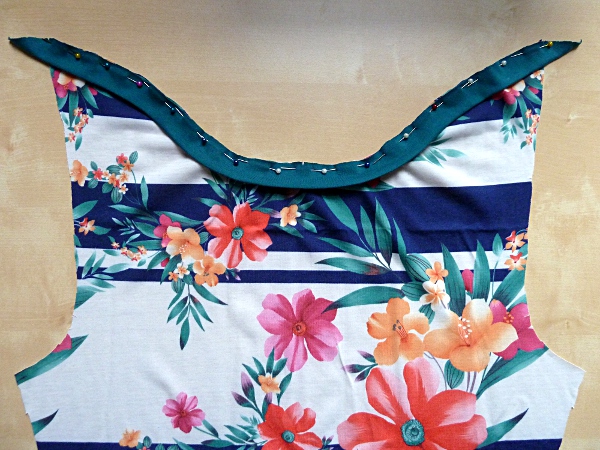
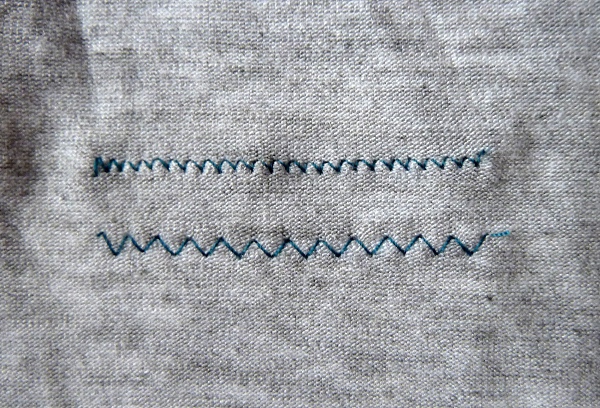
Once your three key points are pinned, stretch the binding evenly into position alongside the neckline, gently curving around the curves. Be careful not to stretch the bodice, just the binding, and pin firmly as you go along the neckline. Stitch in place using either your machine’s stretch/elastic stitch or a regular zigzag stitch. 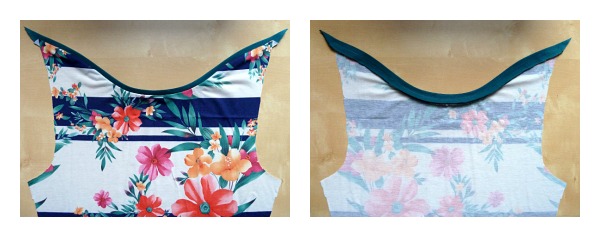
Step 4:
Press the binding up/seam allowance down and secure with a topstitch. You can use a stretch or zigzag stitch to do so, but if you have a twin needle you can use that for a really professional finish. I’ve shared a tutorial on Craftsy for using a double needle here. Repeat this process for the back binding and bodice.
Constructing the shoulders 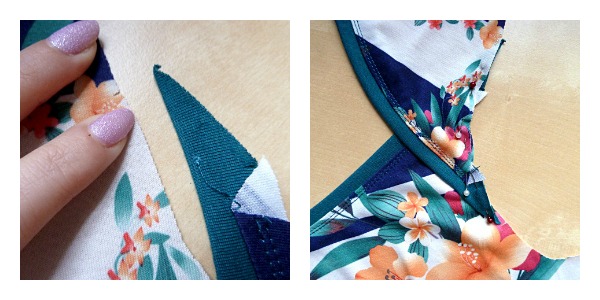
Step 5:
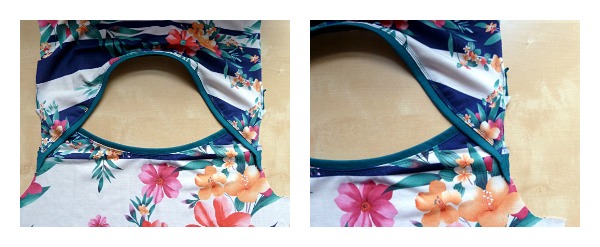
Place both bodice pieces right side up, and lay the back shoulder piece on top of the front shoulder piece. Line up raw edges and the tip of the front bodice binding with the single notch on the back bodice piece. Pin in place making sure both bodice pieces are flat across the shoulder for a smooth neckline. To achieve this, gently ease the tips of the neckline bindings to to match up with the raw edge of what will be the armhole. Try not to stretch the binding, gently maneuvering it instead.
Step 6:
Next, baste the shoulder pieces in place 1/8 inch from the raw edge using a long straight machine stitch. Repeat the process for the other shoulder.
Note: When you start constructing the second shoulder, don’t be alarmed if the back neckline doesn’t lay flat. That’s due to the pattern’s design and the most important thing is to make sure the shoulder line is nice and flat.
Hurray, you’ve now created armholes and are all set to insert the sleeves!
Share tips, start a discussion or ask one of our experts or other students a question.
No Responses to “Sew Stylish: Constructing a Cute and Comfortable Neckline”