
Are you confused by the array of markings on sewing patterns? Dots and triangles, lines and arrows — it can be hard to make sense of them all. Just like symbols on a map, these markings guide your sewing journey.
Decode most common markings with this guide!
Pattern markings can be put into three general categories:
- Fit adjustments
- Cutting guides
- Construction
Markings can be similar in these categories, so it pays to take a good look at your pattern pieces before you start a project and familiarize yourself with the markings.
Some markings differ from one pattern manufacturer to another. However, the basics — such as grain lines fold lines, and notches, all of which we’ll cover here — should be there.
Fit adjustments
Lines are found in all of the categories. Since you might adjust the fit of your pattern before doing anything else, the first marks to note are those that deal with pattern fit adjustments.
Lengthen or shorten here
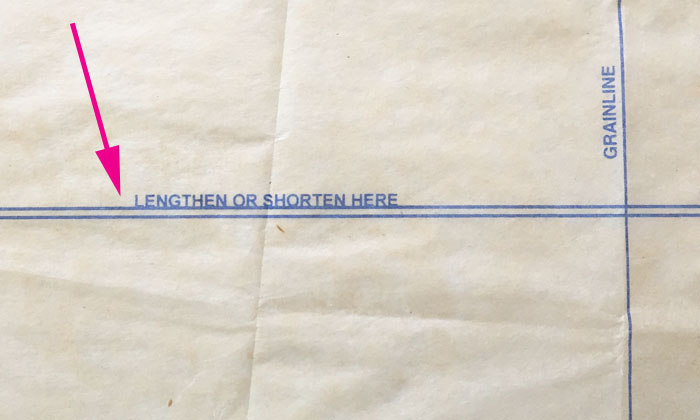
This mark is a double line that is parallel to the grain line and is used to add or take away length. It is particularly useful on dress bodices where you can use it to adjust the waistline to hit you at the proper spot.
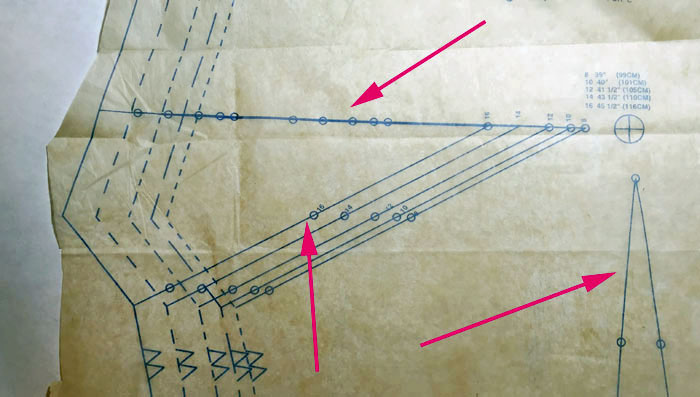
Size selection lines
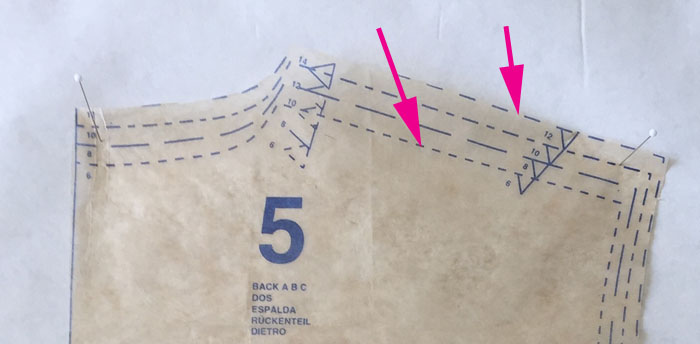
Many patterns contain multiple sizes printed on one pattern tissue or PDF and have different dashed lines to indicate the size selection. It’s a good idea to go over the lines you want to use with a pen — I find colored pencils great for this task as they are soft, mark on the paper or tissue easily and don’t run through the paper as marking pens do.
Circumference measurements: bust, waist and hiplines
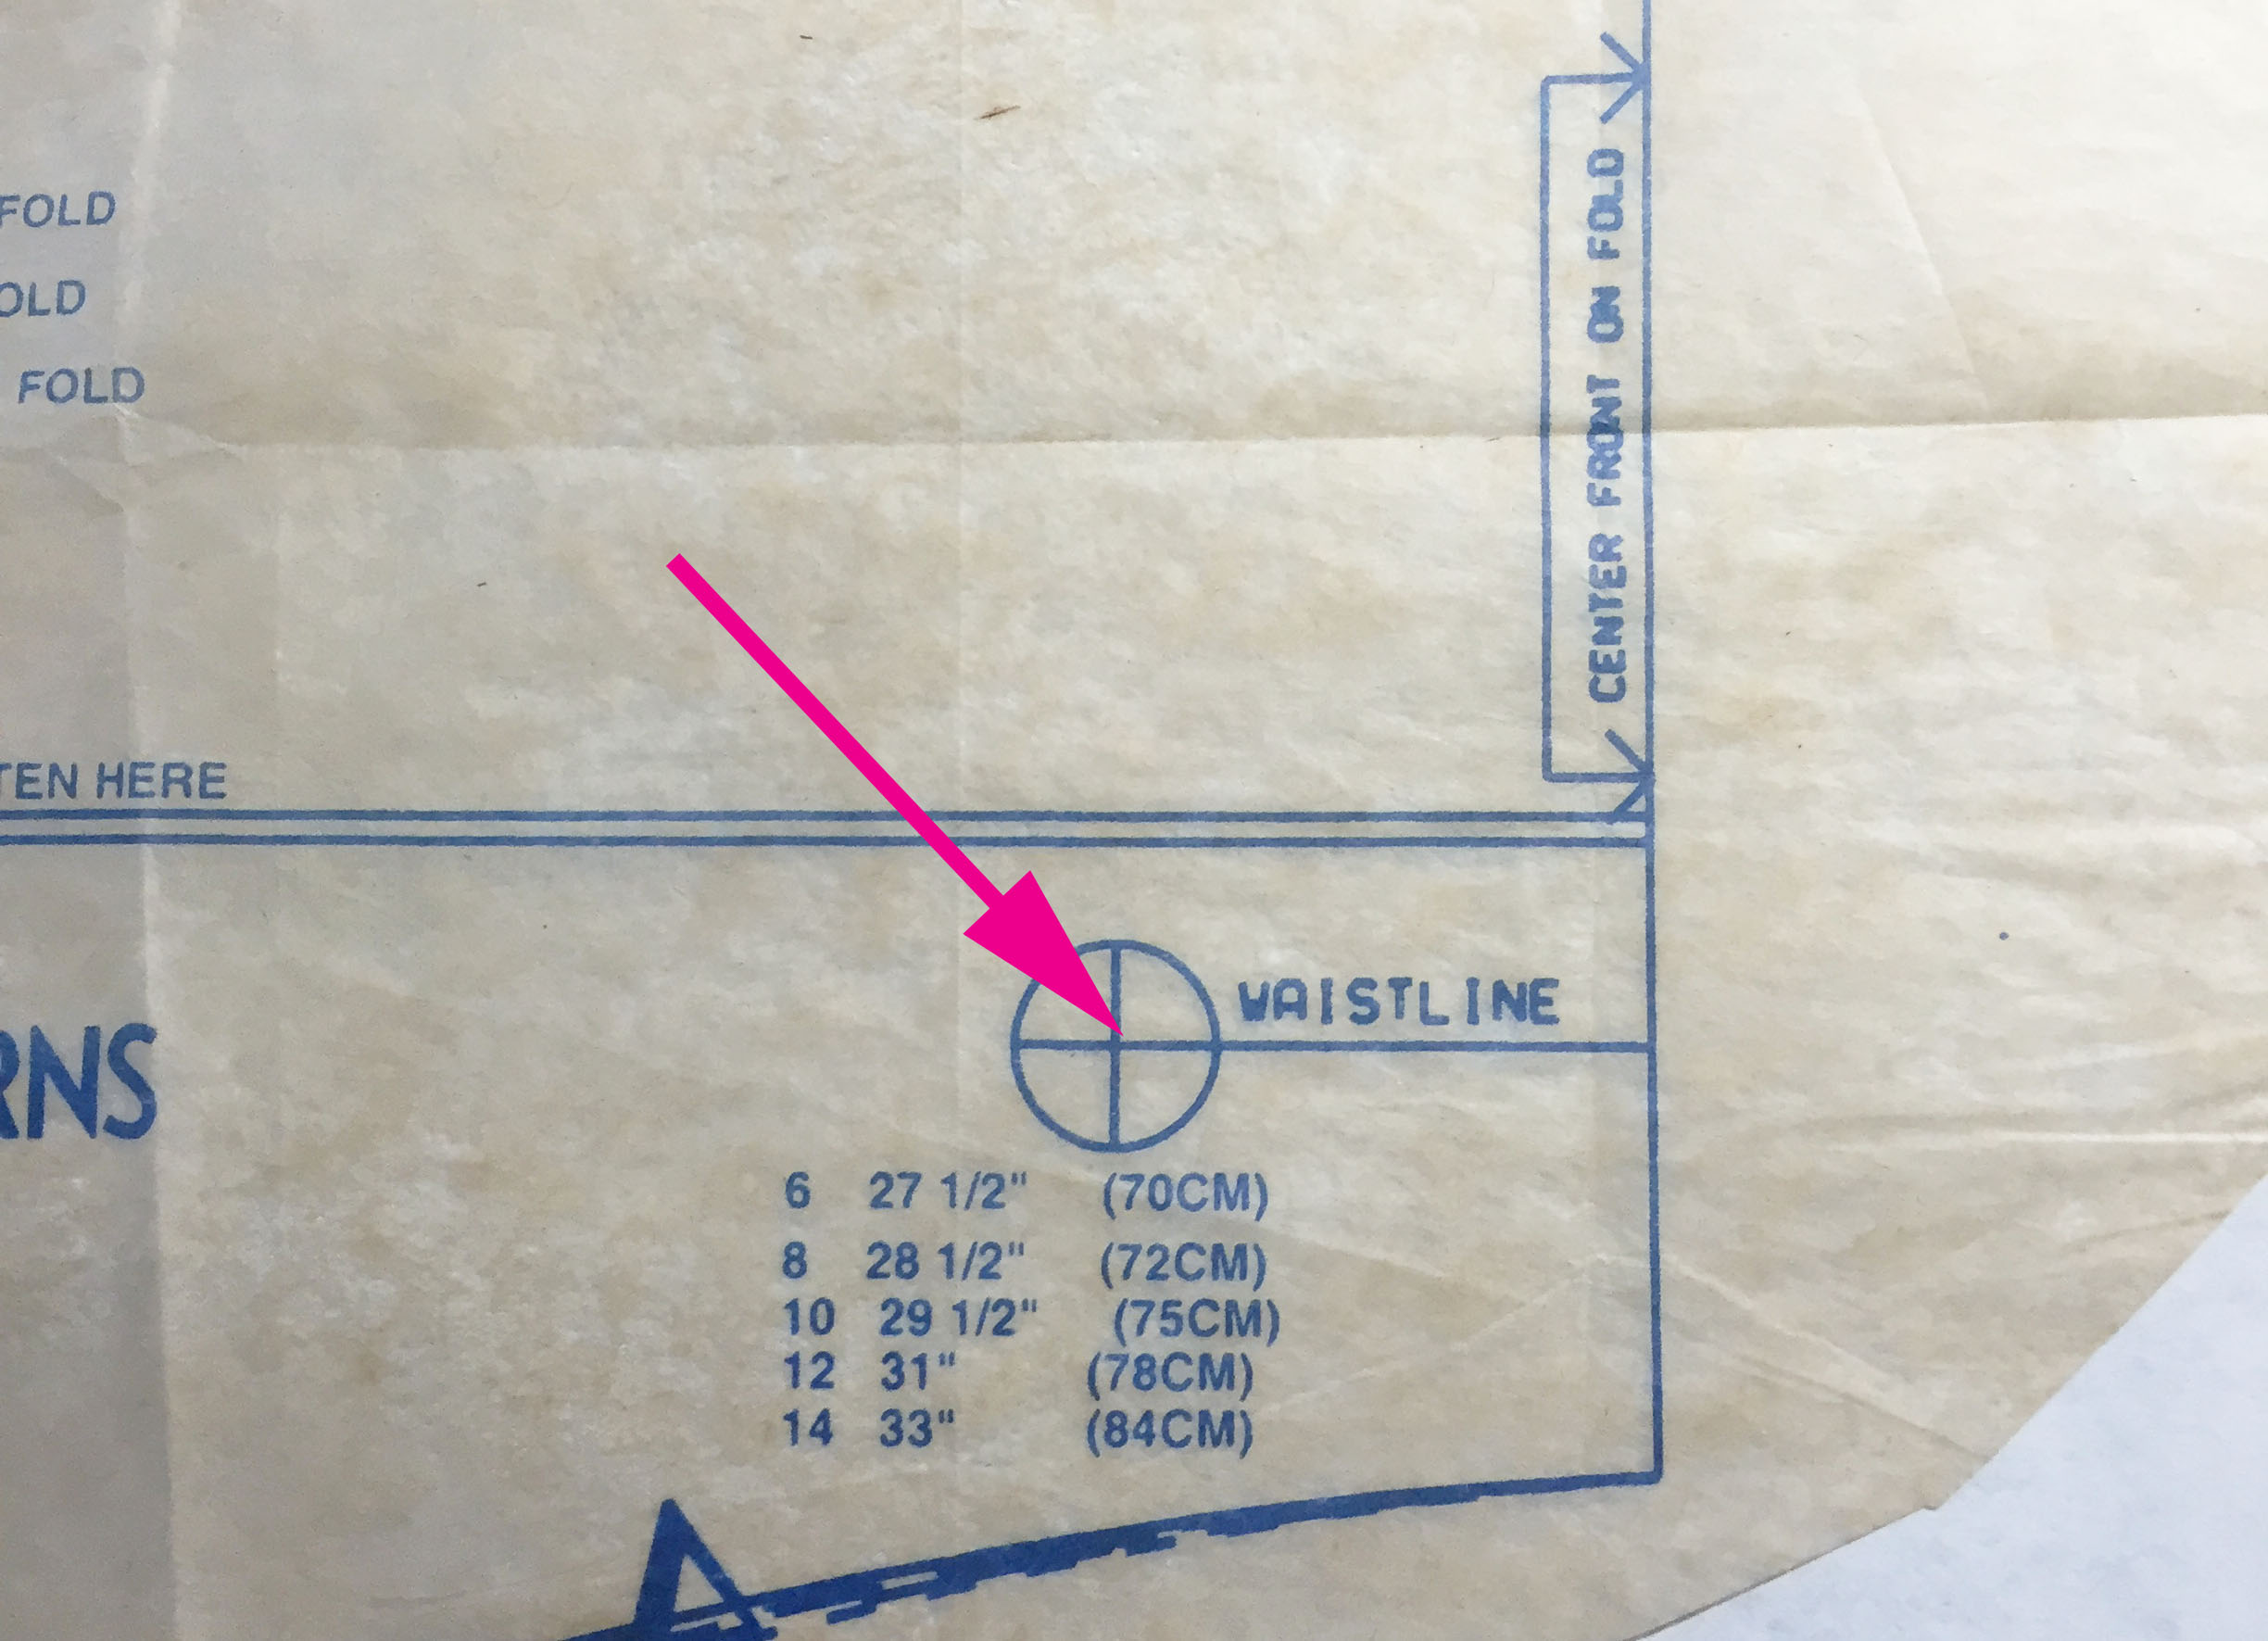
The circle with crossed lines in it indicates the where the pattern has been designed to land on specific body measurements. You will see these circles indicating the bust point, waistline and hip. Many patterns, but not all, have the actual circumference measurements marked next to the circle with crossed lines which is quite helpful. This measurement tells the actual circumference of the finished garment for each size at that point, so note that it does include design and wearing ease.
Cutting Guides
Cut on fold
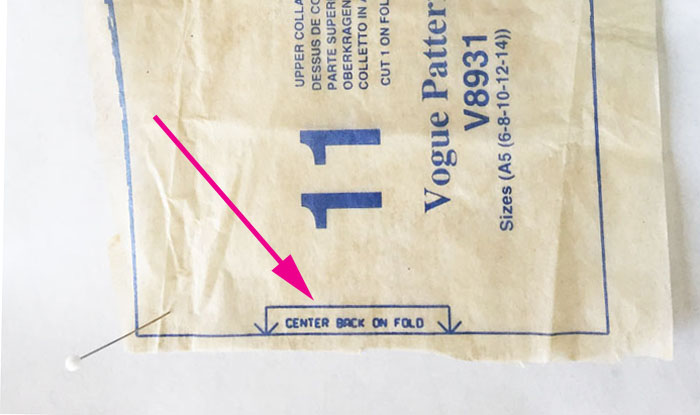
Most patterns have one or more pieces that say “cut on fold.” They are often the backs of garments like shirts and jackets that button or close in the front. In a dress or skirt, the front plus their facings are cut on the fold. Pieces cut on the fold eliminate the seam that would be needed to join pieces.
Grain lines
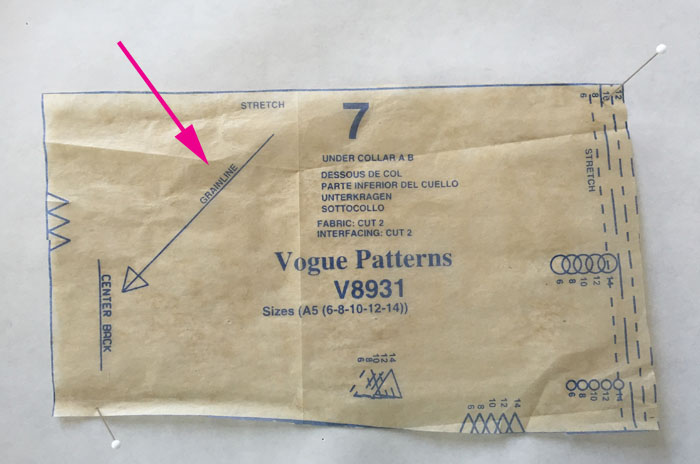
Grain lines are generally marked on all pattern pieces and indicate how the pattern piece should be placed on the uncut fabric, in relation to the selvedges. Grain linee are typically placed parallel to the selvedge edge of the fabric. This example piece is an under collar, so the grain line is diagonal to the center back seam, indicating that the pattern piece is cut on the bias.
Construction
Pattern markings for constructing your garment are there to indicate how the pattern pieces sew together. They can show how to distribute ease, create darts, where to gather and even which part of the garment you are working with.
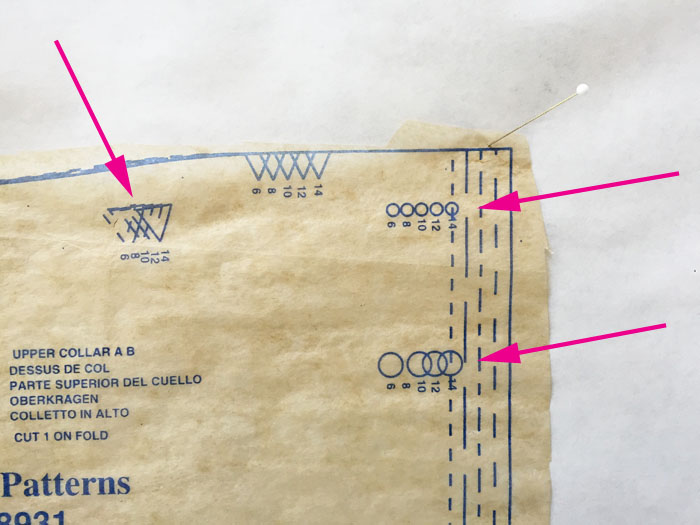
Notches
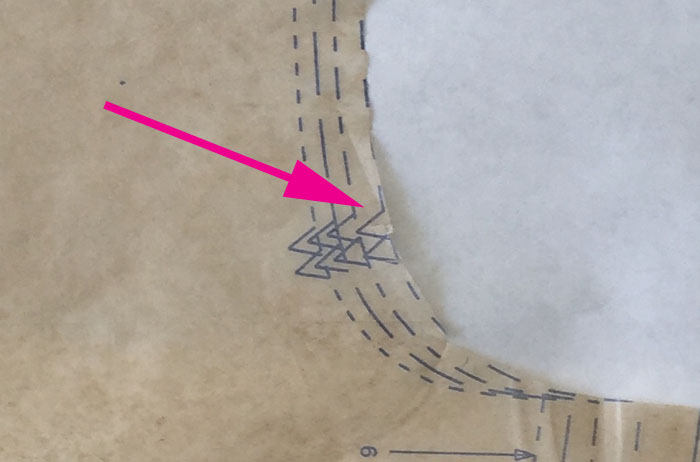
All sewing patterns seem to have some kind of notch mark. They can be triangles that stick out from the cutting line (commonly seen on vintage patterns), and many modern patterns have the triangles as shown here. A lot of European patterns have a small line instead of a triangle, but the idea is the same.
Your pattern instructions will show you which notches match up between the various components and how to join the cut pieces together.
Did you know the notches tell a story? Single notches are mostly found on the fronts of garments, including the sleeve and armhole front. Double notches appear on sleeve and armhole backs, as well as some back necklines. Triple notches are mostly seen on center back seams. These are not hard-and-fast rules but are helpful landmarks — especially when you need to tell the left from right sleeves.
Dots, squares and large triangles
Many sewing patterns have dots of various sizes as well as triangles or squares. These are found on the actual stitching line, as opposed to the cutting edge of the pattern piece. These dots are there to match up with their equivalent dot on another piece and guide your construction.
Large dots are often used to mark a collar and lapel edge. Other dots can tell you where to place the pocket lining or how to create a welt pocket. Triangles are often seen on collars or facings, and usually are matched to a shoulder or other seam. Squares seem to be used when the pattern designer has already used the other markings.
Darts
Darts are indicated on most patterns by a series of dots that create a triangle or other shape. Some patterns include a lot of dots and others are more minimal, with just the legs of the dart marked and then the point where the dart legs intersect. Some darts have shaping, such as vertical darts on a dress or shirt and the stitching lines for these can show where to sew the dart.
These are the basic pattern markings that guide you when fitting your pattern, cutting out your pieces and sewing them together. There are other markings that show pleats, pocket placement, gathers or other design features.
Without these dots, lines, and notches a sewing pattern would just be a shape ‚ so I am glad they are there! It really pays to transfer the markings to your fabric, along with the instruction sheet you have a roadmap to sewing success.
nice and helpful information
Not very helpful
Thank you very much This notes was very useful to me.
When dots and notches do not match up, which one is more important? Or, how should I treat them if they do not match up?
On the picture explaining size selection lines there are triangles (on the left of the picture, no pink arrow) which point horizontally, what do they indicate?
this =NO GOOD HELP
that was no help
I don't understand the pleat markings on Simplicity Sew Easy pattern A1409. I also don't know how to transfer these markings, Please help! Thank You Jeri