
Need a way to make a project pop? Piping may just do the trick. It’s a great way to add contrast, strength and texture to any sewing project. In addition, piping can help accentuate seam lines, adding a huge boost of style to any design.
Read on to learn more about piping, including how to sew your own!
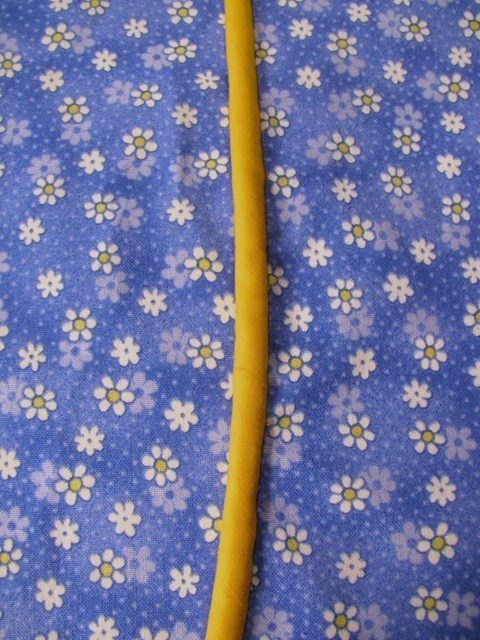
Piping, also referred to as cording or welting, is made from bias-cut strips of fabric that’s folded over a length of rope-like filler and sewn together. Though typically associated with the trim that frames a pillow or upholstery, it has many other applications for all kinds of projects, including clothing for adults as well as kids.

Piping vs. cording
The difference between piping and cording is the thickness of the cord itself. Anything less than ¼” to ½” in diameter is typically considered piping, while those of the thicker variety are most often called cording or welting.
Making your own piping vs. buying pre-made piping
What retailers commonly refer to as piping can be purchased ready-made, either in packages or by the yard and is usually of the thinner variety. All the sewer has to do with these products is simply add it to a project. The chief disadvantage is they come in a limited variety of colors and fabric.
But, why limit yourself to pre-made piping when it is so surprisingly easy to make from scratch? Custom-made piping allows the sewer to customize color, pattern and fabric giving any project a unique and personalized look. All one needs is some cording or “filler,” bias cut strips of fabric, a zipper foot and a bit of time and patience.
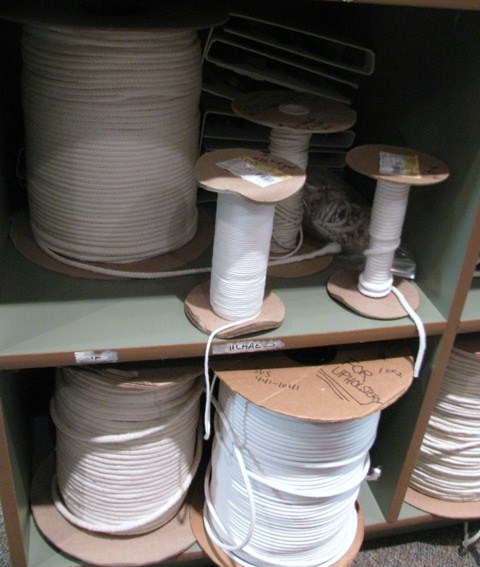
Cording “filling” size & type
The soft clothesline-looking cording that’s used to make piping comes in a wide variety of widths and fiber content. The most commonly available cording is made of 100% cotton or cotton covered polyester, but many other types of cording materials are available.
The size of the cording is measured by the width, or diameter of the cording itself, stated in fractions, such as 3/16″, or ½” widths. It is best to select a cording width that is most compatible with the project in mind. For garment construction, the cording width should be quite small, while for home decor items like pillows, the wider varieties look best.
How much piping do I need?
To determine the length of piping that will be needed simply measure where you plan to apply it. Divide the number by 36 to determine the cording length requirement in yards.
How to make the bias fabric strips
Once the needed length of cording is measured, you need to determine the width of the fabric strips that’ll wrap around it. Wrap a measuring tape around the cording to determine its circumference. Add double the seam allowance measurement (for 5/8″ seam allowances, you’d add 1¼”), plus 1/8″ for fabric ease.
As an example, for cording that is 5/8″ in circumference and using 5/8″ seam allowances, the fabric strips need to be 2″ in width.
The fabric strips that cover the cording filler must be cut on the bias (a 45-degree angle) to fit snugly and smoothly over the filler and so it can turn corners or curves without any gaping or puckers. As a result, you’ll need a sizable amount of yardage. To cut the strips, use a good ruler and a rotary cutter. Together they make for clean, straight cuts, not to mention it makes the process super fast.

You’ll need a fabric strip as long as the cording plus about 5″ for insurance and joining. Depending on the project, the length of your fabric strip could exceed the width of the fabric it is cut from. Therefore, you’ll need multiple numbers of fabric strips pieced together.
But how many strips do you need and how much fabric yardage is required? To figure that out follow these simple calculations:
- Measure the width of the fabric minus the unusable selvage edges. Let’s say the width nets out at 43″.
- Divide the total length of the fabric strip needed by the usable width of the fabric. In this example, 80″ ÷ 43″ = 1.86 strips. Round up to the next whole number which is 2. This means to make the required length of piping 2 bias strips of fabric must be cut.
- To determine the amount of fabric yardage needed divide the number of strips needed by the strip width measurement. In this case 2 strips ÷ 2″ width = 1 yard. While that may seem like a lot of fabric, this creates a strip with the fewest number of seams. With a shorter length of fabric more seams in the fabric strip will be required.
How to make the piping
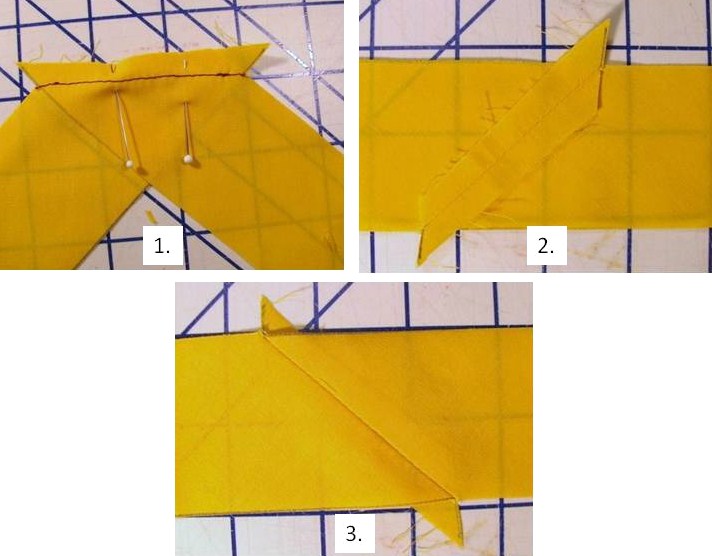
Now for the fun part. Let’s make the piping! First, you need to join all the bias-cut strips of fabric together to make one long fabric strip. The strips must be sewn together along the bias grain of the strip so align them as shown in the photo. Using ¼” seam allowances sew the strips together and press the seams open.
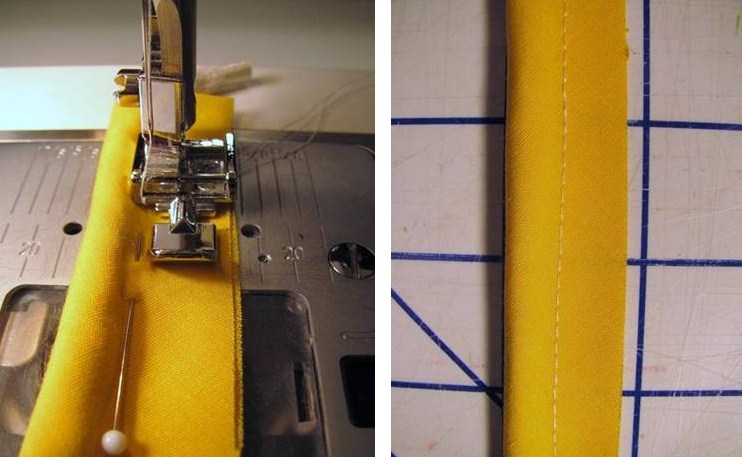
Next, lay the cording along the center of the fabric strip. Fold the fabric over the cording so the fabric edges come together. Pin in place for the first 3-4 inches. It is not necessary to pin the entire cording length. Extend the cording just slightly beyond the fabric end to allow for any shrinkage while sewing.

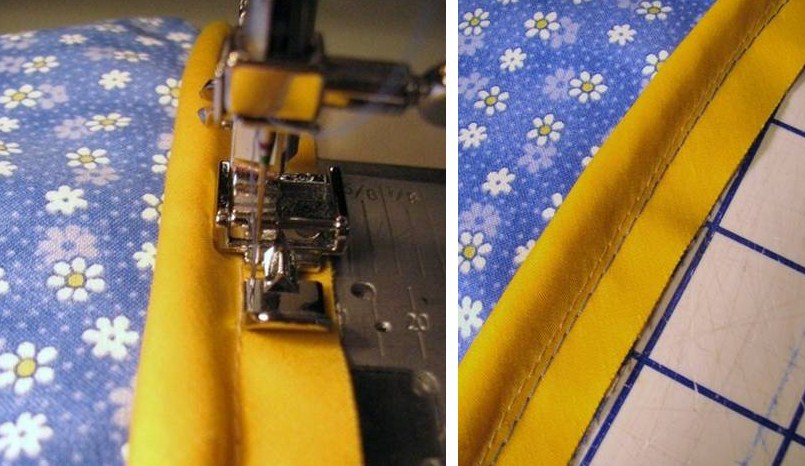
Attach a standard zipper foot to the sewing machine and set it to the left alignment. Place the pinned cording under the presser foot. Lower the presser foot so it rests comfortably next to the cording but not tightly against it, and begin to sew.
After the first 3-4 inches use your hands as you sew to match the fabric edges together. Make sure the zipper foot sits next to, but not too tightly against the cording. Your piping is now ready to use.
How to attach piping to projects
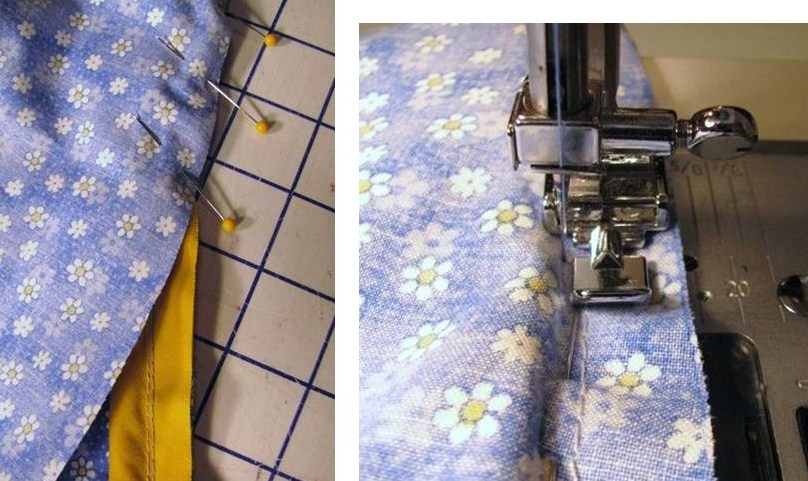
This is a two-step process. Step one is to attach the piping to one side of the project seam edge. Step two is to join the other corresponding piece with the piping sandwiched in between. With the right side of the project facing up, lay the piping with the seam edges together. Pin in place. Using the zipper foot and setting the stitch length to baste, sew the piping to the project stitching just right of the original piping stitch.
Next, lay the corresponding project piece, right side down onto the piping. Pin in place and stitch once again, this time using a regular length stitch and sewing tightly against the piping. That’s all there is to it.
Share tips, start a discussion or ask one of our experts or other students a question.
No Responses to “How to Make and Sew Your Own Piping”