A truly successful representational drawing is all about getting the shadows right. For something to look three-dimensional enough to leap off the page, the shadows need to present the object as we would encounter it in real life– especially at the edges. A hard shadow edge can flatten a round object or make the light falling on an object seem much too harsh.
Let’s take a look at how shadows work, and ways to take on the edges.

We all know that an object receiving light casts a shadow on whatever surface it’s resting on, and that shadow takes roughly the shape of the object. Of course, the cast shadow alone is not enough to make something appear three-dimensional, as you can see in the ball below.
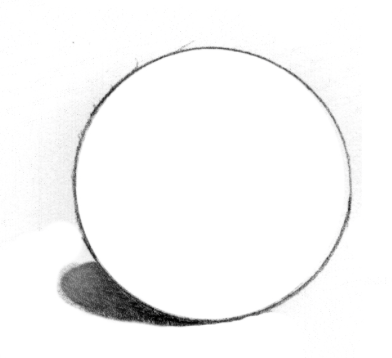
An object is also casting a shadow on itself. This is the surface shadow– the shadow that falls on a surface is called the cast shadow.
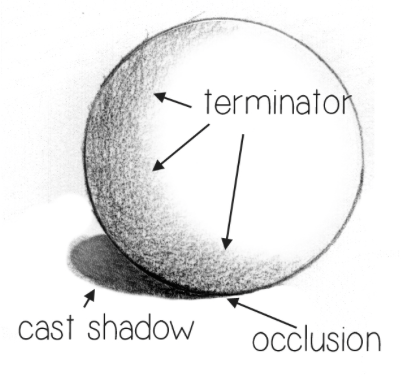
Without the surface shadow, the ball just looks like a flat disc. With the surface shadow and the cast shadow, we get something more like this:
Notice that the edge of the cast shadow is clean and sharp.
This indicates a strong light source, such as direct sunlight or a close lamp. The shadow on the ball itself shows a much gentler transition from light to dark. This area where the highlight ends and the shadow begins is known as the terminator line. Because the ball is curved, the terminator is very gradual, thought is can still get a bit sharper depending on the brightness and proximity of the light source. Occlusion occurs where the main shadow meets the cast shadow, and is usually very dark.
As the cast shadow gets further from the object, it is receiving more ambient and reflected light, and often lightens.
In a situation with less direct or intense lighting, such as a cloudy day, the cast shadow can often become diffused. The edges of the shadow soften and lighten, and there is no crisp edge at all. Also, depending on the reflective qualities of the surface of the object, reflected light may be present within the shadow, often at the edge closest to the surface being reflected.
This means the interior of the shadow– often the area just past the terminator– is darker. This dark area is called the core shadow.
A reflective object like a ping pong ball might have a strong core shadow.
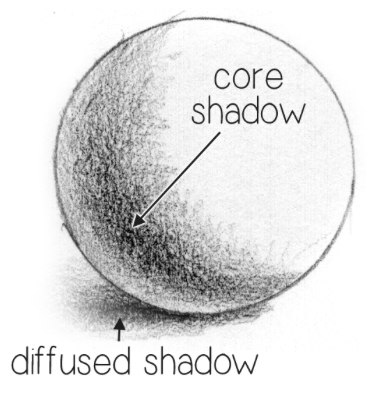
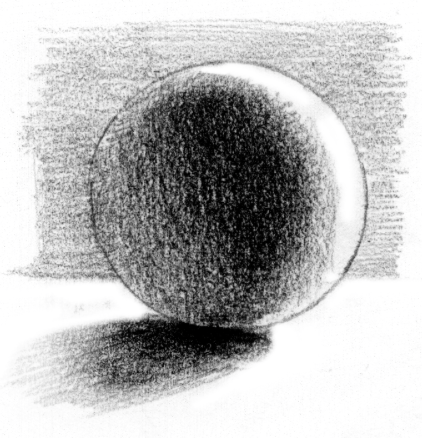
In a rear-lit or edge-lit situation, the core shadow can even make up the bulk of the surface shadow.
Notice also how the shape of the terminator on the sphere inverts to follow the highlighted edge of the sphere here.
In hard-edged objects the shadows behave a little differently.
Core shadows aren’t obvious (though reflected light in surface shadows is still there) but terminators are sharp and clear. The biggest difference is that flat planes all have a different relationship to the light source. Those directly facing it will be bright, but other planes, depending on how directly or obliquely they face the light, will consist of halftones– not as dark as the areas in shadow but not as light as the areas in direct light.
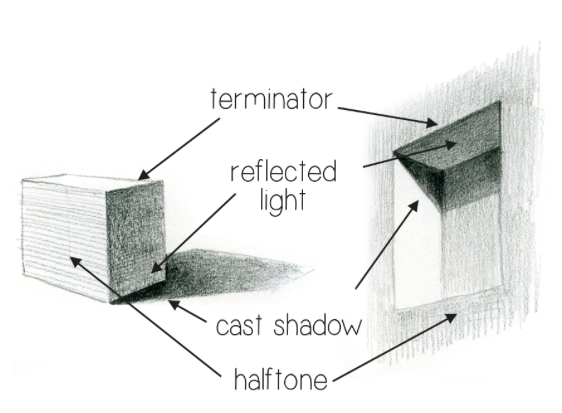
Notice that, instead of a core shadow, the plane of shadow is darkest immediately following the terminator. Reflected light creeps into the shadow plane as it approaches the area of occlusion. Because the objects are not rounded at the point of occlusion, the cast shadow is dramatically darker than the surface shadow in both the box on the left and the recessed box on the right. Because some planes are not receiving the full light source, there are halftones as well.
Take a look at the shadows of curved and hard-edged objects around you, then look at some textured or fuzzy objects. You’ll likely notice the same things about their shadow edges!

Share tips, start a discussion or ask one of our experts or other students a question.
No Responses to “Drawing Diffusion and Occlusion: Shadow Edges”