
I used to be a fan of the cuff-down sock, but lately the patterns I’m interested in are toe-up. Making this switch doesn’t just mean changing my knitting direction, it also means trying out a totally different heel, such as a short row heel.29
One of the patterns that motivated me to try the short row heel was the Double Lace Rib Toe-Up Socks pictured below (which is available for FREE right here on Craftsy)!
Follow below to learn a method for toe-up sock short row heels.
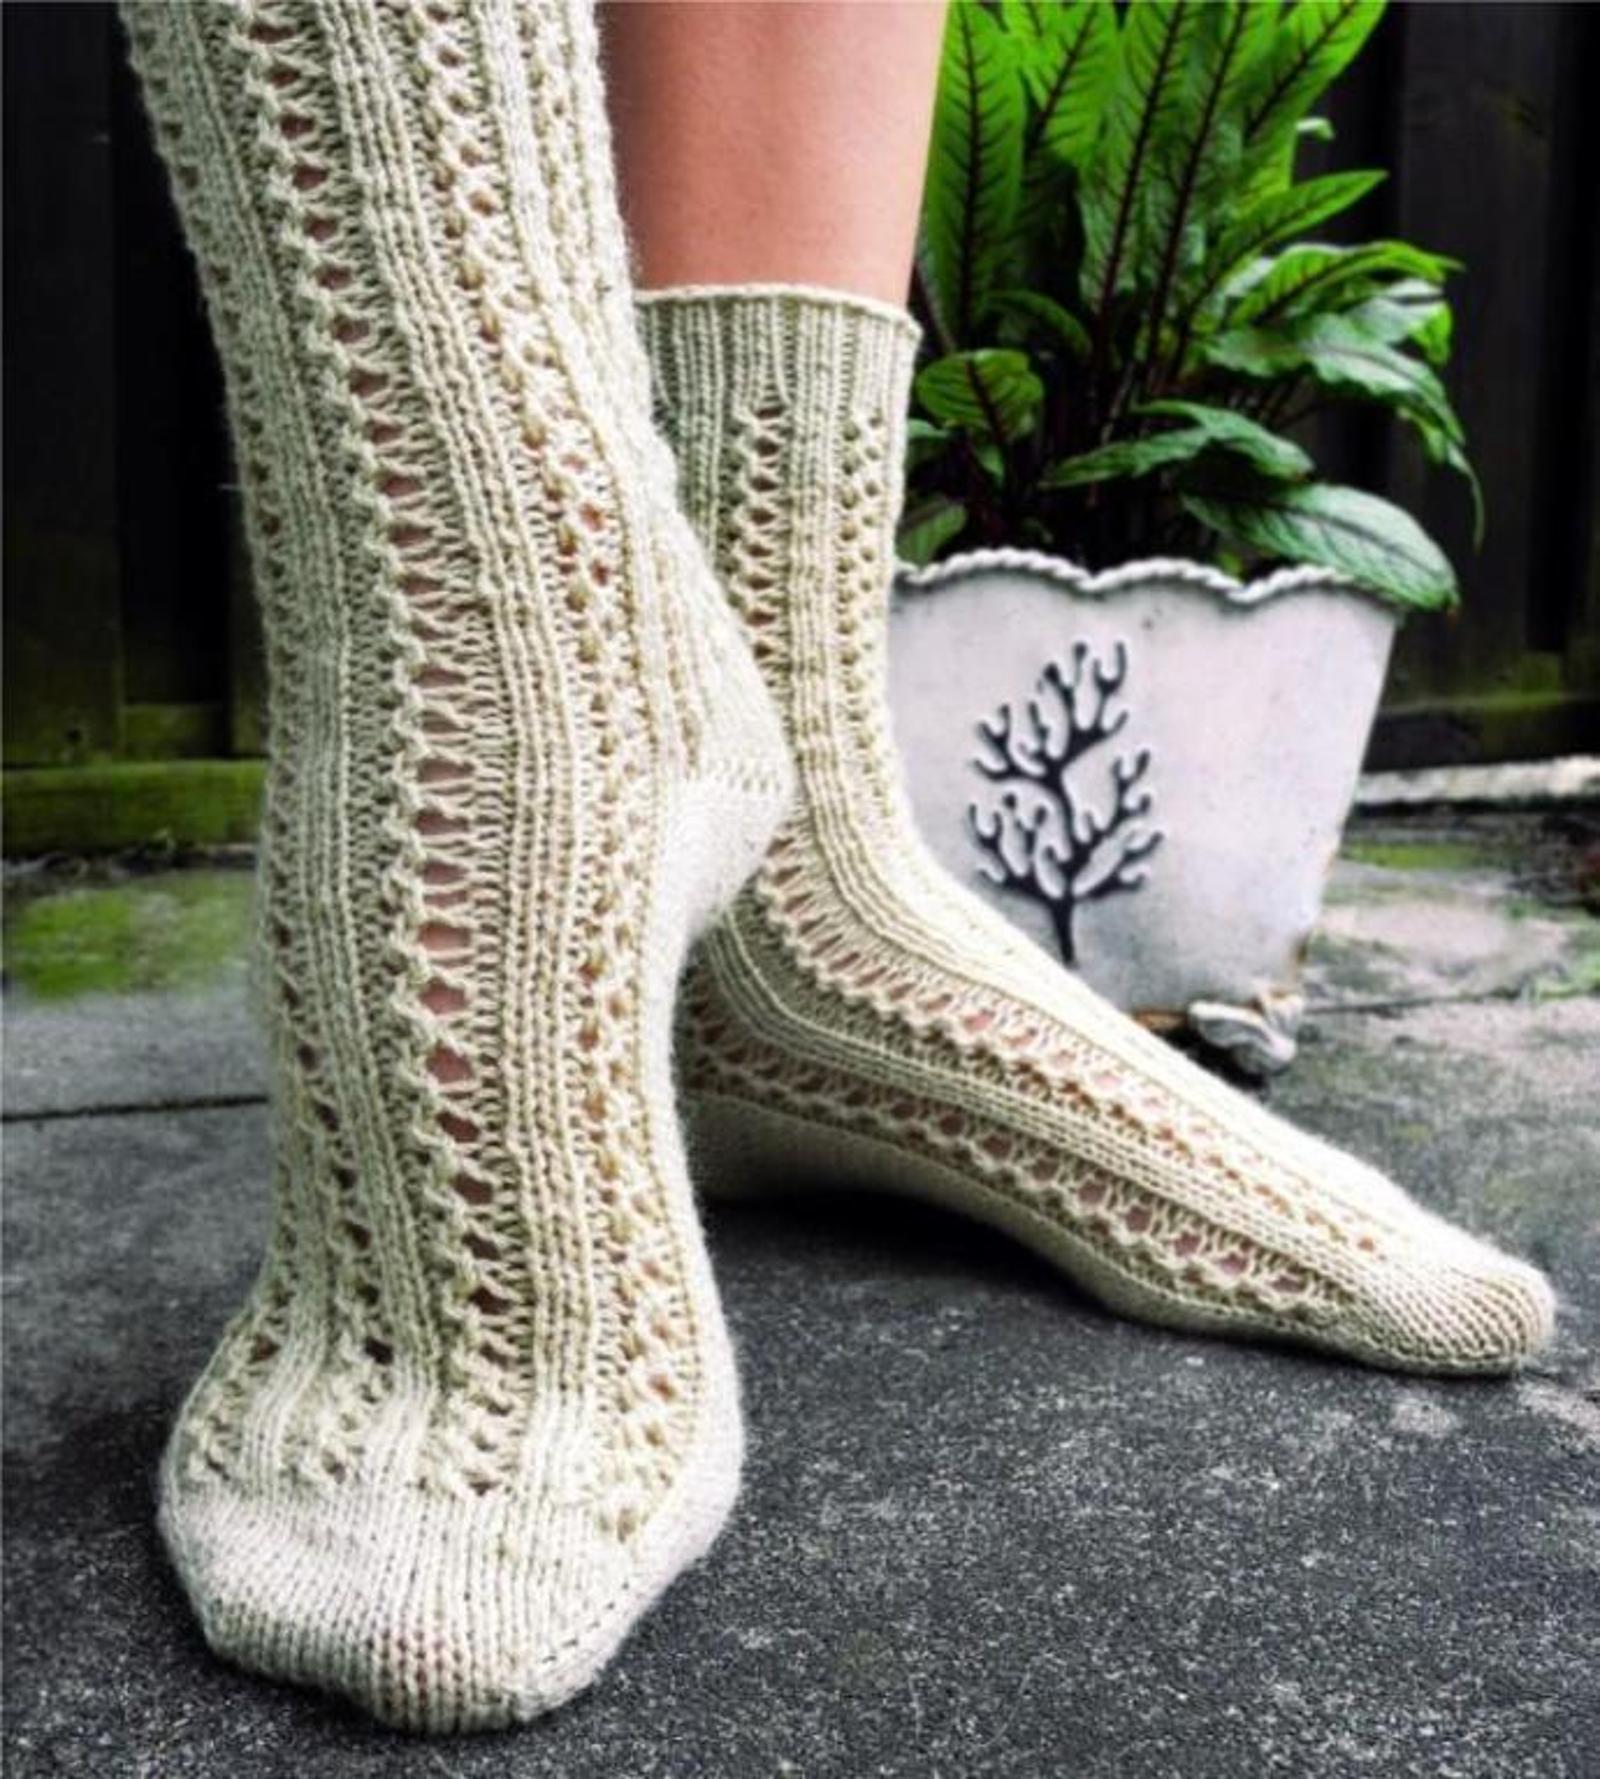
Photo via Crafty member reWOLLuzza Knits
Short row heels on toe-up socks
The toe-up sock heel is a little different from the heel on cuff-down socks because it doesn’t require picking up any stitches or decreasing. You simply work the short row heel, then join the knitting back into the round to keep going.
While there are some variations in approaching the the short row heel, in this tutorial we’ll follow the instructions from the Double Lace Rib Toe-Up Socks. The tutorial has two separate parts and assumes that you already know how to wrap and turn (w&t).
Note: I’m using Magic Loop to knit these socks, but you can also apply the same technique using double-pointed needles.
Experienced knitters can work off the pattern, but I’ve also provided more detailed, step-by-step directions so you can see how each part is done.
Short row peel part 1 pattern:
Row 1: K29, w&t.
Row 2: P28, w&t.
Row 3: K to 1 st before last wrapped st, w&t.
Row 4: P to 1 st before last wrapped st, w&t.
Rep rows 3 and 4 until 12 sts remain unwrapped in the middle.
Detailed instructions for part 1 pattern:
Step 1:
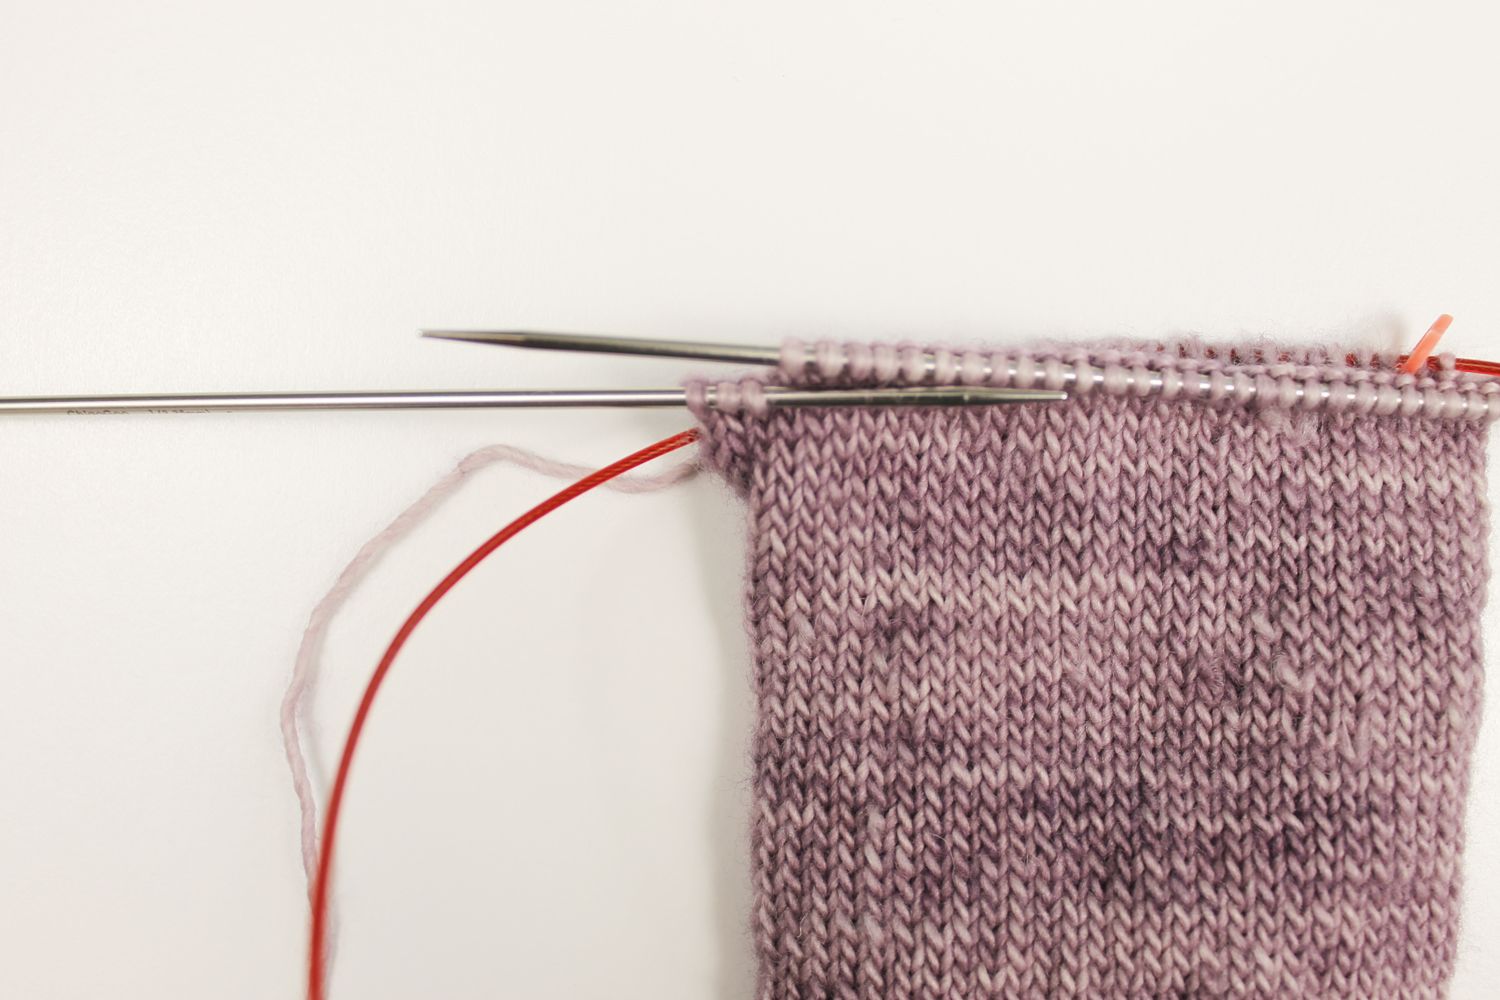
I’ve knit 29 stitches, and now I’m ready to do my w&t on the knit side.
Step 2:

Wrap the next knit stitch.
Step 3:
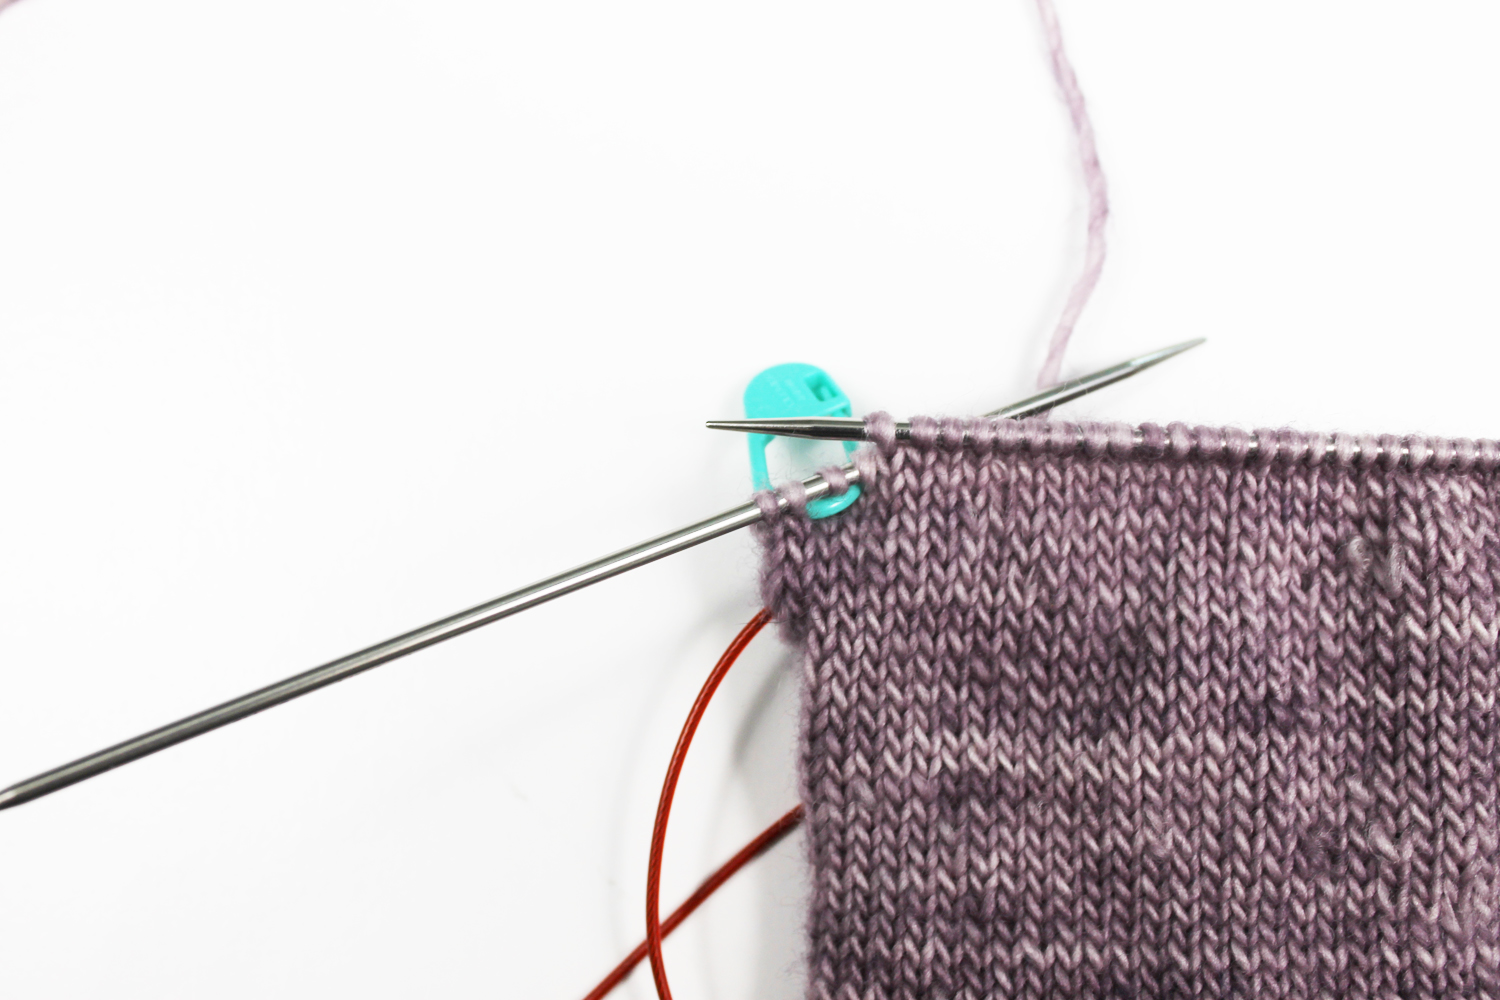
Turn your work to the wrong side, preparing to work the purl row for Row 2. I like to mark my wrapped stitches with a stitch marker. It’s especially handy for socks since the yarn is thin and it can be difficult to see those wraps.
Step 4:
I’ve purled 28 stitches across, and now I’m ready to w&t on the purl side.
Step 5:
Wrap and turn the purl stitch, mark it with a stitch marker, then turn your work to the knit (right) side.
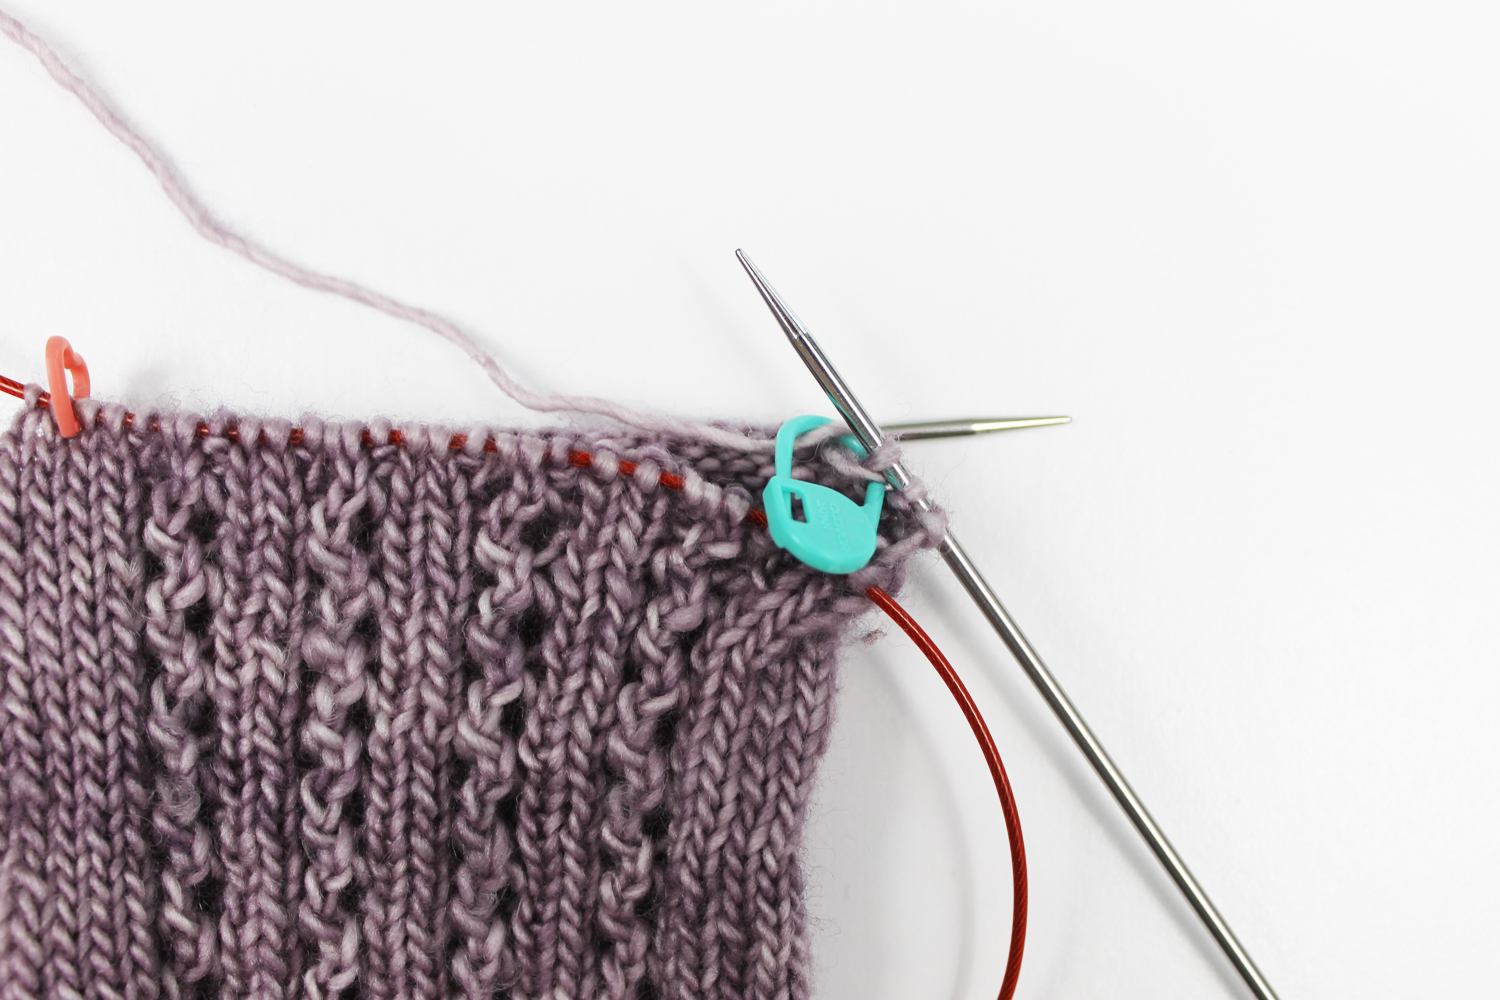
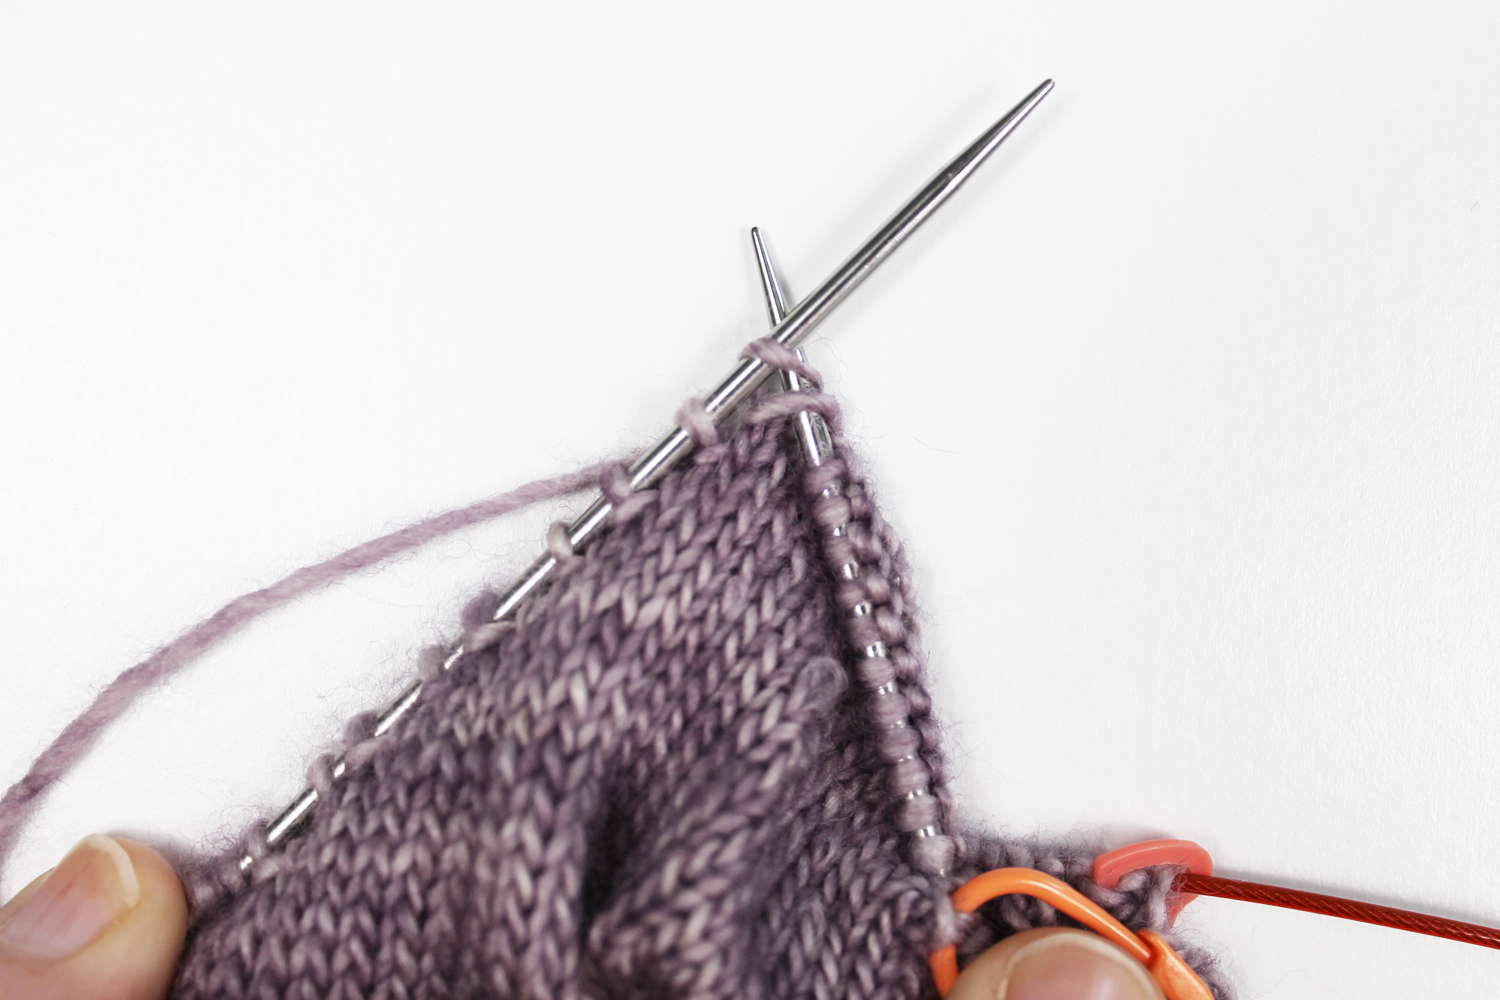
Step 6:
For Row 3, we’re going work back across the knit row and stop 1 stitch before our wrapped stitch. (My wrapped stitch is marked with the green marker above).
Step 7:
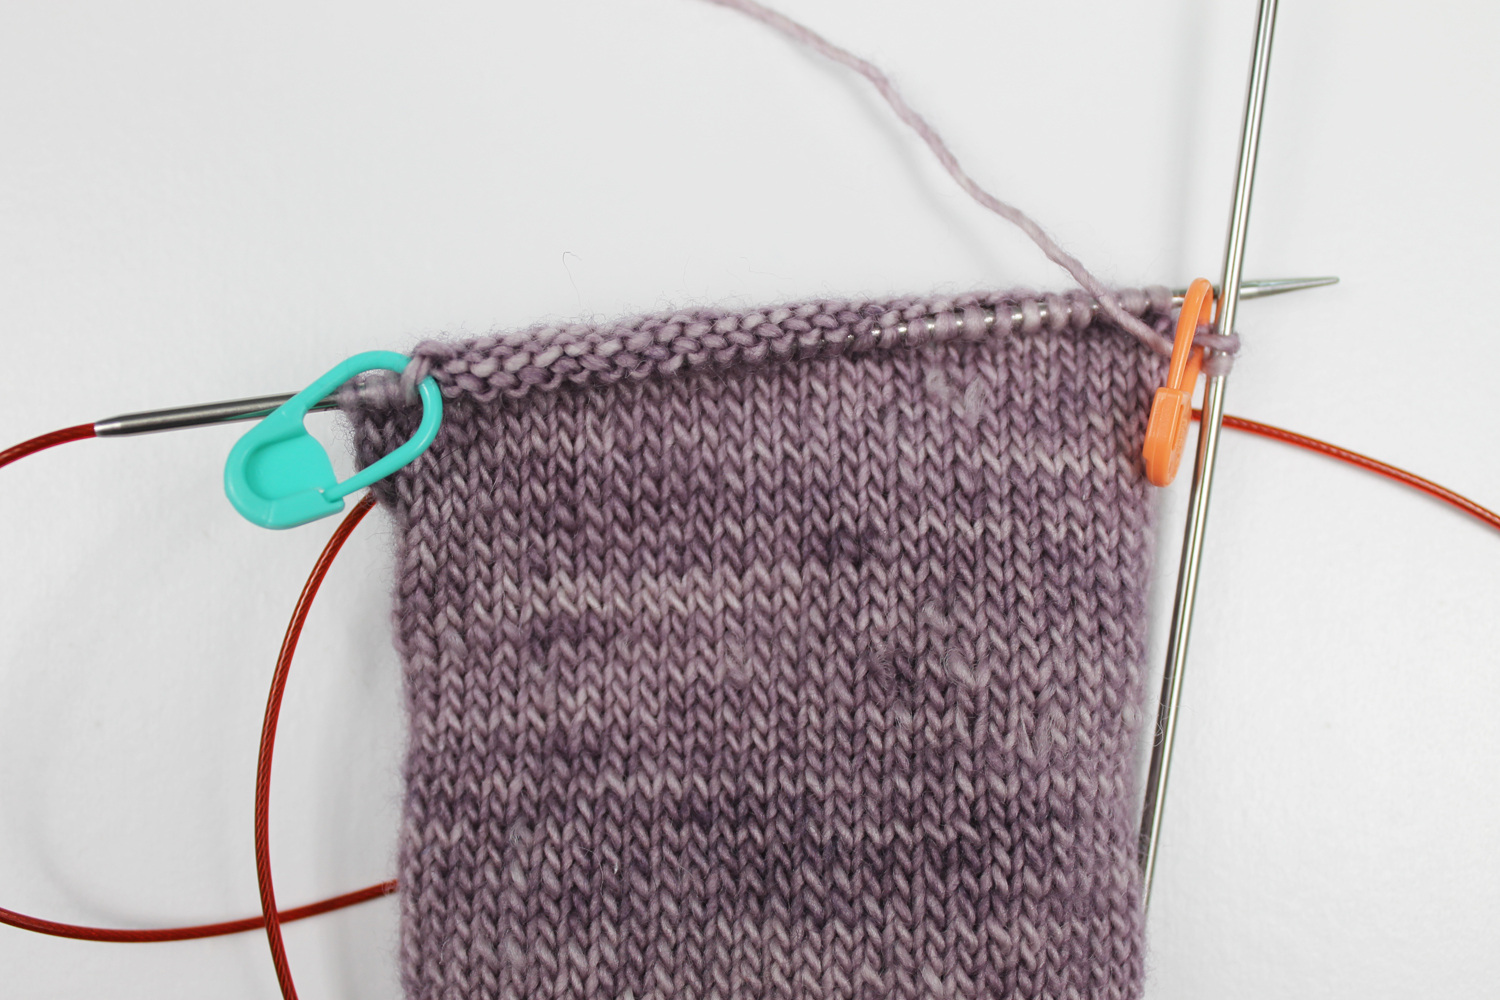
Wrap and turn the stitch where you stopped, then move the stitch marker to the new wrapped stitch.
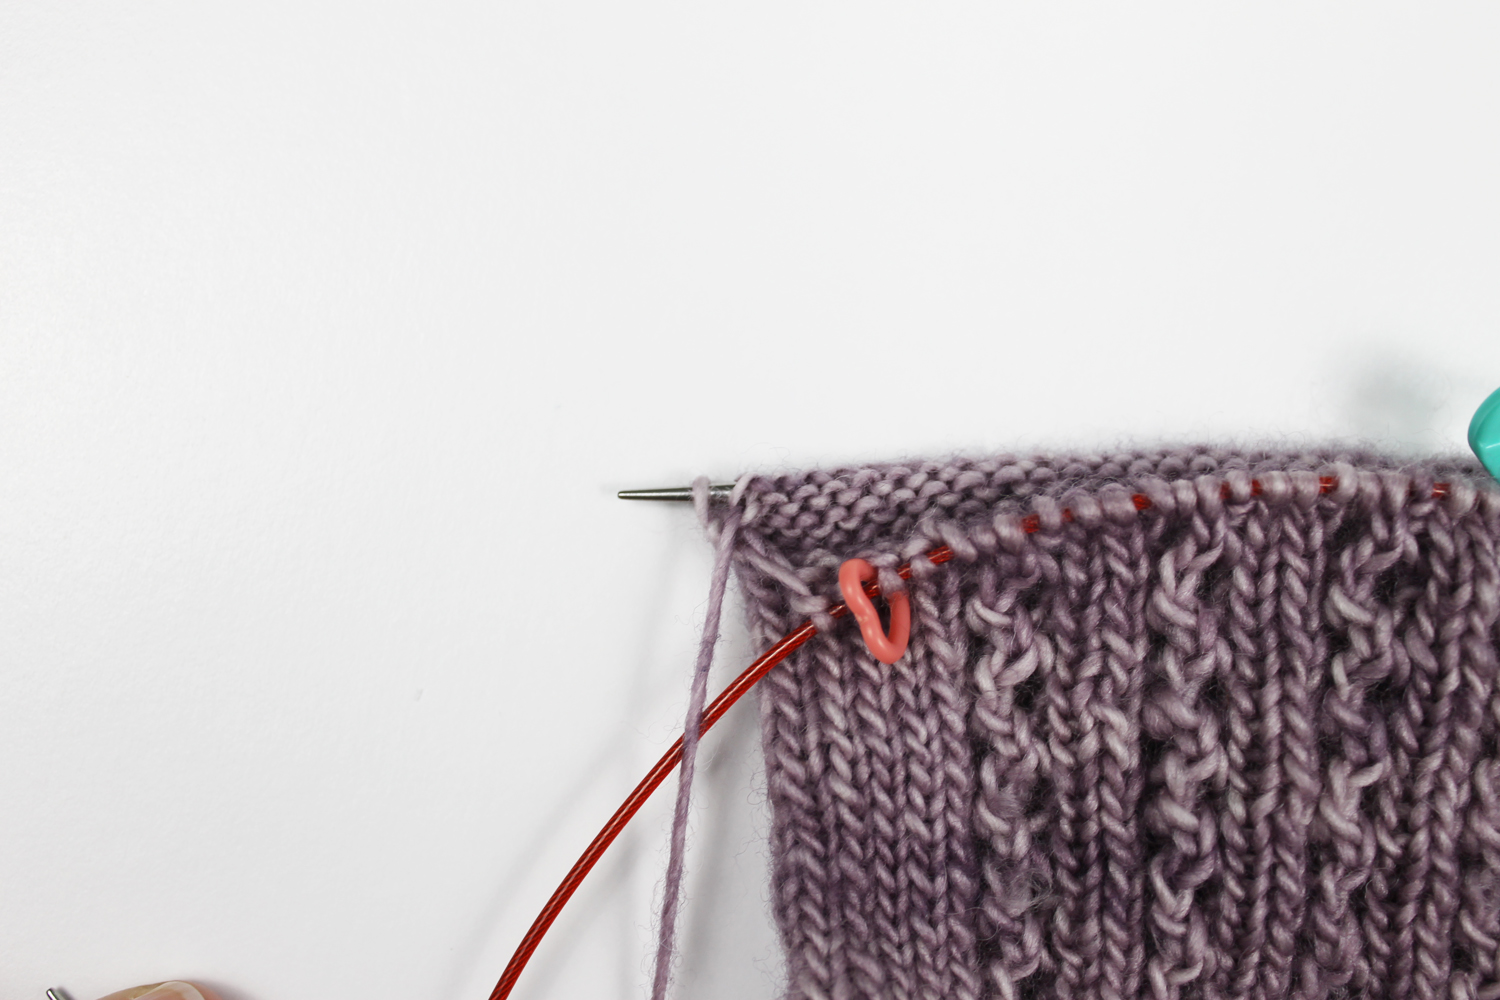
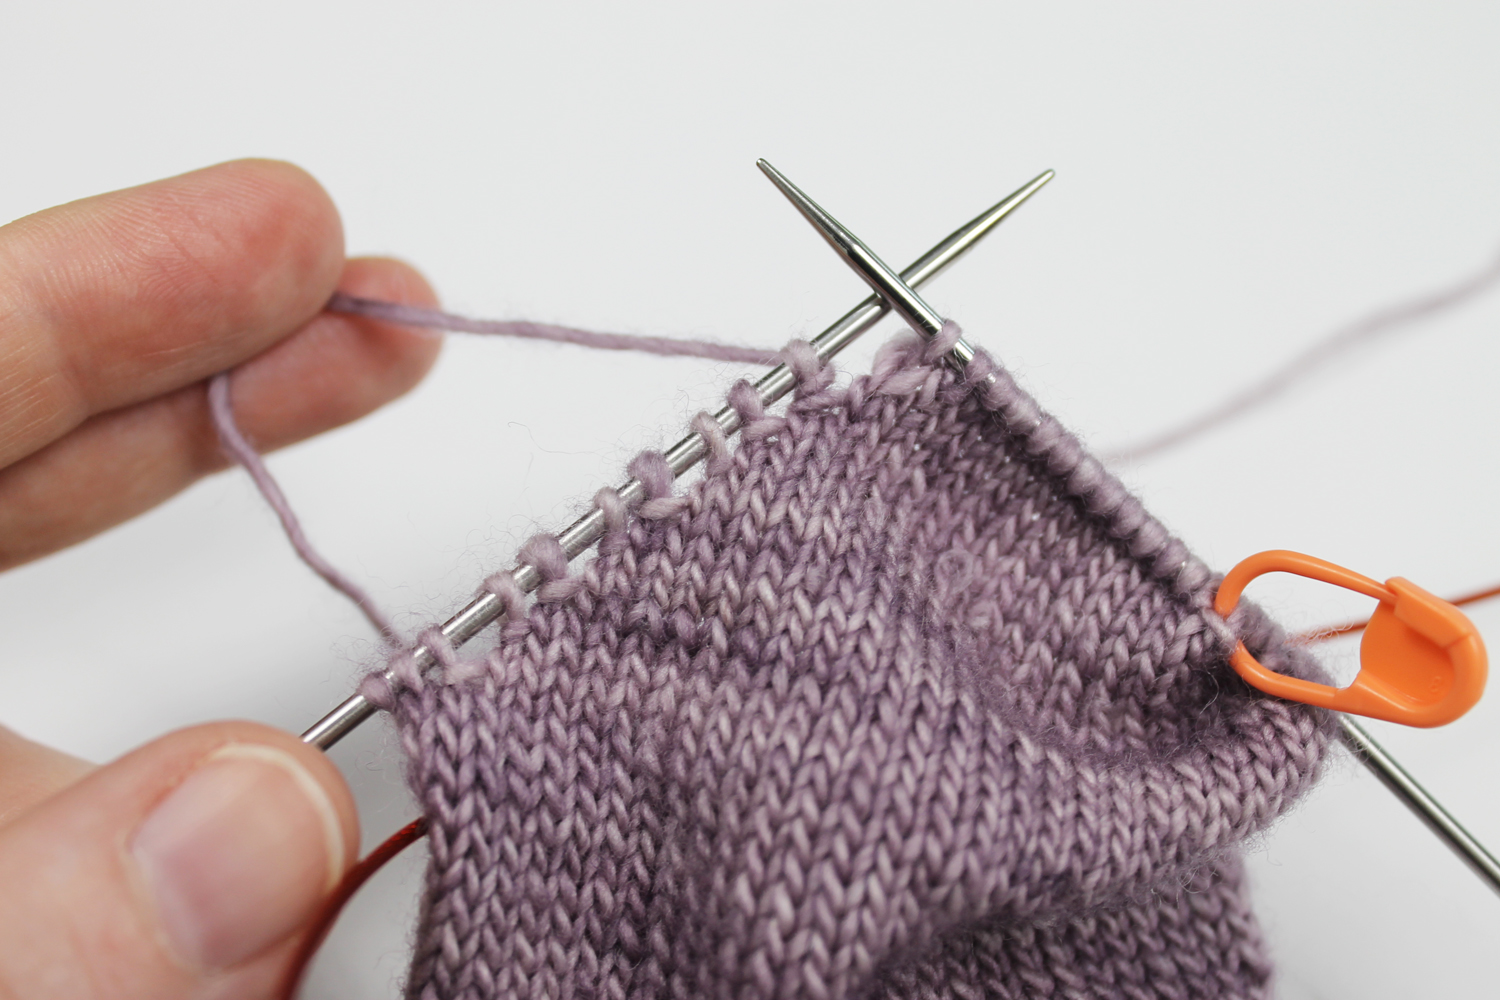
Step 8:
For Row 4, purl back over to one stitch before your marker. Wrap and turn the stitch where you stopped, then move the stitch marker to the new wrapped stitch. If you check out the stitches to the left of the green marker above, you can see the tiny little wraps around the stitches. They almost look like purl stitches, but they’re not!
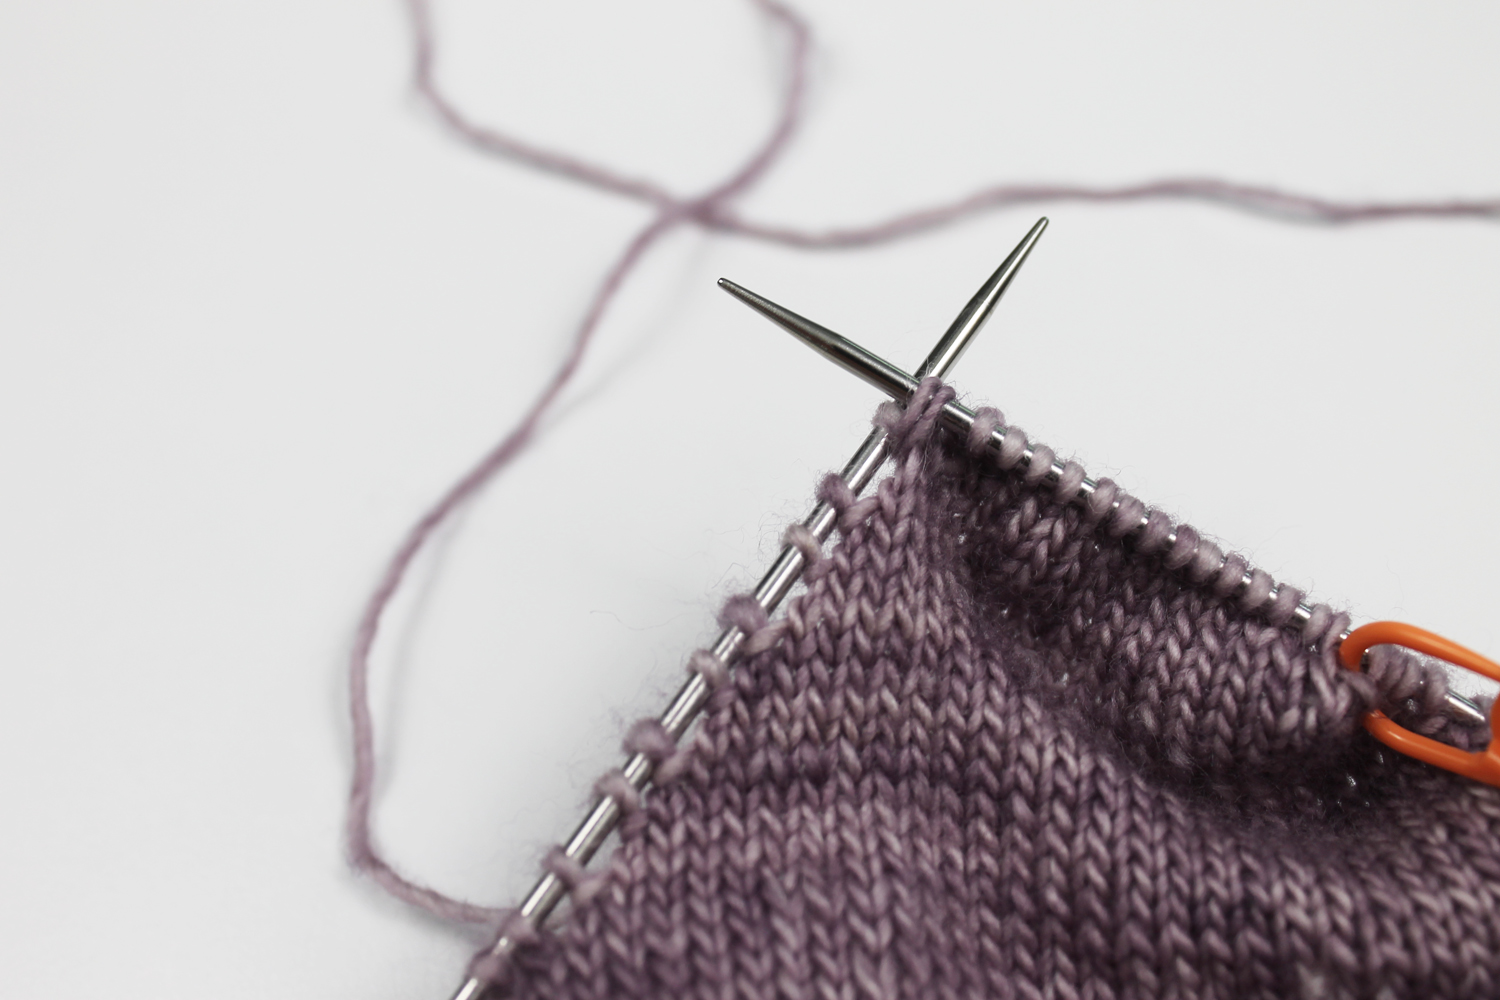
Step 9:
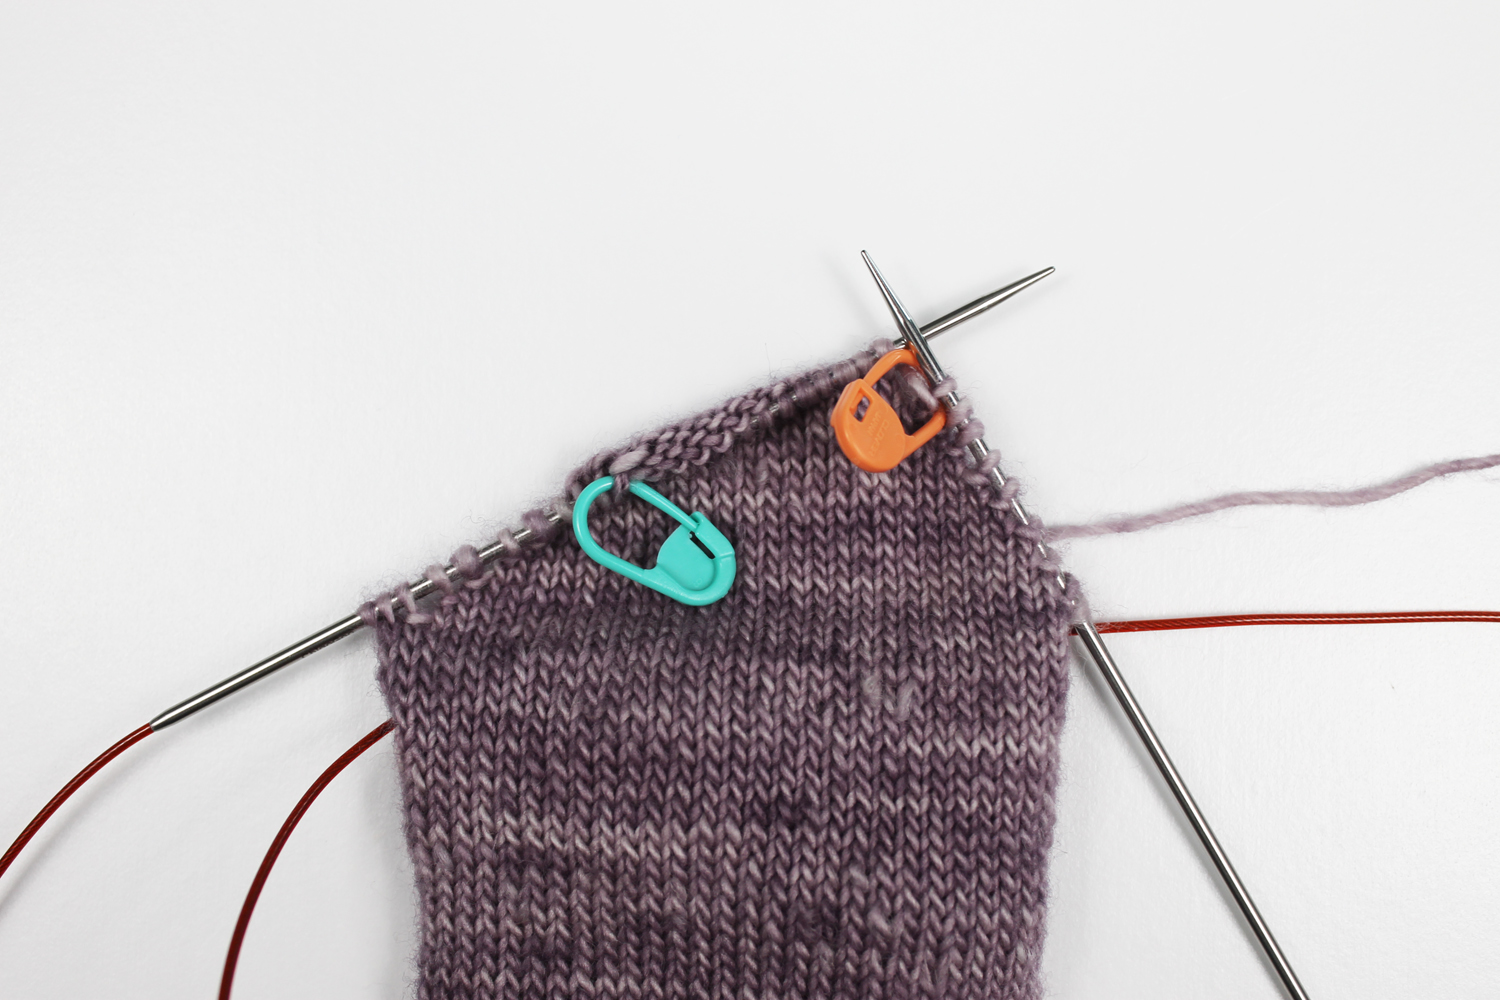
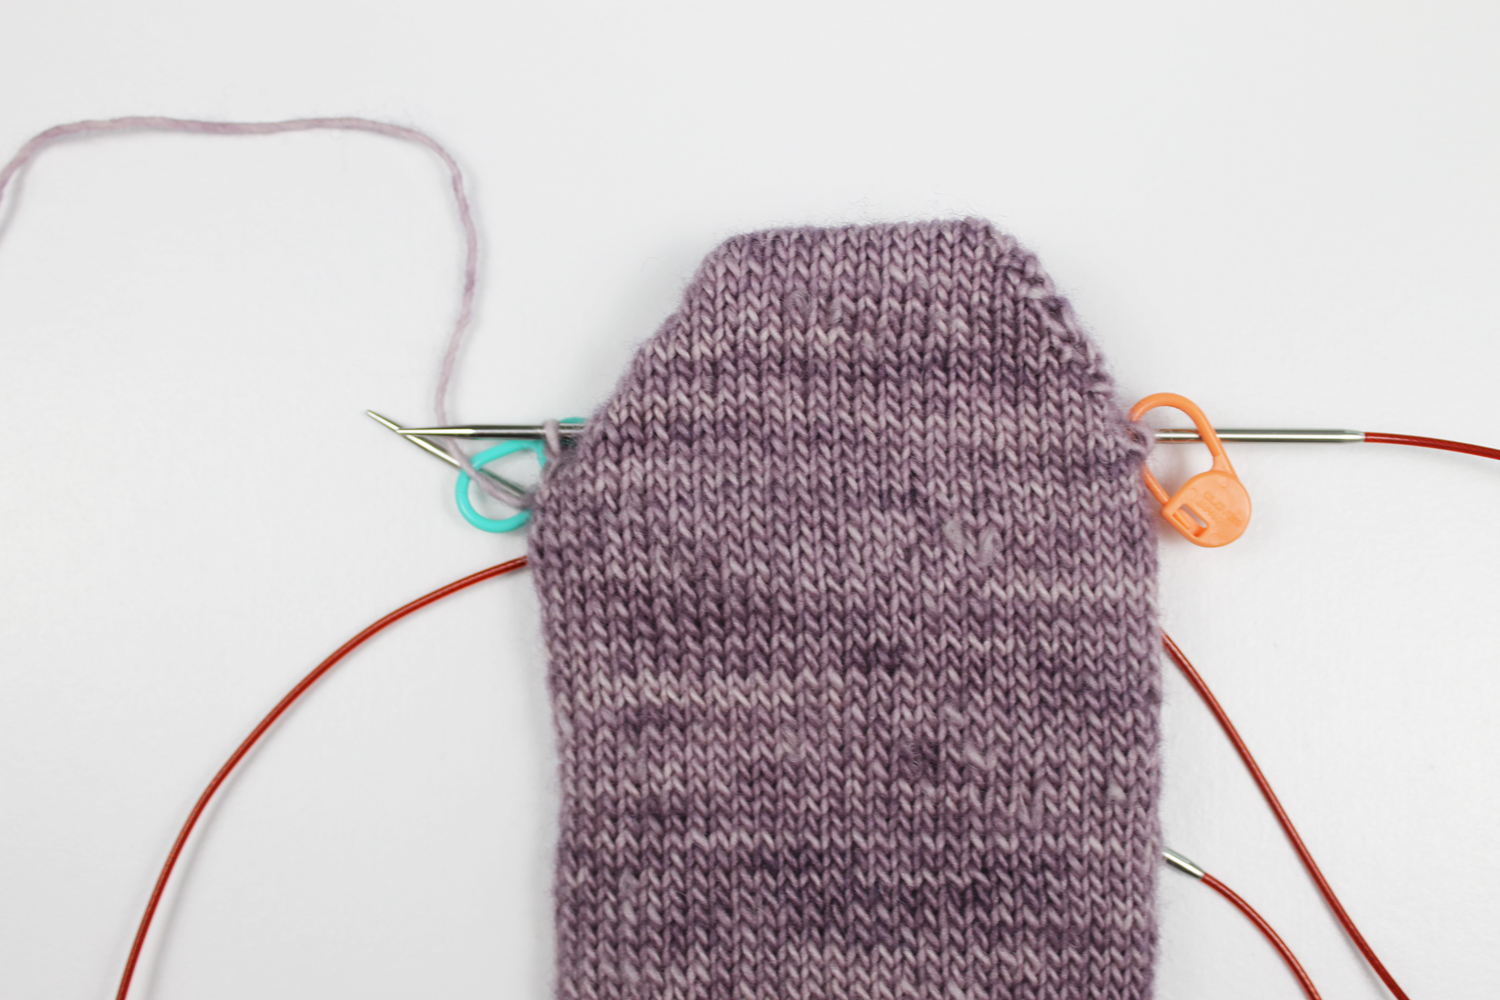
Repeat Rows 3 and 4 until you have 12 stitches between the markers that are not wrapped. When you reach this step, your heel should have soft angles on the sides.
Short row heel part 2 pattern:
Row 1: K to first wrapped st. Pick up the wrap and k it tog with the wrapped st, w&t. (2 wraps around this stitch)
Row 2: P to first wrapped st. Pick up the wrap and p it tog with the wrapped st, w&t.
Row 3: K to the double-wrapped st, pick up both wraps and k them to tog with the wrapped st, w&t.
Row 4: P to the double-wrapped st, pick up both wraps and p them tog with the wrapped st, w&t.
Rep rows 3 and 4 until all wraps have been picked up and worked tog with their respective sts.
Detailed instructions for part 2 pattern:
For the second part of the heel, we’re using the same technique except that we’re double wrapping the stitch, then picking up those double wraps. This part of the heel involves both picking up wrapped stitches and double wrapping stitches.
Step 1:
Knit to the first wrapped stitch, then pick up the wrap and knit it along with the stitch.
Step 2:
W&t the next stitch, creating a double wrap on that stitch.
Step 3:
Repeat this for Row 2, purling over to the wrapped stitch and picking up the wrap to purl it along with the stitch. Then w&t the next stitch to make that double wrap.
Step 4:
In Row 3, knit over to the double-wrapped stitch. To pick up these wraps, use the same technique as you would when you pick up one wrap, except you’re picking up both wraps at the same time.
Step 5:
W&t the next stitch to create your next double wrap.
Step 6:
For Row 4, purl over to the double-wrapped stitch, pick up both wraps and purl them together with the stitch. W&t the next stitch to create your next double wrap.
Step 7:
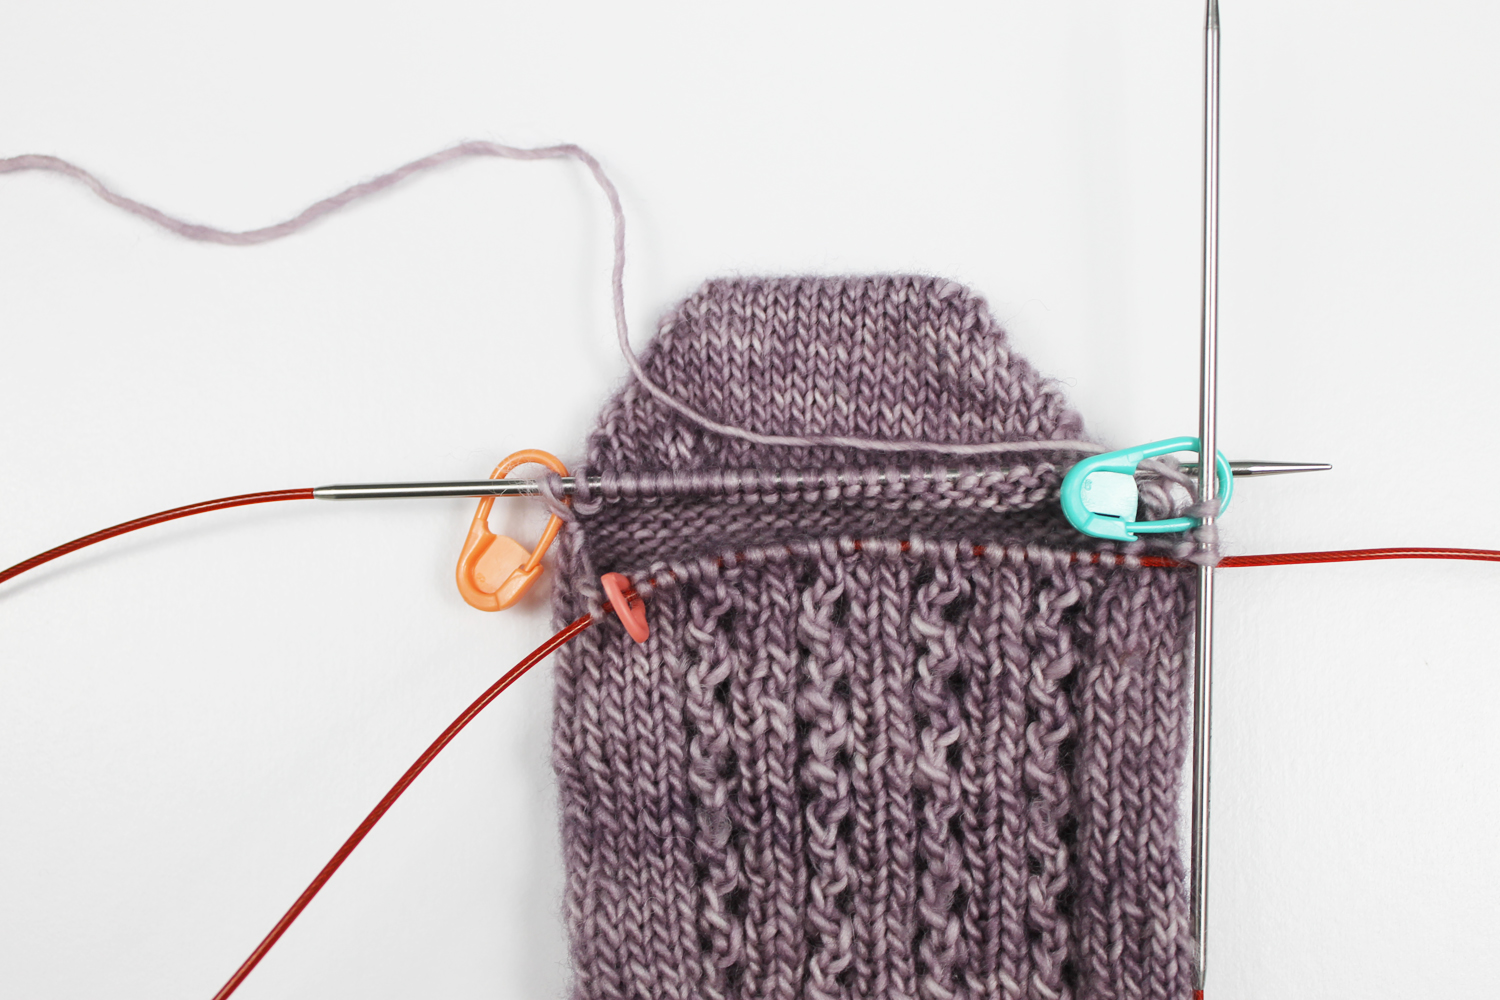
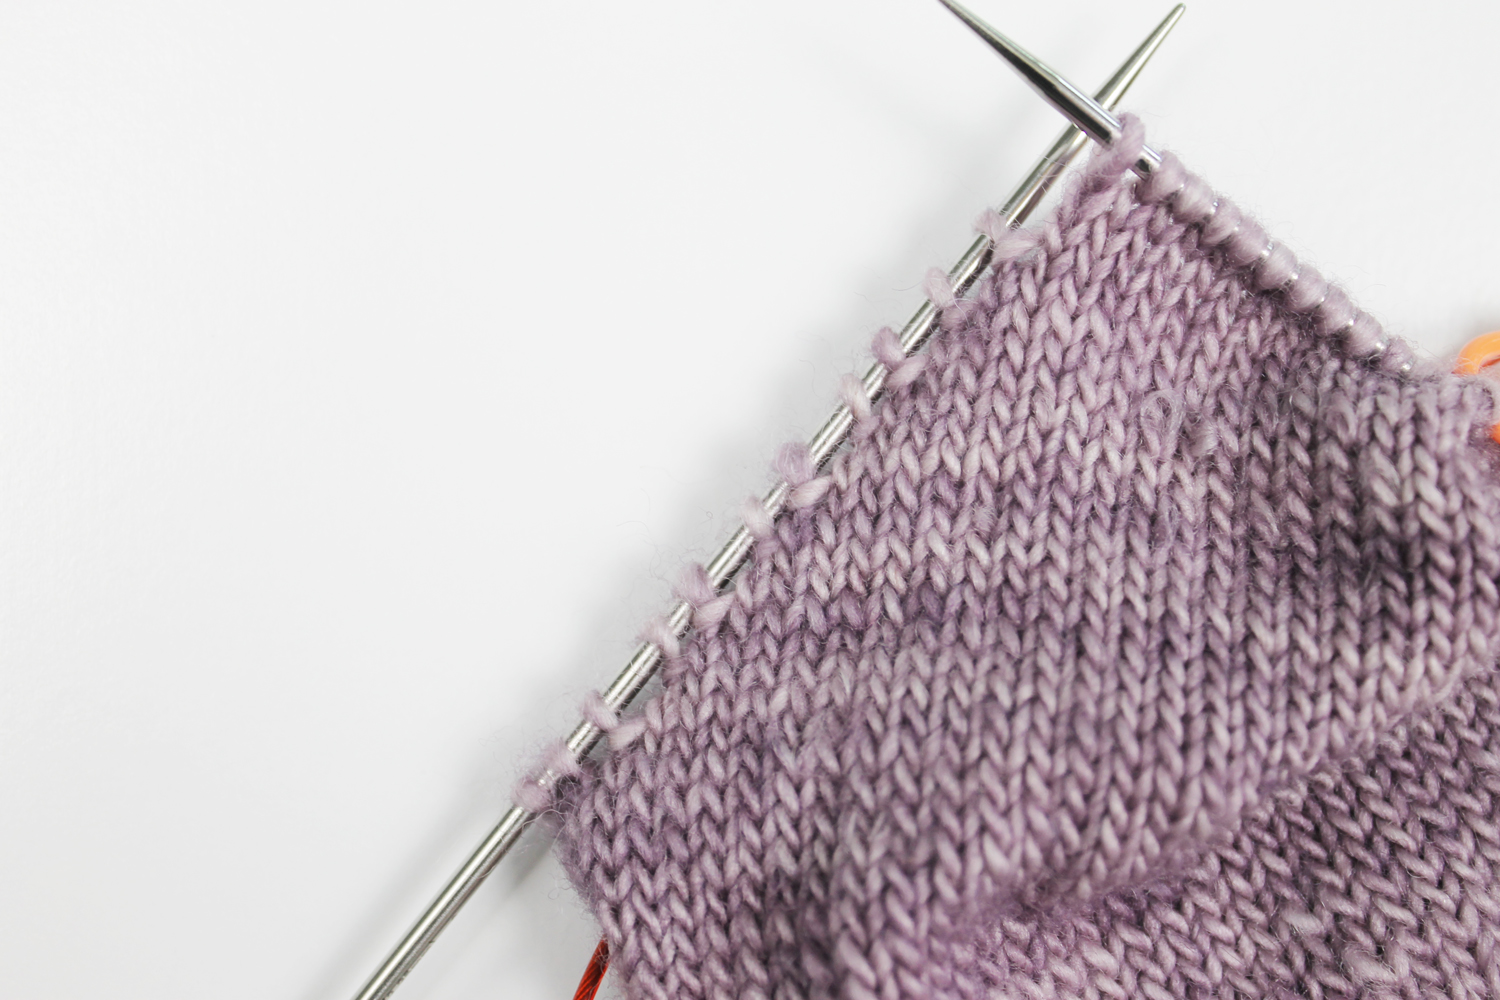
Repeat Rows 3 and 4 until all the stitches have been picked up and wrapped. When you finish these steps, your heel will look something like the photo above.
To finish your toe-up sock heel
If you flip your sock over, you’ll see the angles that your short rows created. Now you can simply rejoin your work into the round — no picking up stitches, decreasing, or anything else!
Share tips, start a discussion or ask one of our experts or other students a question.
No Responses to “The Best Way to Knit a Toe-Up Sock Heel”