
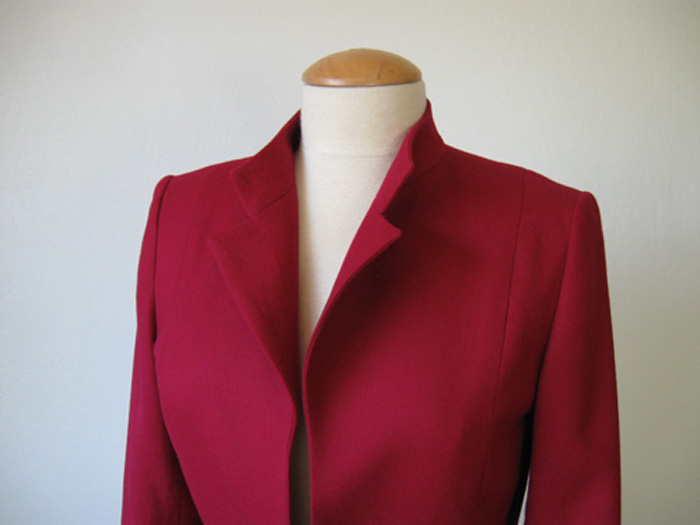
Sleeves might seem like a simple part of the garment but they are more than just tubes of fabric to cover your arms. A well designed and constructed sleeve will have some gentle shaping and follow the natural curve of your body. A nicely fitting sleeve can be the difference between a comfortable garment and one that is just a bit off.
Understanding sleeve pattern pieces
A good sleeve pattern will have lots of markings that you can use both to adjust the fit and as a guide for your garment construction.
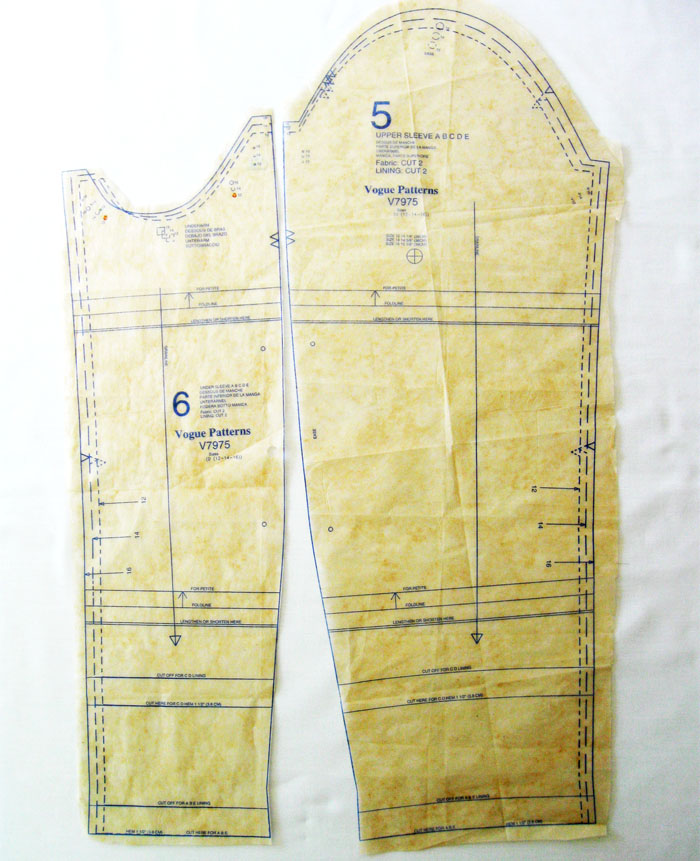
This is a typical multi-size two-piece sleeve for a jacket. Note that it has all the standard pattern markings such as grain line and notches to match when sewing. However, a sleeve has some unique markings that are specific to the pattern pieces.
Adjustment lines
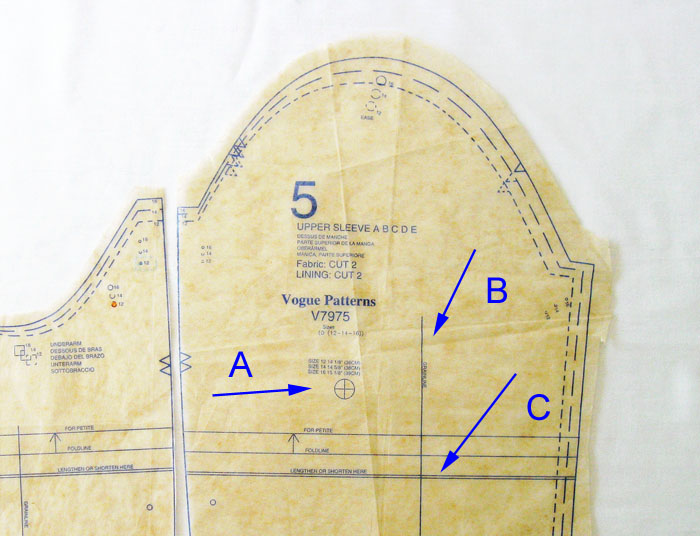
Pictured here is the upper sleeve pattern piece, which has a number of marked lines on it:
A. Bicep circumference
Like other pattern, the circumference notations is shown here as circle with a cross inside. You could also find this information alongside a horizontal line. Either way, it tells you the circumference of the finished sleeve at that point.
If the bicep circumference is not marked on your pattern, you can measure the finished circumference yourself, usually at about 1 inch below the underarm. Be sure to deduct the seam allowances from your measurement of the pattern pieces if they are included.
For comfort in a coat or jacket, this circumference should be 2″ to 3″ larger than your actual bicep measurement.
If you are not sure what the sleeve circumference should be you can measure an existing coat that fits well and use that number. To adjust the circumference you can do a bicep adjustment or even make a two-piece upper sleeve.
B. Grain line
The grain line is marked here, as on any pattern piece. It is important to cut out your sleeve pattern pieces properly according to the grain markings so they will hang correctly.
C. Shorten or lengthen lines
These lines are for adjusting the length of the pattern piece prior to cutting out your sleeve. I find that I can often place the upper sleeve pattern piece at my shoulder and be able to tell if I need to shorten or lengthen.
If you always find ready-to-wear sleeves either too long or too short, this is the pattern marking for you. It really helps to make this adjustment prior to cutting out your fabric and assures the hem will be in the right place. It is critical for a sleeve with a button vent at the bottom, so it can be really useful to make a muslin test garment when sewing a style with this feature.
Notches and other markings
A two-piece sleeve generally has markings for assembling the sleeve and also for setting the sleeve into the armhole. These are what you’ll commonly find:
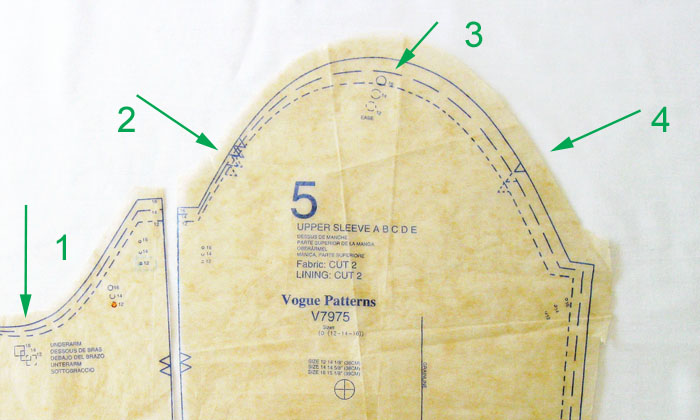
1. Underarm mark
This marking, often a square, lines up with the side seam on the garment body. Even if the garment doesn’t have a side seam, the center of whatever pattern piece should have a mark that matches up with this mark on the under sleeve.
2. Double notch
This is most always seen on the upper back portion of the sleeve. It matches up to a double notch on the upper back of the garment armhole edge.
3. Dot at the top of the sleeve
This dot indicates where to match to the top of the sleeve to the top of the garment. Usually this is the shoulder seam, but sometimes it is not, in the case of a garment that has the shoulder sleeves shifted for design reasons. Even if there is no shoulder seam on your pattern, there should be a dot to match with this sleeve dot.
4. Single notch
This is generally seen on the front of the sleeve and matches up to a single notch on the front garment armhole edge. Note that the convention is to have the back of the sleeve with the double notch and the front with the single. This has saved me many times from putting the left sleeve in the right armhole and vice versa!
Small and large dots
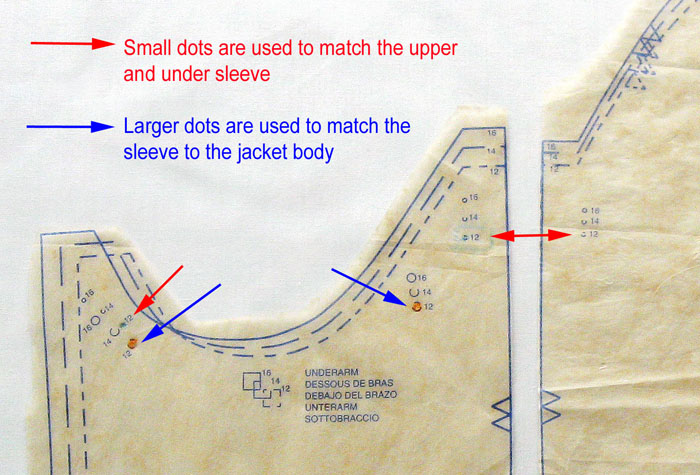
The upper and under sleeve pattern pieces can be a bit confusing as they don’t seem to match up properly along the seam edges. Some coat or jacket patterns have more than one set of dots and it can be a bit confusing as to what the various dots indicate.
Small dots
Smaller dots are used to match up the upper edges of the sleeve seams when you are sewing together the upper and under sleeve. Note that edges of the pattern pieces are irregular but this is due to the seam allowance. If you match the small dots when sewing the seam, then you will have a correctly shaped sleeve that will fit into the rounded armhole.
Large dots
Larger dots are used to match up the sleeve to the jacket body. They are usually on both the front and back of the garment. Sometimes they also indicate sections where you are easing the sleeve cap.
Here’s an example of the first sleeve seam sewn together.

Even though the seam allowance might stick out a bit, the small dots match up and are right on the sleeve’s stitching line. Note also that on the upper sleeve portion, typically the back seam is higher than the front seam.
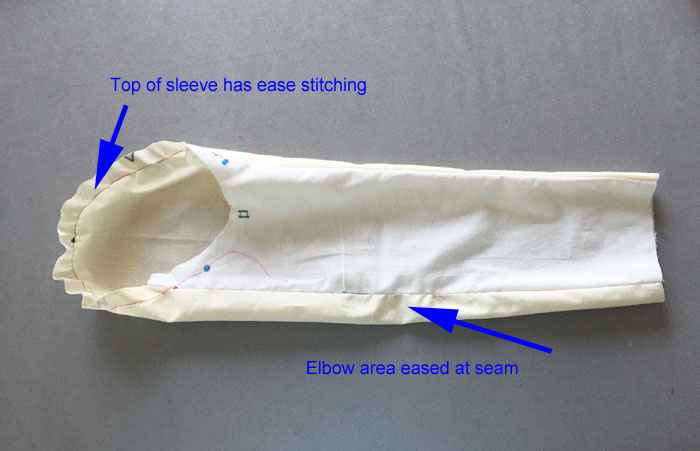
Easing at the elbow can also be included in the back of the two-piece sleeve. The back of the upper sleeve is slightly longer than the under sleeve, and dots indicate a section that should be eased on that seam. This gives the sleeve a gentle curve to mimic the shape of the arm in a relaxed position.
The sleeve cap is eased into the armhole, here using a long stitch to gently pull in for shaping.
One last tip for fitting on coats and jackets…
Test your muslin sleeve in your garment! Often when making a coat I set aside the fabric and sleeve pattern pieces, not cutting them out with the coat body. Try sewing up the coat, doing any last fitting steps and then basting in a sleeve made of muslin. This is a great way to fit the actual sleeve in the garment, including the finished hem length, without sacrificing your fashion fabric. It even helps to audition various shoulder pads if needed and make adjustments in the sleeve cap that your fabric may call for. Then you can cut out your sleeves in the garment fabric. You can even hem them before you sew them in for a really fast finish.
Thank you for the info.
Great information. This was very useful.