
Learn simple step-by-step instructions for drawing flowers!
 You’re in good company when you draw flowers. Botanicals have a special place in art history, dating back from the 16th century. Artists like Jan Brueghel the Elder would paint beautiful arrangements as a way to create color during the dark and grey winters. Here, we’re carrying on the tradition, in our own way, with a small bouquet.
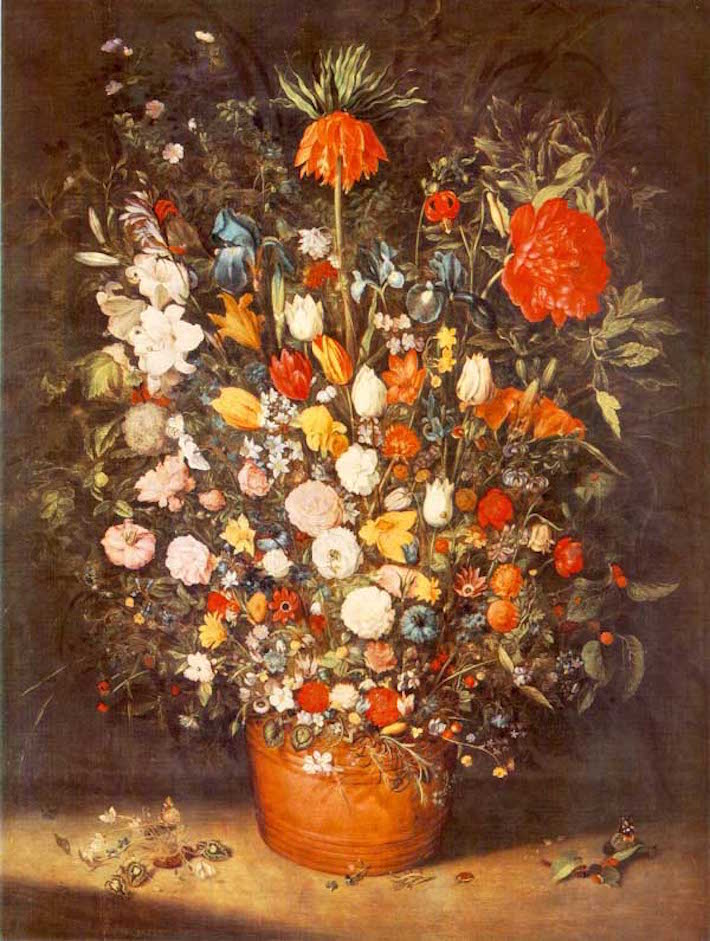 Bouquet by Jan Brueghel the Elder (1599)
Getting started
Select some of your favorite drawing tools — pencils, an eraser and paper — before you begin the project. In addition to your supplies, you’ll also need to pick out three or four flowers to sketch. I found a nice large bouquet and took several blooms from it. To get the most out of this exercise, pick different types of flowers so that you can practice drawing a variety of petals.Don’t forget…
Some flowers are easier to draw than others. Often, they can seem complicated: petals overlap one another (appearing foreshortened), and they can have lots of small details and folds. This, however, is the fun in the challenge. And as long as we take things step by step, drawing the flowers won’t seem so daunting. The meticulousness of it will make your drawing great. Remember: tackle every single petal one at a time.Step 1: Start with simple circles.
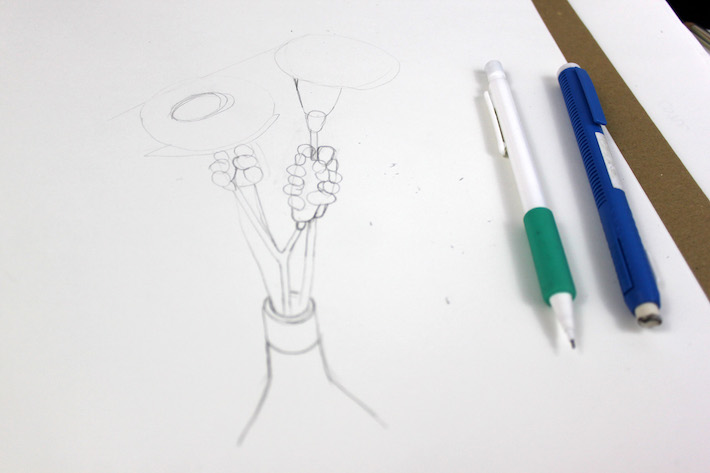 Flowers are never square or rectangular. They don’t have hard edges. Keeping this in mind, we’re going to sketch out some basic circular and oblong shapes, mimicking the overall form of the flower.
Starting with simple shapes also helps to make sure our drawing has a good structure. Take some time and study your bouquet. Ask yourself these questions:
Flowers are never square or rectangular. They don’t have hard edges. Keeping this in mind, we’re going to sketch out some basic circular and oblong shapes, mimicking the overall form of the flower.
Starting with simple shapes also helps to make sure our drawing has a good structure. Take some time and study your bouquet. Ask yourself these questions:
- How tall does each flower look when compared to its neighbor?
- At what angle is a circle leaning? Does it appear oblong?
- How much space is in between each flower?
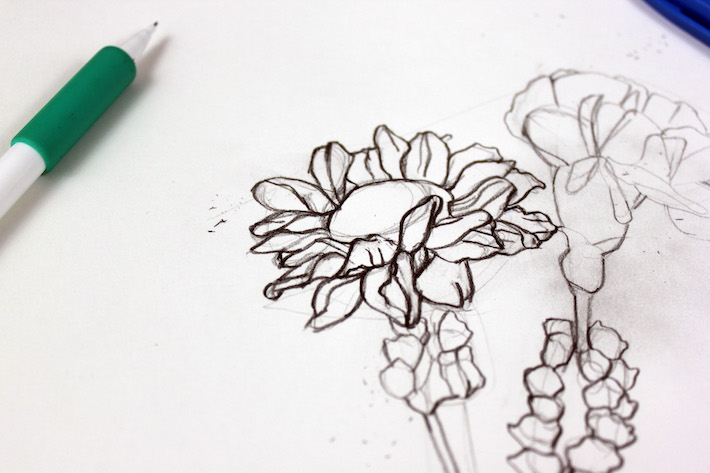
Step 2: Refine circles and add petals.
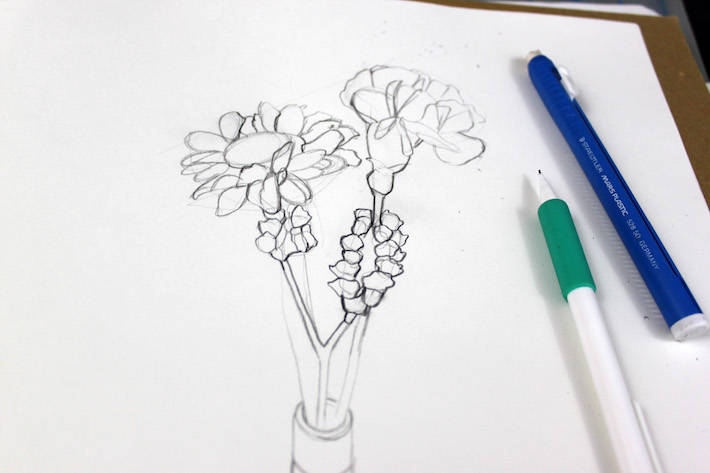 Once you’ve drawn the general shapes for your flowers, begin to delve into the details. This includes drawing every petal you see. I know this can sound tedious, but it’s an important step in getting your artwork to look realistic.
For now, just focus on the general shape of the petals and the center of the flowers. Make ovals or circles for how the petals appear, overlapping shapes as you see them. Don’t worry about erasing at this point — you’ll refine everything later. Right now, it’s just about getting all of the elements on the page.
Once you’ve drawn the general shapes for your flowers, begin to delve into the details. This includes drawing every petal you see. I know this can sound tedious, but it’s an important step in getting your artwork to look realistic.
For now, just focus on the general shape of the petals and the center of the flowers. Make ovals or circles for how the petals appear, overlapping shapes as you see them. Don’t worry about erasing at this point — you’ll refine everything later. Right now, it’s just about getting all of the elements on the page.
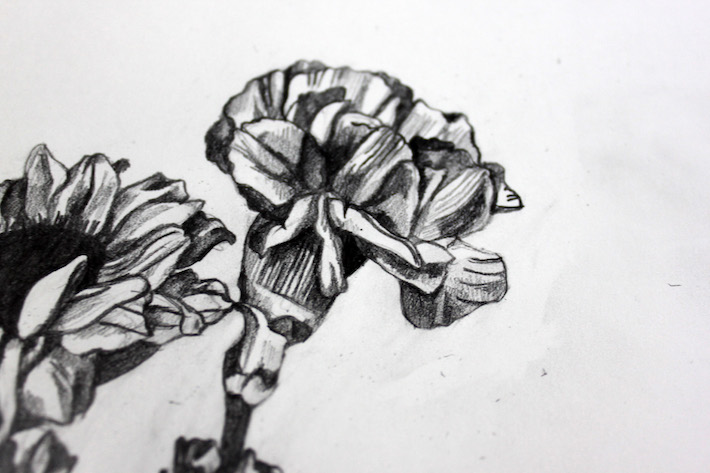
Step 3: Focus on the fine details.
 By now, you’ve got a visual grasp on where everything is on your page. Start to refine each petal as necessary. Some elements will appear billowing and open, while other petals might look closed, wrinkled or partially folded. Draw whatever you see.
Foreshortening is a big part of this drawing. With so many petals, there is a constant overlapping of shapes. Study each part and observe the following:
By now, you’ve got a visual grasp on where everything is on your page. Start to refine each petal as necessary. Some elements will appear billowing and open, while other petals might look closed, wrinkled or partially folded. Draw whatever you see.
Foreshortening is a big part of this drawing. With so many petals, there is a constant overlapping of shapes. Study each part and observe the following:
- What does a folded petal look like?
- How does one petal look when placed next to another?
- What petals look like they’re closer to the viewer?
Step 4: Start shading.
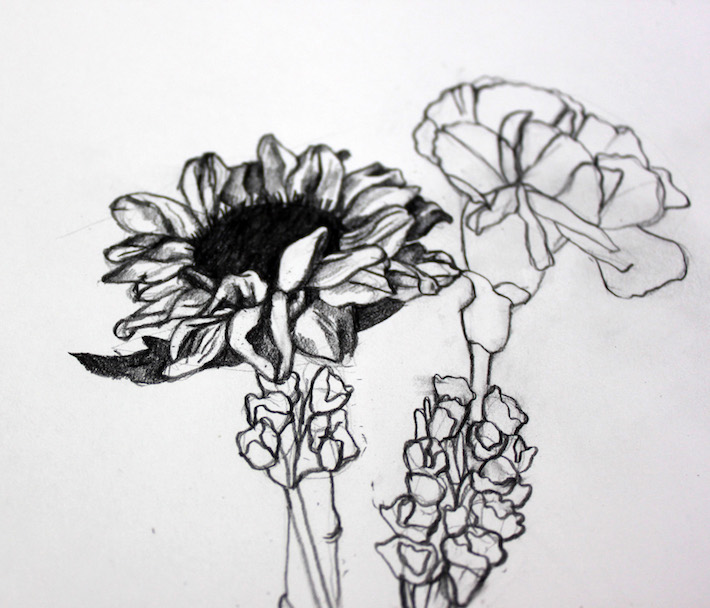 Now we’re on the home stretch! Once you’ve got your petals all drawn, start to shade every individual petal. Some will be very dark while others will be much lighter. If you’re new to shading, start with the video lessons in Drawing Dimension: Shading Techniques to learn the fundamentals.
In foreshadowed objects, things closer to us will appear and will seem lighter. Darker areas will appear farther away.
Now we’re on the home stretch! Once you’ve got your petals all drawn, start to shade every individual petal. Some will be very dark while others will be much lighter. If you’re new to shading, start with the video lessons in Drawing Dimension: Shading Techniques to learn the fundamentals.
In foreshadowed objects, things closer to us will appear and will seem lighter. Darker areas will appear farther away.
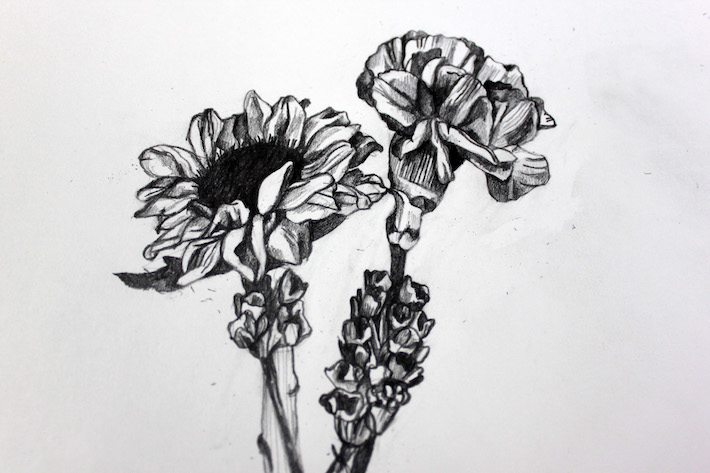
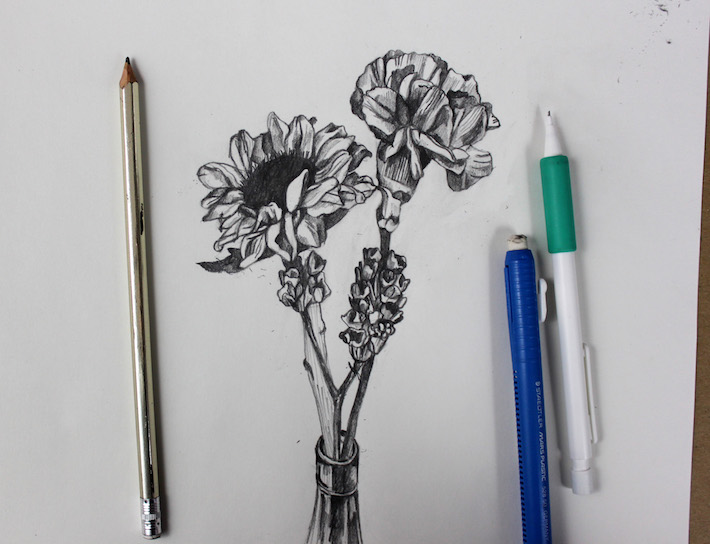
Step 5: Clean up your drawing.
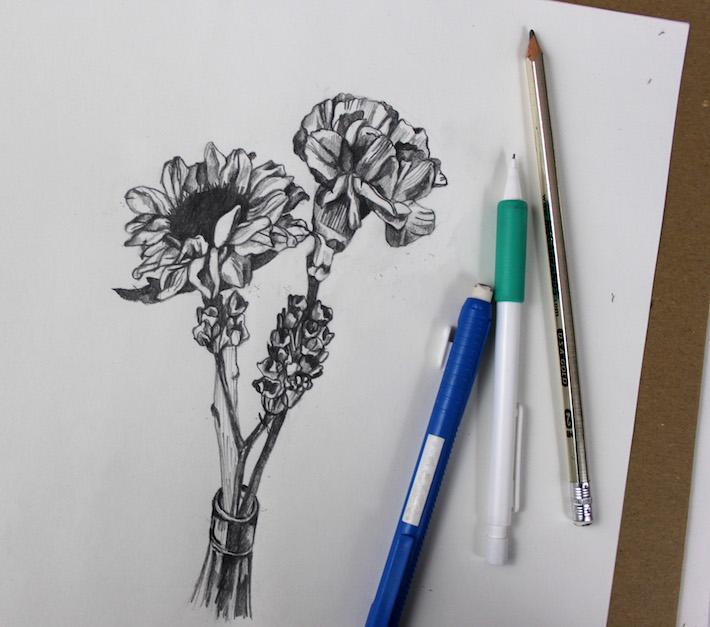 Complete your shaded drawing by erasing any little lines or smudges that occurred during the drawing process.
Share tips, start a discussion or ask one of our experts or other students a question.
No Responses to “Draw Your Garden: Step-by-Step Instructions for Drawing Flowers”