
You’ve probably learned how to sew half-square triangles in two a a time, in sets of four, and even eight at a time. But if you’ve never tried piecing half-square triangles from pre-cut strips, you don’t know what you’re missing!
Because these half-square triangles are cut on the bias, the edges are prone to stretching, but with careful pressing, you’ll have no problems. This method is quick and easy, plus there is very little fabric waste.
How to strip-piece half-square triangles
This tutorial shows you how to quickly sew and cut an entire row of matching half-square triangles from pre-cut strips (the 2½” x width-of-fabric strips that come in a jelly roll). These HSTs measure 2½” unfinished (2″ finished).
For this tutorial, I’m using Boundless Blenders Botanical Hydrangea Pre-Cuts.
Let’s get started!
Step 1:
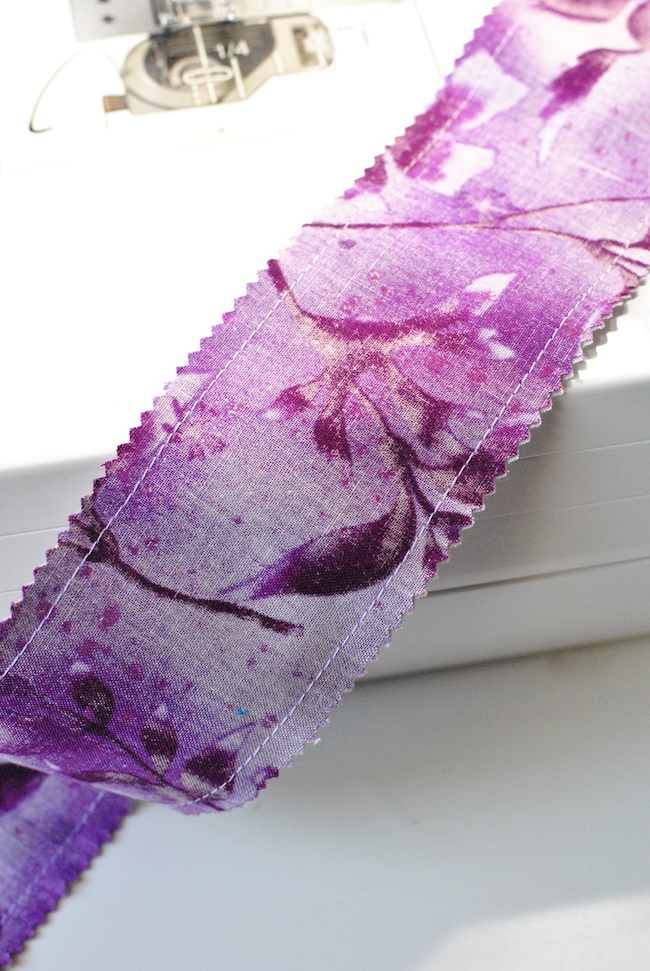
Place two contrasting 2½” strips right sides together. Sew ¼” seam down the long sides of the fabric. I used width-of-fabric (43″) strips, but you can use any size you have available.
Step 2:
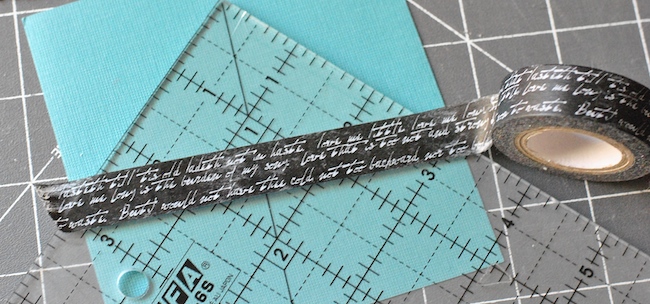
Use a piece of tape (such as washi tape, painter’s tape or masking tape) to mark a straight line that passes through both 2½” marks on your ruler. Tear the tape and press the ends over to the back side of the ruler.
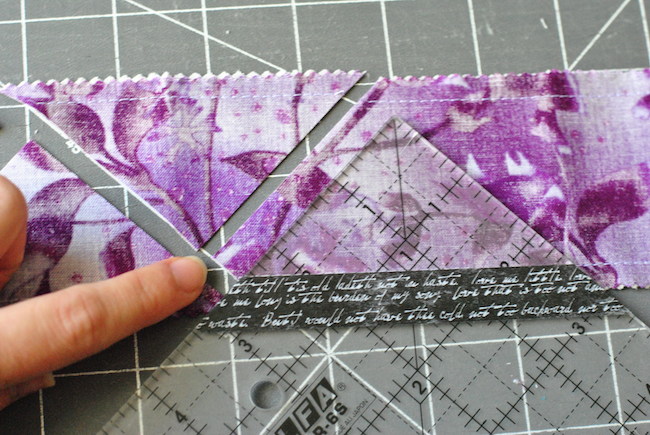
Step 3:

Lay your sewn fabric strip on a cutting mat. Place your ruler so that the 2½” tape line is directly on top of the bottom seam you sewed. You can start at the far left side of the strip, where my finger is pointing. Use a rotary cutter to trim away on both sides of the ruler, removing the fabric around the triangle point of the ruler.
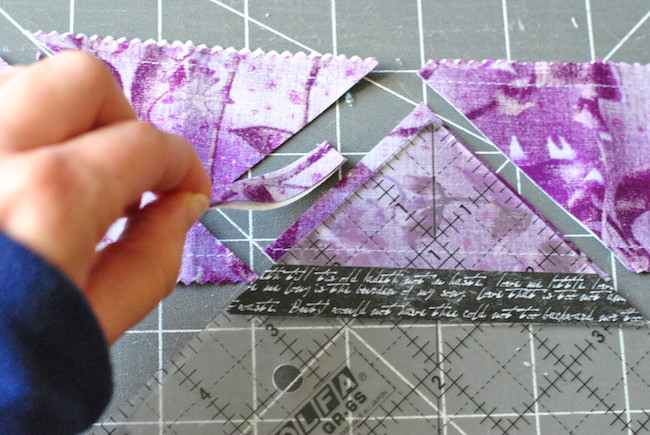
Step 4:
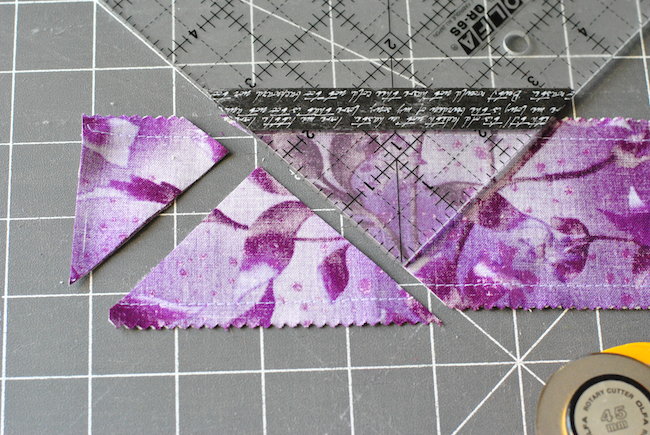
Discard the fabric in the upper left. Turn your ruler 180 degrees and line up the 2½” tape line with the top seam line, and also align one edge of the ruler with the diagonal edge you just cut. Trim on the other side of the ruler to make the next half-square triangle.
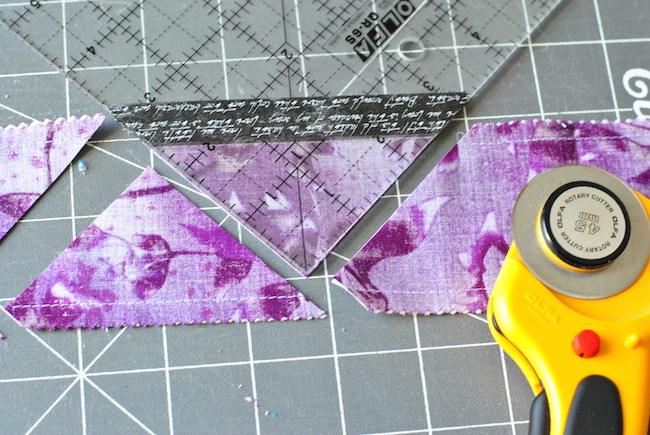
Step 5:
Turn the ruler 180 degrees again, and line up the tape line with bottom seam, starting at the edge of the stitched line. There will be some extra fabric to the left, which you’ll discard. Trim around both sides of the ruler.
Move the excess fabric out of the way. You should now have three half-square triangles.
Step 6:
Continue to the end of the strip, or until you’ve cut as many HSTs as you’d like.
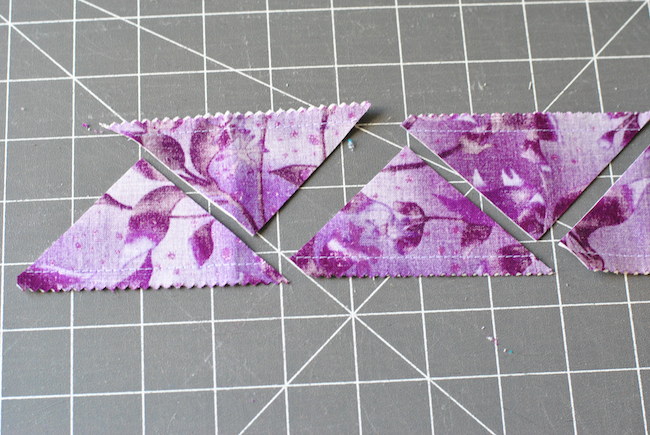
You’ll notice that some of the HSTs have dog ears (points in the seam allowance) and others are already trimmed off. Don’t worry about this! It just means that some of them will already be trimmed and ready to press.
Step 7:
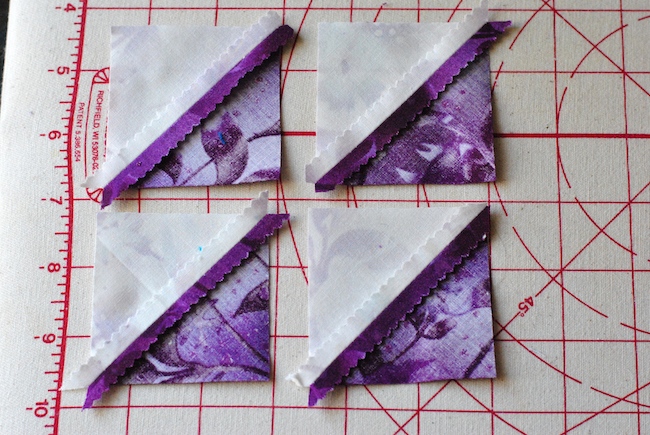
Press the seams open (or toward the darker fabric, if you prefer). Trim off the dog ears, the extra fabric that extends beyond the block. I used a sharp pair of fabric scissors for this step, but you could use a rotary cutter if you prefer.
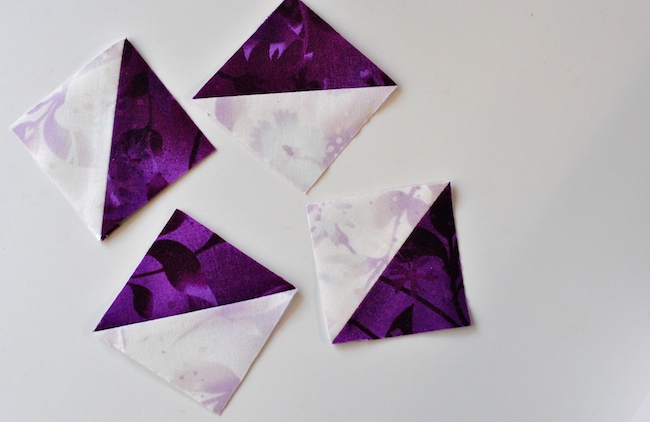
Step 8:
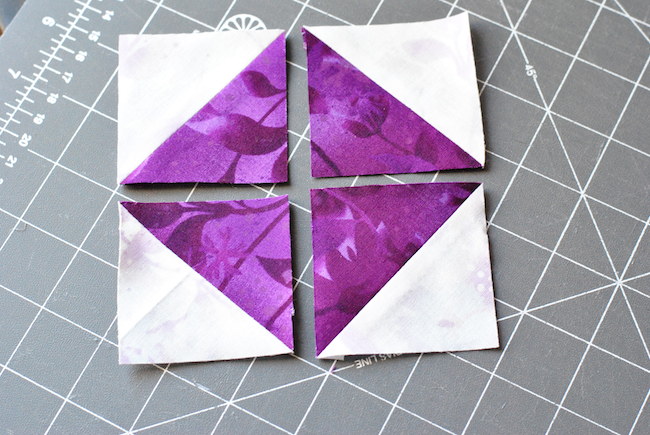
After trimming the blocks, arrange them any way you’d like! I hope you enjoyed this tutorial, and if you make any projects using this method, please let us know in the comments.
Share tips, start a discussion or ask one of our experts or other students a question.
No Responses to “A Speedy Way to Piece Half-Square Triangles With Pre-Cuts”