
You’ve just finished knitting a top-down sweater, only to realize the hem is way tighter than the rest of the sweater. Ugh! Thankfully, there’s an easy solution: it’s called JSSBO, aka Jeny’s Surprisingly Stretchy Bind-Off.
The knitter behind the name is Jeny Staiman, whose genius bind-off technique uses yarn overs to create that extra stretch without changing the way the edging looks. You’ll need a little more yarn and a bit more time when using this method, but it’s worth it to never knit too-tight hems, sock cuffs or necklines ever again.
Jeny’s Super Stretchy Bind-Off
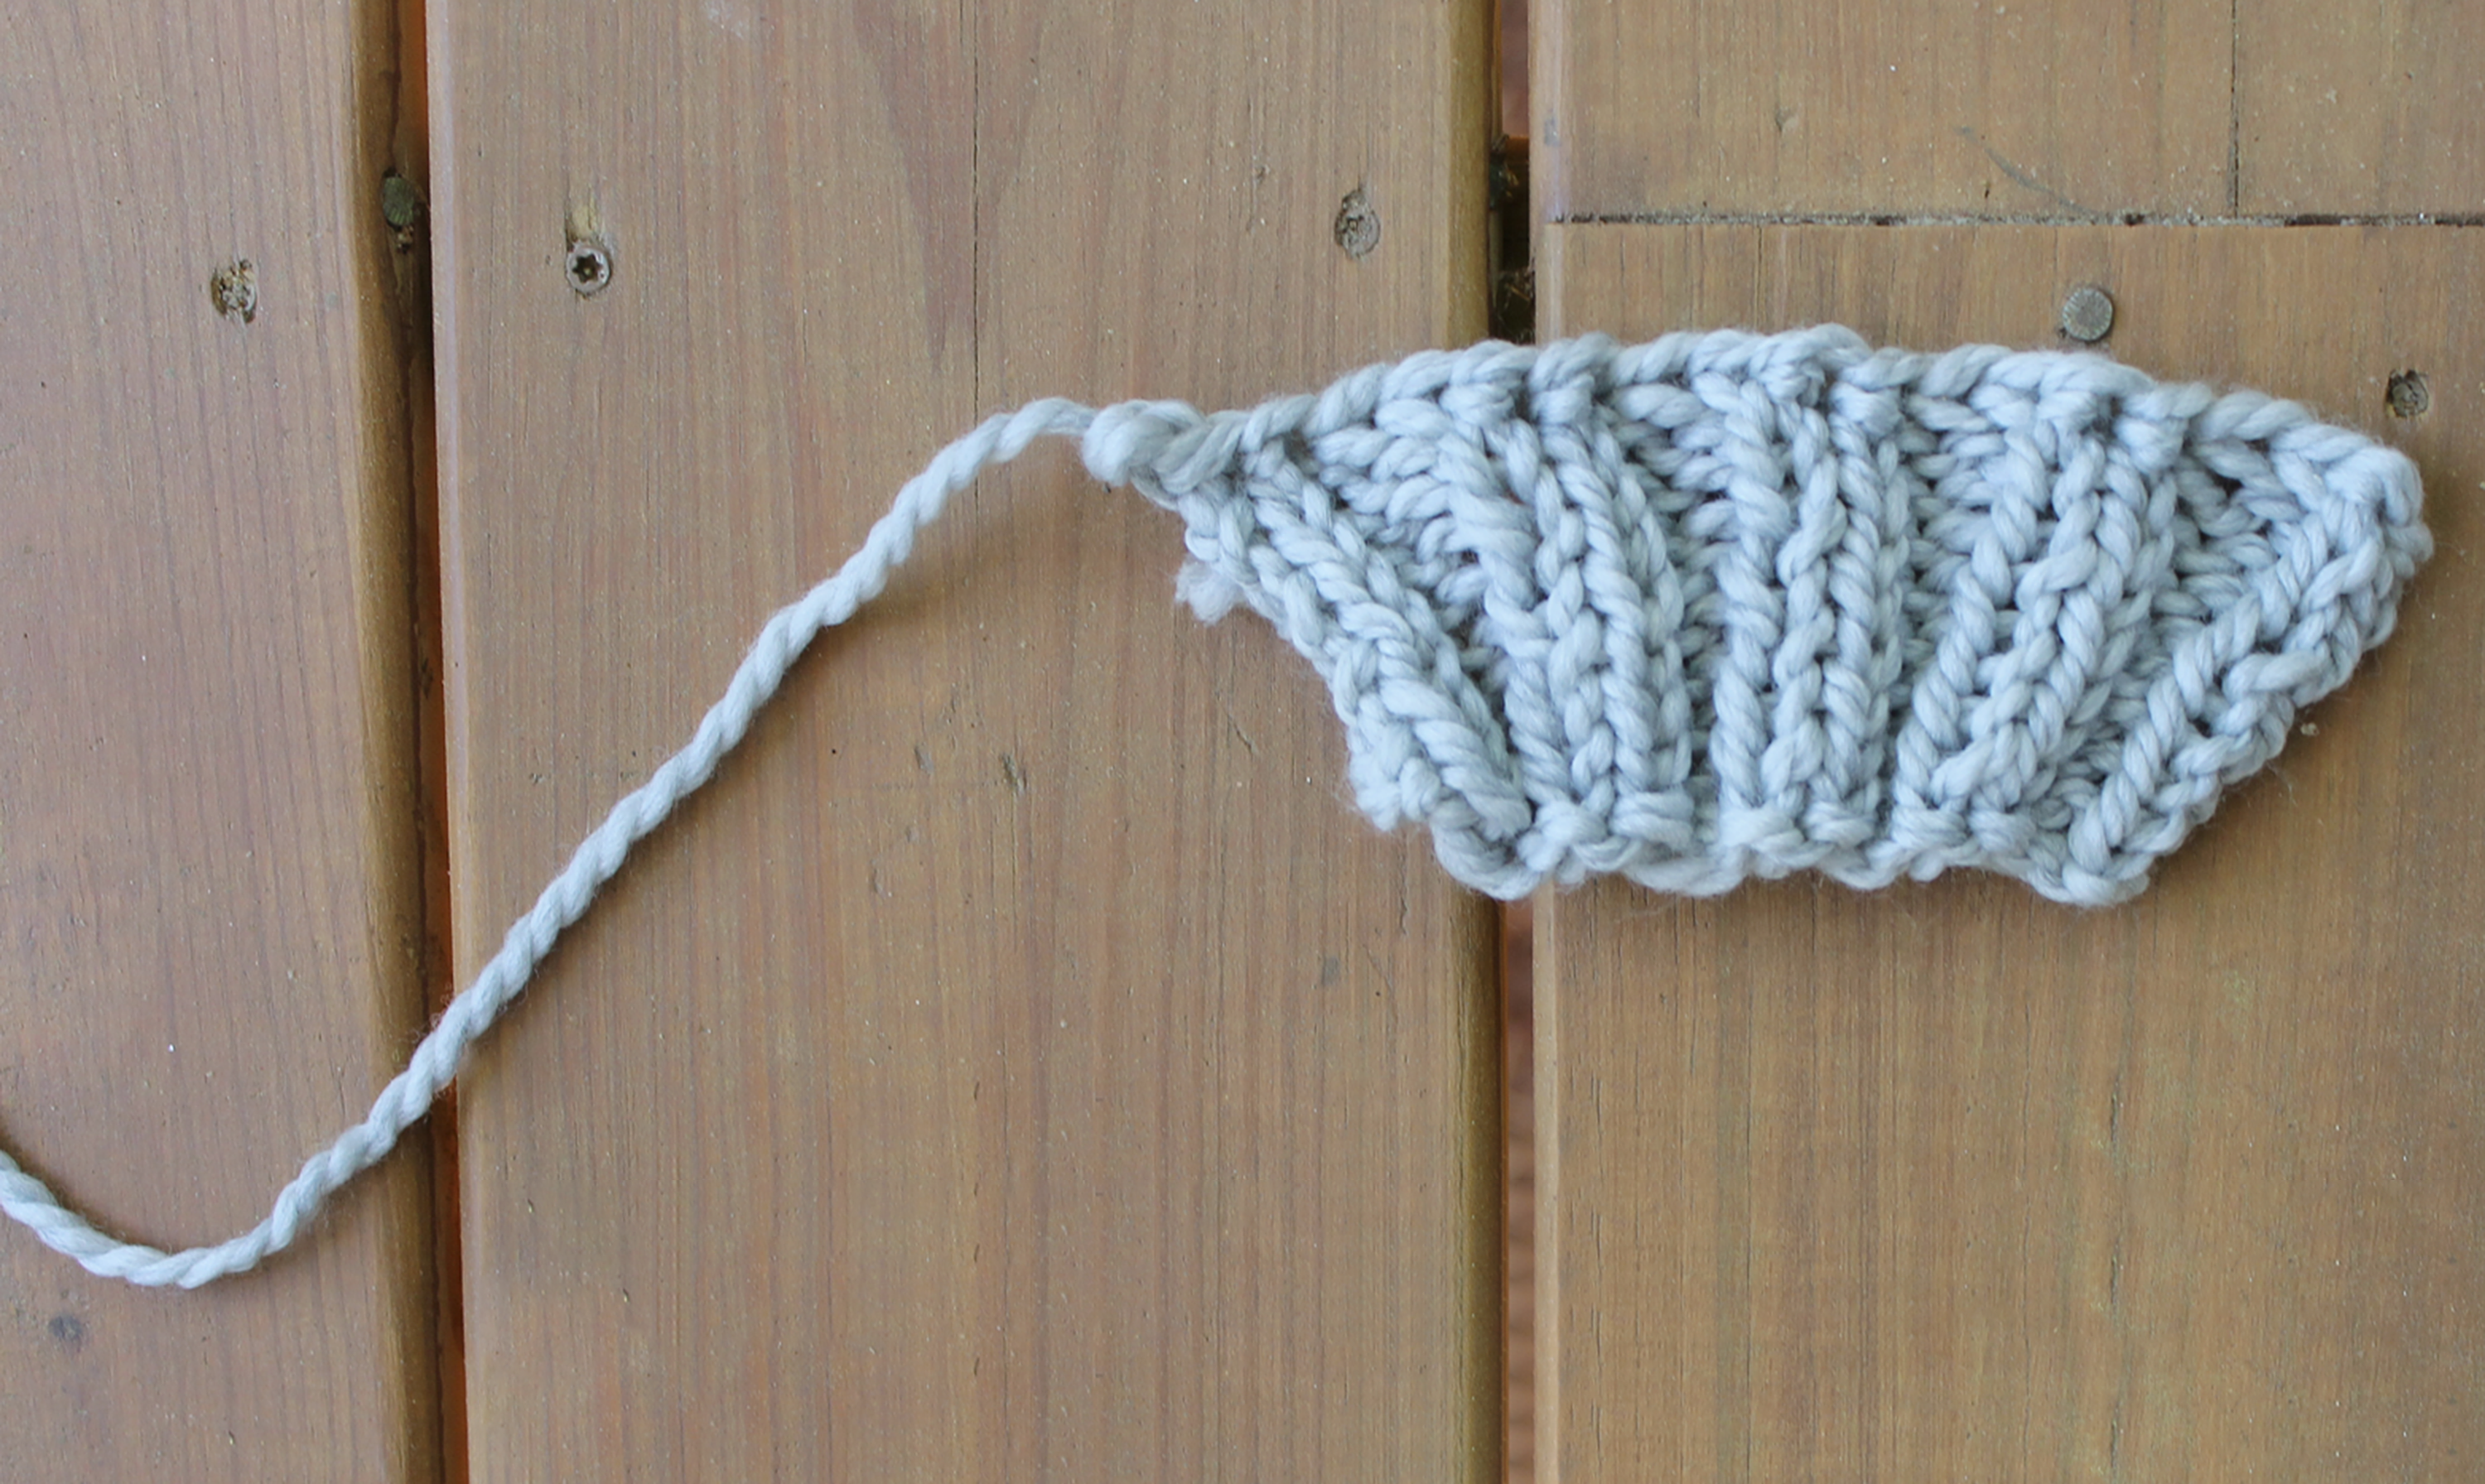
This example is for a ribbed swatch, so you can see how to treat both knit and purl stitches.
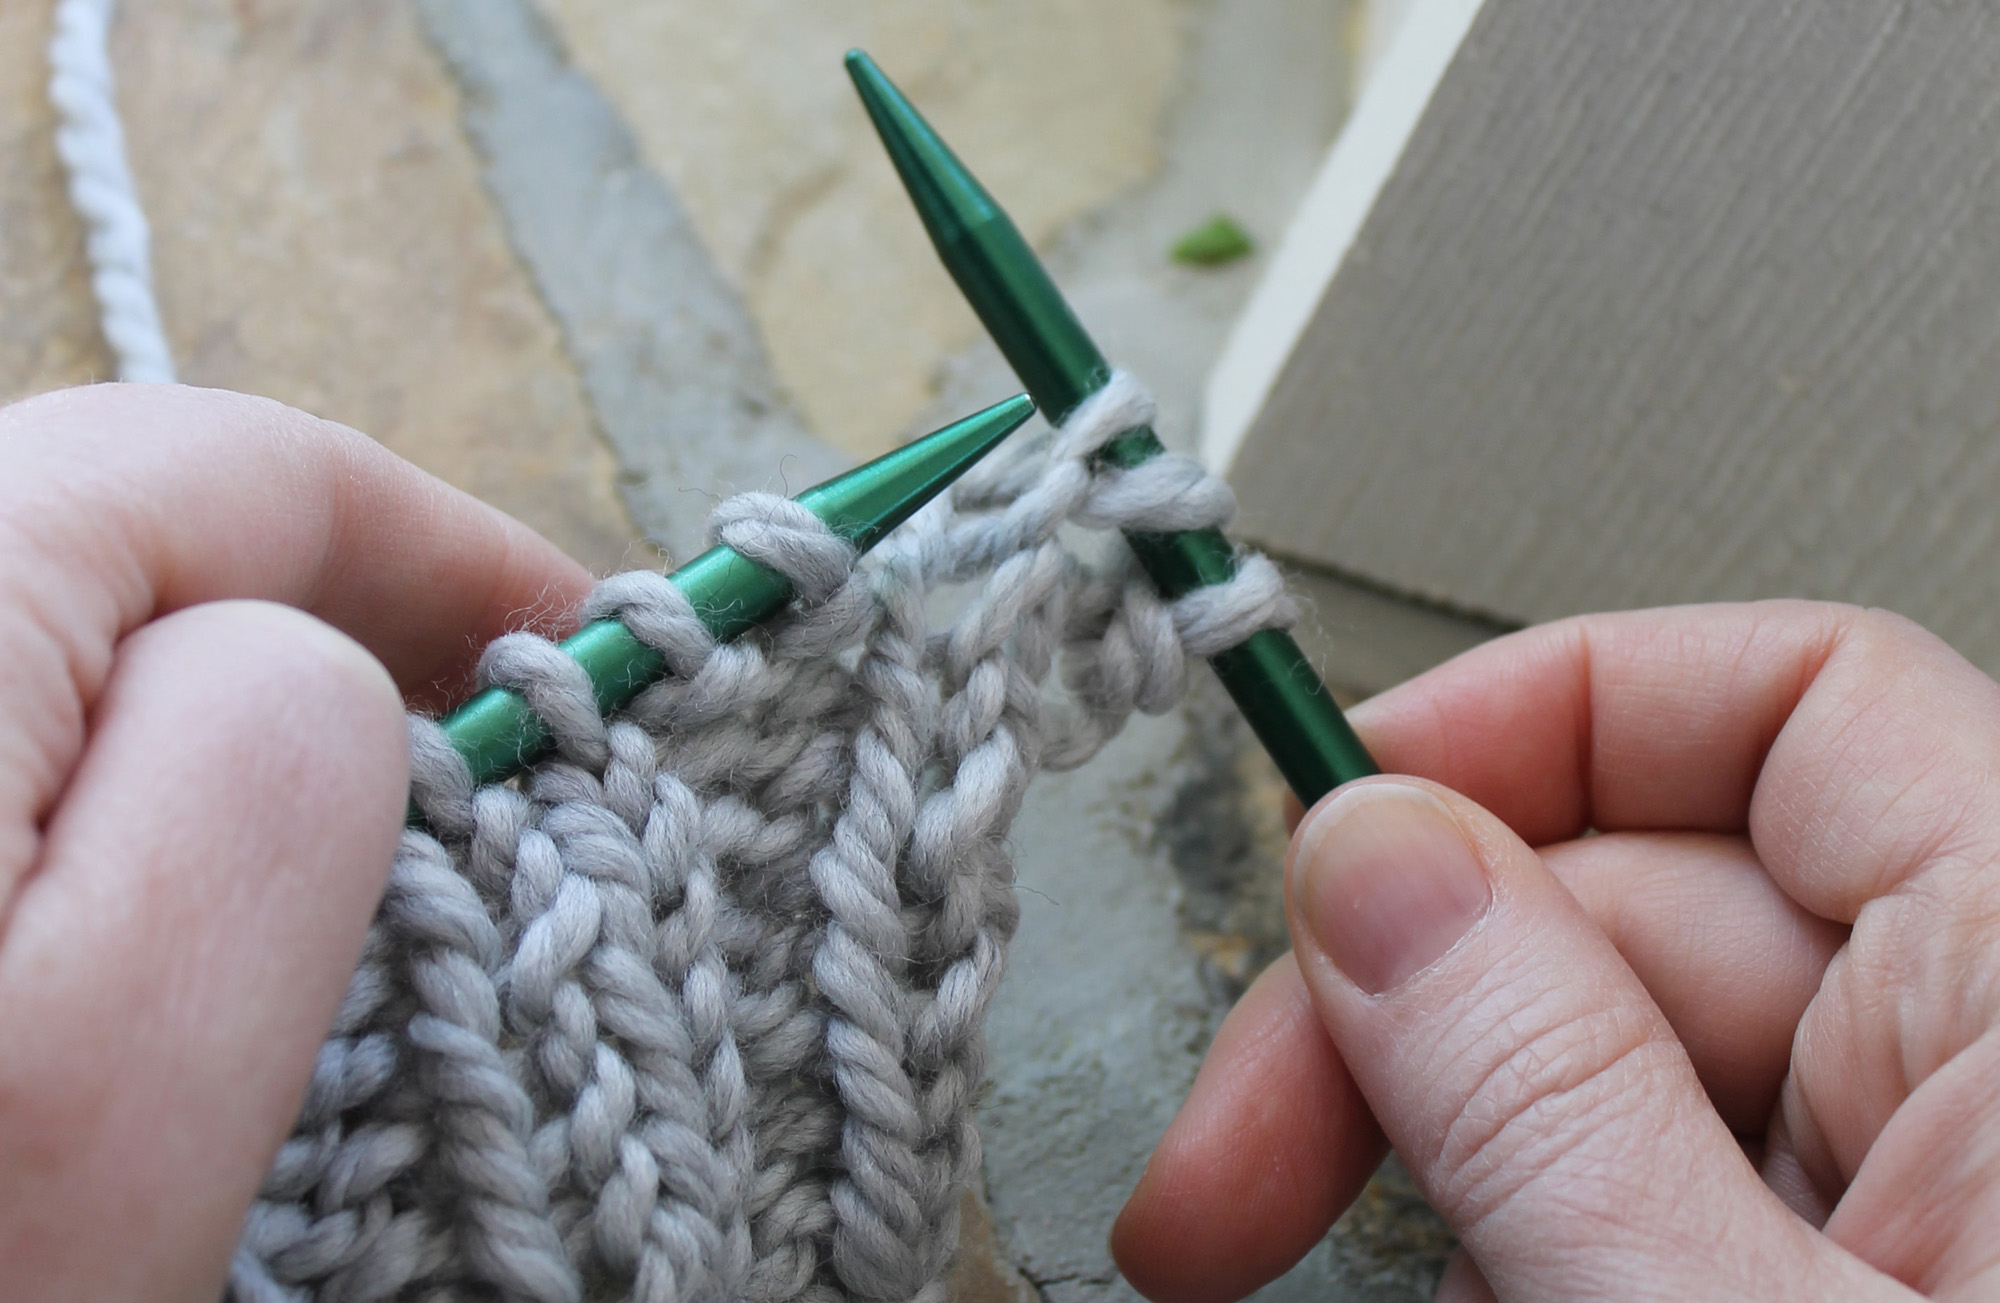
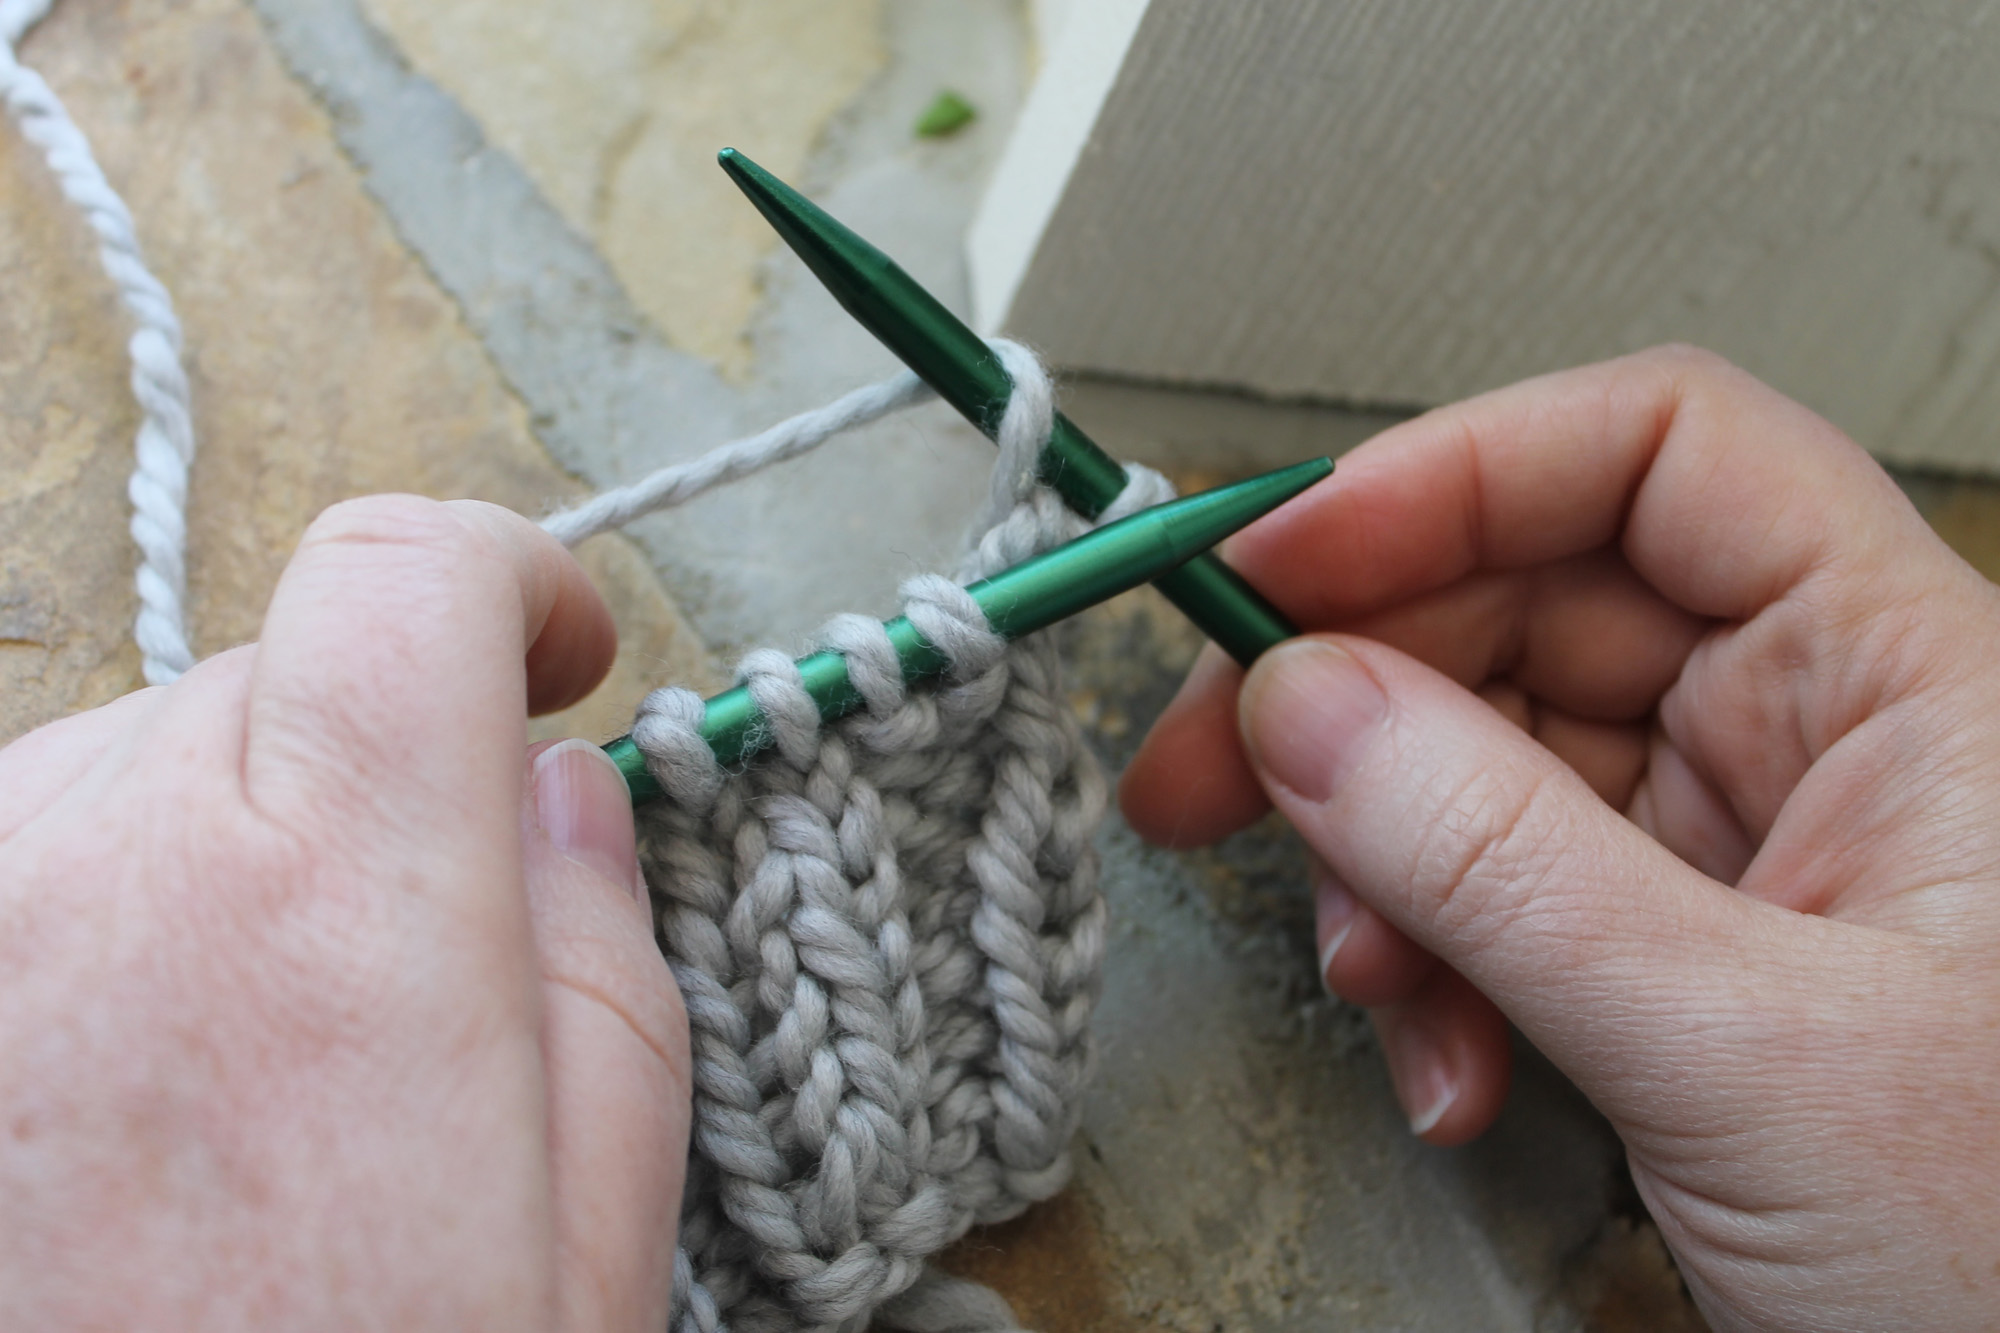
1. Wrap the working yarn around your needle as if you were doing a yarn over, but in the opposite direction. (You’ll be going from the back of the needle to the front of the needle closest to you.)
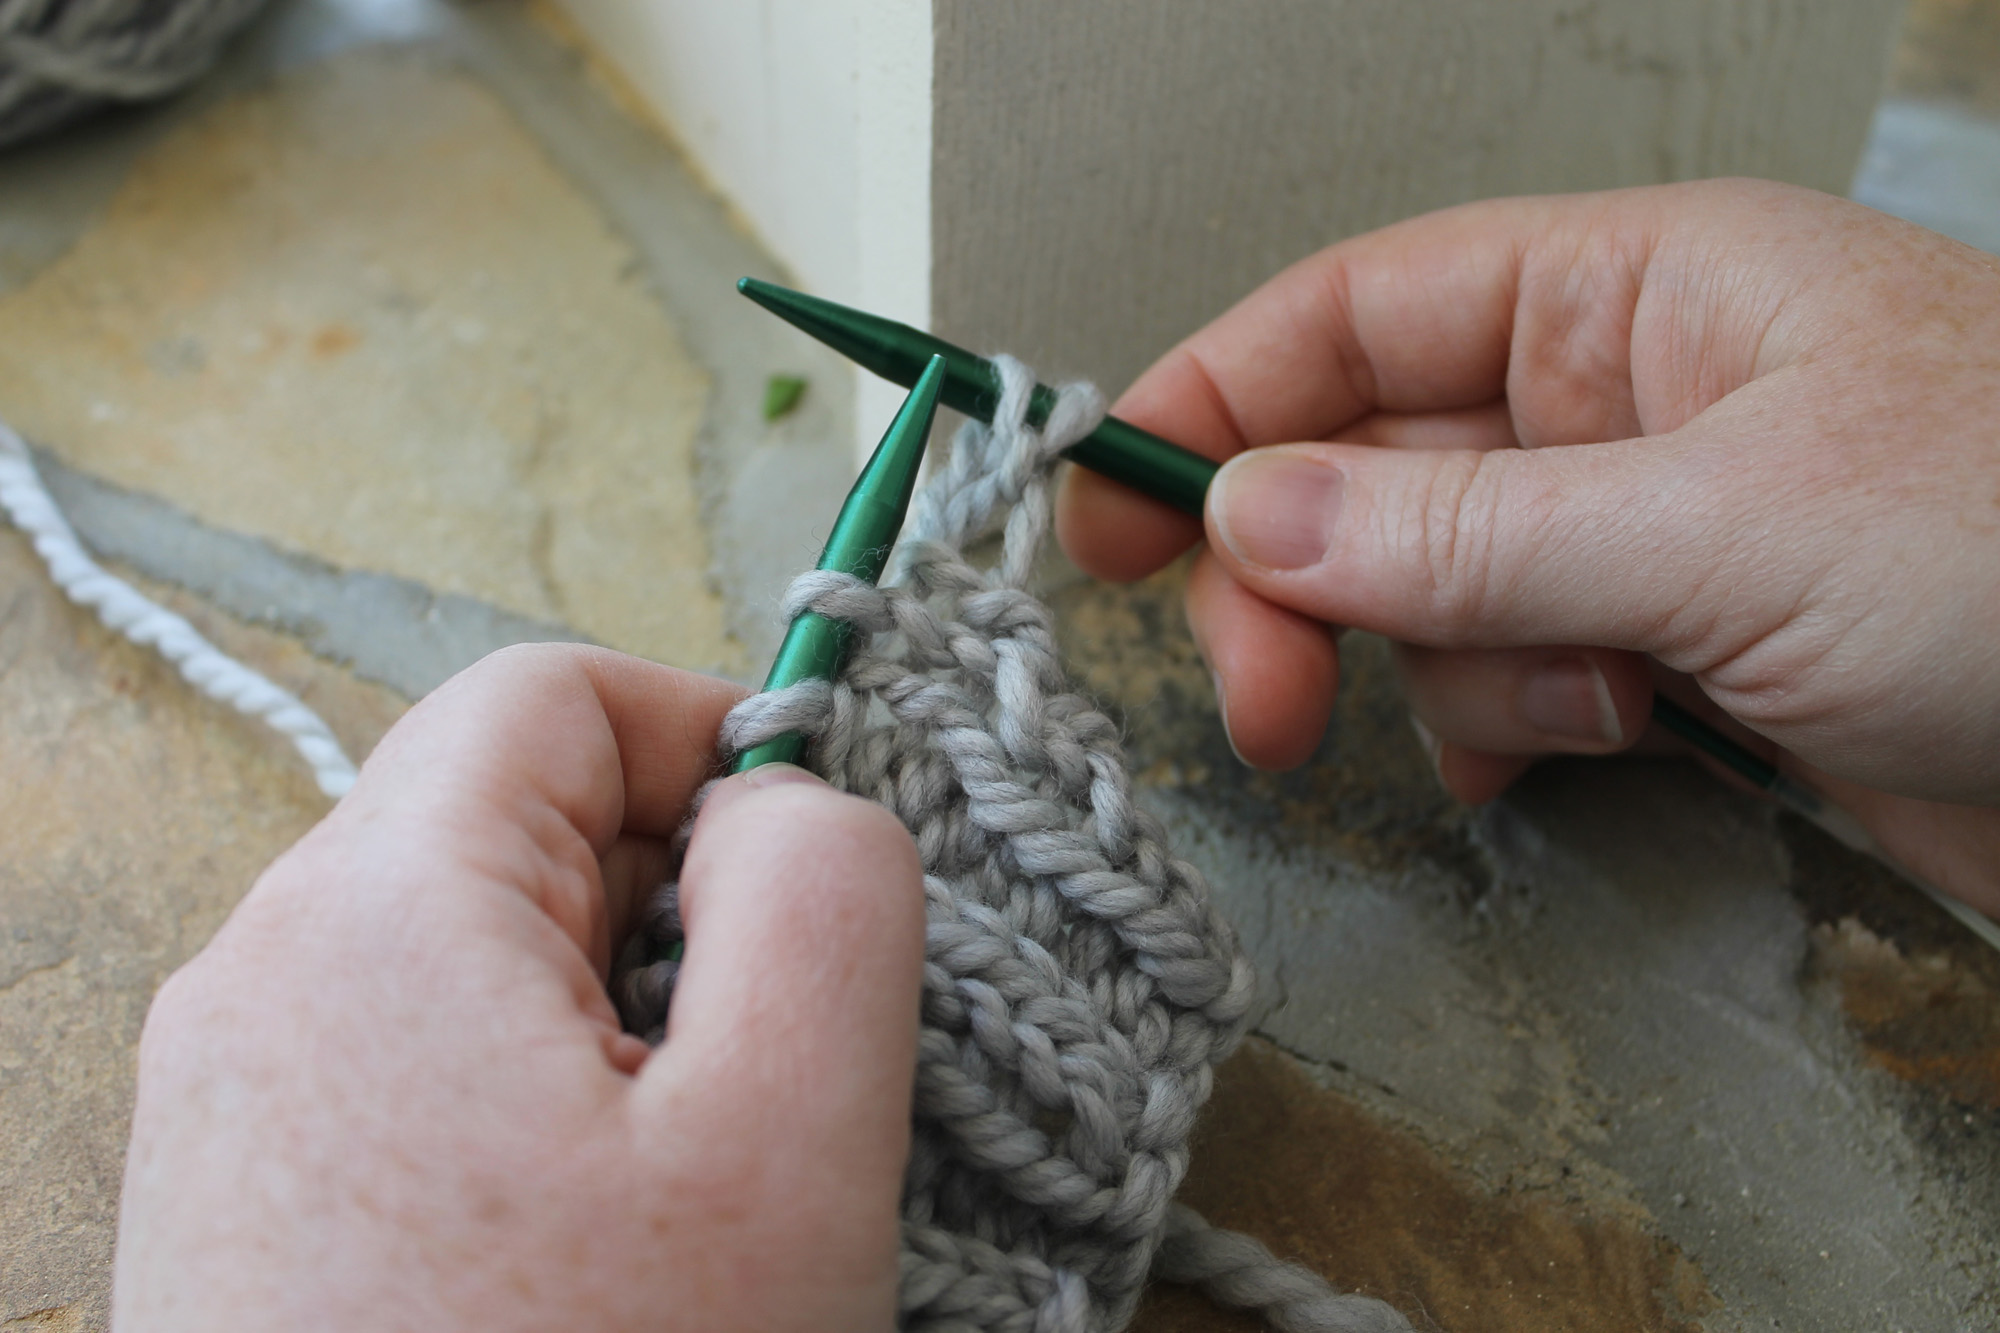
2. Knit the next stitch. You should now have two stitches on your right needle: the yarn over and the knit stitch pictured above. You’ve now prepped one knit stitch for the bind-off.
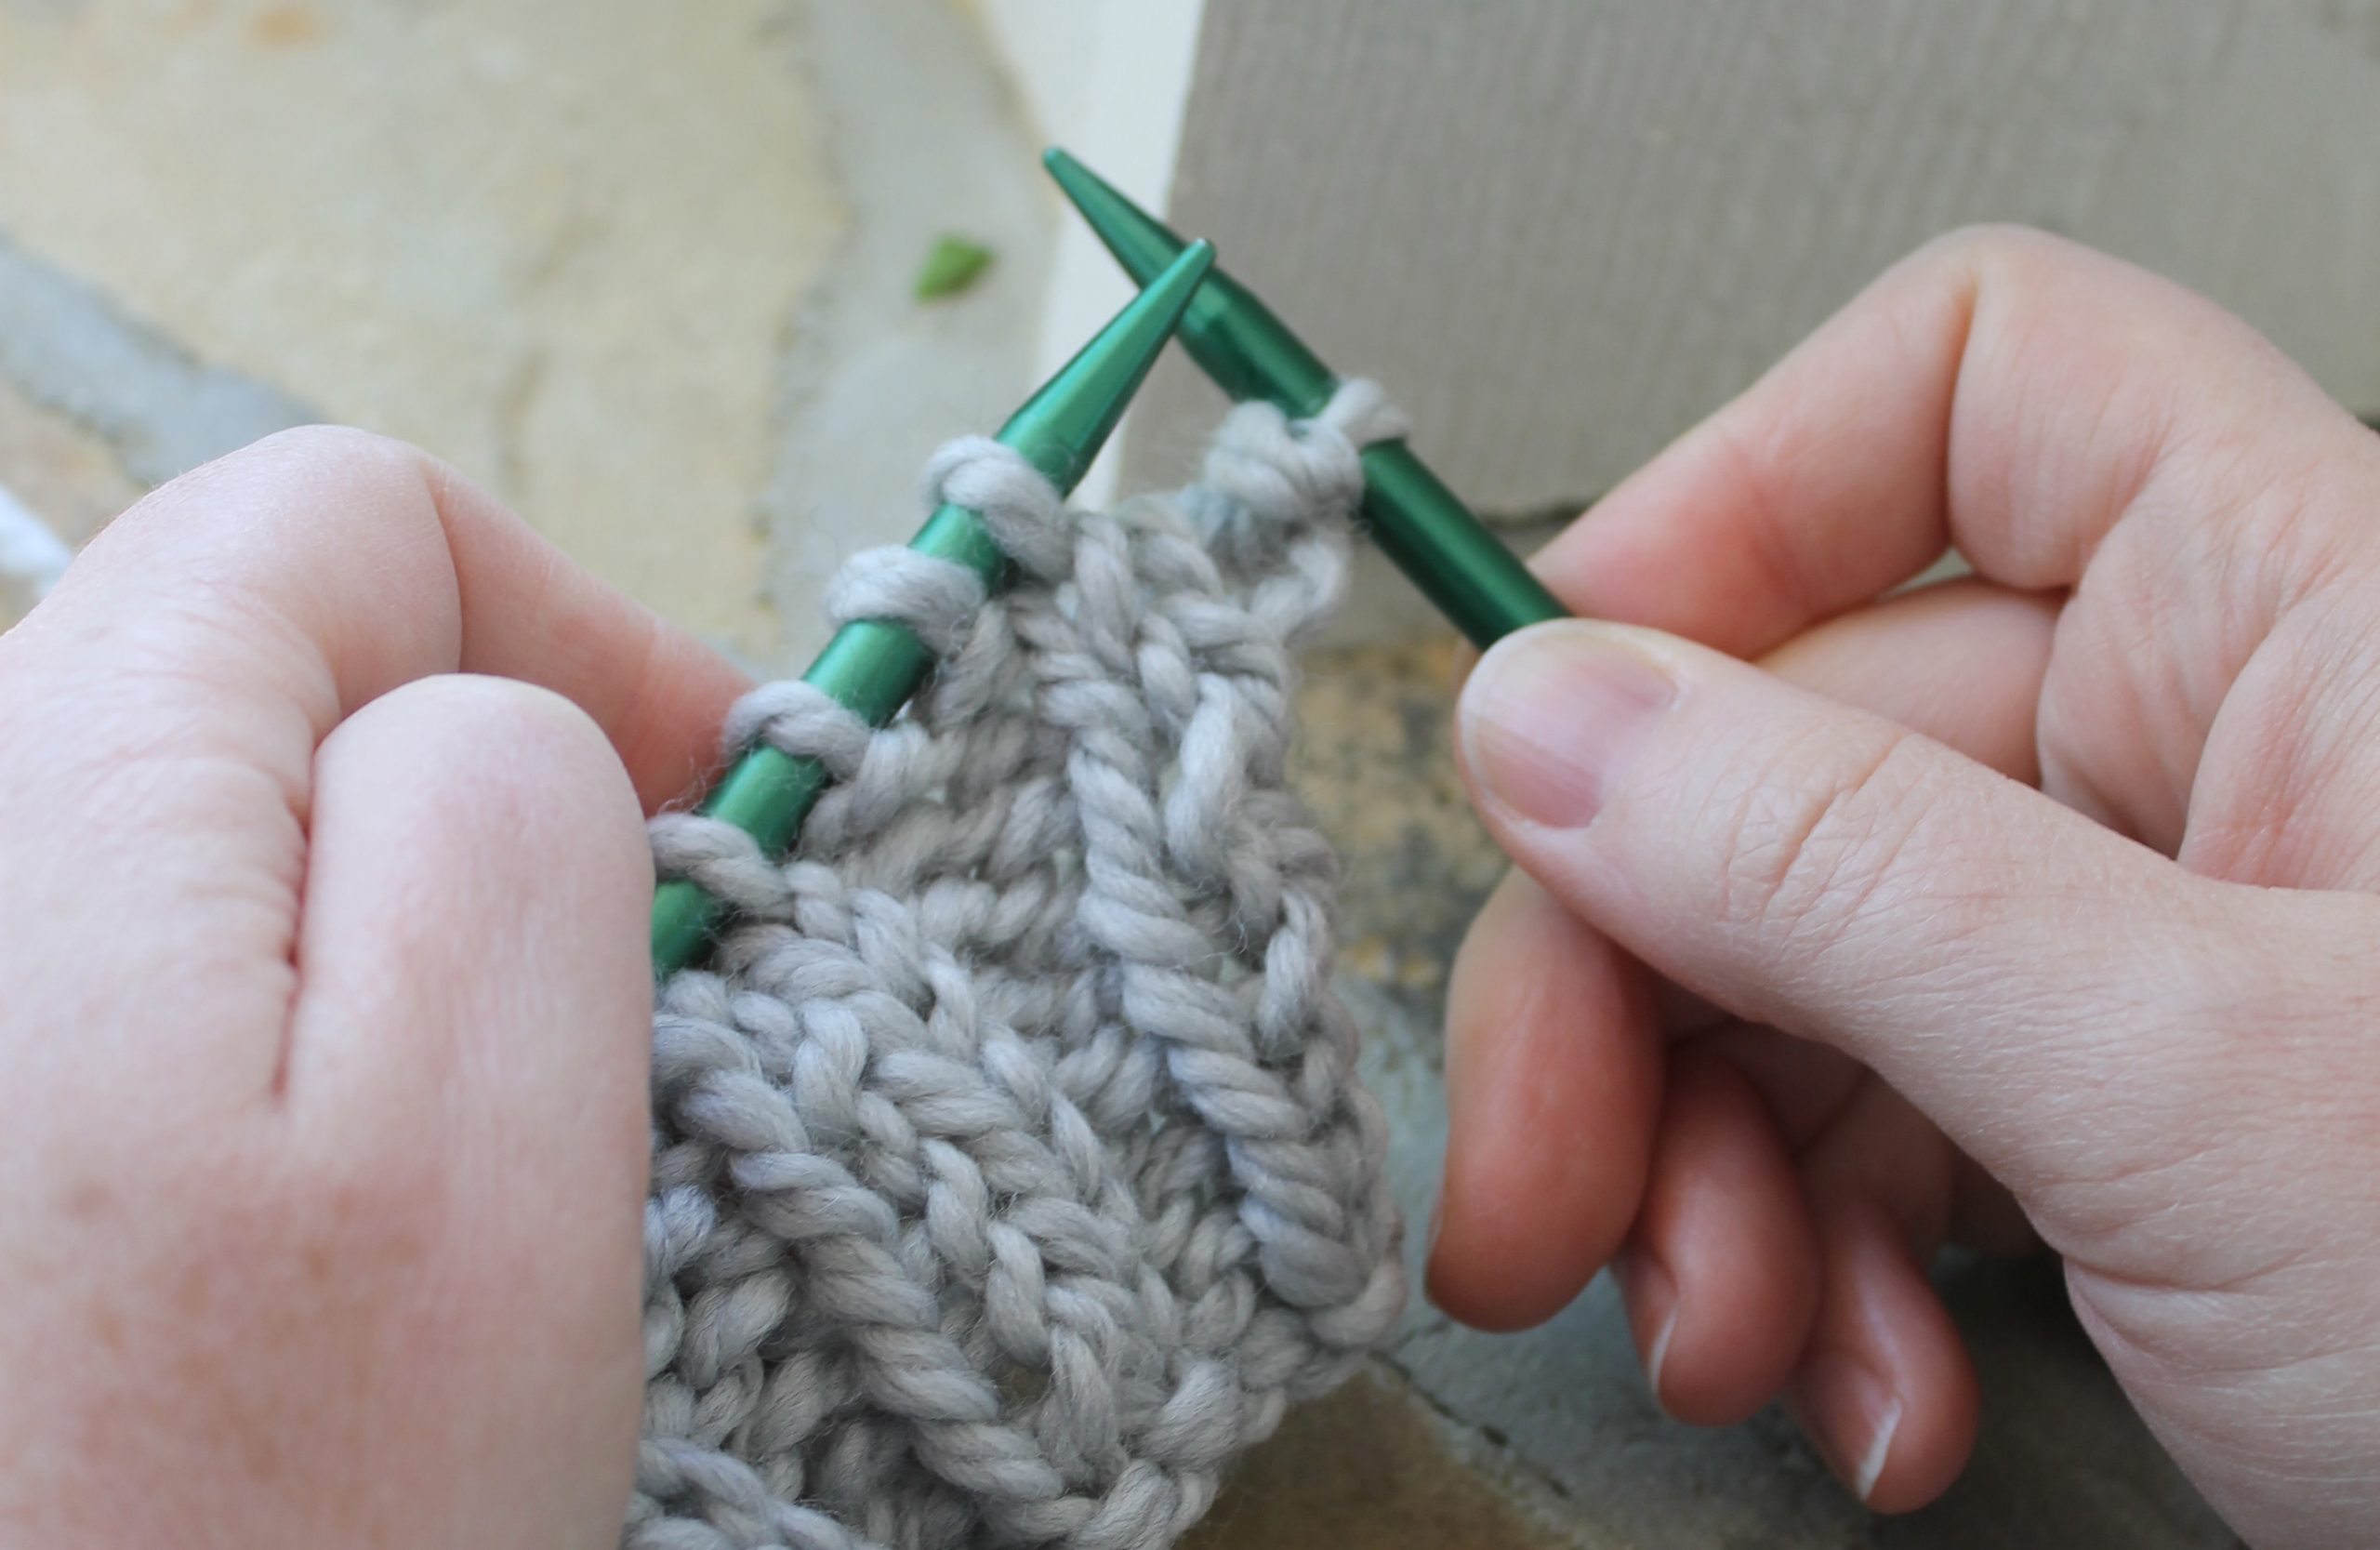
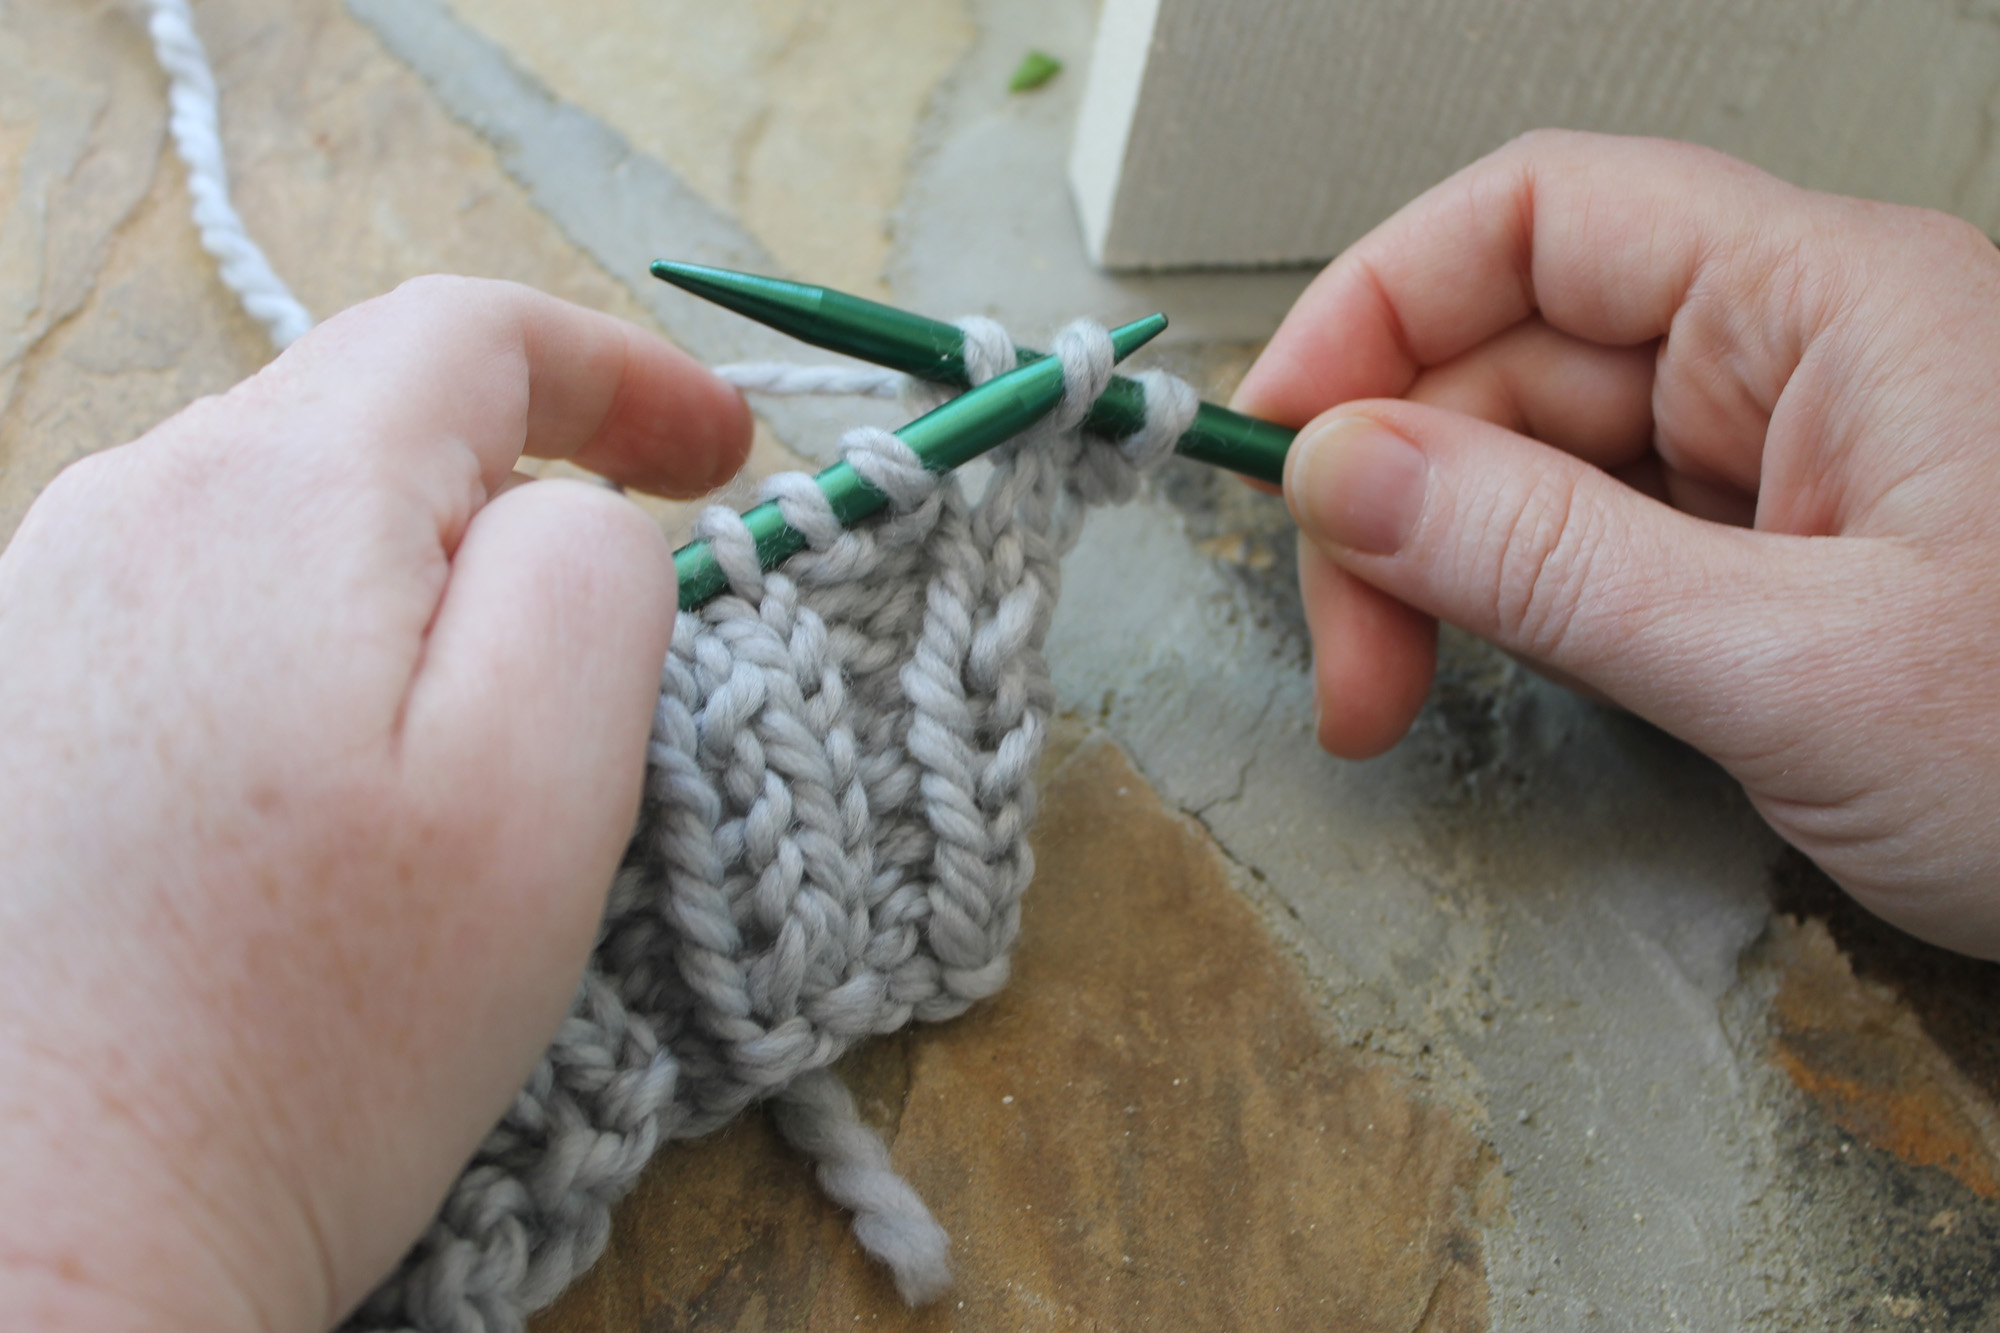
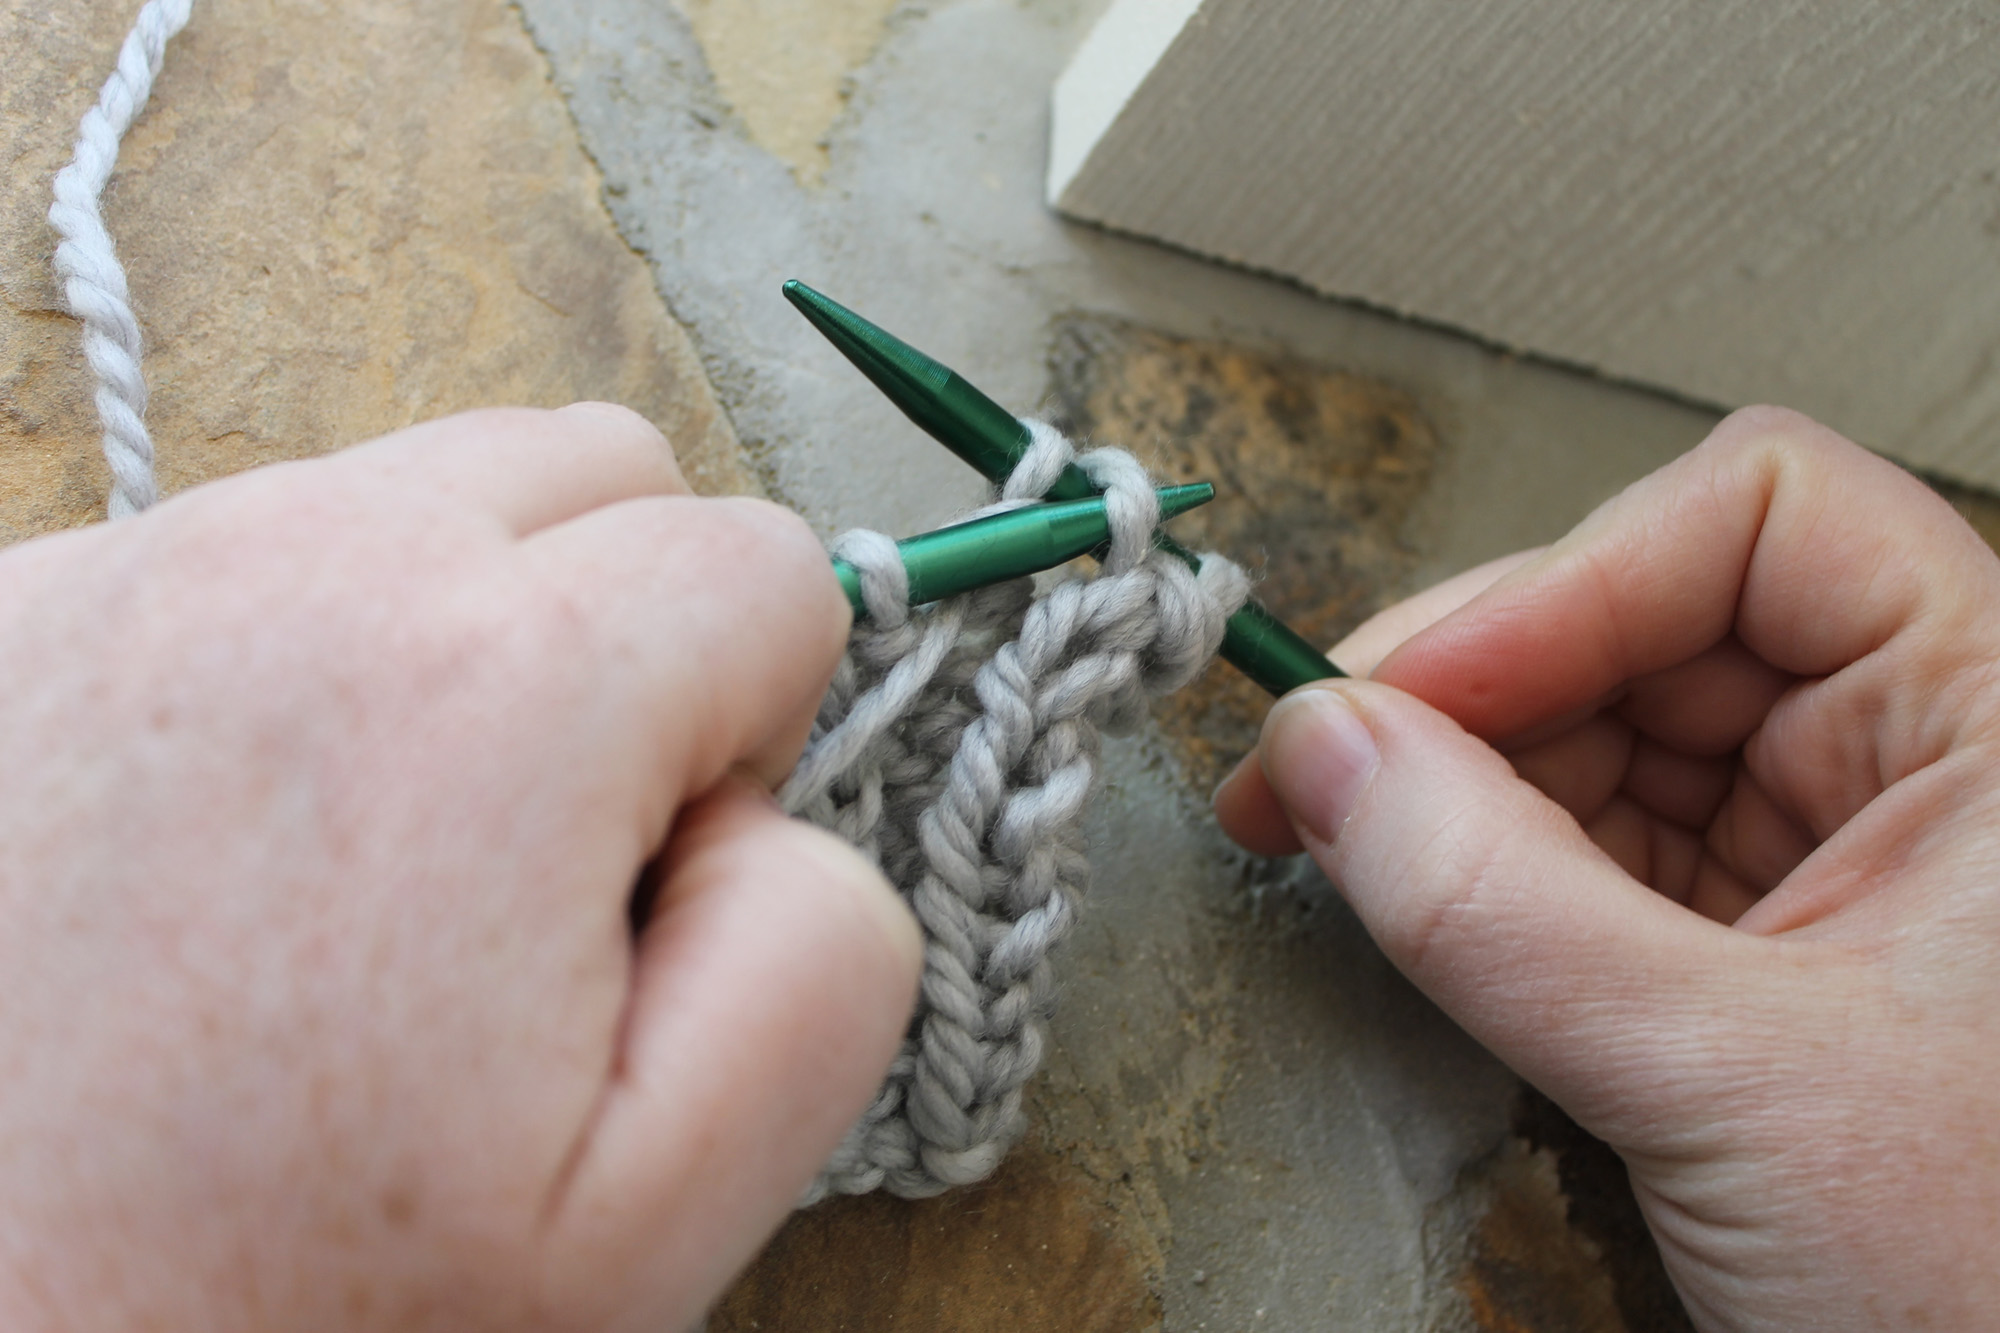
3. Insert the left needle into that first yarn over on the right needle. Pass it over the knit stitch. You should now have one stitch on your right needle.
4. Wrap a reverse yarn over.
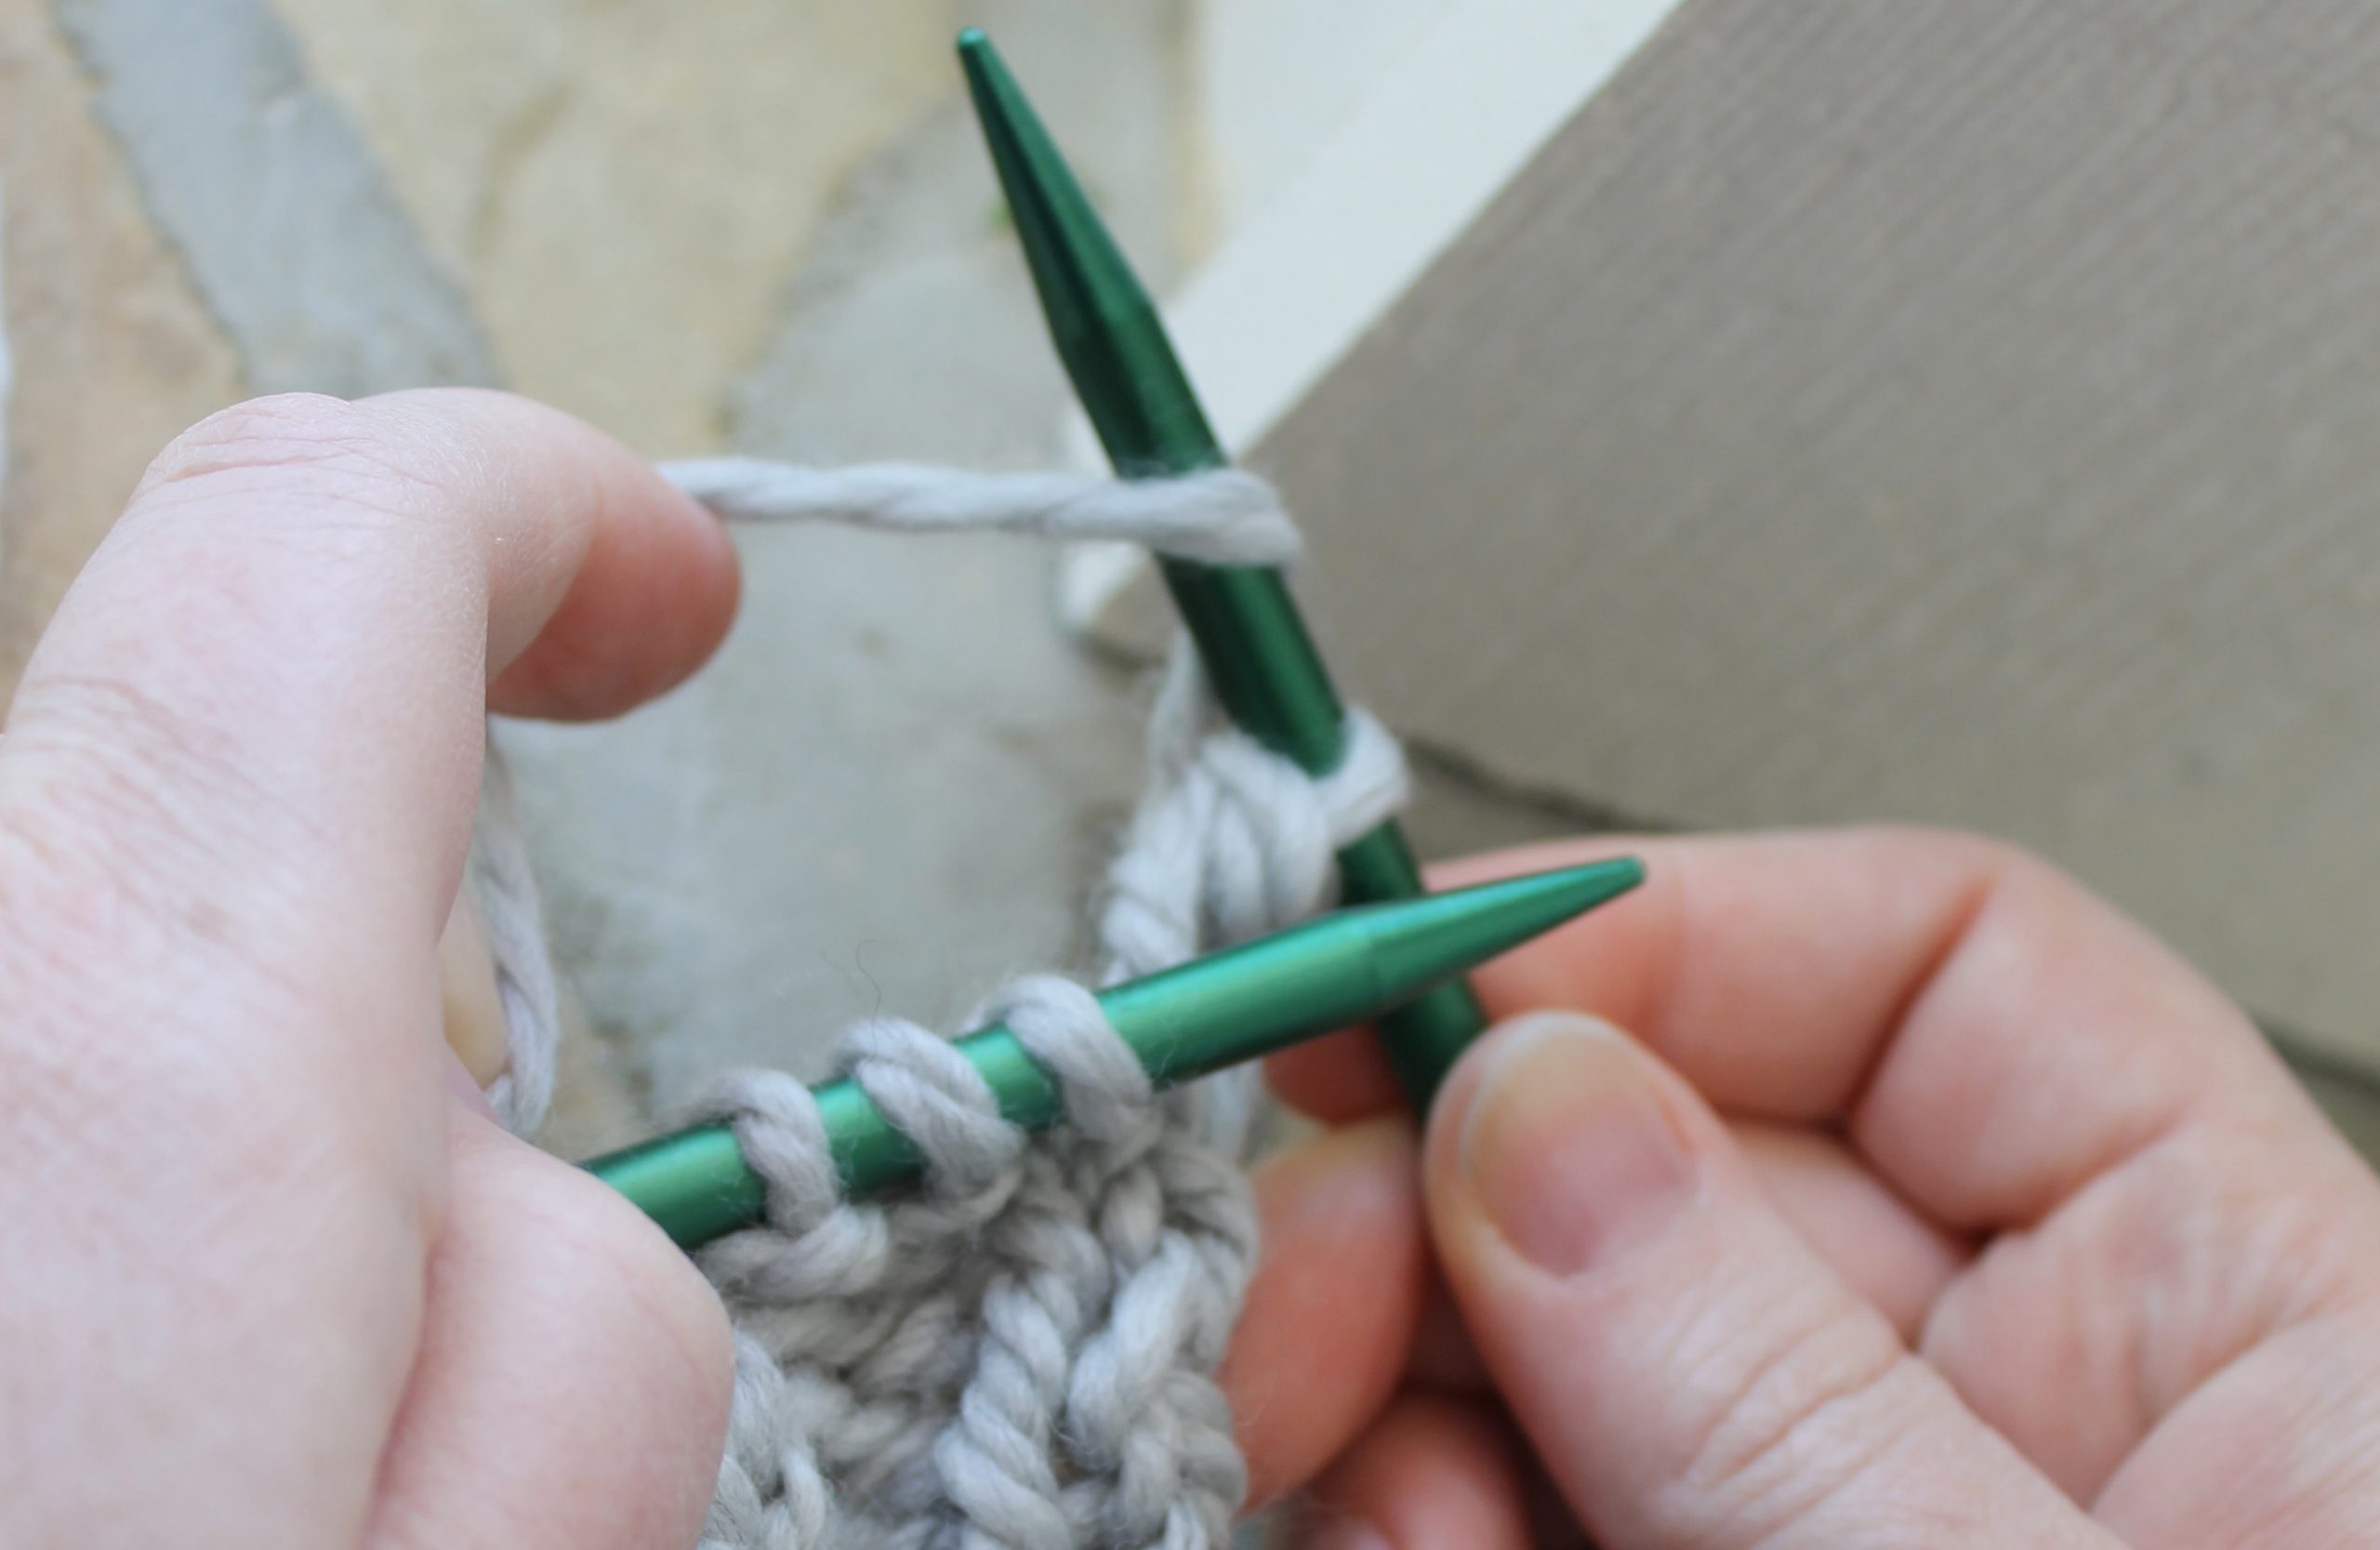
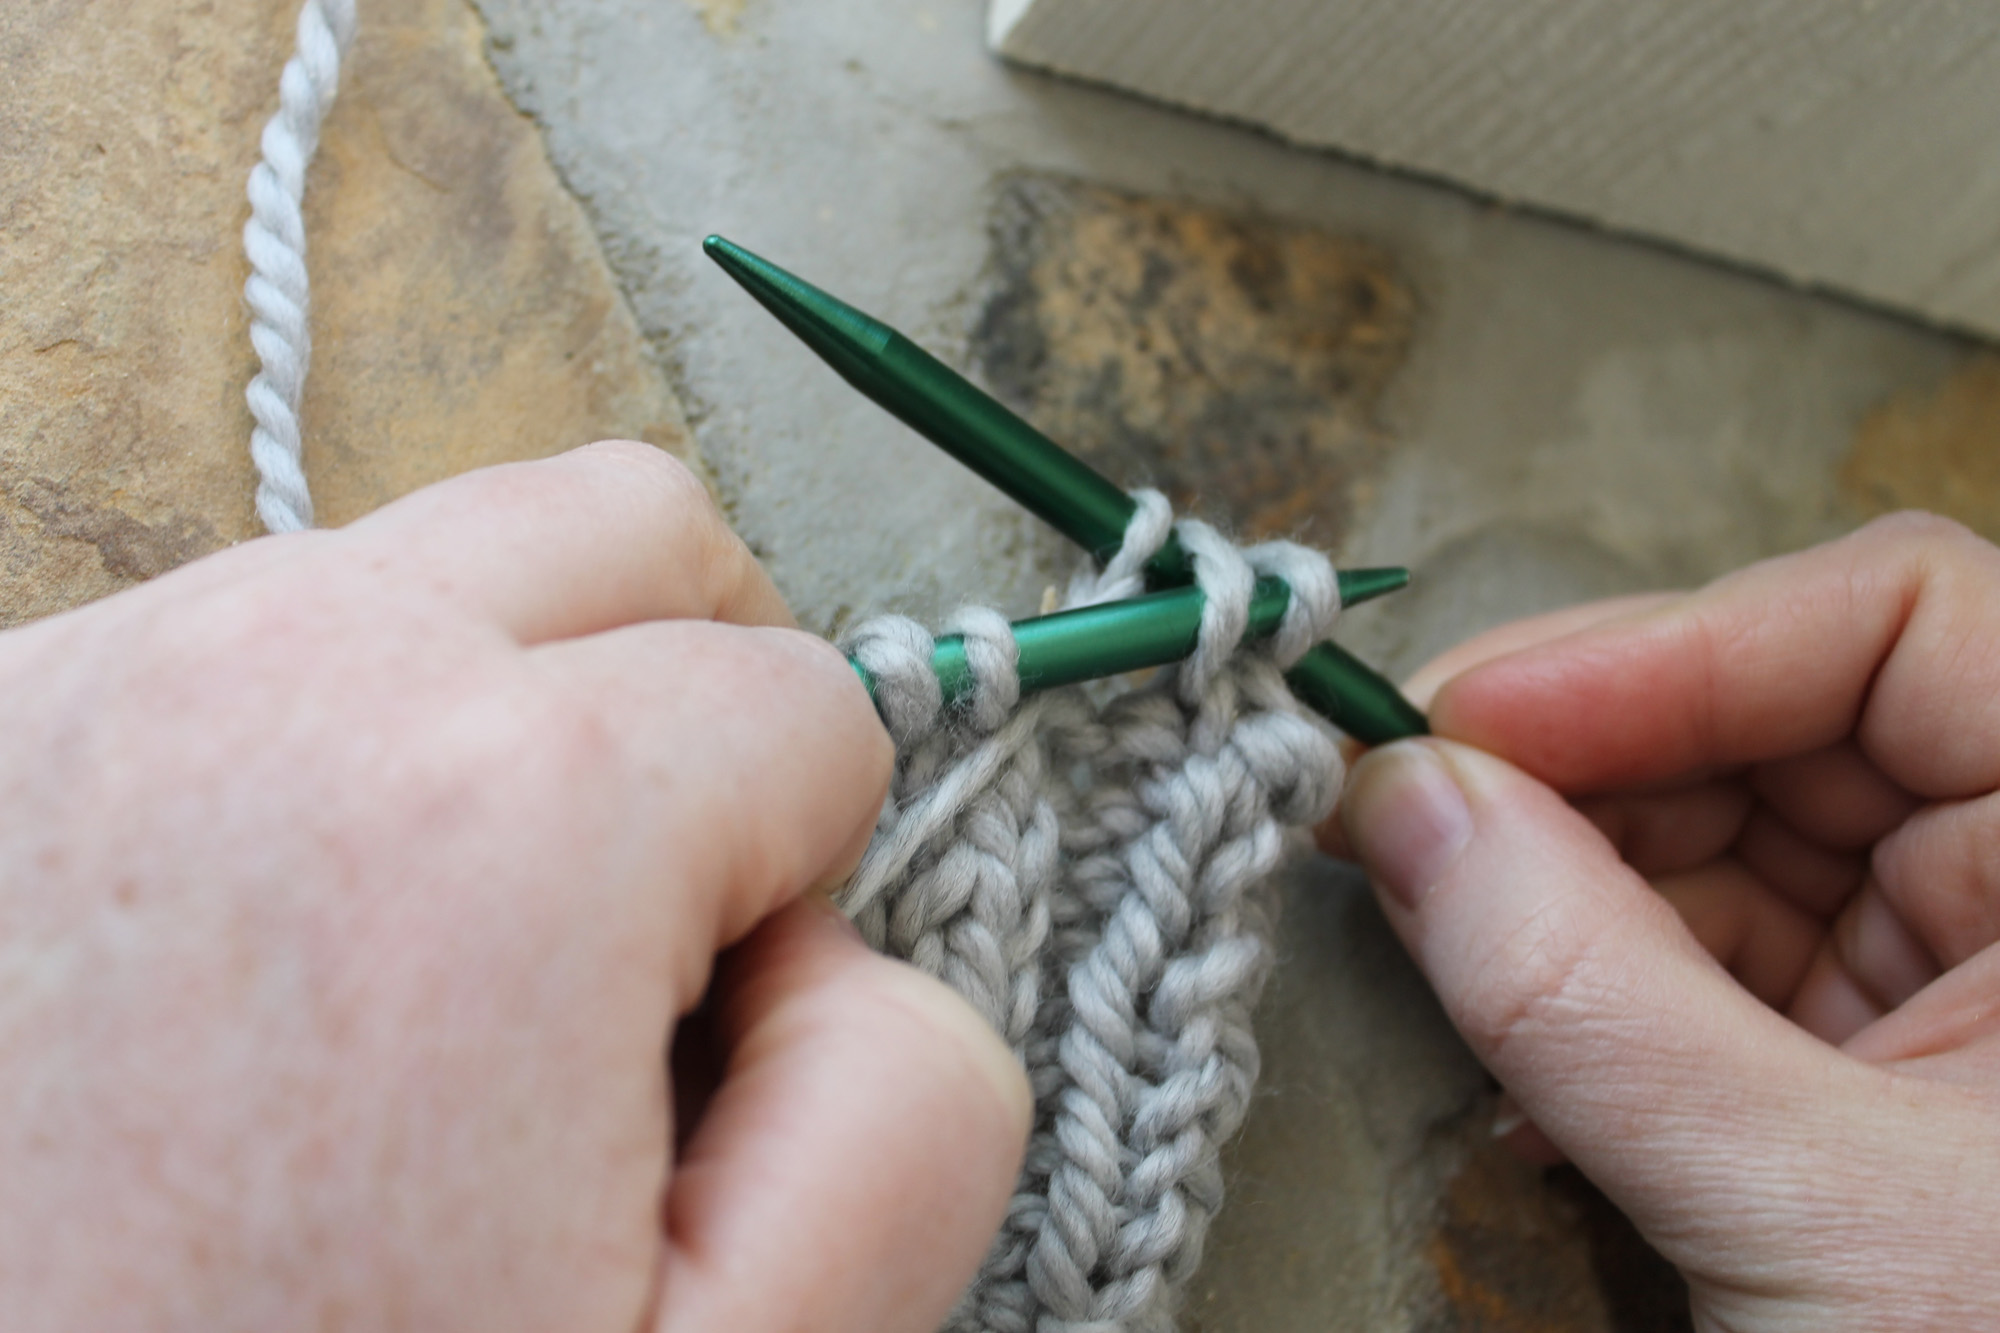
5. Knit the next stitch. You’ll now have three stitches on the right needle.
6. Pass over the yarn over. You’ll be leaving two stitches on your right needle.
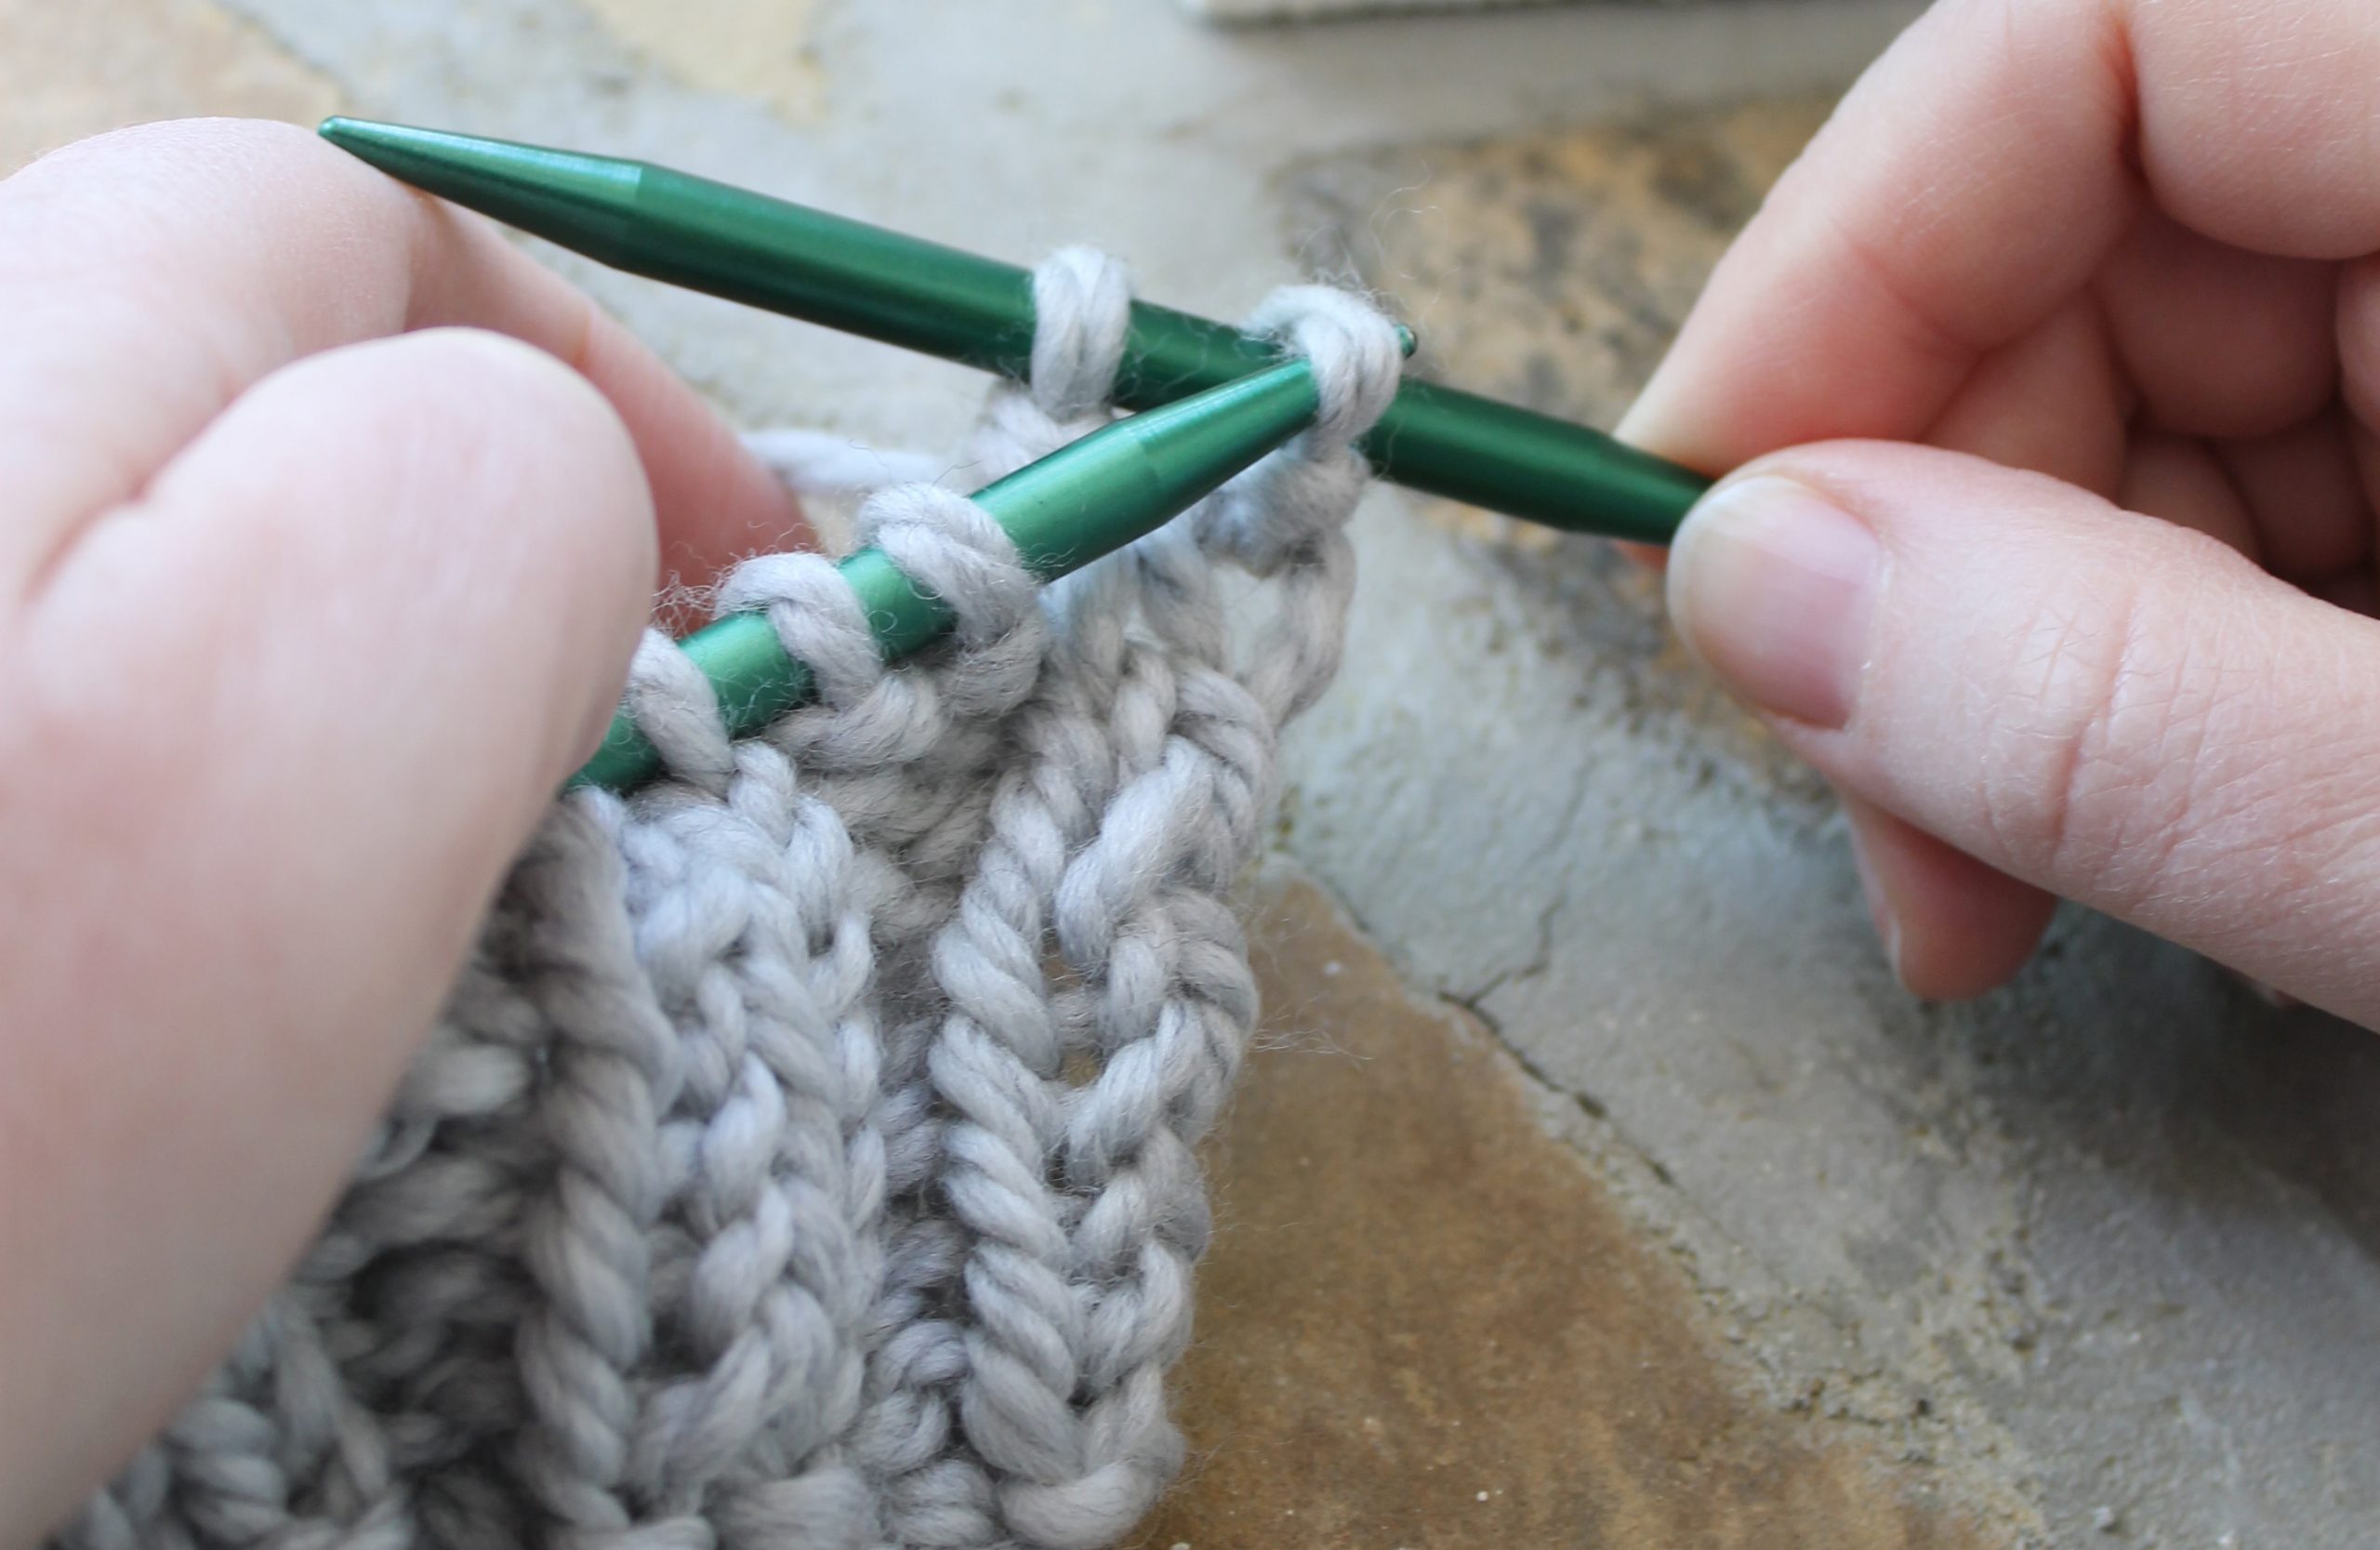
7. Pass the knit stitch over.
Now you should have just one stitch on your needle.
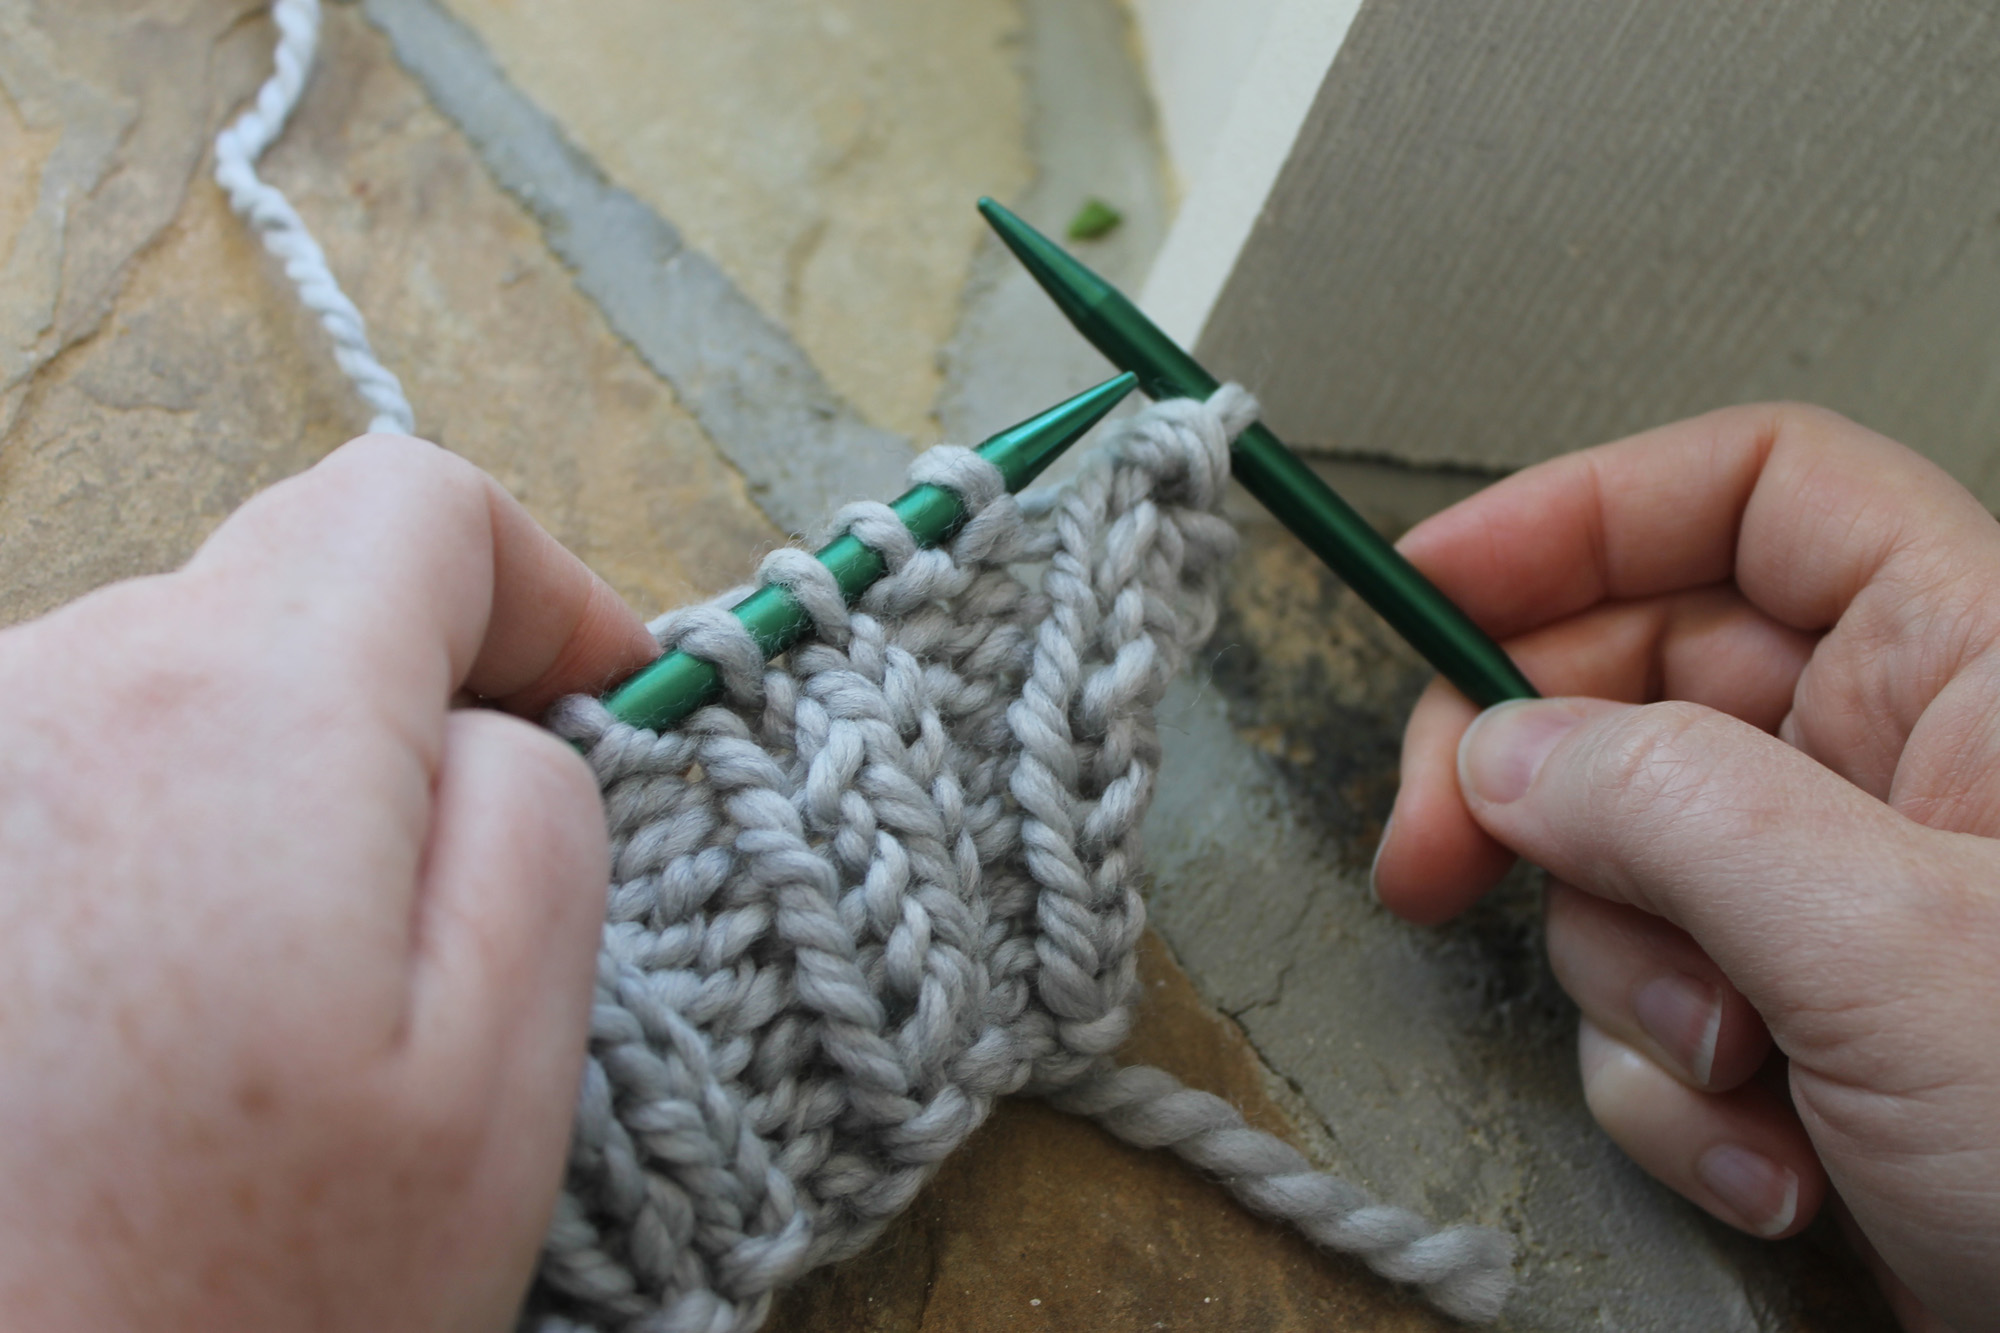
8. A purl stitch works exactly the same way, except you use a regular yarn over instead of a reverse one. So wrap the yarn around your needle, then purl the next stitch. At this point, you’ll have three stitches on your right needle.
9. Pass the knit stitch over the purl stitch. If you want to speed up the process, you can pass the yarn over and the previous stitch over at the same time.
10. Repeat these steps across the row. You’ll always be wrapping the appropriate yarn over before you knit or purl a stitch. When you only have one stitch left on your needle, cut the yarn and slip it through the last stitch, just as you normally would after binding off. And you’re done!
As you may have noticed, the basic idea behind Jeny’s Surprisingly Stretchy Bind-Off is that each stitch gets a yarn over before it — a reverse yarn over before a knit stitch, and a regular yarn over before a purl stitch. Each time you wrap a yarn over, you should have just one stitch on the right needle, plus the yarn over.
Don’t get frustrated if you don’t remember all the steps at first; the method can seem overwhelming before you dive in. But after you do it a few times you’ll have it down pat!
Thank you for the help!