
It’s always fun to try new things with your crochet, and lately we’ve been experimenting a lot with surface crochet.
Surface crochet is a great way to add designs and a bit of texture to your finished projects. It looks like a chain stitch on top of your usual crochet stitches, and crocheters of any level will be able to do it.
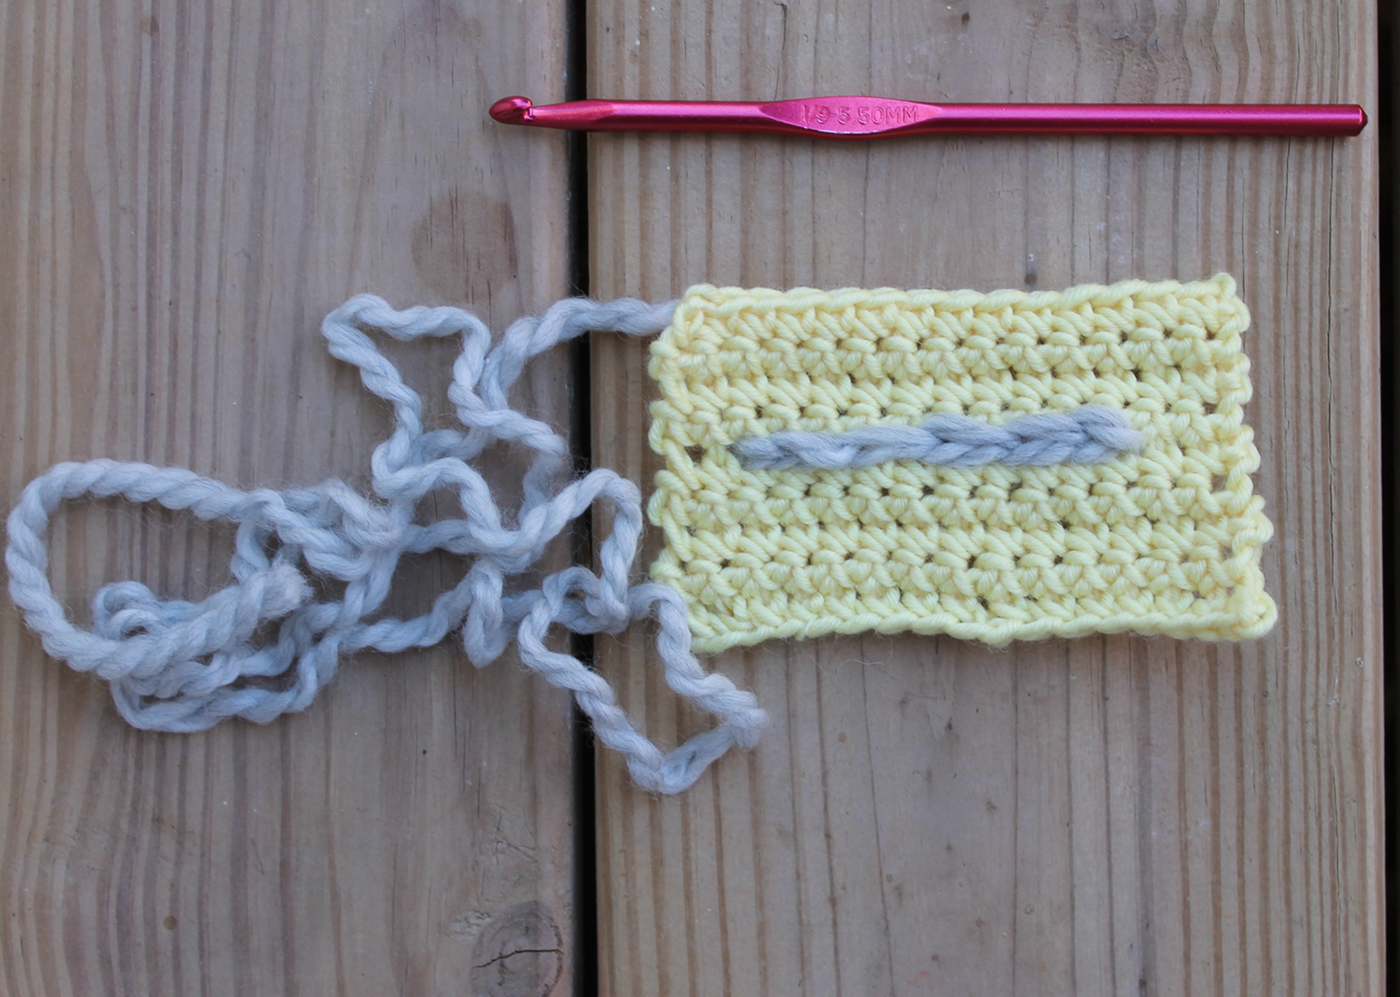
Surface crochet adds lines, color, texture and creative design to your already stitched crochet.
What is surface crochet?
Surface crochet is added to an already crocheted fabric. You can use it to create a design or simple lines right on top of the original stitches.
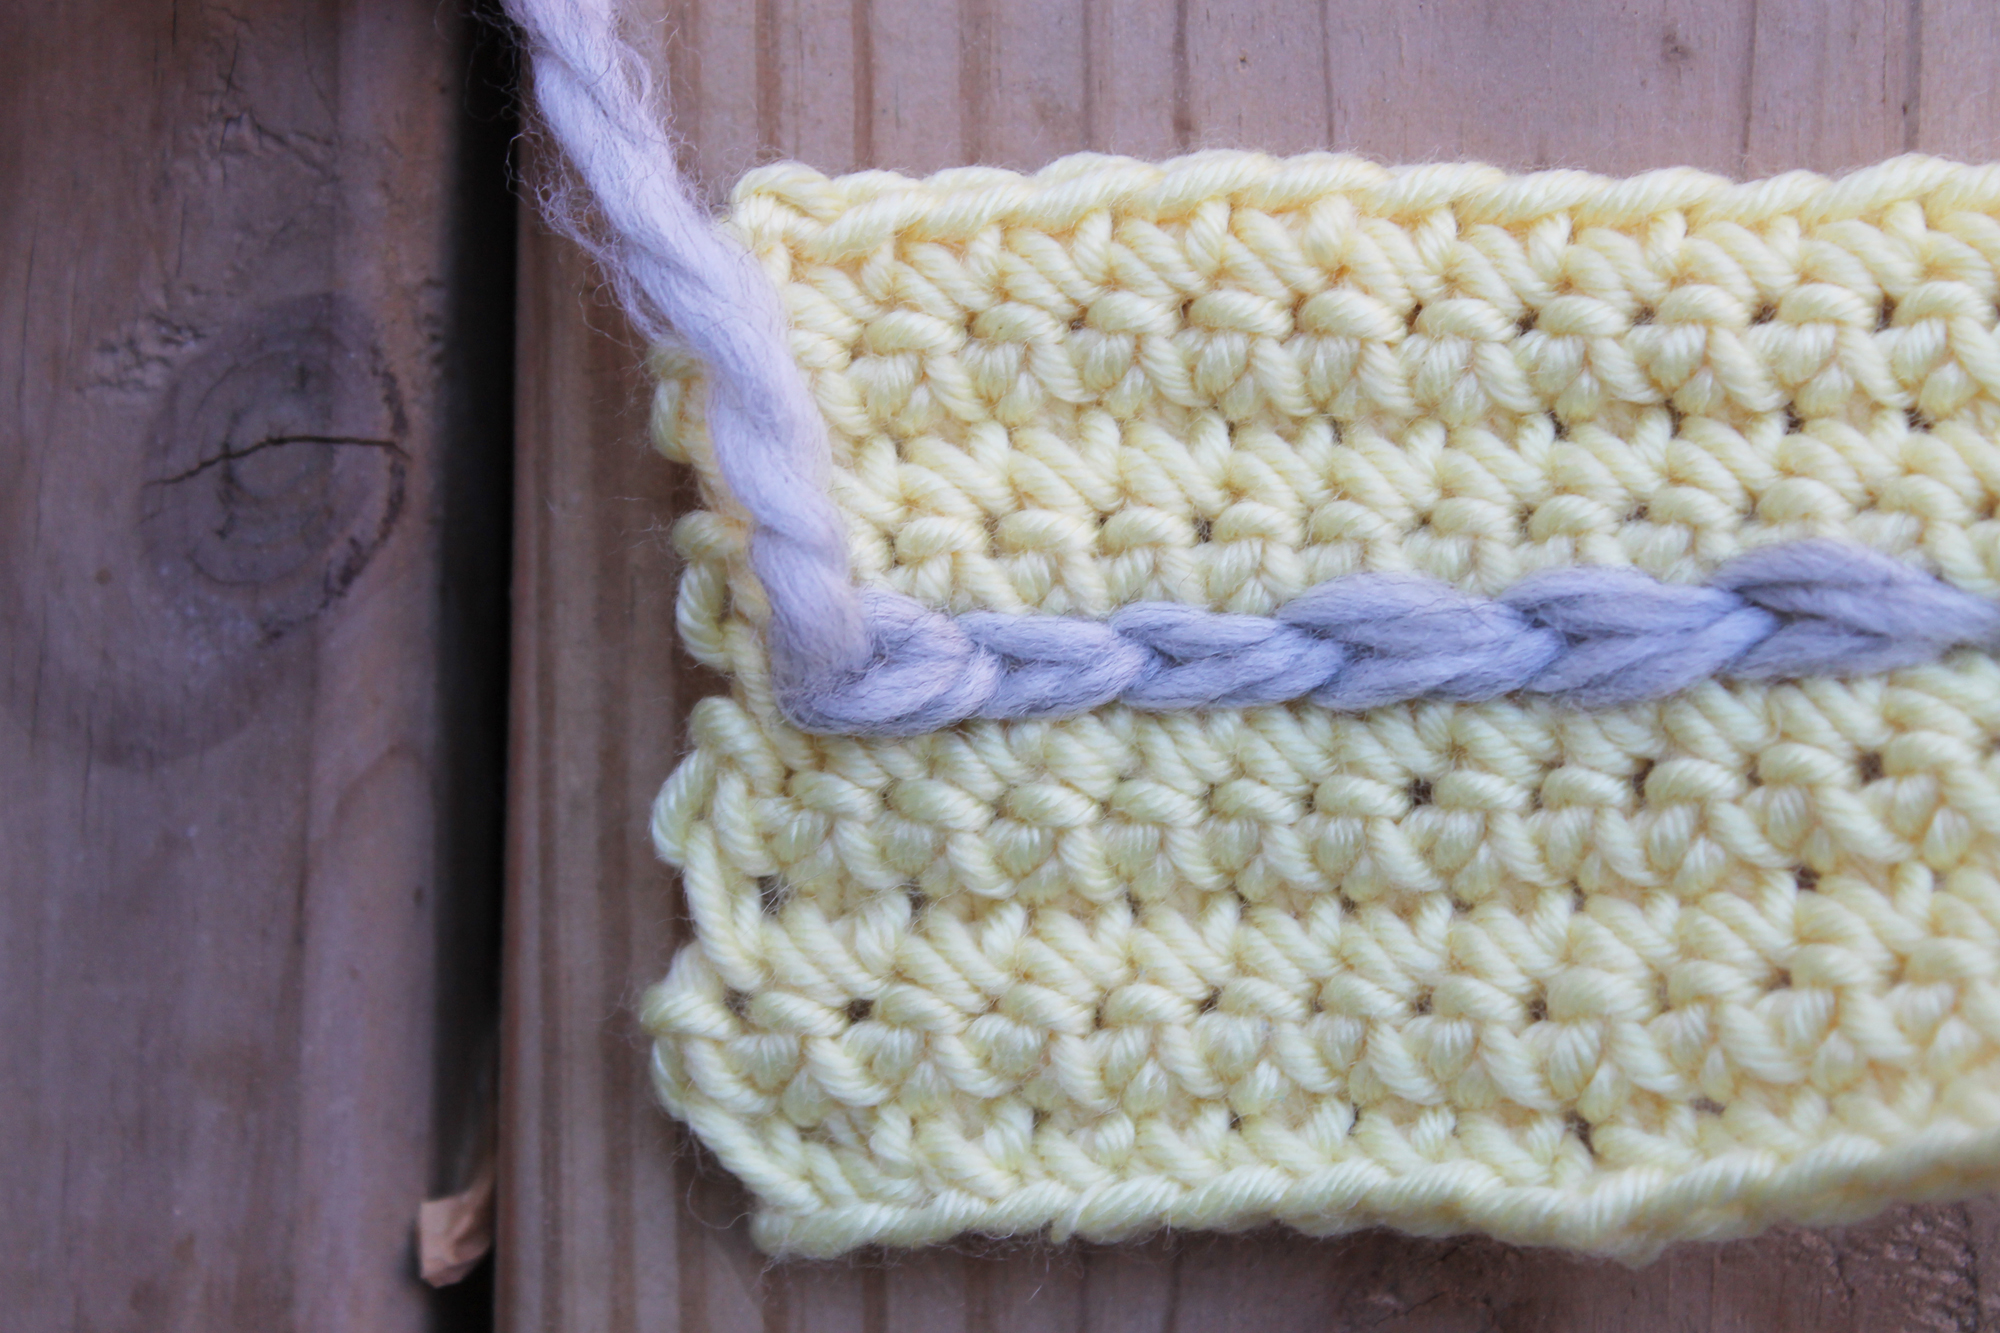
The stitch looks like a chain stitch that just hangs out right on top of your work. The stitches are raised just a bit off the surface, which gives your piece a nice variation in texture.
When to use surface crochet
Surface crochet is best on single crochet fabrics. That’s because single crochet stitches are close together, with no gaps or holes in between where your surface crochet stitches could get lost.
You can also use surface crochet on knitted items like sweaters. It’s perfect for breathing new life into an old second-hand sweater that you don’t like to wear anymore, for example.
Surface crochet works great on plain, solid-colored projects, since the new stitches can stand out and don’t get lose among a lot of color.
Ready to try surface crochet? Follow along to add lines and designs to your projects.
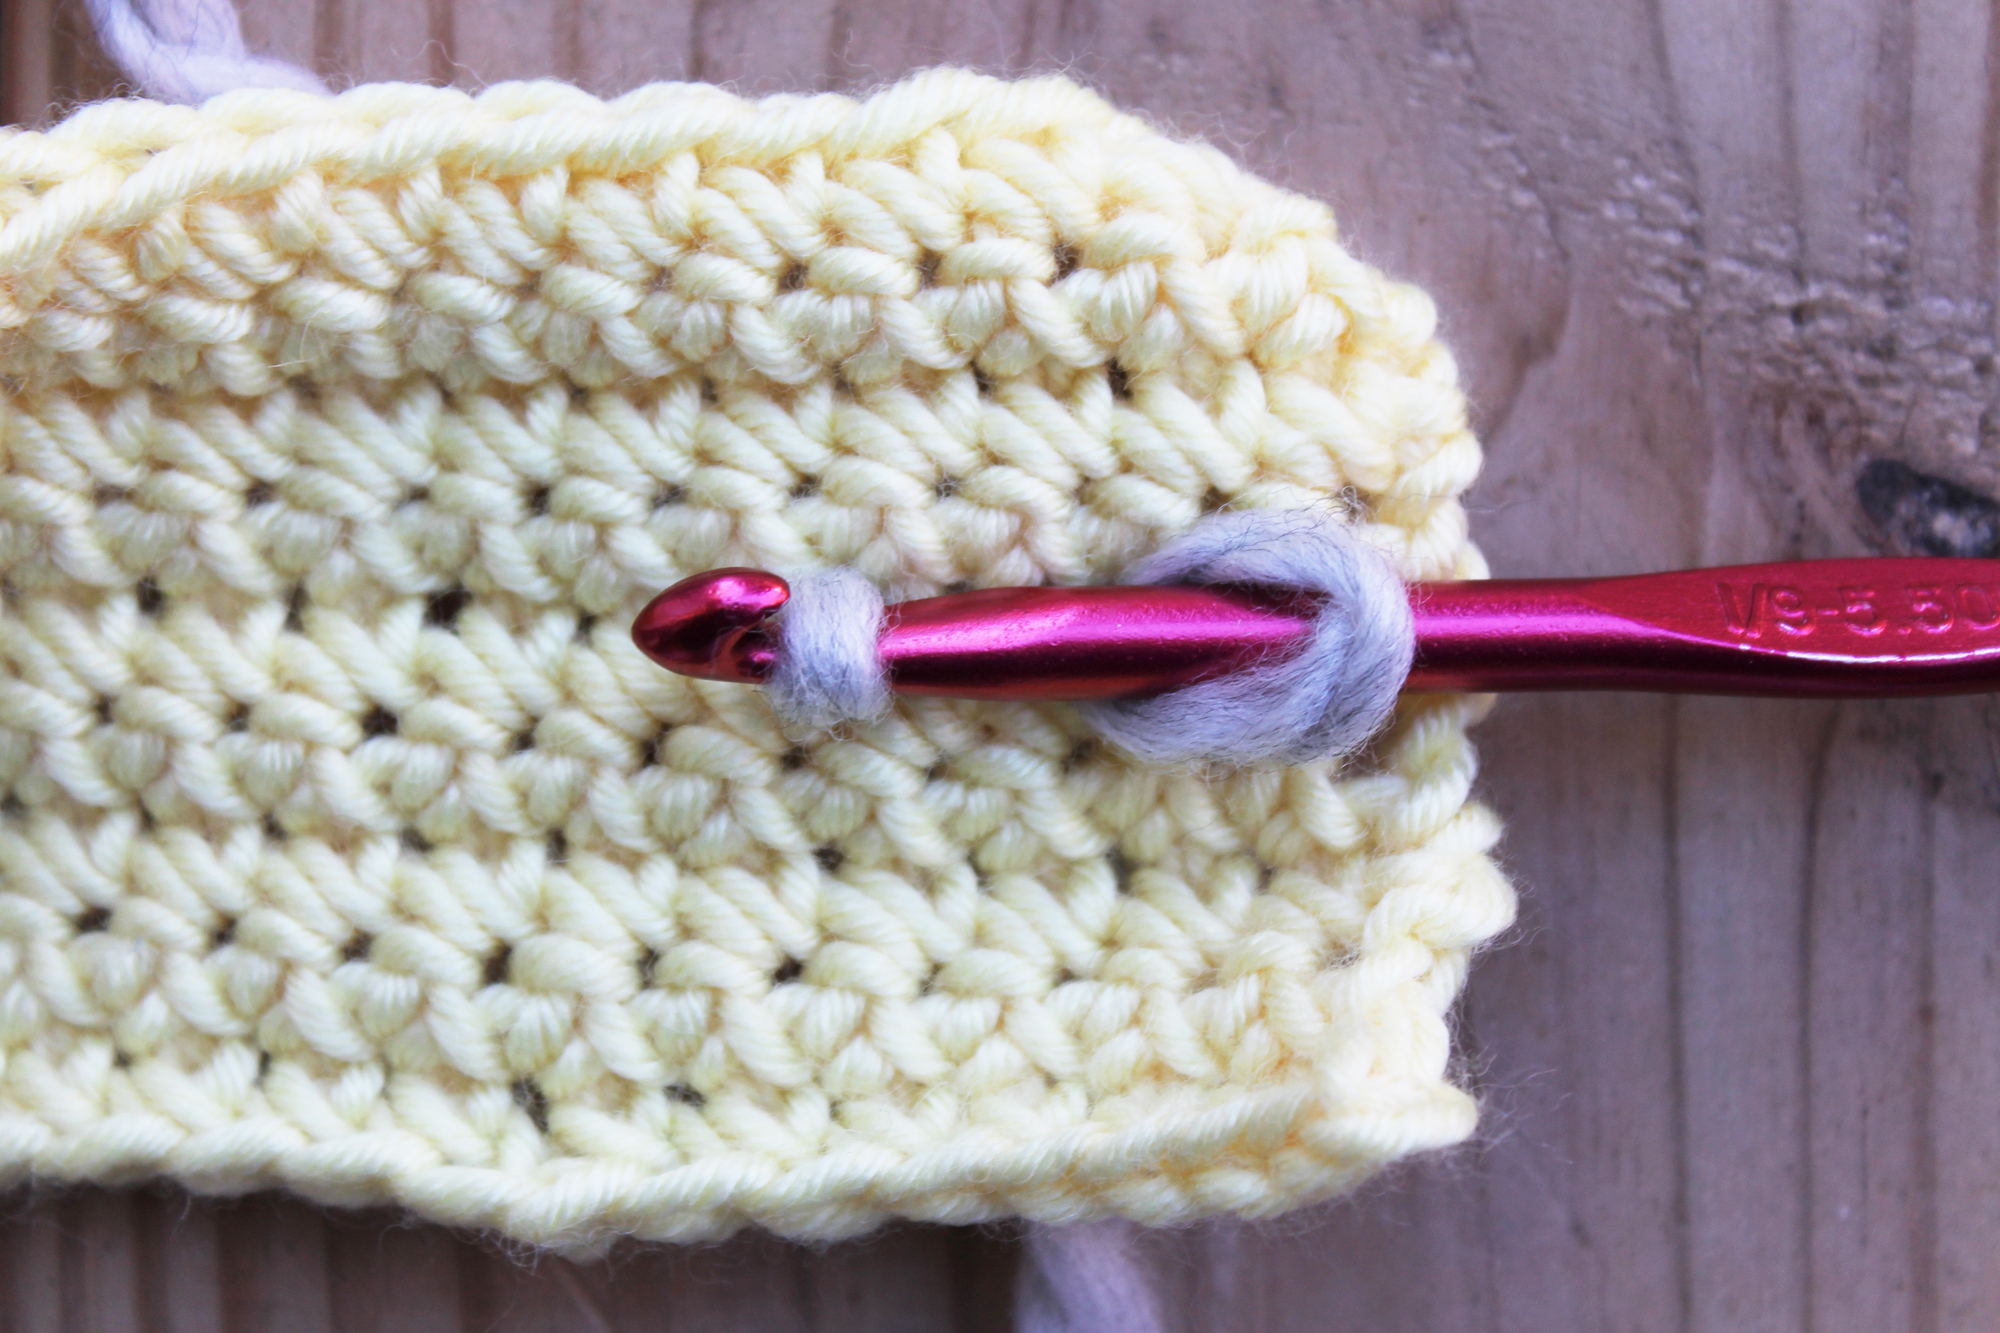
Insert your hook from front to back into the place where you want to begin your line of stitching. Fold the working yarn in half over the hook.
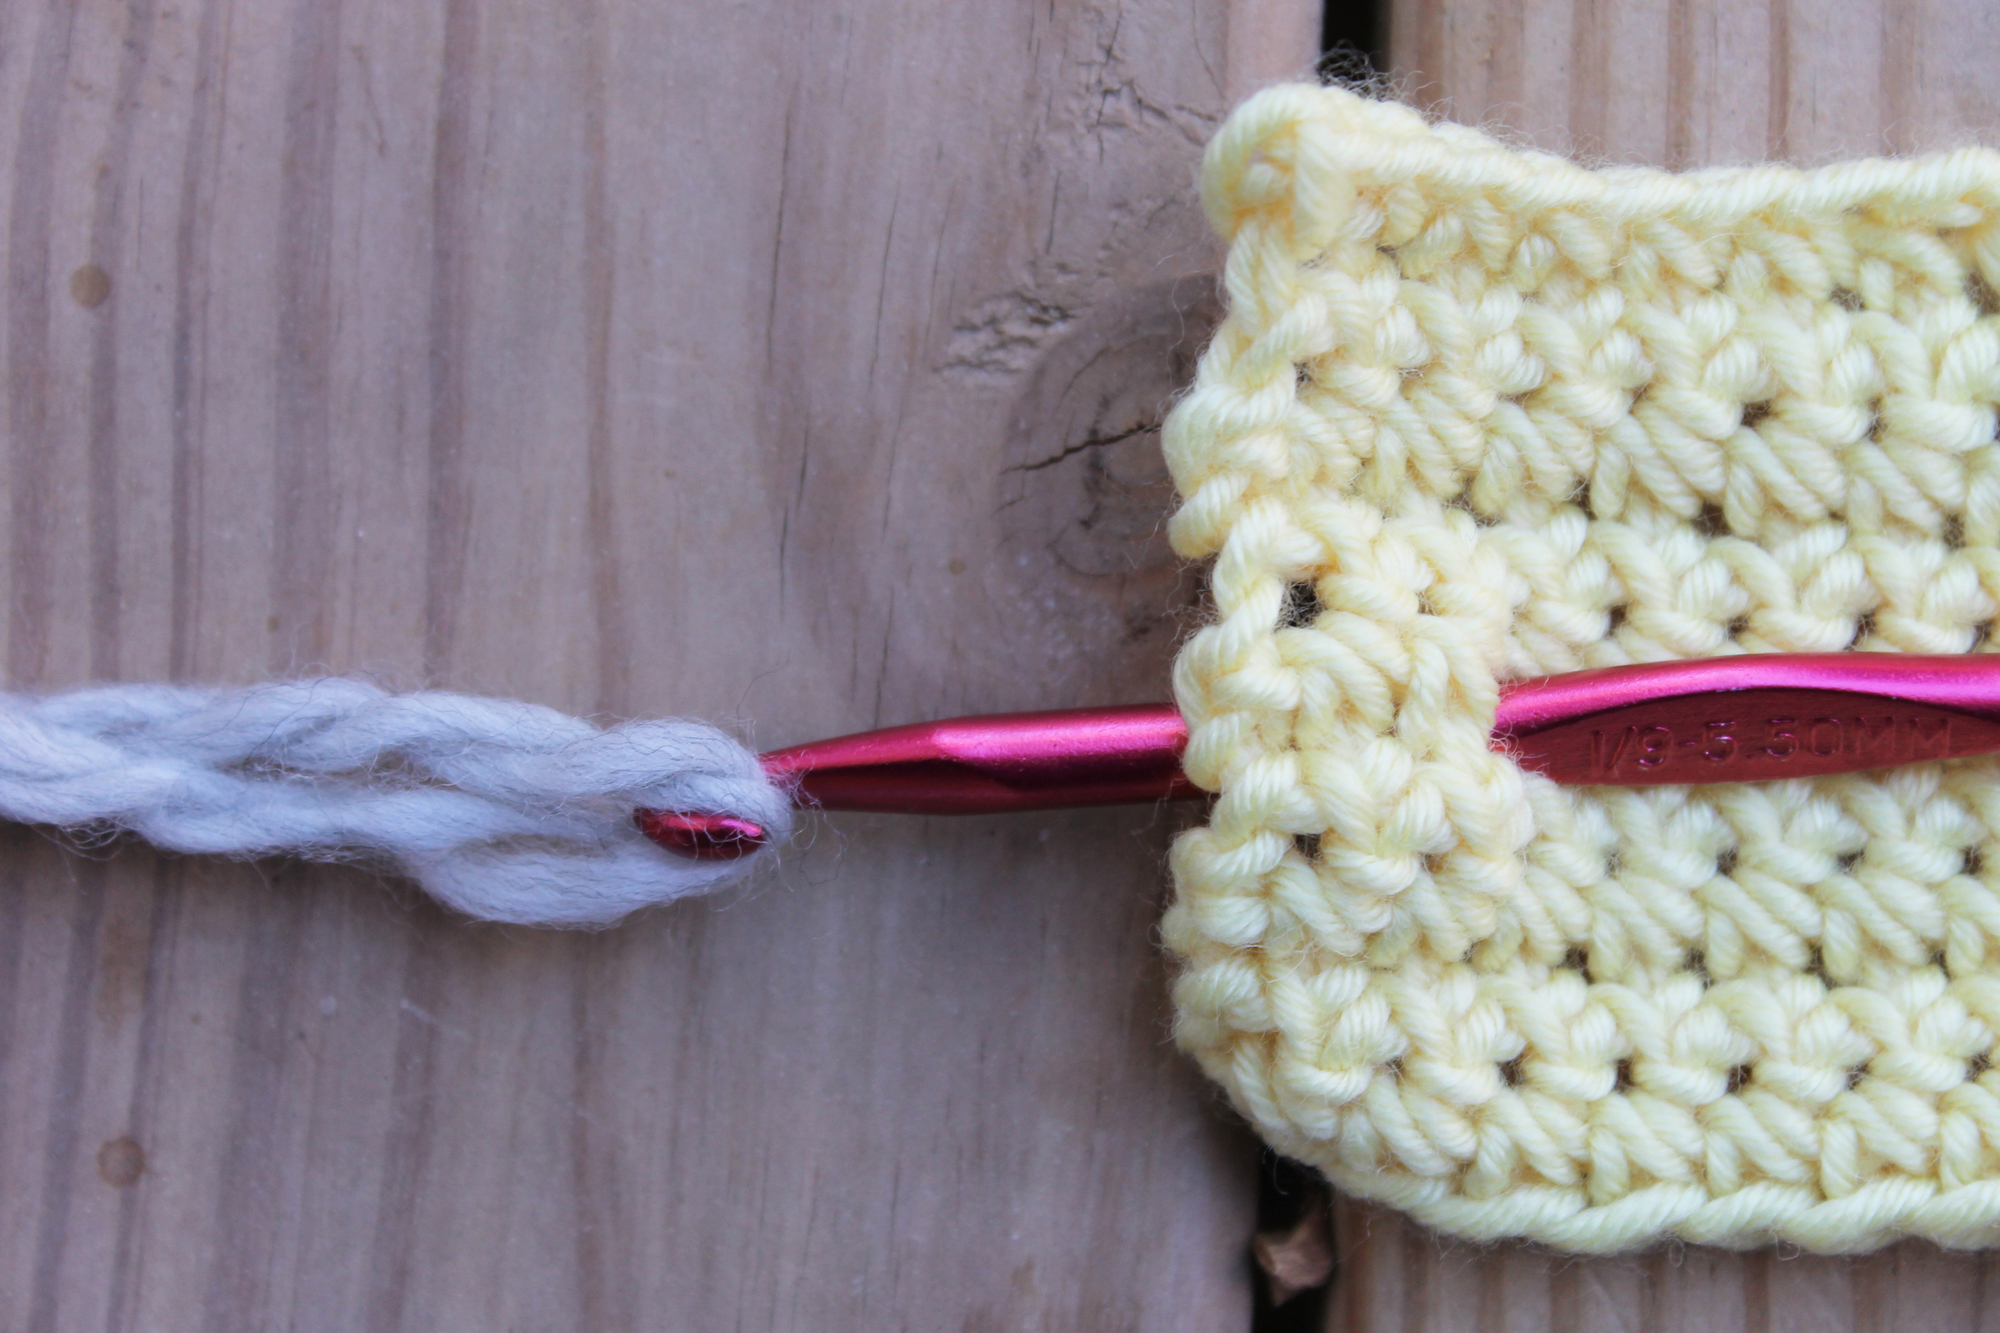
Pull the loop through the work to the right side, leaving the tail in the back of the work. (You’ll secure it later.)
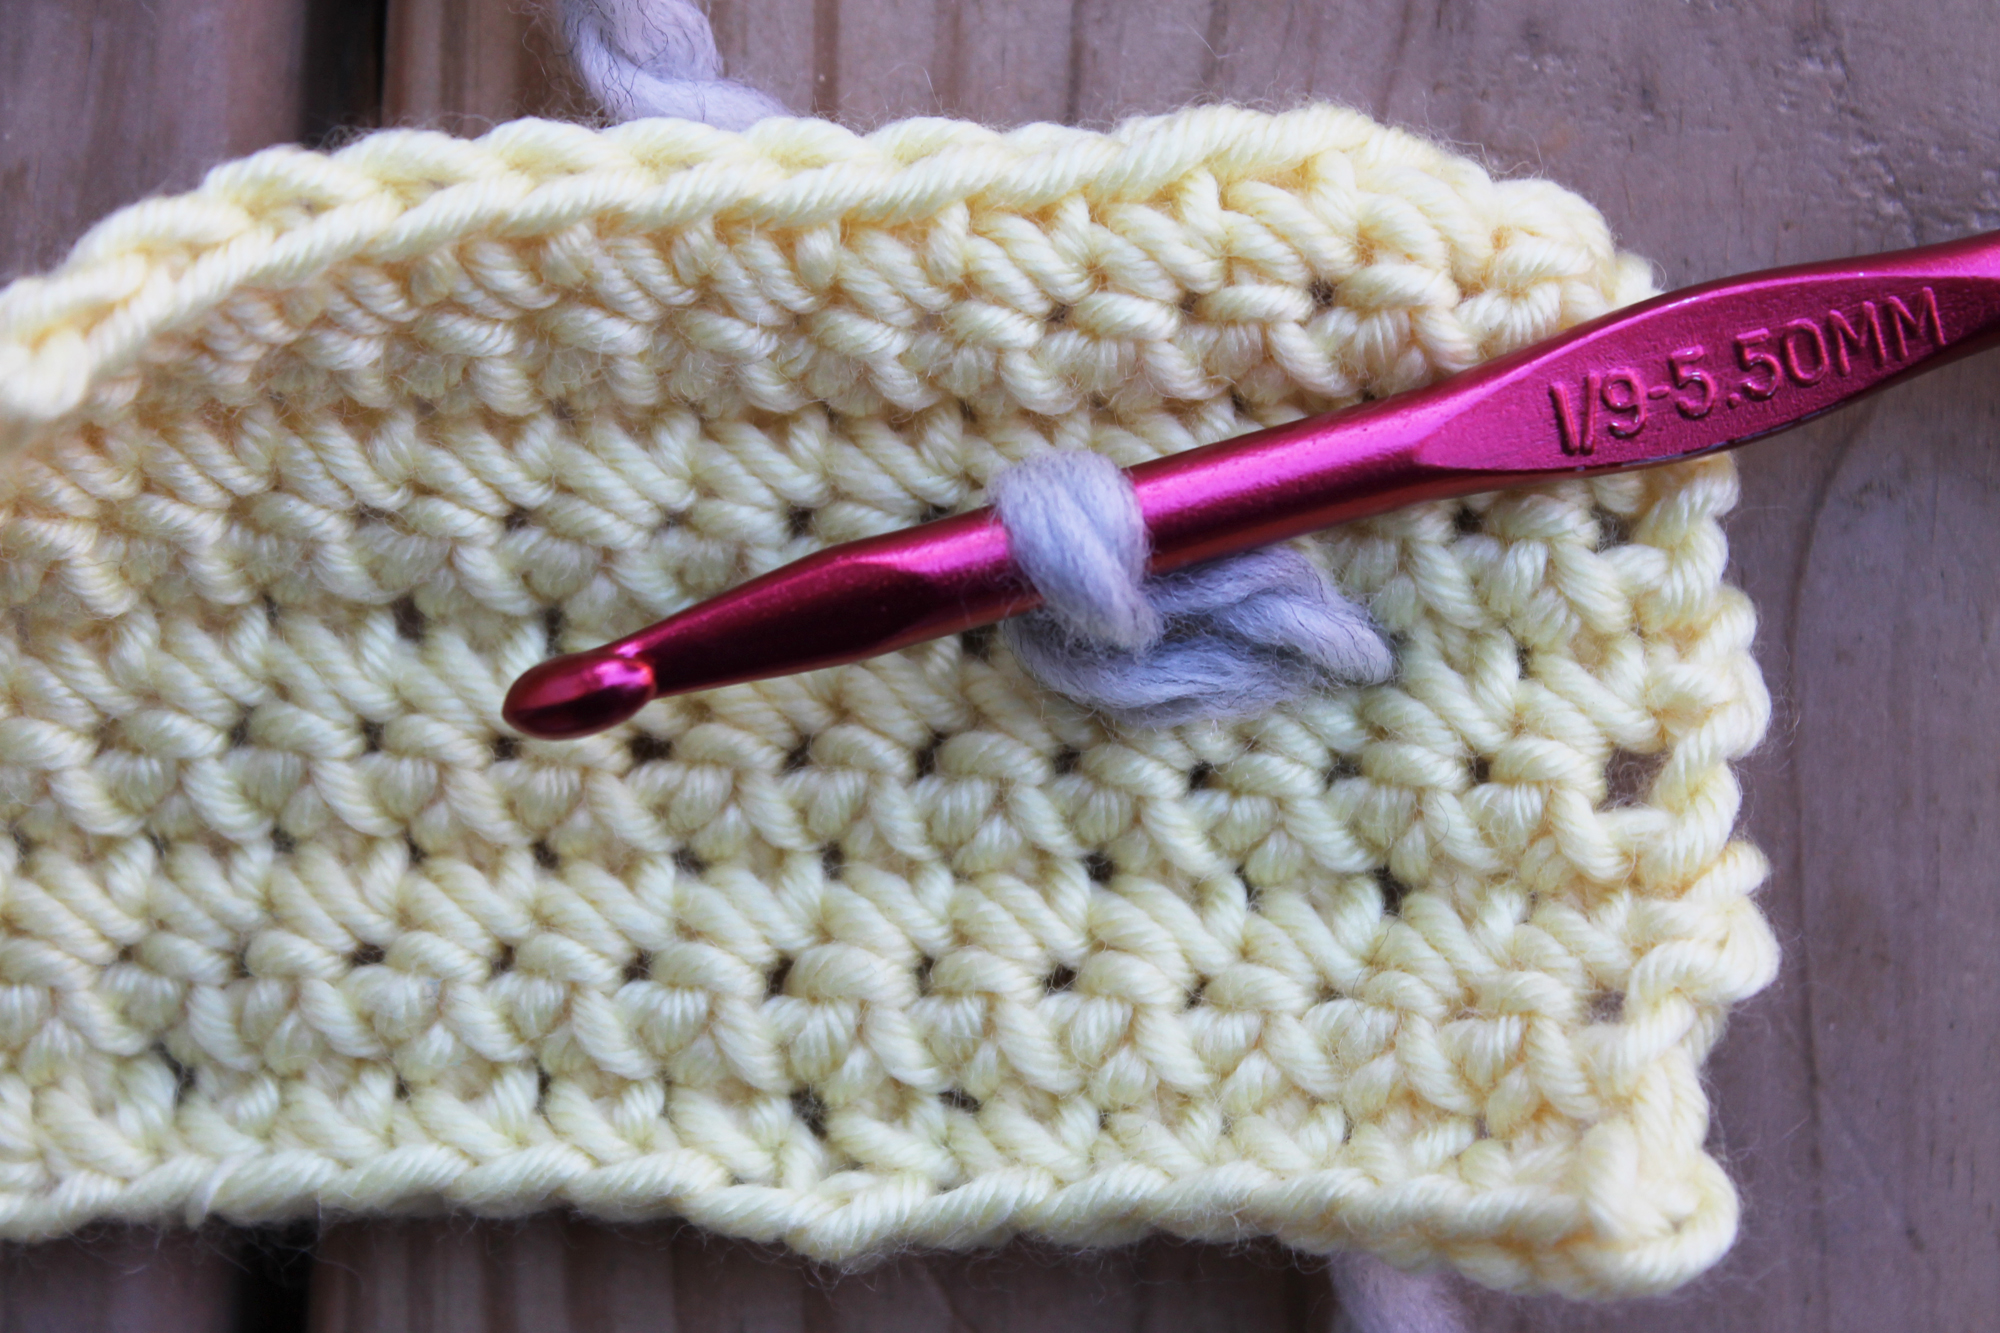
Insert the hook from front to back where the next stitch will go. Because I’m working with a heavier yarn here, I skipped a space between each surface crochet stitch. If you’re using a lighter yarn, though, you might want to go ahead and stitch into the very next stitch.
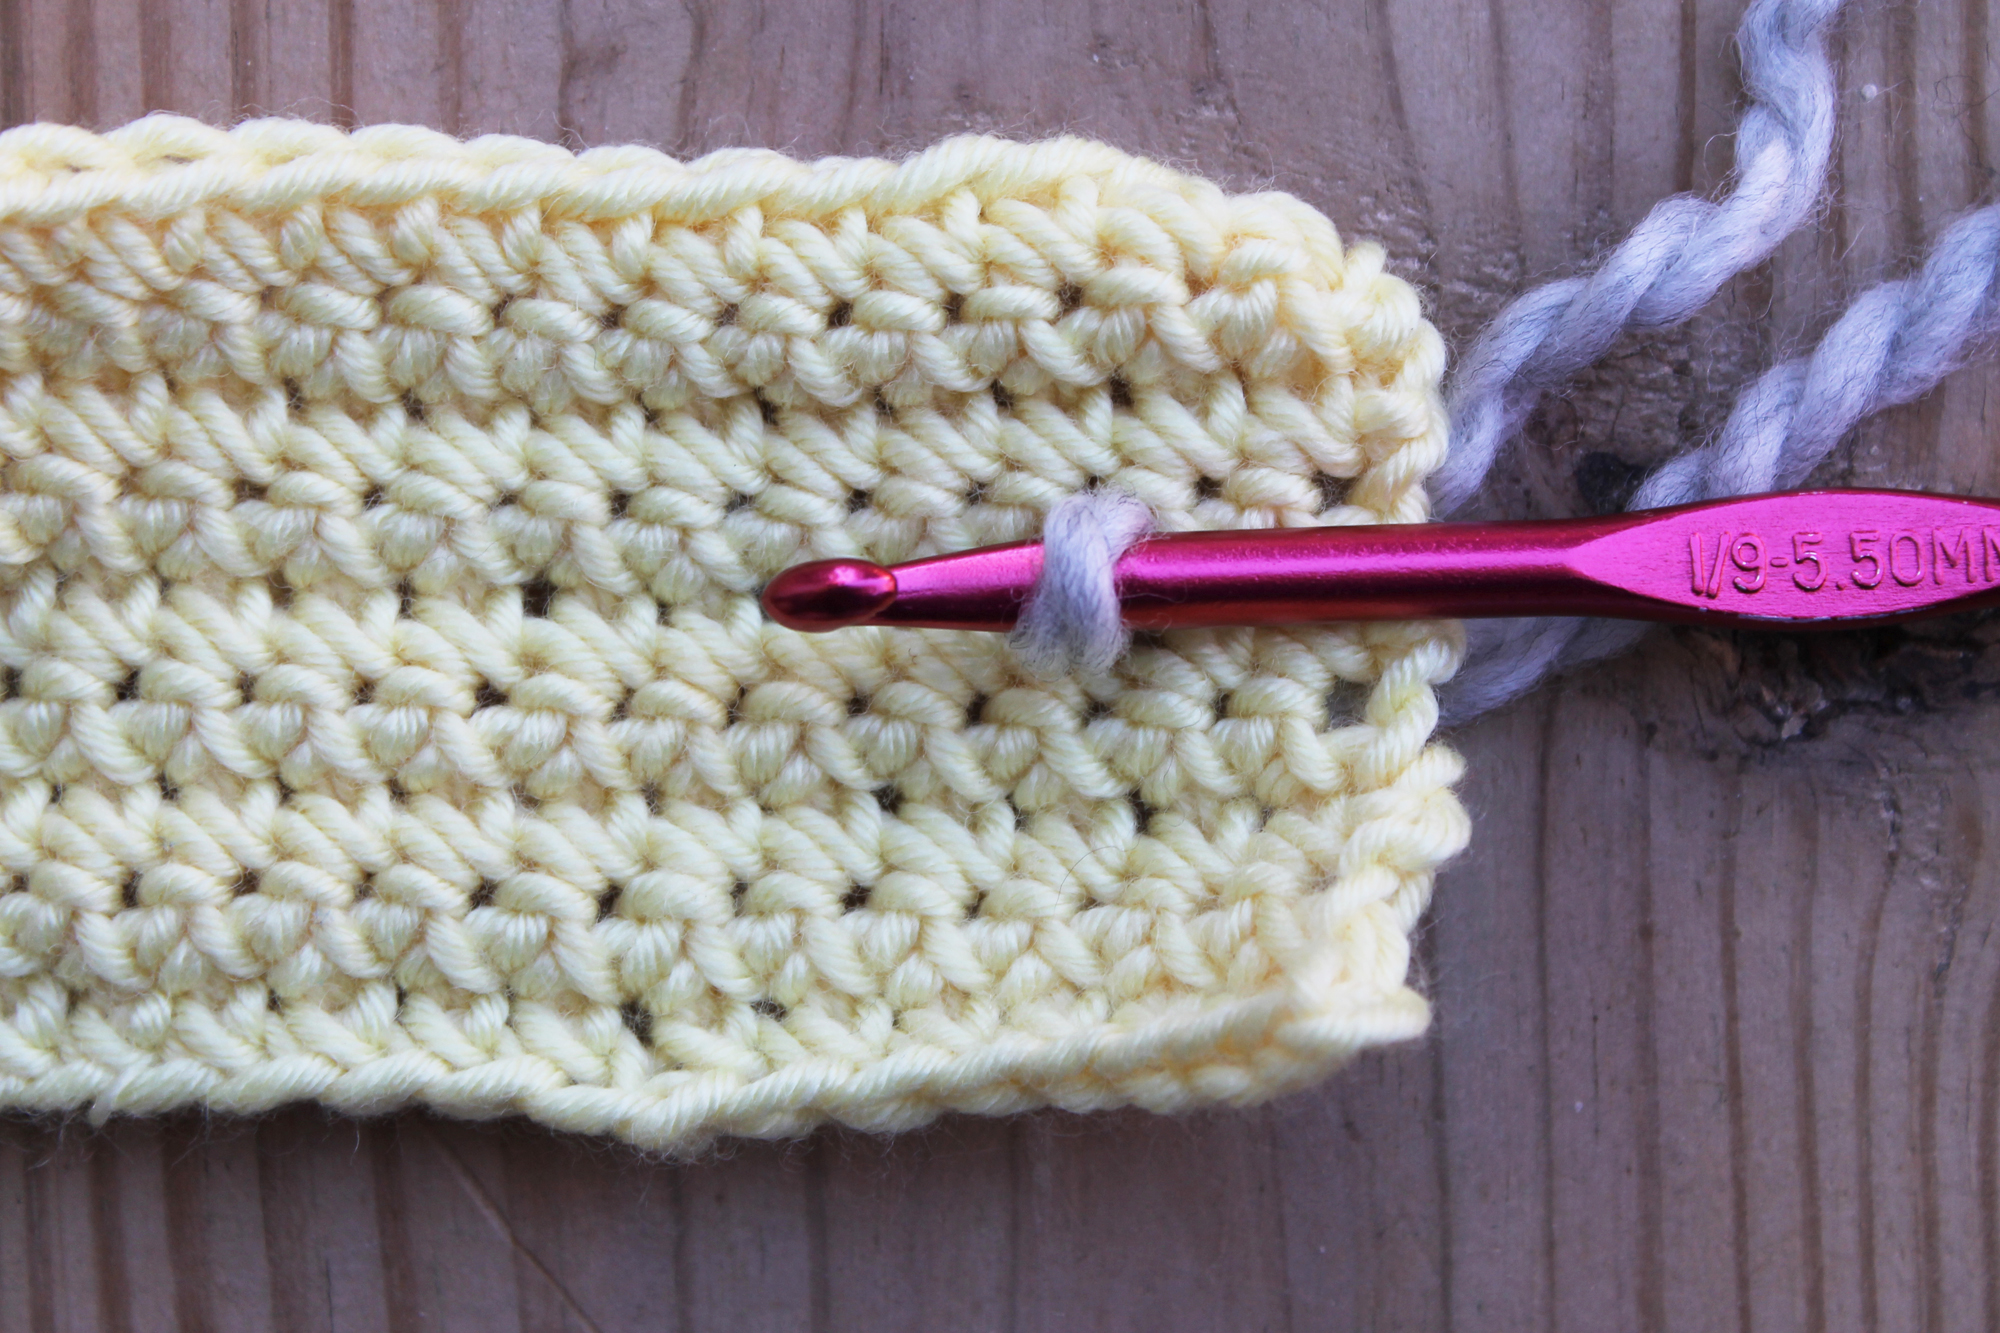
Yarn over the hook, then pull the loop through to the right side of the work.
Pull the loop through the first loop that’s already on your hook. You’ve made one surface crochet stitch!
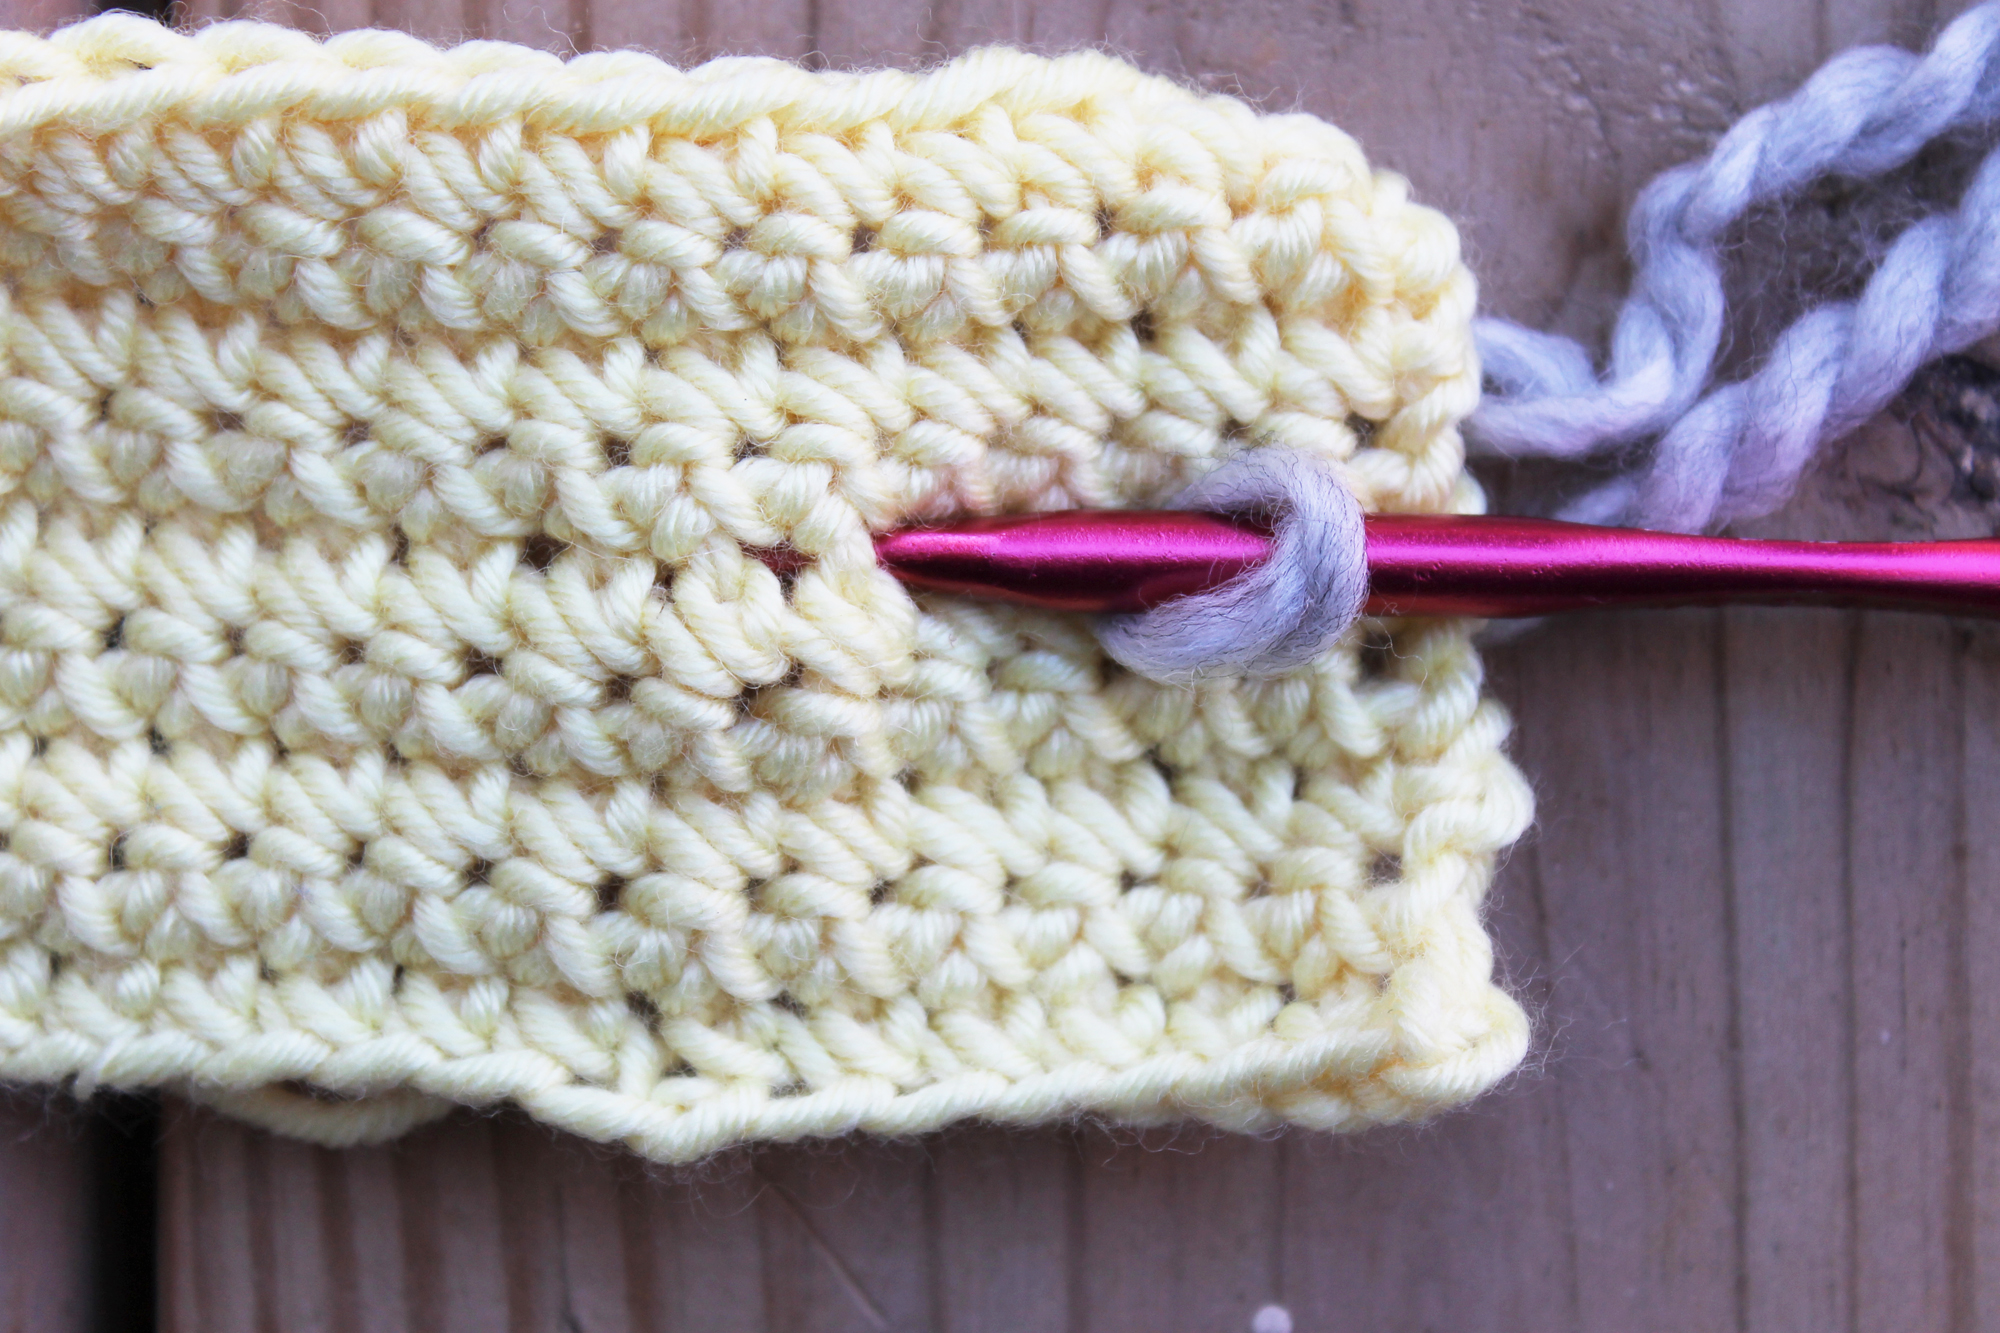
Now repeat those steps to make another surface stitch: Insert the hook from front to back, then pull up a loop.
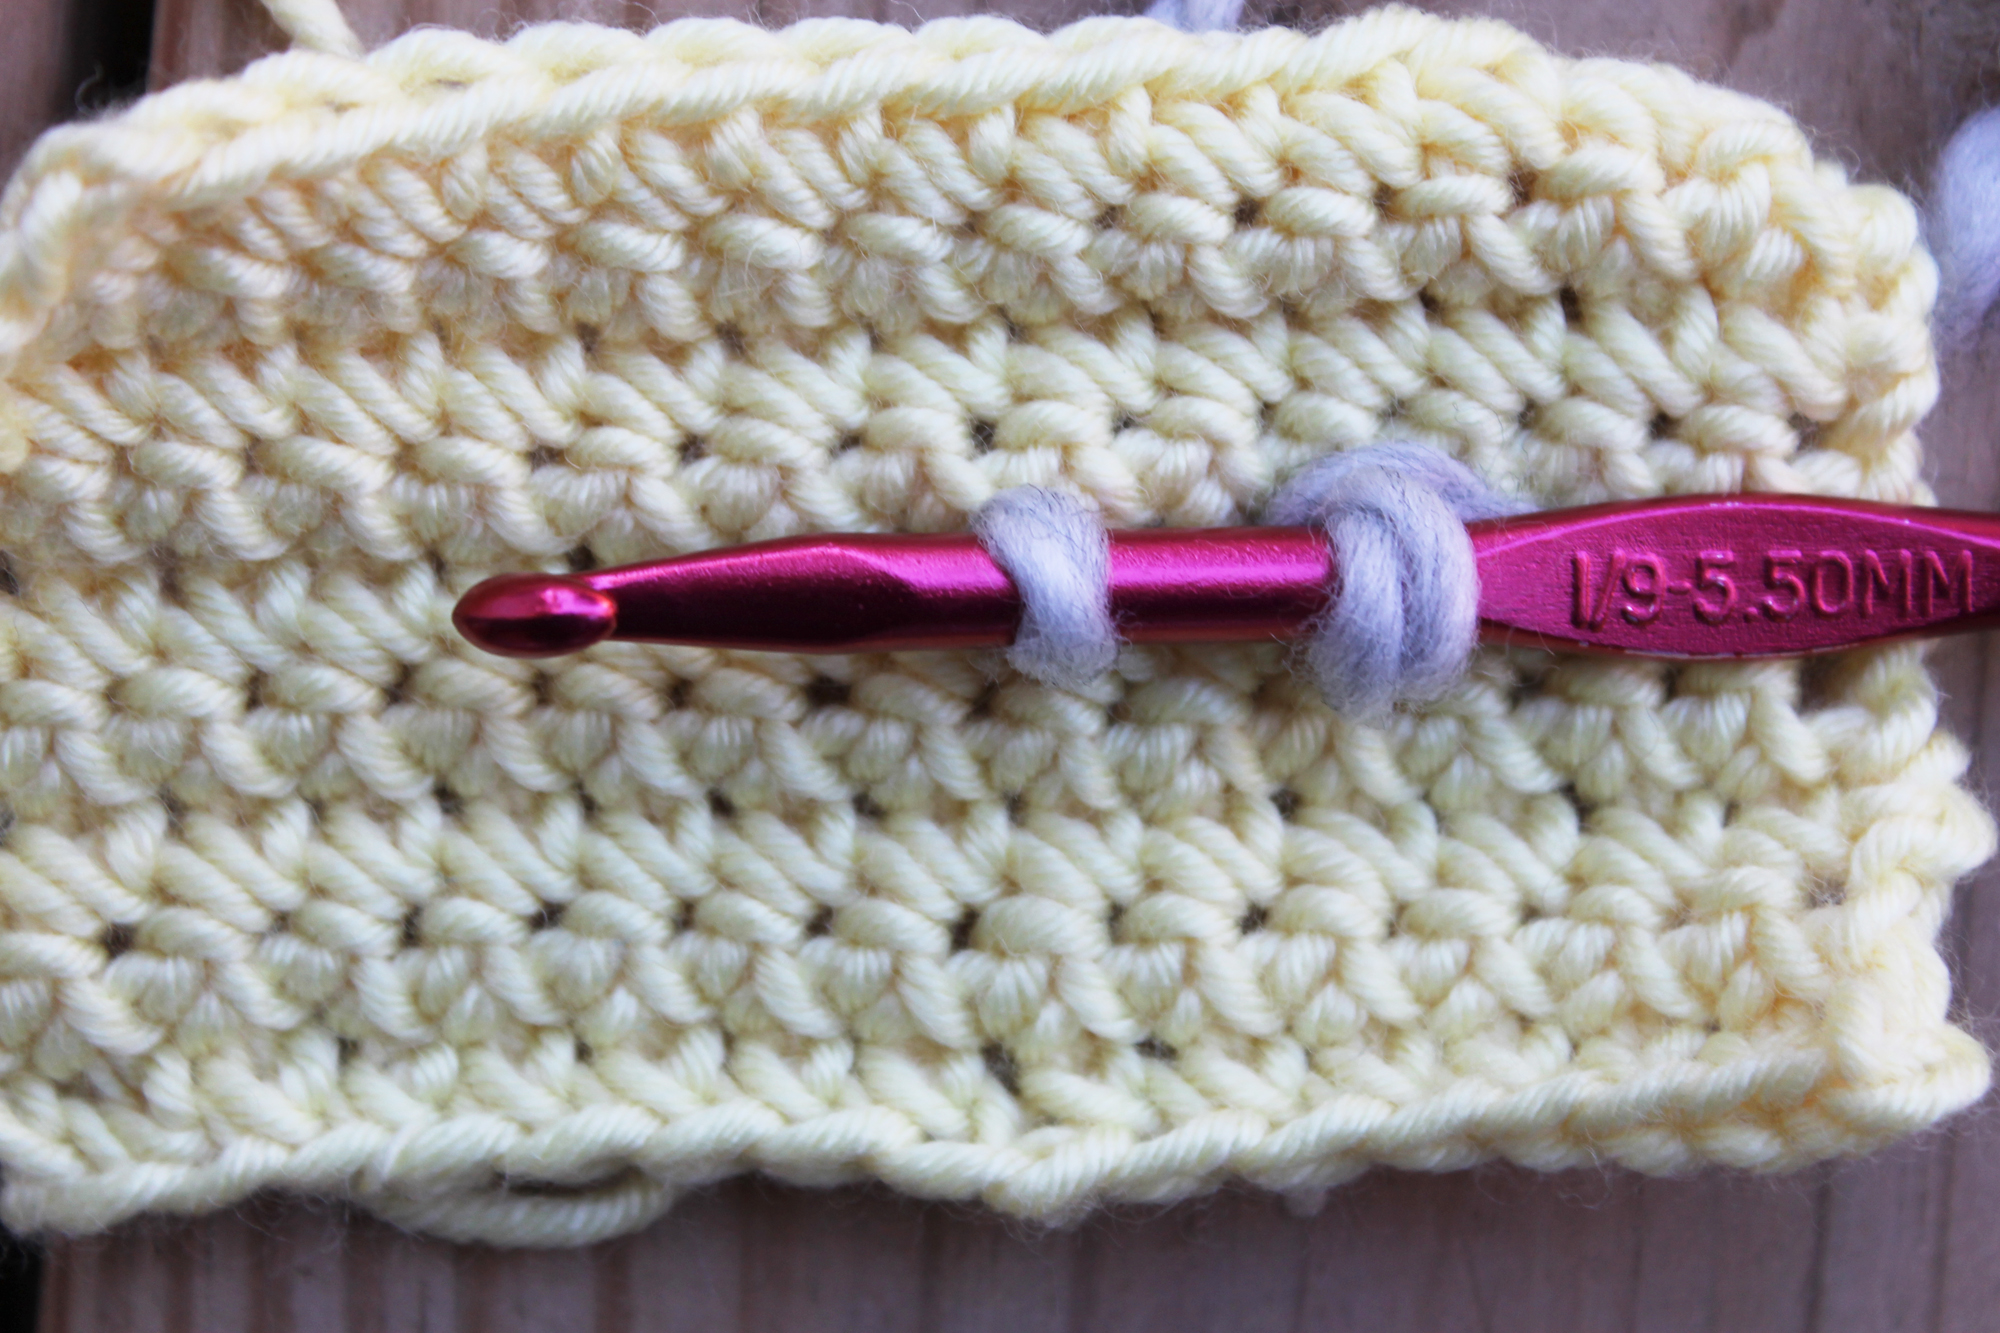
Pull the loop through the first loop that’s already on your hook. See? Easy!
Continue these steps until you have reached the line length you want. That could be a line that goes all the way across the work, or it could be a shorter line. It’s up to you!
Fastening off
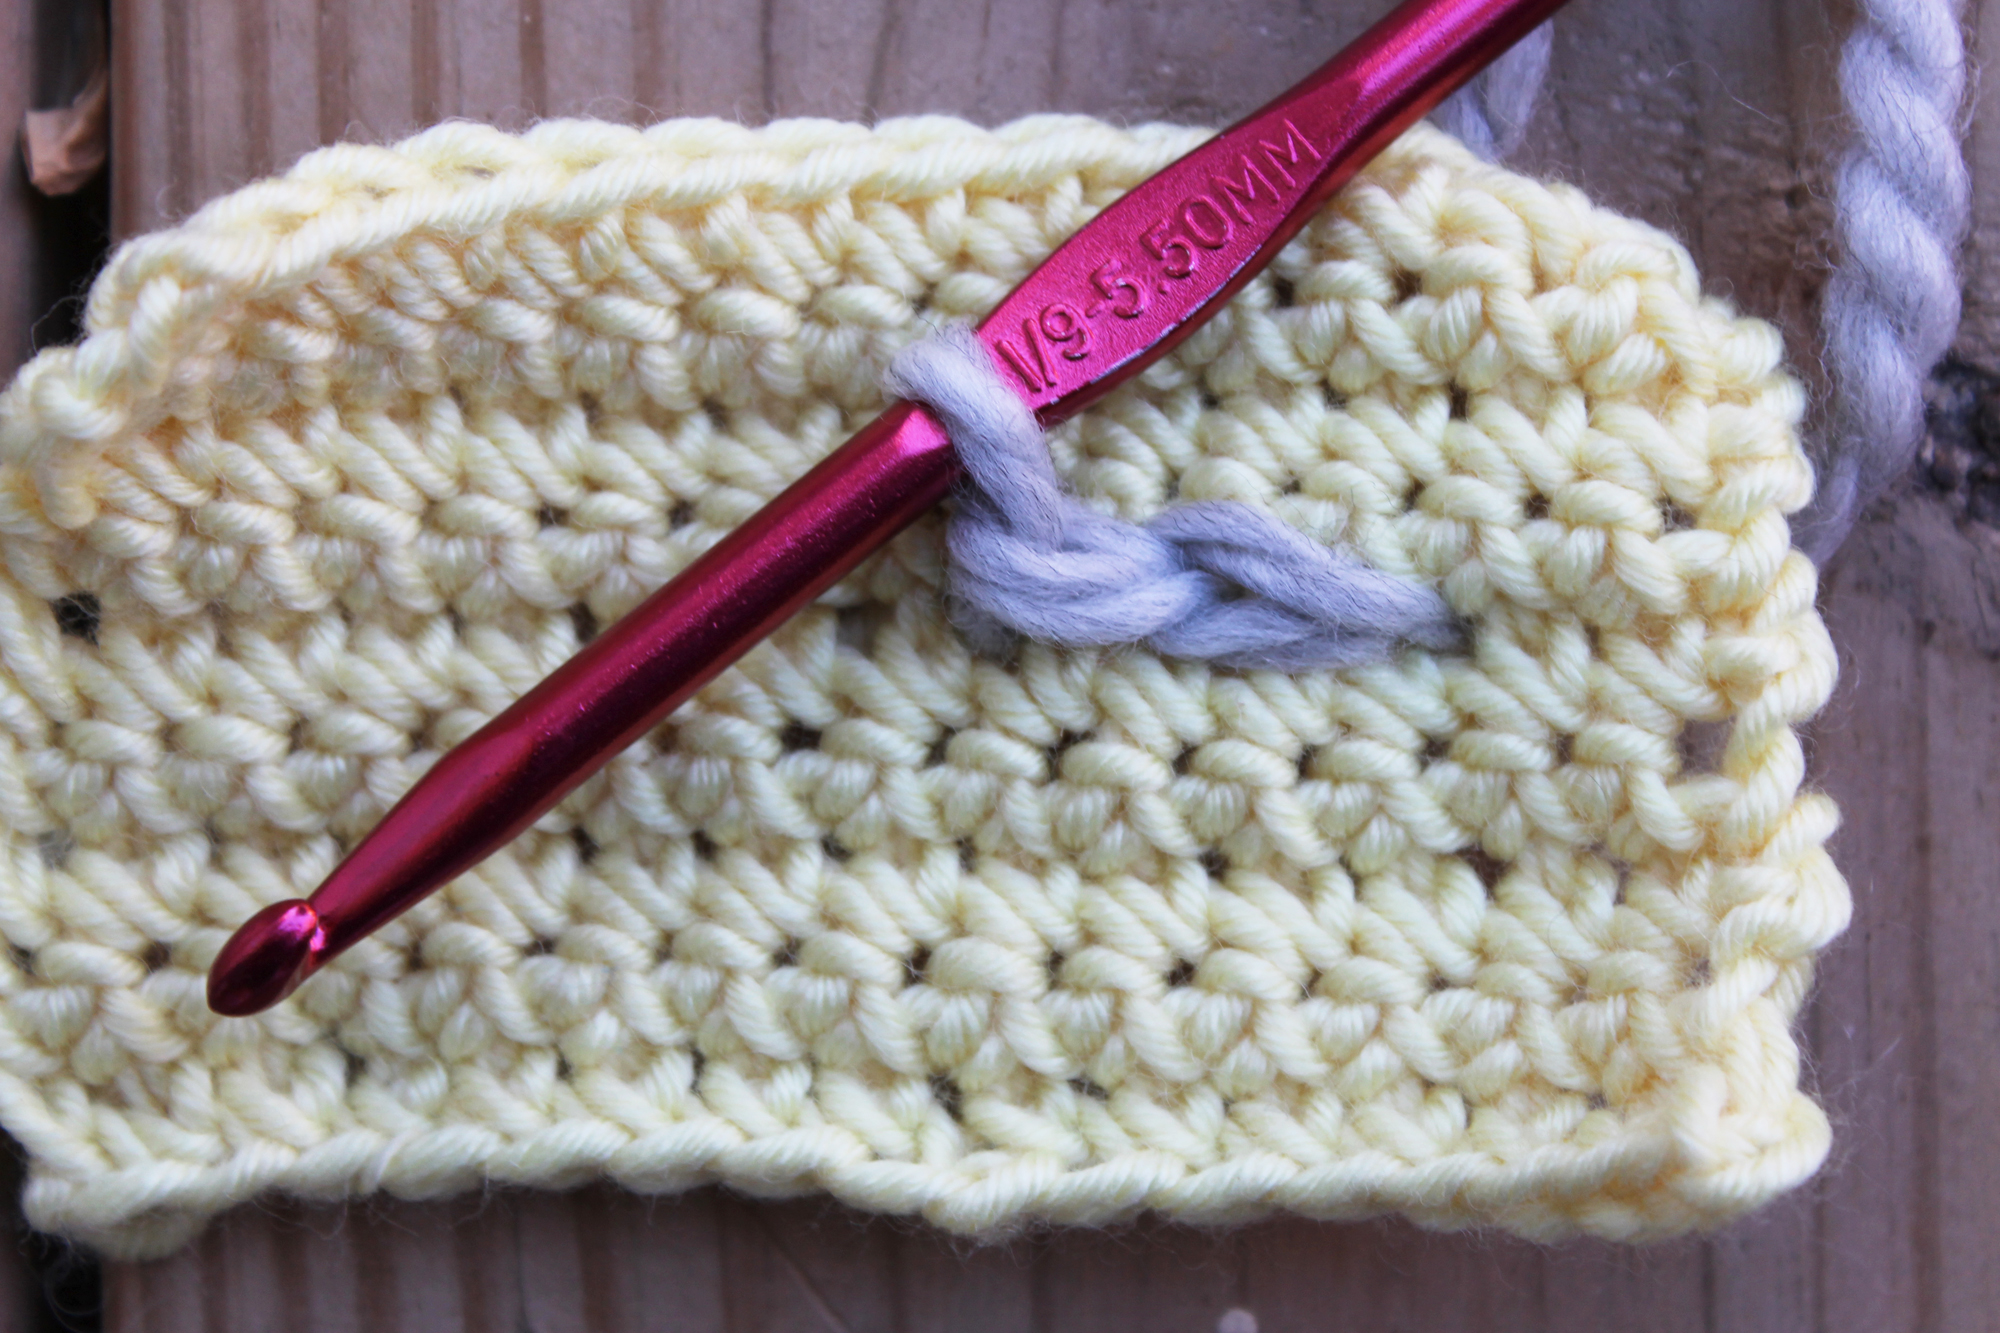
Once you’ve reached the desired length, cut the working yarn and leave a long tail. Use your hook to pull up a long loop, then insert your hook through the fabric. Yarn over hook and pull the yarn tail through the fabric and through the loop, just like you would with your usual crochet project.
Pull the yarn tail through to the wrong side of the project.

Weave in the loose ends of the surface crochet on the wrong side.
Surface crochet tips
- Try to keep an even tension as you work. If your tension is too tight, your project will draw up and pucker. If the tension is too loose, it can leave loops that might snag later.
- Experiment with different yarn weights. Some crocheters like the neat look of surface crochet that matches the weight of the project yarn. For my sample here, though, I used a light yellow yarn paired with a thicker gray yarn.
- Your surface crochet doesn’t just have to be straight lines. You can change direction and create a plaid-like design, or you can make designs like stars, circles, etc.
- If you want to plot out a design, you can draw on lighter-colored crochet with a tailor’s marker that washes out when you hand wash it.
- Surface crochet works on knitted fabric, too. Try it out on hand knit projects or on store-bought sweaters that need a makeover.
Share tips, start a discussion or ask one of our experts or other students a question.
No Responses to “Add Texture, Color & Fun Designs With Surface Crochet”