
The curved seat of the Tage Frid-style three-legged stool was Frid’s main inspiration for building it in the first place. It’s his attempt to deconstruct a seat, tearing it down and building it back with only the essential elements.
His idea (see my original post describing the process) came from sitting on a fence rail for a couple hours at a rodeo and realizing it was fairly comfortable. He thought if it just had a bit of a curve to it, it would be even more comfortable. Frid realized that a seat didn’t have to be round or large; it just had to support your sit bones.
Follow along as I describe my process for shaping the seat of this iconic stool.
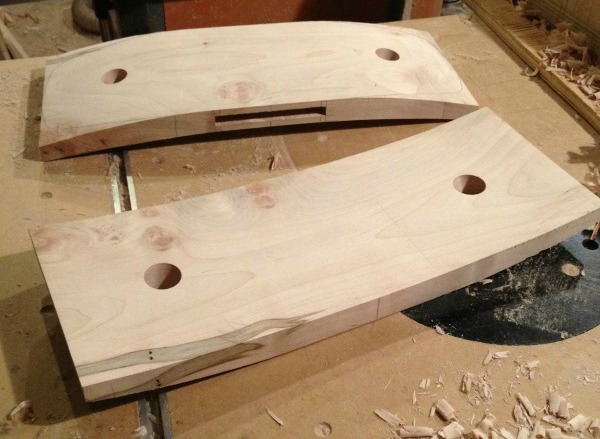
Two seats cut and smoothed to their final curved shape
Love furniture making? Check out the new Craftsy woodworking class Doors for Cabinetry & Fine Furniture. You’ll learn how to make perfectly built and fitted doors that instantly elevate your Canterbury and fine furniture projects, with expert instruction from furniture maker Robert Spiece.
Browse all our online woodworking classes.
5 steps to shape the seat
There are five main steps for shaping the seat: drawing the curve, removing the bulk of the material for the top and bottom of the seat, establishing a crisp edge to the curve, smoothing the surface of the seat, and cutting it into an oval shape. Let’s tackle each step!
Step 1: Draw the curve of the seat
The seat blank starts at about 1.5” thick, and Tage Frid designed the stool with a deflection of 5/8”. This means the depth of the curve at the center of the seat is 5/8”.
To draw this curve and prepare for a future step in the process, draw the shapes on two pieces of plywood and then cut them to the final shape for use in a jig. One piece will establish the top of the seat and the other will establish the underside of the seat. Start by drawing a line near the bottom of a piece of plywood that represents the thickness of the seat blank. Draw another line in the middle of the piece. For the top piece, make a mark at 5/8”. To draw the curve, use a long, thin piece of wood and a spring clamp. Starting at the center line, bend the wood until it reaches a curve that is pleasing to you. Mark the curve with a pencil and then do the same for the other side.
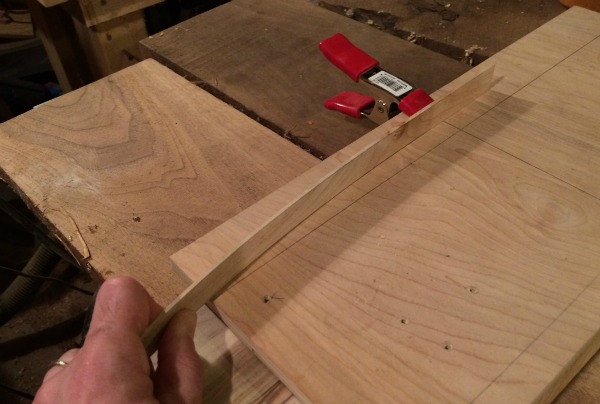
Bend a thin piece of wood to find a pleasing curve that is easy to reproduce
For the bottom, there are two things to keep in mind.
First, the underside of the stool should be flat for at least 3” on either side of the center line. This flat surface will be helpful when registering it against a jig in future steps.
Second, now is the time to establish the thickness of the seat, which should be about 1”. This is thick enough to support the legs but thin enough to have a nice curve. From these points 3” away from center, draw the curves for the underside using the same method as above.
When you are satisfied with the curves for the top and underside of the seat, cut them with a band saw and sand them so they are smooth and fair. Put these pieces against the seat blank and draw the curves onto the wood.
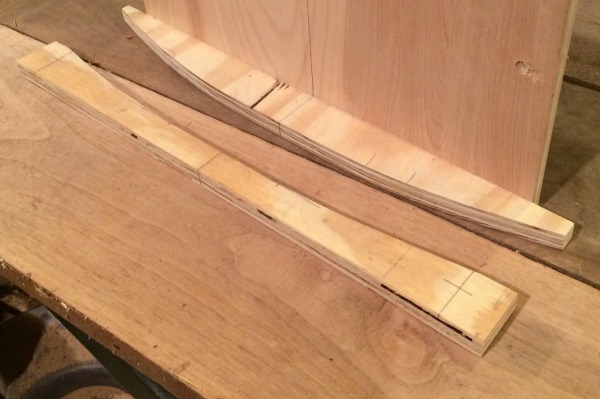
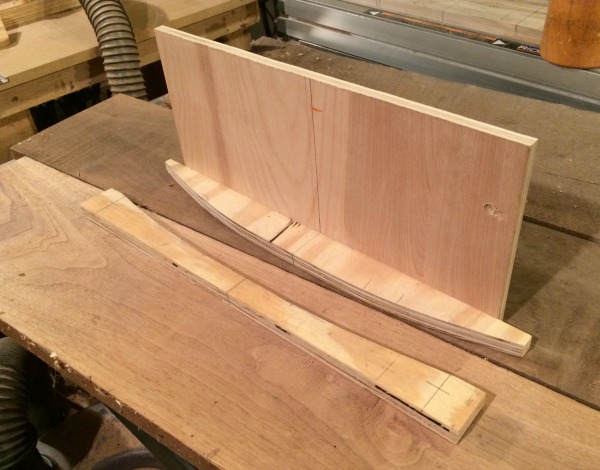
The upper and lower curves cut out of plywood to use as patterns
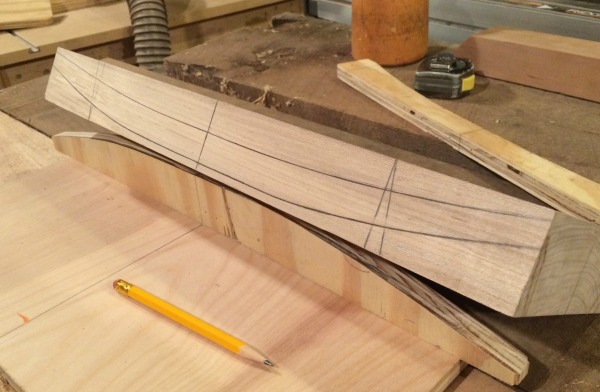
The curve drawn on the front of the seat blank
Step 2: Remove material of the top and bottom of seat
For this step, I use a table saw sled and a dado stack. A dado stack is a set of blades and chippers designed to cut grooves with flat bottoms. The blades (one on either end) and chippers are each 1/8” wide. They are mounted side-to-side on the arbor of a table saw and the number of chippers establishes the width of the groove you are cutting. A dado stack is great for cutting grooves and rabbets, but is also helpful in removing a large amount of material efficiently. The table saw sled, dedicated for use with the dado stack, helps ensure a controlled, safe cut at 90 degrees.
A dado stack on the table saw cuts grooves of varying widths
Start with the top of the seat, which means the seat blank will be upside down with the top resting on the sled. The dado stack should be about 1/2” or 5/8” wide.
Using the curve you drew on the seat, adjust the height of the dado stack and cut away material as close to the line as possible without touching it. This will involve several passes. Start in the center of the top and work outward. Don’t make any cuts near the outside edges of the top. We will need that area of the top as a bearing surface later.
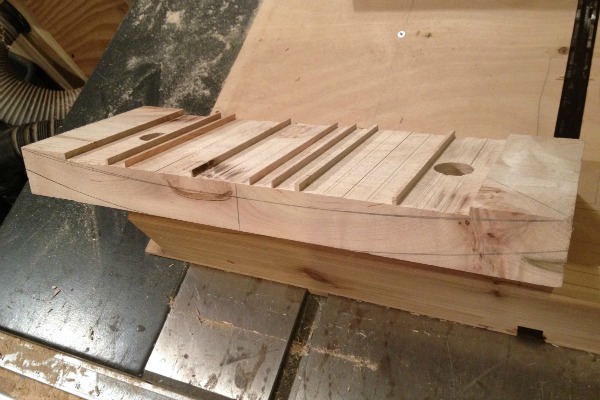
A seat blank after the first passes with the dado stack. Gradually work your way close to the line without taking off too much material at once.
Once you’ve removed most of the material for the top, flip the piece and work on the bottom, except this time work from out to in. Don’t go too close to the marks at 3” away from center.
Step 3: Establish a crisp edge to the curve of the seat
With the bulk of the material removed, it’s time to cut a crisp edge on the front and back of the seat. Use the plywood curves from earlier to make a jig for the router table. The jig consists of a piece of plywood approximately 6” by 17”, a bit longer than the final length of the seat.
On one long edge of the plywood, drill three countersunk holes at about 3/16”, just wider than the shank of a #8 wood screw. Place the plywood curve for the top of the seat on a flat surface and attach the plywood base with three screws. You will remove that piece after cutting the top curve and replace it with the curve for the underside of the seat.
A jig to cut curves on the router table with a flush cut pattern bit
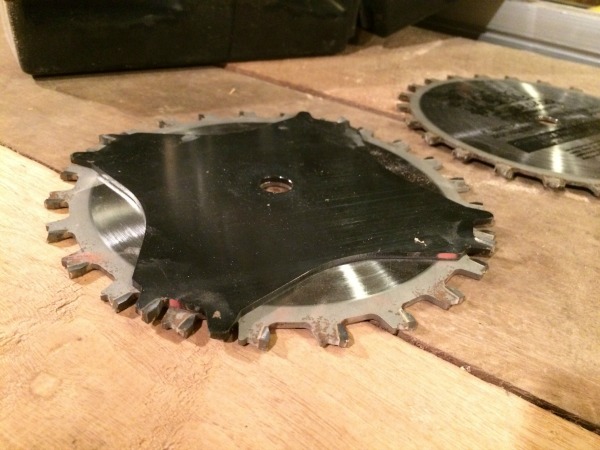
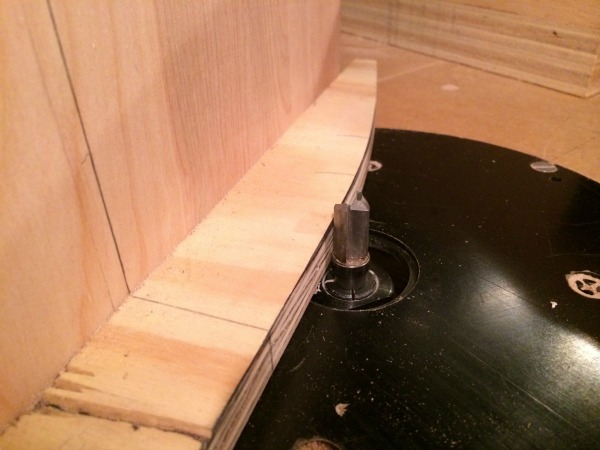
With the wood clamped to the jig, use a flush cut router bit with a bearing. The bearing will ride against the curve and mimic it when it cuts the wood.
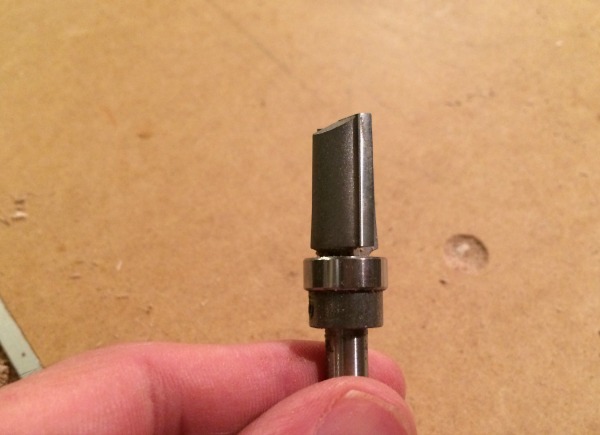
The cylinder just below the blade is a bearing that rides against patterns to mimic their shape.
Set the bit to make about a 1/4” deep cut. The goal is not to remove lots of material but rather to establish a crisp line. Make the cut, then unclamp the seat blank. Flip it and clamp it to the jig with the underside against the plywood to make the cut for the opposite side of the seat. Remove the top curve from the jig and replace it with the underside curve. This time, put the top side of the seat blank against the jig and clamp it.
To make these cuts on the router table, be sure to keep the jig flat against the table. Move the jig toward the left when making the cut.
Adjust the bit to make a shallow cut — just enough to define the curve.
Step 4: Smooth the surfaces of the seat
The amount of smoothing you will need to do depends on how much material you removed with the dado stack. At this point, use a hand plane to remove as much of the remaining material as possible. A spokeshave or even a gouge would be helpful, too. Once you get fairly close to the line, use a random orbit sander with 60 or 80 grit paper to establish a smooth curve on the top and underside.
Step 5: Cut the oval shape of the seat
The ends of the seat have an oval shape to them. Make a pattern for half of the curve on a piece of paper or cardboard. Use the pattern to draw the curve on both ends. Cut these curves with a band saw and clean them up with sandpaper.
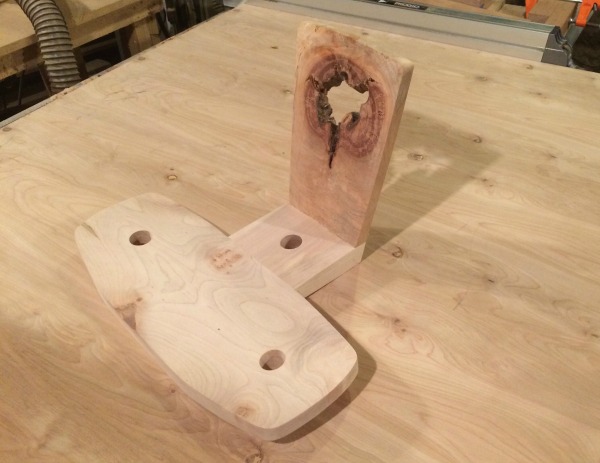
All three parts of the seat assembled and ready for the legs
With the seat shaped and smoothed, the next steps are making the legs and stretchers and putting the whole piece together.
Don’t miss the next installment of this series, where we’ll describe how to make the legs and stretchers of this Tage Frid stool with a combination of power tools and hand tools. Subscribe to the Craftsy Woodworking Blog today to stay up-to-date on all the fun!
You might also enjoy the previous posts in this series, where we covered the story behind the iconic Tage Frid three-legged stool, starting the seat and drilling holes for the legs.
Share tips, start a discussion or ask one of our experts or other students a question.
No Responses to “Making a Tage Frid-Style Stool: Shaping the Seat in 5 Steps”