
Tailor’s tacks are key to sewing with thick winter fabrics. Keep reading for a step-by-step tutorial for mastering marking your sewing projects using tailor’s tacks.
The winter sewing season is well underway. For us sewers, this means we redirect our focus towards making projects that require warm and often bulky fabrics, like woolens and fleece. As any experienced sewer knows when working with these types of fabrics sometimes different sewing techniques, from those used for lighter weight fabrics, must be employed. One such example transferring pattern markings.
Standard transfer paper, marking pens, and even chalk are less likely to work well, or not at all, on fabrics that are thick and lofty, so sewers much rely on the marking method of last resorts, tailor’s tacks to do the job.
Tailor’s tacks are loose, looped, hand sewn stitches that transfer markings from tissue patterns onto the fashion fabric. This simple yet effective technique uses thread as the medium for leaving visible marks on the fabric. They are used to indicate such things as the placement of darts, pockets or pleats and buttonholes.
Tailor’s tacks are not exclusive to thick fabrics. They are also a good choice for very delicate fabrics that might be marred by other traditional marking methods. Tailor’s tacks can be applied to a single or double layer of fabric. For especially thick fabrics applying the tailor’s tacks in a single fabric layer is best.
All that is required to complete tailor’s tacks is a needle and thread in a contrasting color so the tacks are readily visible.
Here are the steps for sewing tailor’s tacks, using a dart as the example.
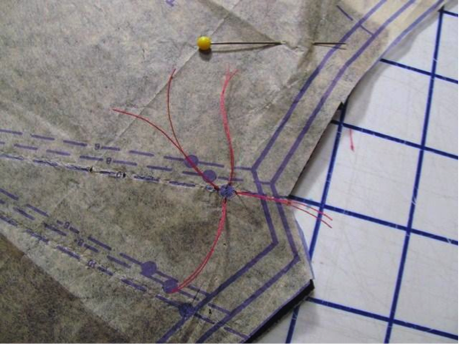
Step 1:
Thread a needle with a long, double strand of thread in a contrasting color to the fashion fabric. Do not knot the strand. In the dart example tailor’s tacks will be needed to mark the dat’s apex, dart legs and starting dots. Essentially, use tailor’s tacks wherever a dot or placement mark appears on the tissue pattern.
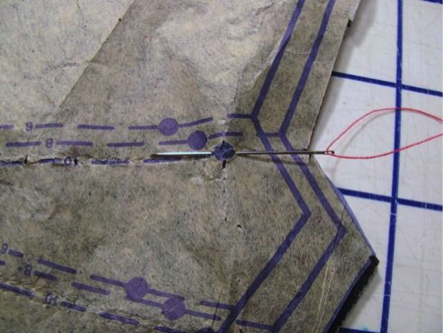
Step 2:
Starting from the first dot near the seam edge, insert the needle through the tissue pattern and both thicknesses of fabric from one end of the dot under and through to the opposite end of the dot. Leave a sizeable thread tail of approximately 1” to 1 ½” long at both ends.
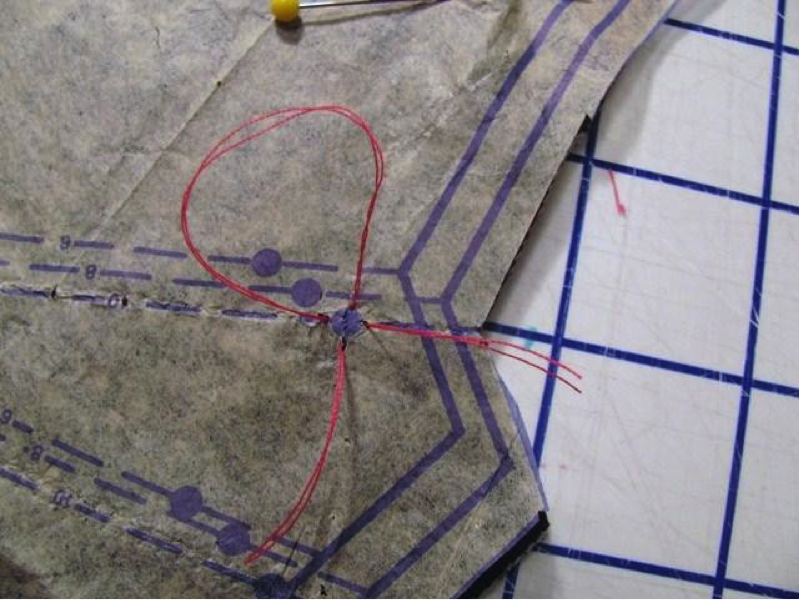
Step 3:
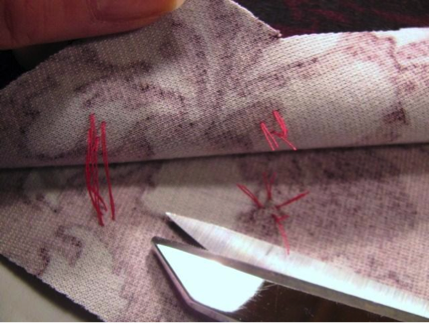
Next, without cutting the thread insert the needle 90 degrees and sew through the dot creating what is essentially an X stitch. A loop will be present and once again, leave a long thread tail.
Step 4:
Cut through the loop. This will allow the tissue pattern to easily slip off the fabric.
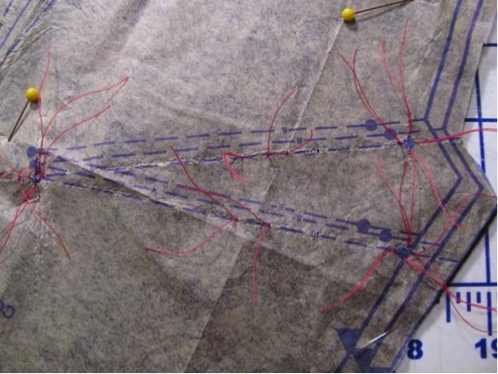
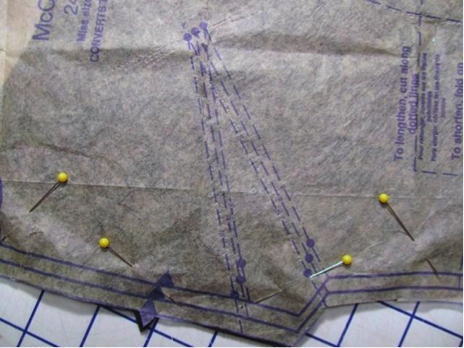
Step 5:
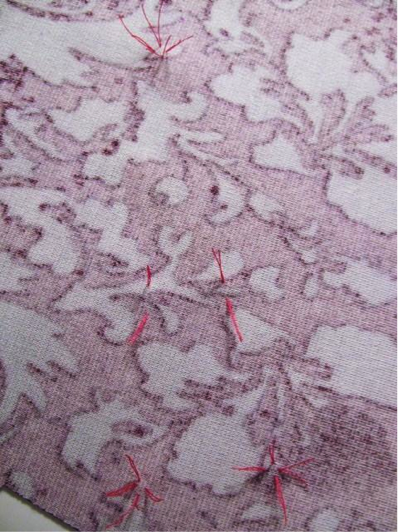
Stitch all of the necessary tailor’s tacks that will form the shape of the dart.
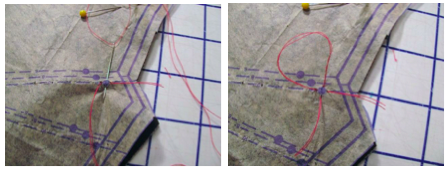
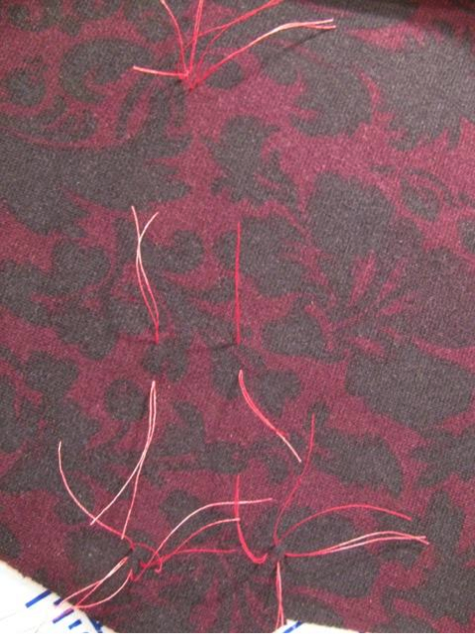
Marked dart w/ tissue removed Underside of fabric
Step 6:
With all of the dart markings complete and all the looped stitches cut, carefully slip the tissue pattern off the fabric.
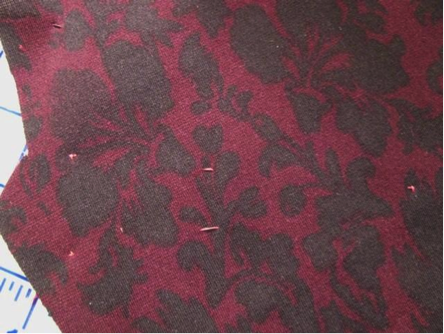
Step 7:
To finish the tailor’s tacks very carefully begin to separate the two layers of fabric starting with the first set of tacks. As the layers separate it will expose the tailor’s tacks threads. Cut them in half so that a tailor’s tack remains on both layers of the material.
Step 8:
Continue to separate and cut the tailor’s tacks until all the dart markings are complete and visible on both layers of the material. The pattern piece is now ready for sewing.
Depending on the fabric it is important to note that tailor’s tacks can easily slip out of the fabric, so either complete the darts as soon as possible or use caution when handling the pattern pieces throughout construction.
Share tips, start a discussion or ask one of our experts or other students a question.
No Responses to “Make Your Mark: How to Use Tailor's Tacks for Pattern Marking”