
Do you love the warm, soft patina of yesteryear? You can easily capture that aesthetic in your quilts. Learn how to achieve this look through the simple method of tea staining.
Photos by Karen Walker
What is tea staining?
Before the time of bleach, tablecloths and even clothing that had been discolored and tarnished by use were given new life through the process of tea staining. When tea staining fabric, the item would be fully submerged in a kettle of hot water and tea leaves until the desired hue had been acquired.
Today, the methods are much easier! Like in the past, a pot of boiling water with a handful of tea bags can do the trick.
How to tea stain fabric
First, you could use boiling water and tea.
Use approximately two tea bags to each cup of boiling water. Let the tea bags steep for about 15-20 minutes and then remove them from the water. If you want a darker color, add more tea bags.
Or, you could use cold brew tea.
Preparing a bowl of cold brew tea is, in my opinion, the easiest method for tea staining. Add enough water to your bowl to immerse your fabric or project; then stir in an ample amount of cold brew tea mix to create a dark color. That’s all there is to it!
Cold brew tea can stain the bowl, so select one specifically for tea staining. A paper or disposable plastic bowl works great too for small projects. I recommend putting something under the bowl, in case of spills. You don’t want to tea stain everything!
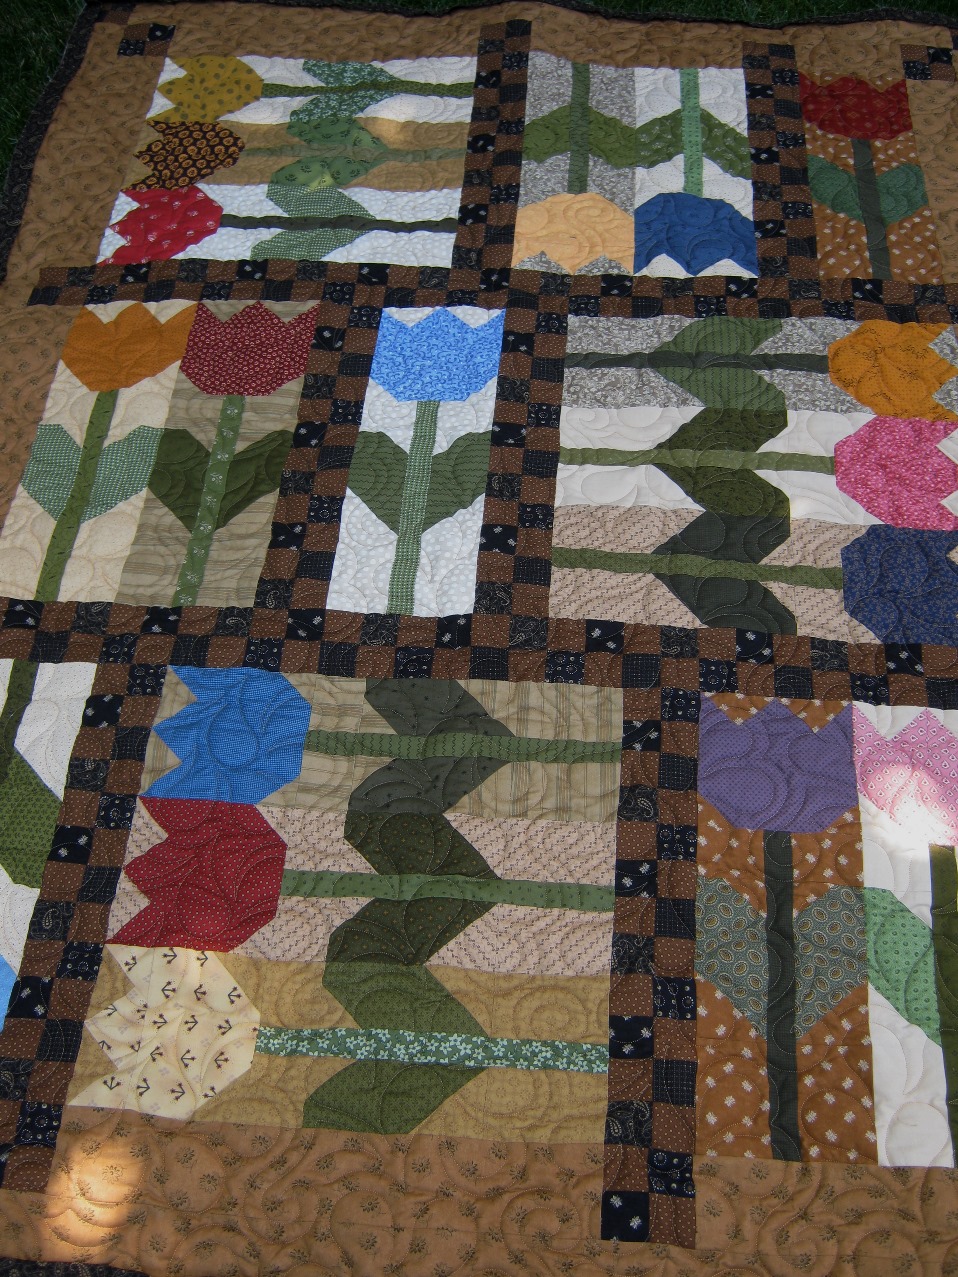
What about tea staining a whole quilt?
Rather than dyeing the entire quilt after it is finished, it’s best to dye the fabrics before piecing. Here’s how to dye your quilting fabric.Step 1: Wash all your fabrics beforehand.
This will make sure the shrinkage will be consistent throughout.
Step 2: Choose a few fabrics to stain.
You may not want to stain all the fabrics in your quilt. Wet the fabric under the faucet first, then follow the tea staining method of your choice — hot or cold brew.
Step 3: After the tea bath, rinse the fabrics.
After the fabric has soaked for at least 15 minutes, take it out and rinse thoroughly. A lot of tea will rinse out. If you want the fabric darker, place it back into the tea bath and repeat the process.
Step 4: Set the dye.
Set the tea-stained color by soaking the fabric in a pot of two parts vinegar, one part water and 2 tablespoons of salt. Let it soak for 15-20 minutes. Rinse throughly and dry in a dryer, then iron.
Step 5: Start quilting.
Now that your fabric has been dyed, dried and pressed, you can start piecing your quilt top.
I do not recommended tea staining individual quilt blocks.
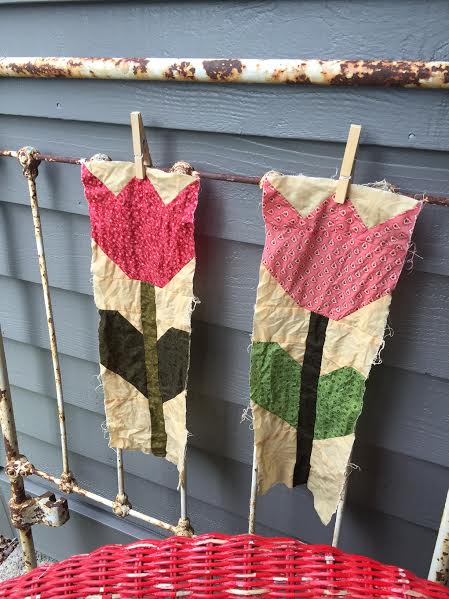
For example, in my Tulip Crush pattern, I wanted to darken the backgrounds on two tulip blocks. I did not pre-shrink any of my fabrics beforehand but decided to take a chance and dip the two blocks into a bowl of cold brew anyway.
Well, they shrunk — even when aired dried. Preshrink all fabrics first.
A note about cleaning tea-stained fabric
Most laundry detergents have active ingredients to remove stains. If your quilt is one that will be used and washed many times, the tea staining will begin to fade with each washing. However, at this point, you could re-stain the entire quilt. I recommend doing this in a large laundry tub sink or bath tub.
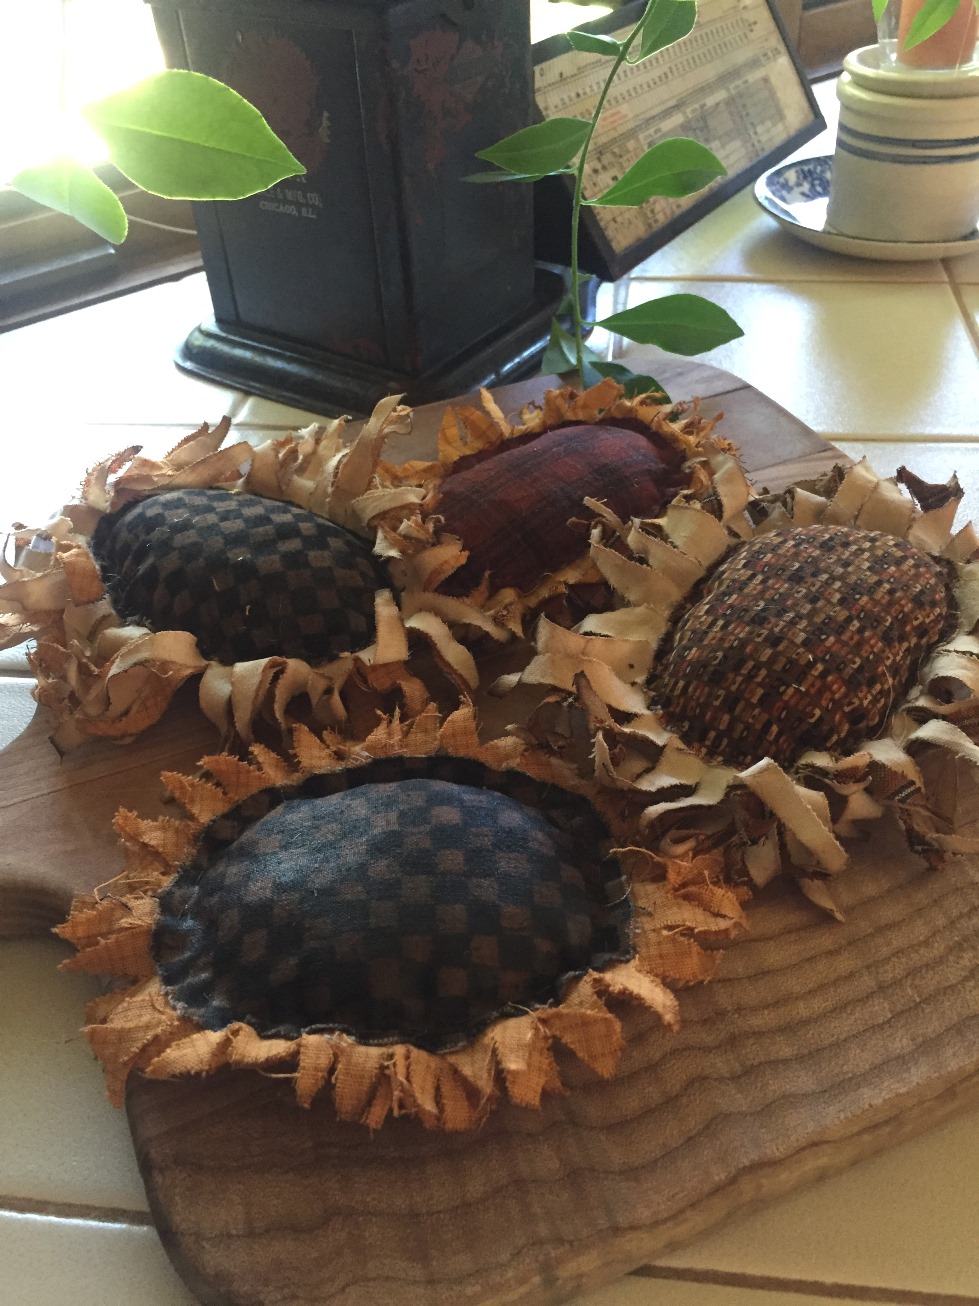
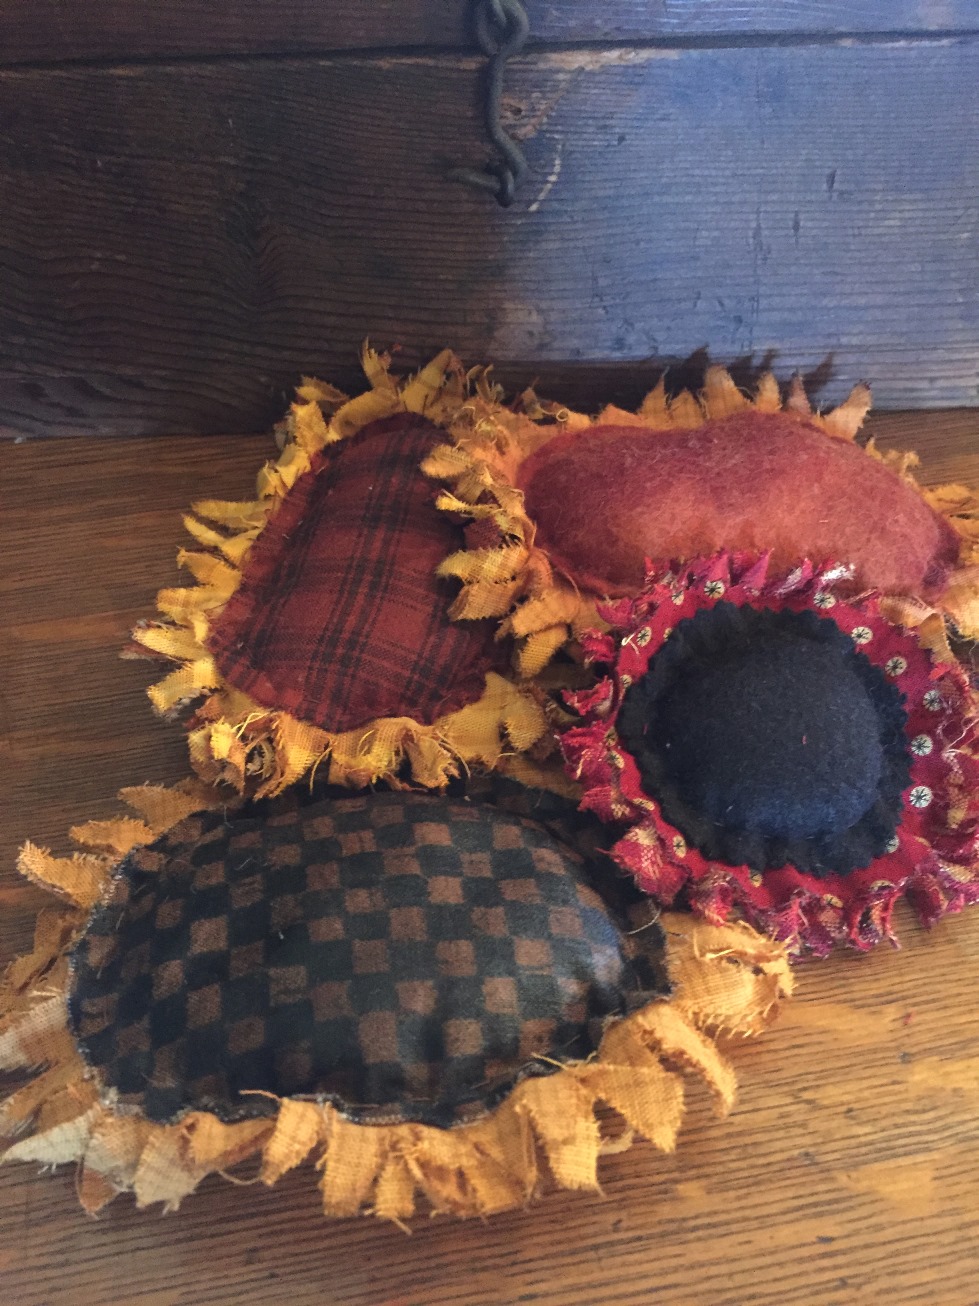
Want to practice tea staining on a small project? These sweet sunflowers are the perfect practice project.
Follow along with the step-by-step tutorial to try your hand at tea staining something small. You can download a free PDF copy of this Tea-Stained Sunflower Tutorial here.
Step 1: Begin by washing your fabrics.
This allows the stain to set and avoids and shrinkage in the future. No need to iron right now.
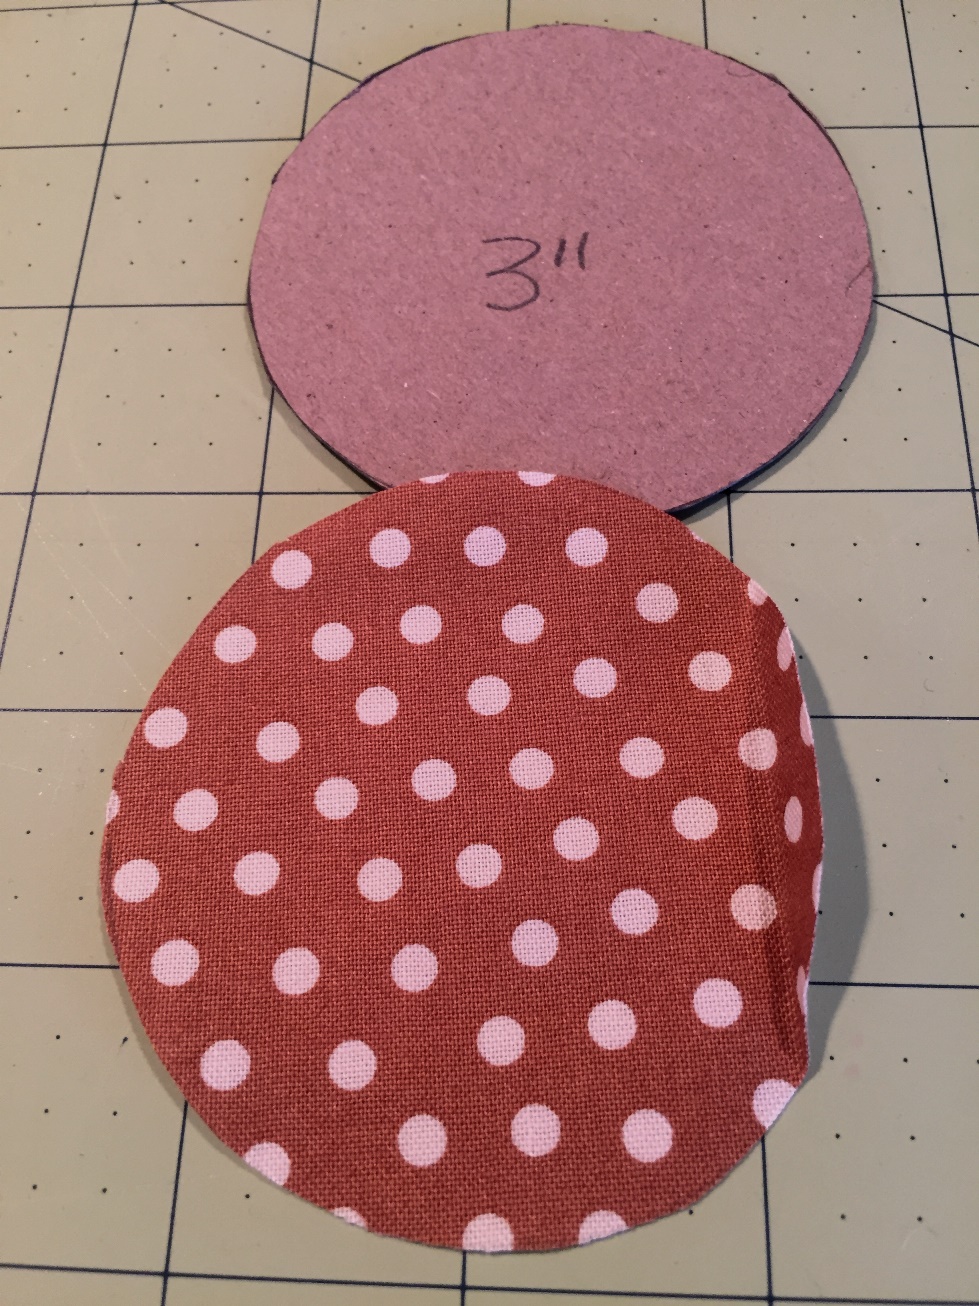
Step 2: Make templates for the sunflowers.
Make your templates any size using drinking glasses, bowls, salt shakers — whatever you have on hand — to draw circles onto cardboard for templates.
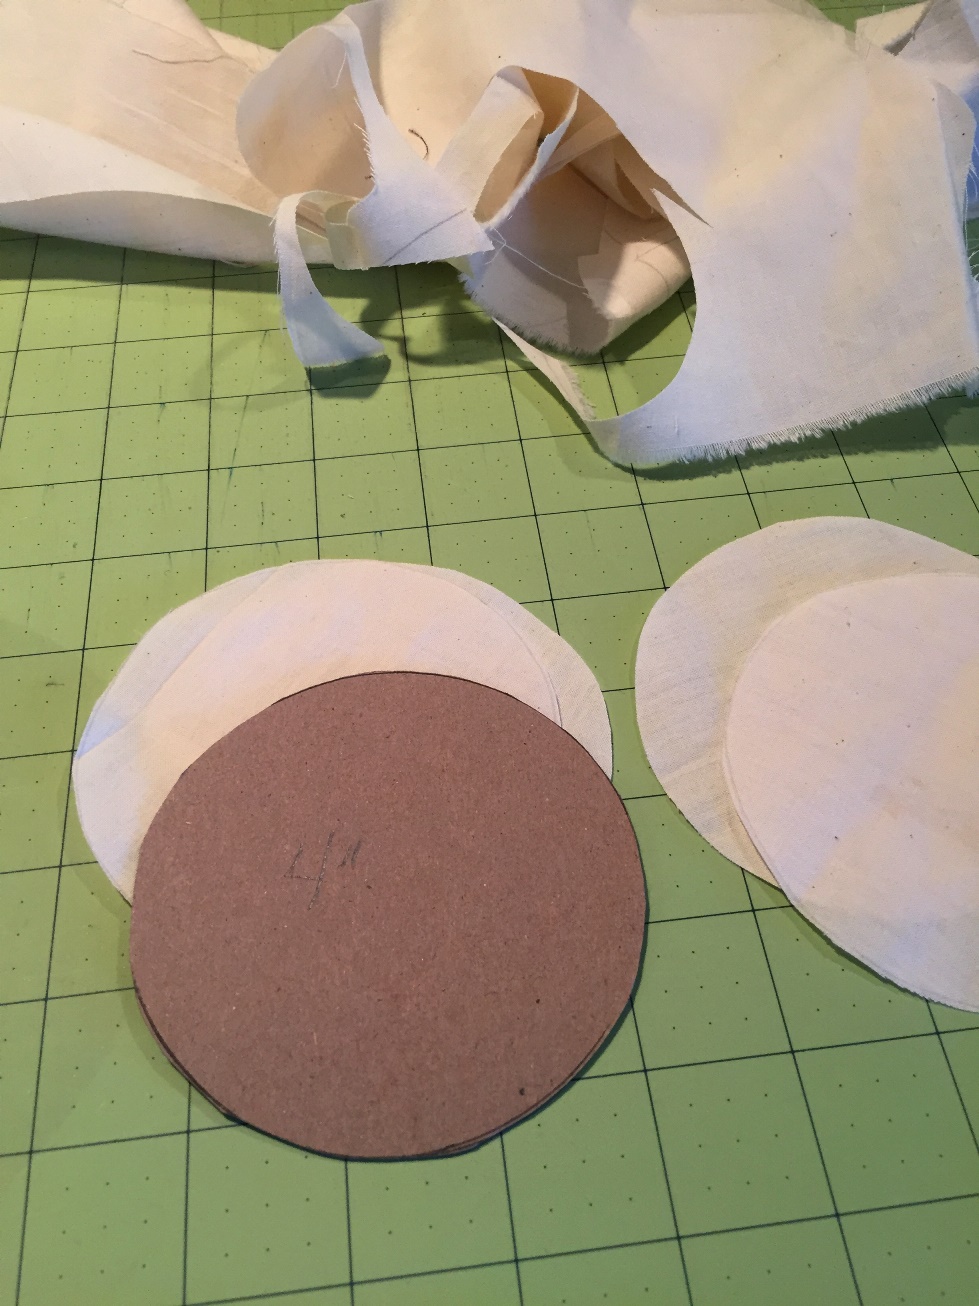
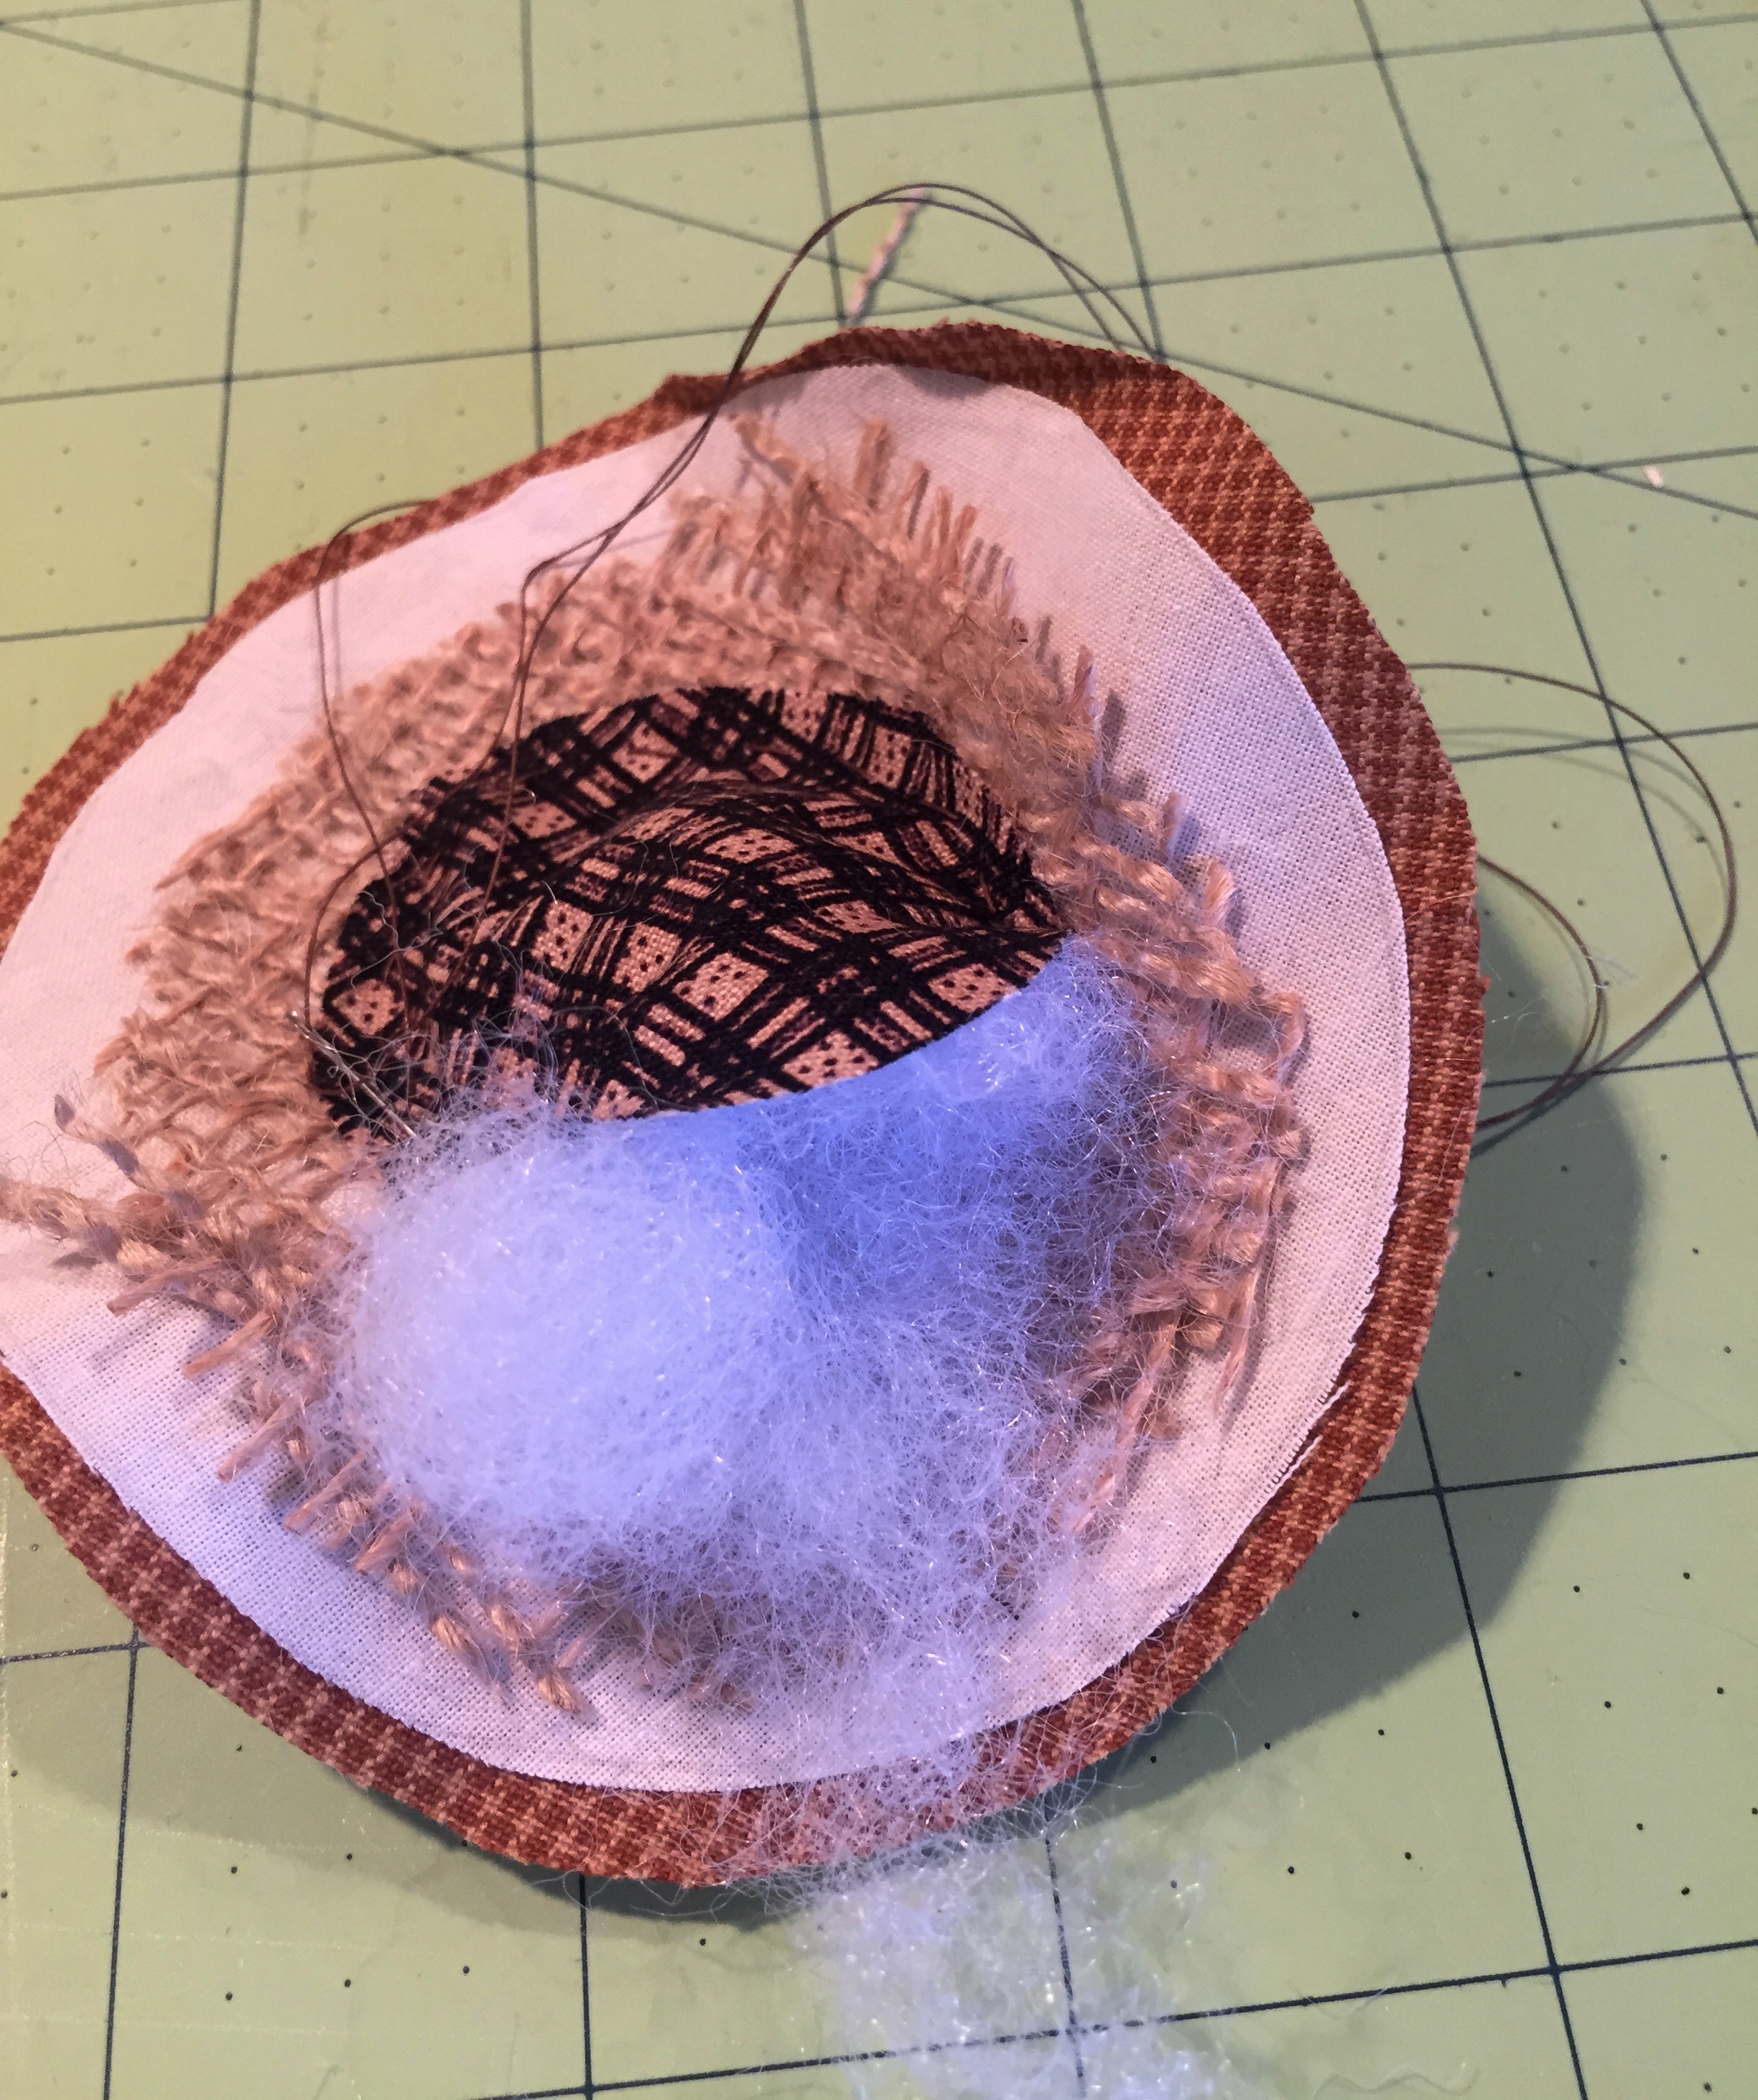
Step 3: Layer a few circles.
I like to layer about three or four circles to create the sunflower. The circle for the back of the sunflower should be reversible: You will be able to see it from both the top and the back of the flower.
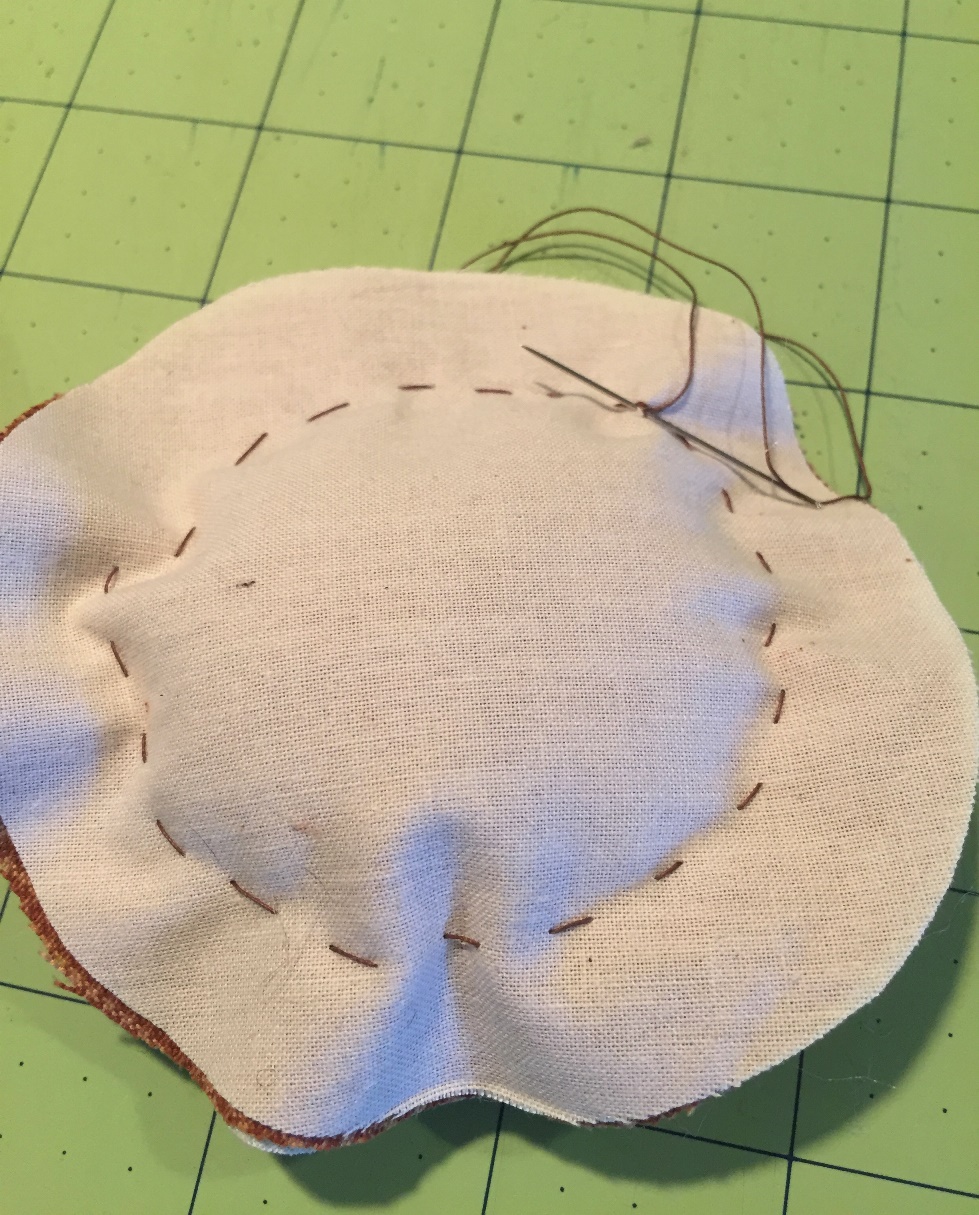
Step 4: Sew the layers together.
Hiding a knot underneath the center circle, baste through all layers, leaving an opening for stuffing. Stitch all the way around, leaving a inch or more of fabric around the stitching, which will create the petals later on.
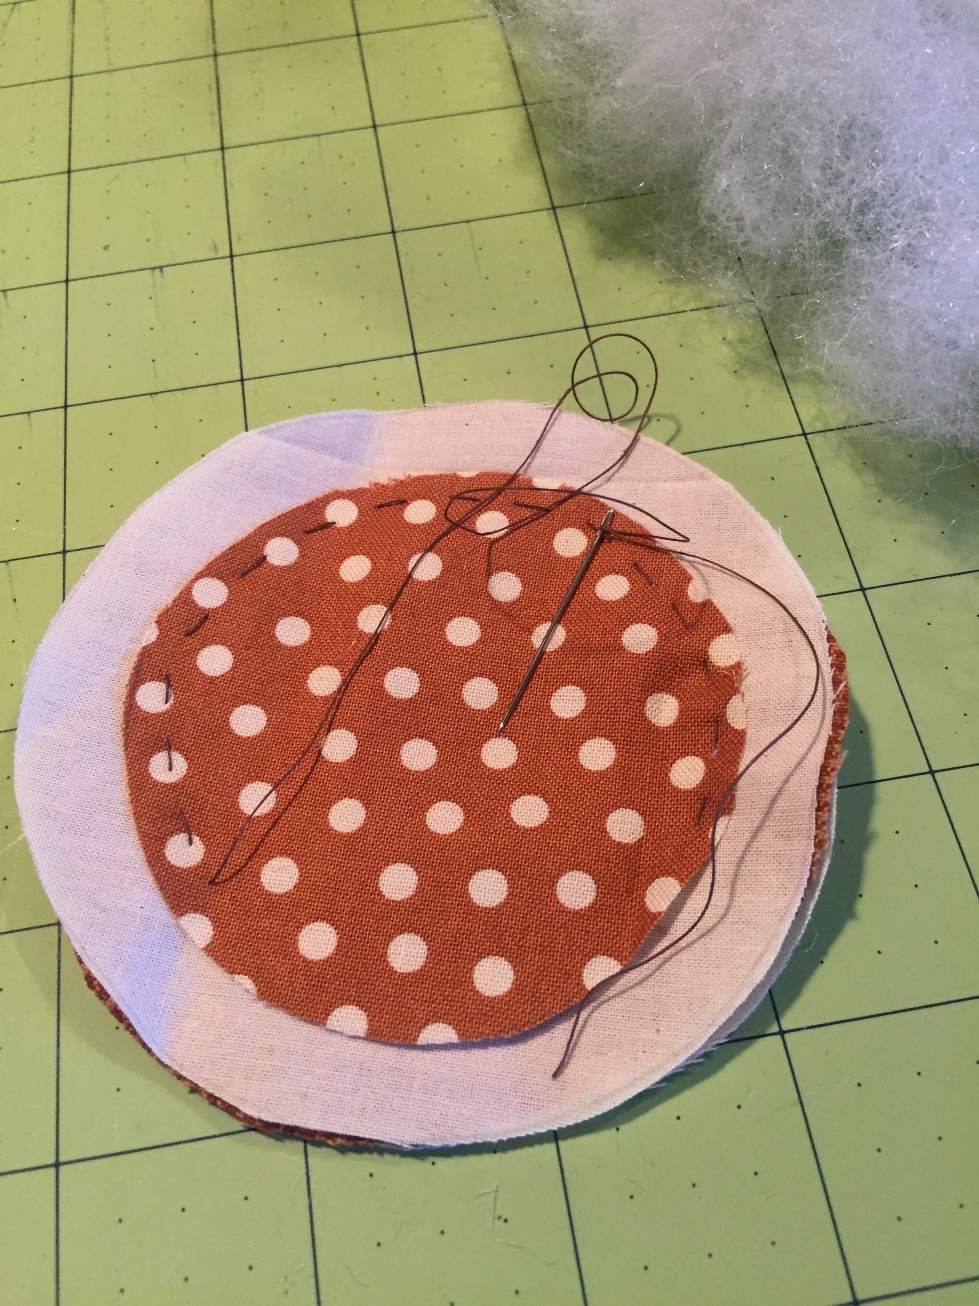
Add the stuffing only under the top circle.
Continue the basting stitch to close the opening
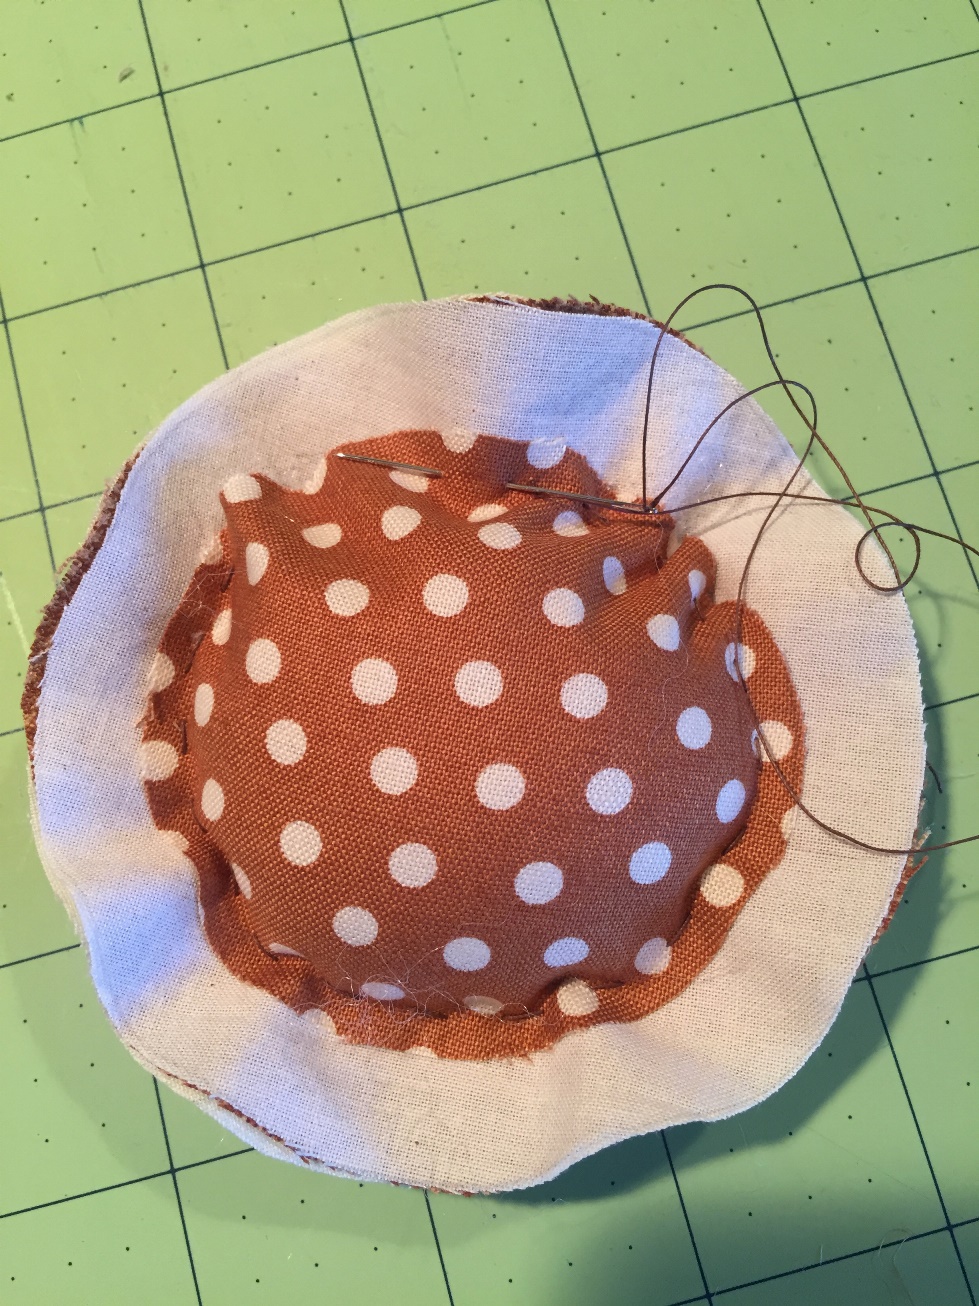
Knot off the basting on the back of the sunflower.
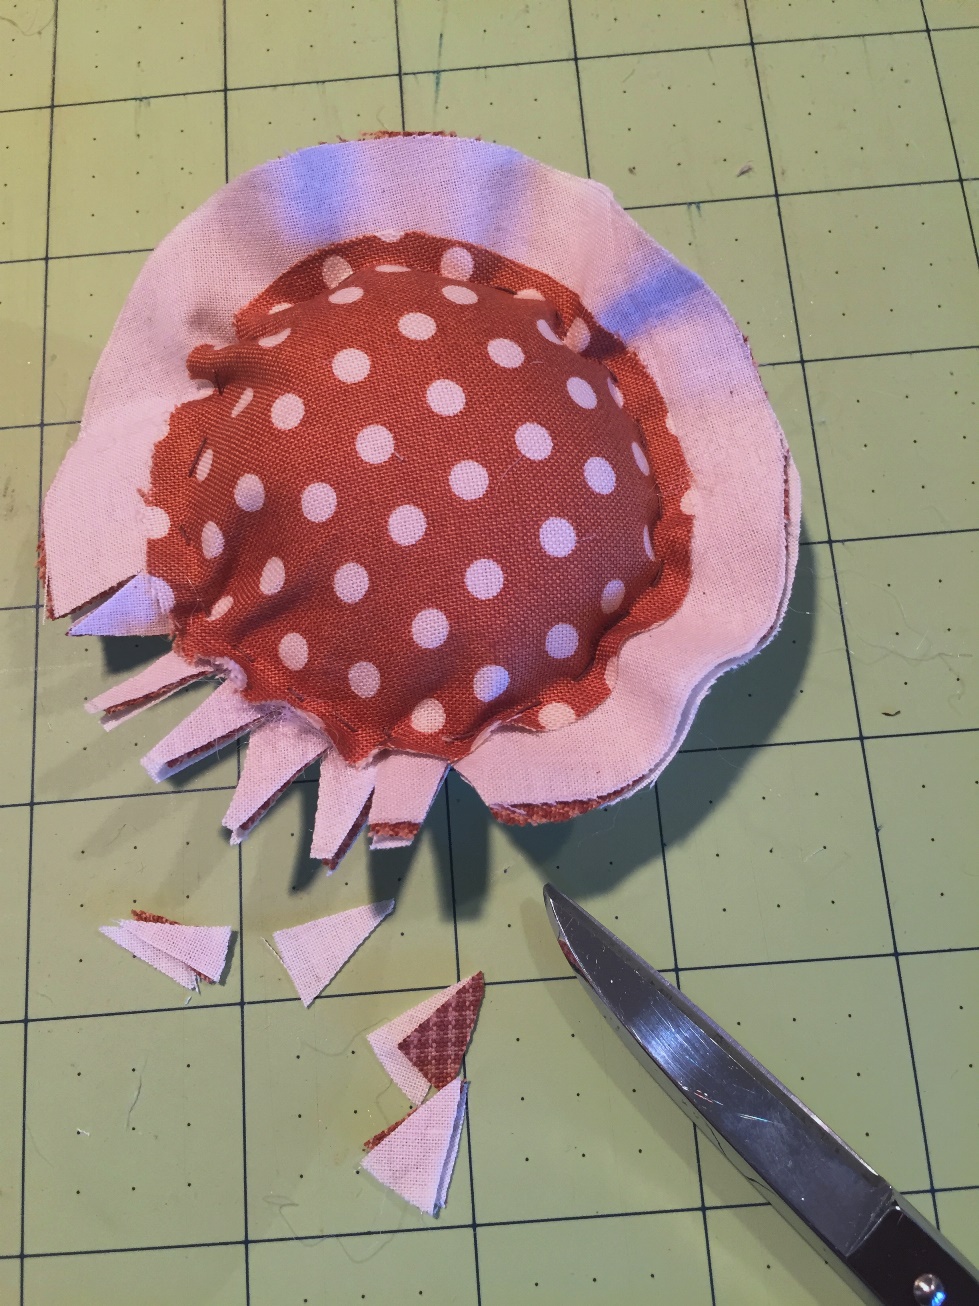
Step 5: Cut the petals
Clip little V shapes to create petals. Do not cut into the center circle. Consider using pinking shears when cutting out the center circle — gives it a fun edge!
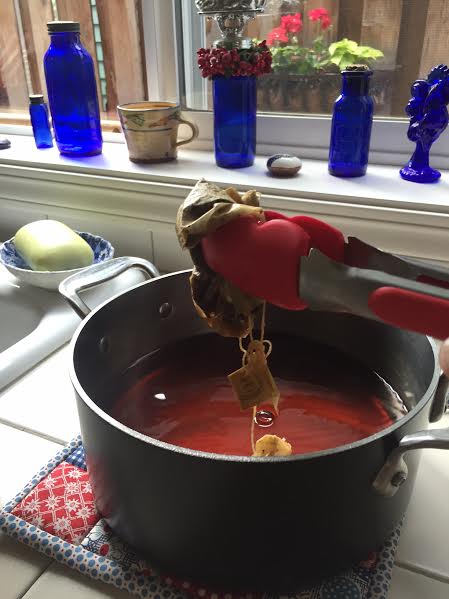
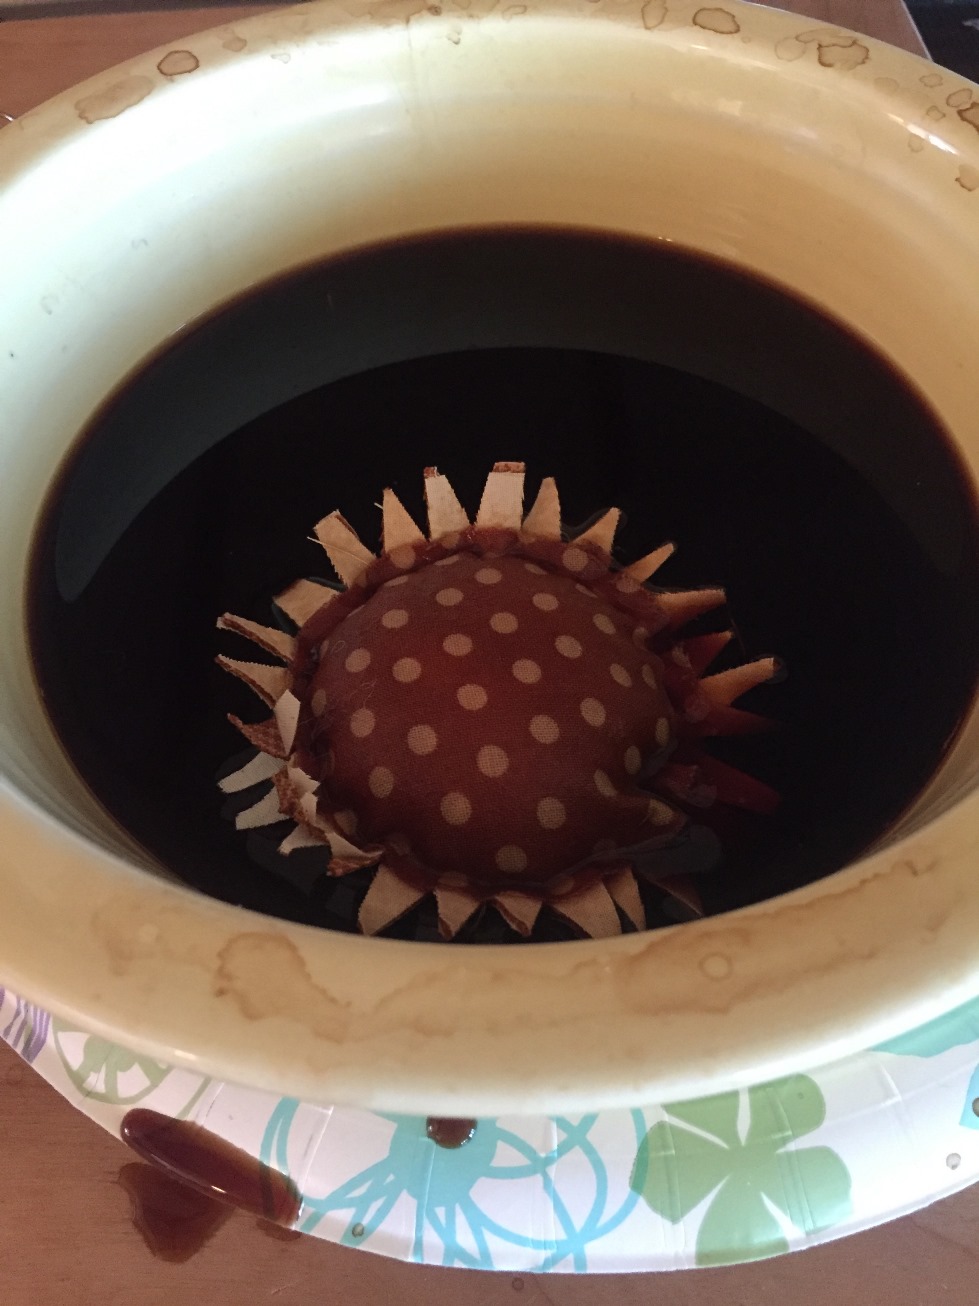
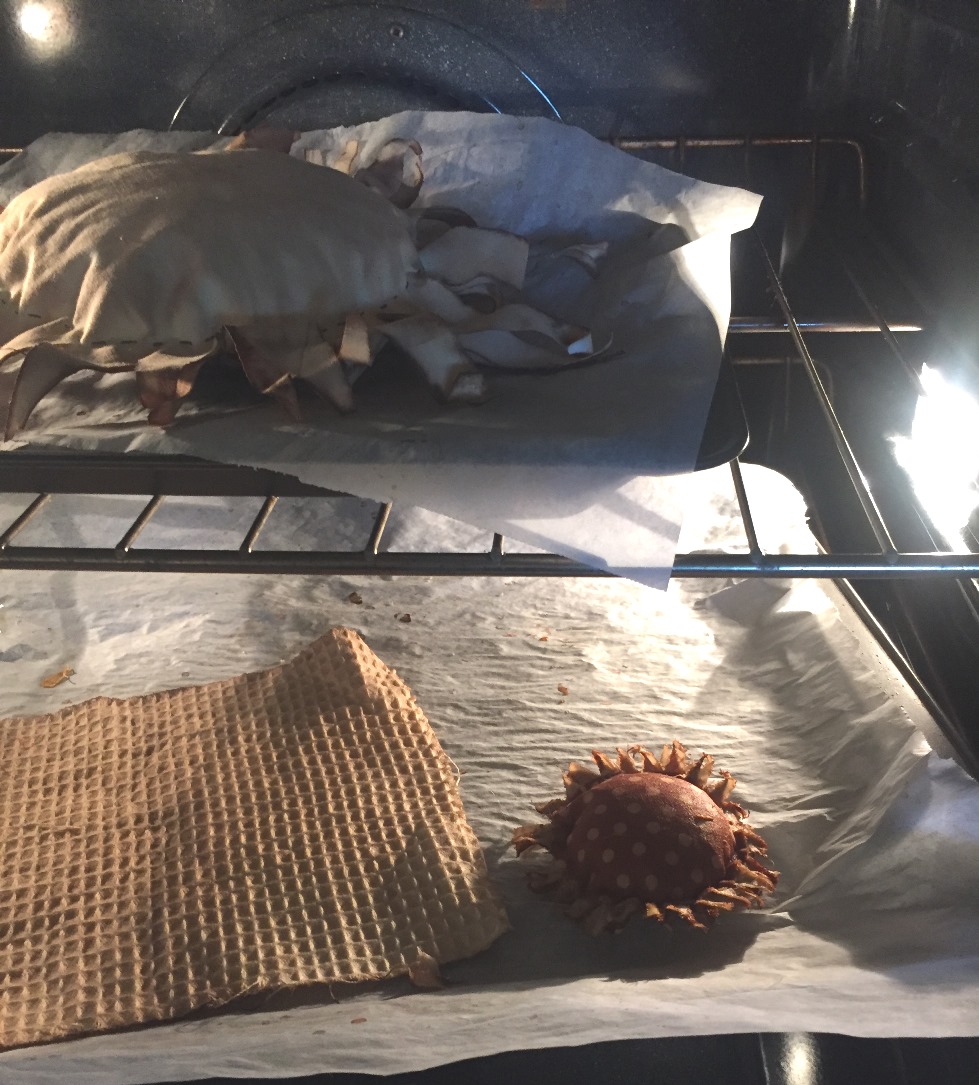
Step 6: Tea stain the finished sunflower.
Using tongs, submerge the sunflower into the tea bath for a minute. Check to see if you like the color; if not, place it back into the tea solution. I left mine in for a minute, then swirled just the petal tips back into the tea.
Once the color is to your liking, squeeze the sunflower to remove as much of the excess liquid as possible.

Step 7: Set the dye.
Set the sunflower onto a parchment paper–lined cookie sheet and place in a 200 F oven for 5 minutes. Watch carefully: You’ll want to flip the sunflower over a few times during the drying process. The size of the sunflowers will determine the drying time.
If the petals tips darken or start to burn, tend to become a bit darker, take the flowers out to air dry the rest of the way.
Consider brushing your sunflowers with a craft glue or a water-glue solution to stiffen the petals and or centers if needed. This step comes after the tea bath and before oven drying.
Share tips, start a discussion or ask one of our experts or other students a question.
No Responses to “Give Your Projects an Antique Glow With Tea Staining”