
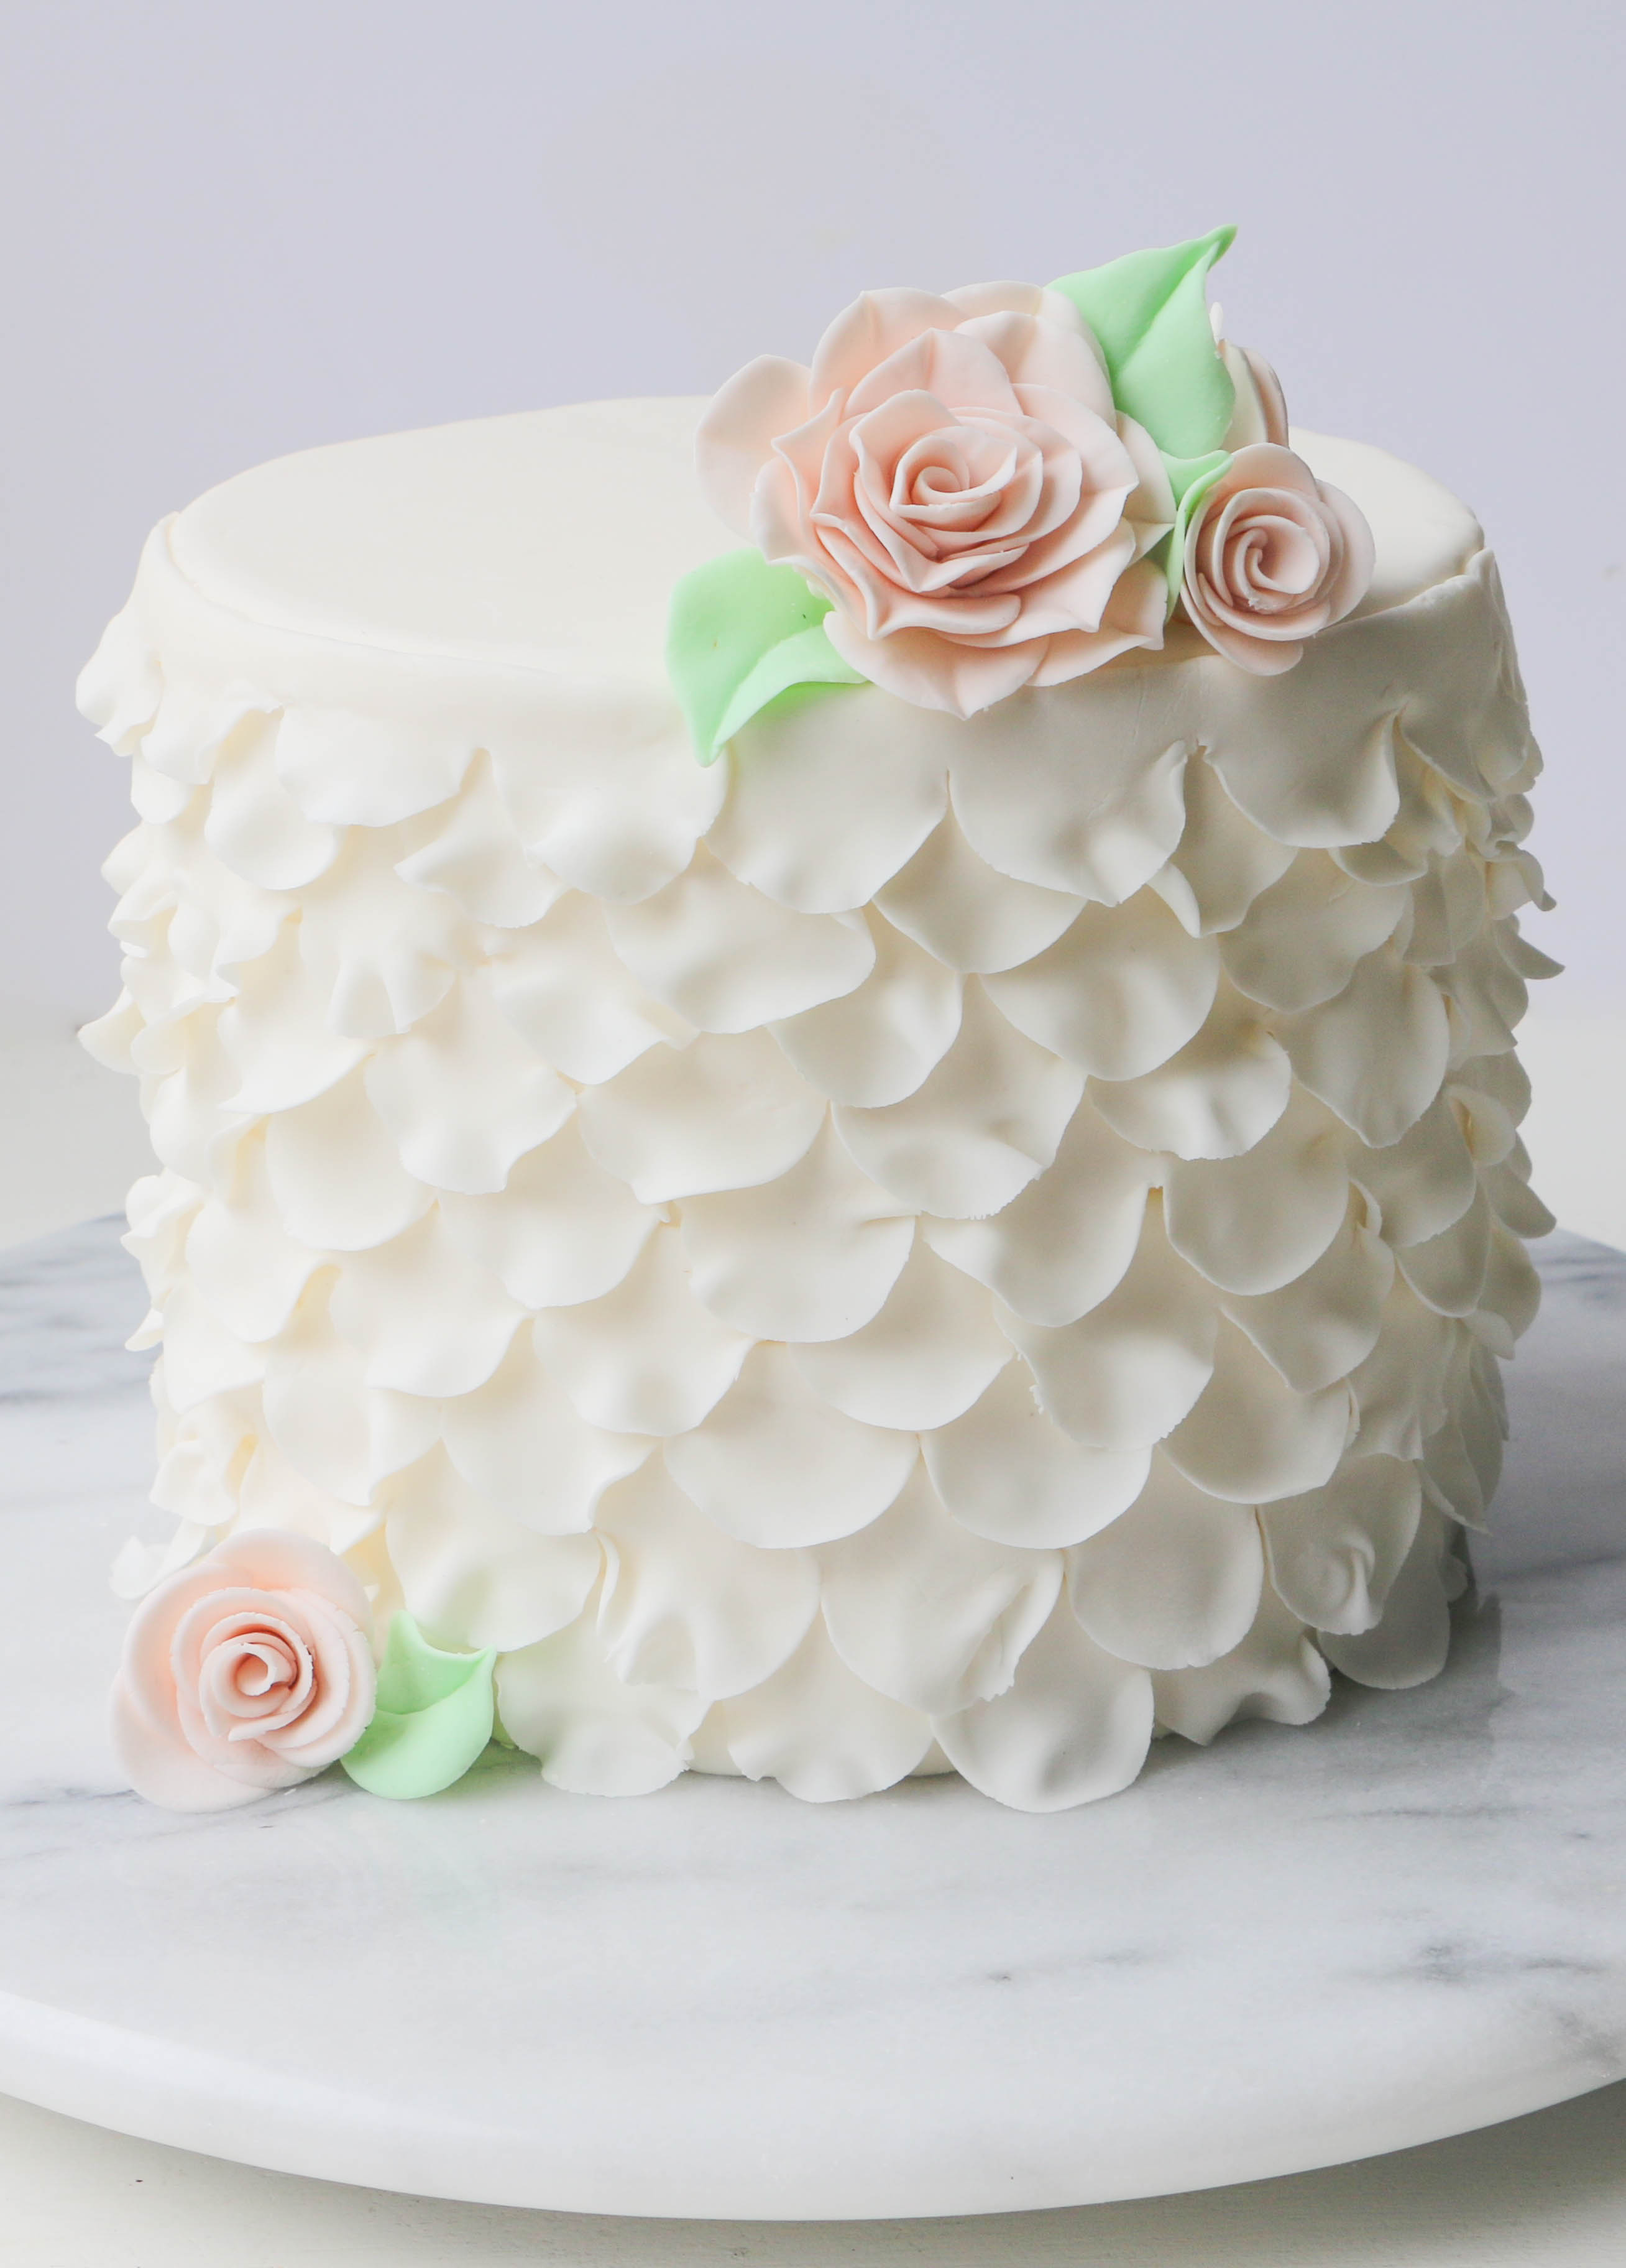
One amazing tool can not only help you make a stunning ruffled cake, but you can also maximize return on your tool purchases, cut down on clutter and minimize decorating time. The Easiest Rose Ever Sugar Flower Cutter may look like a simple cutter, but read on to find how it can be used to make four stunning designs, including flowers, leaves and even ruffles!
Images via Erin Bakes
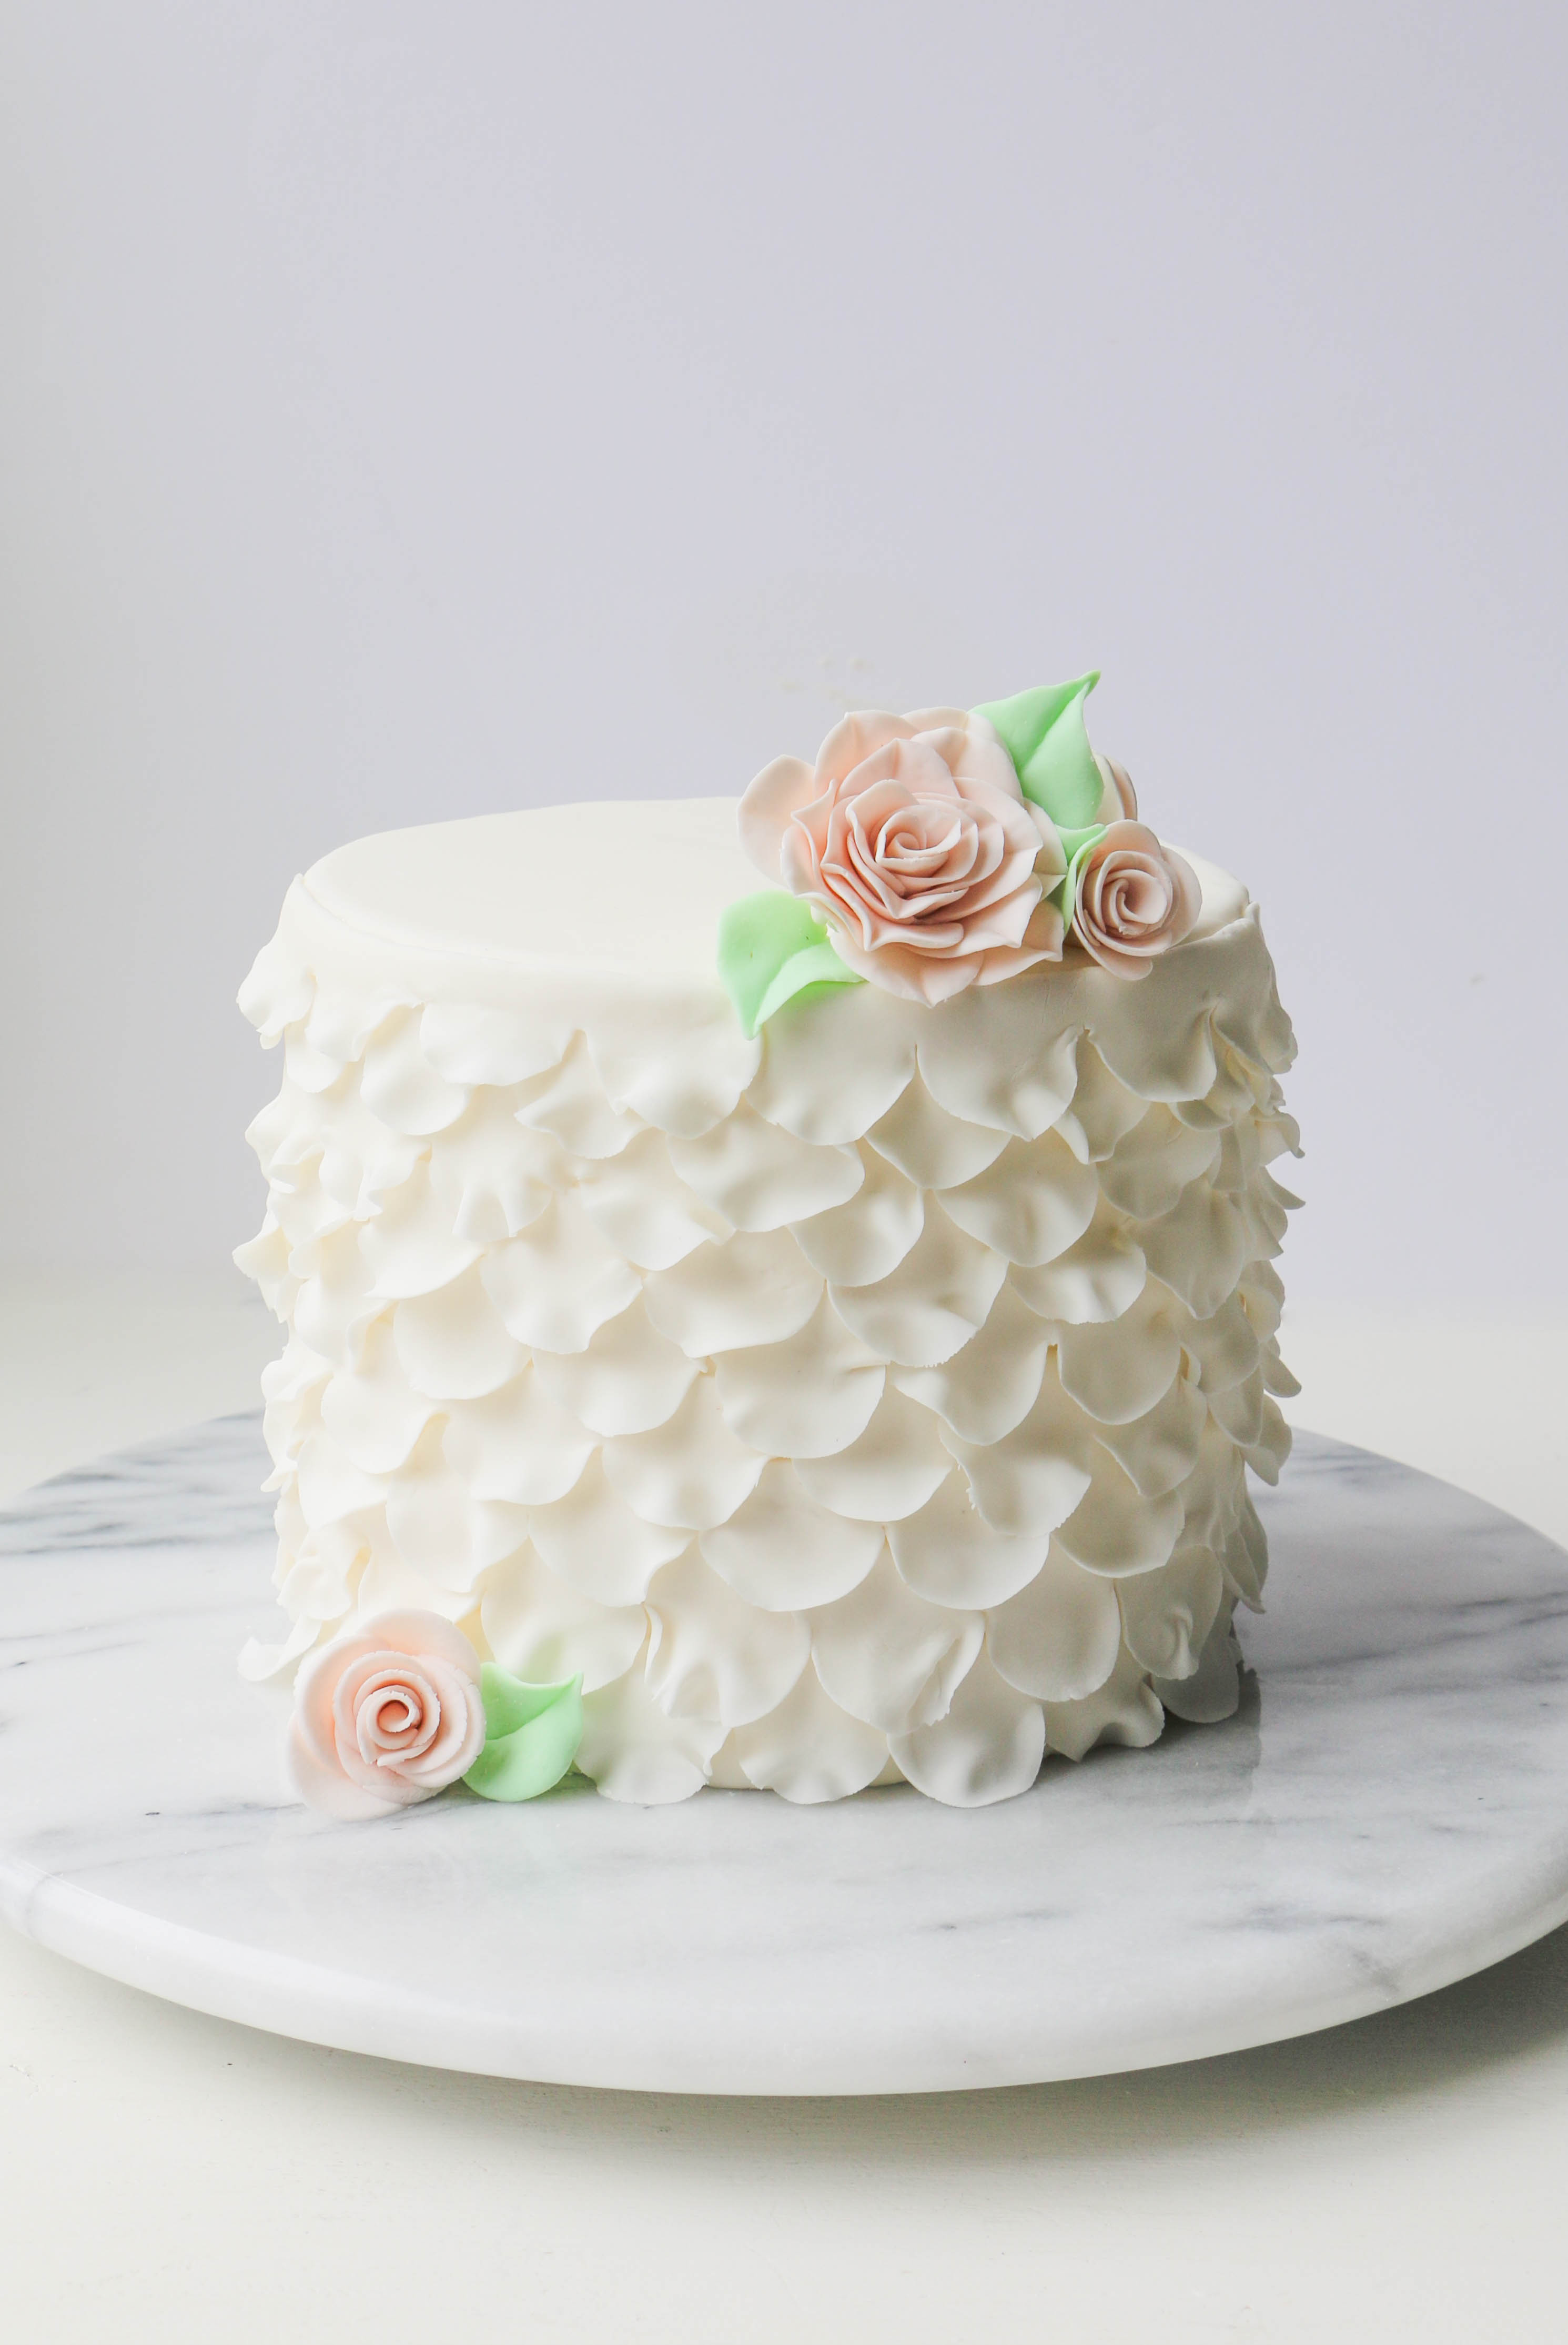
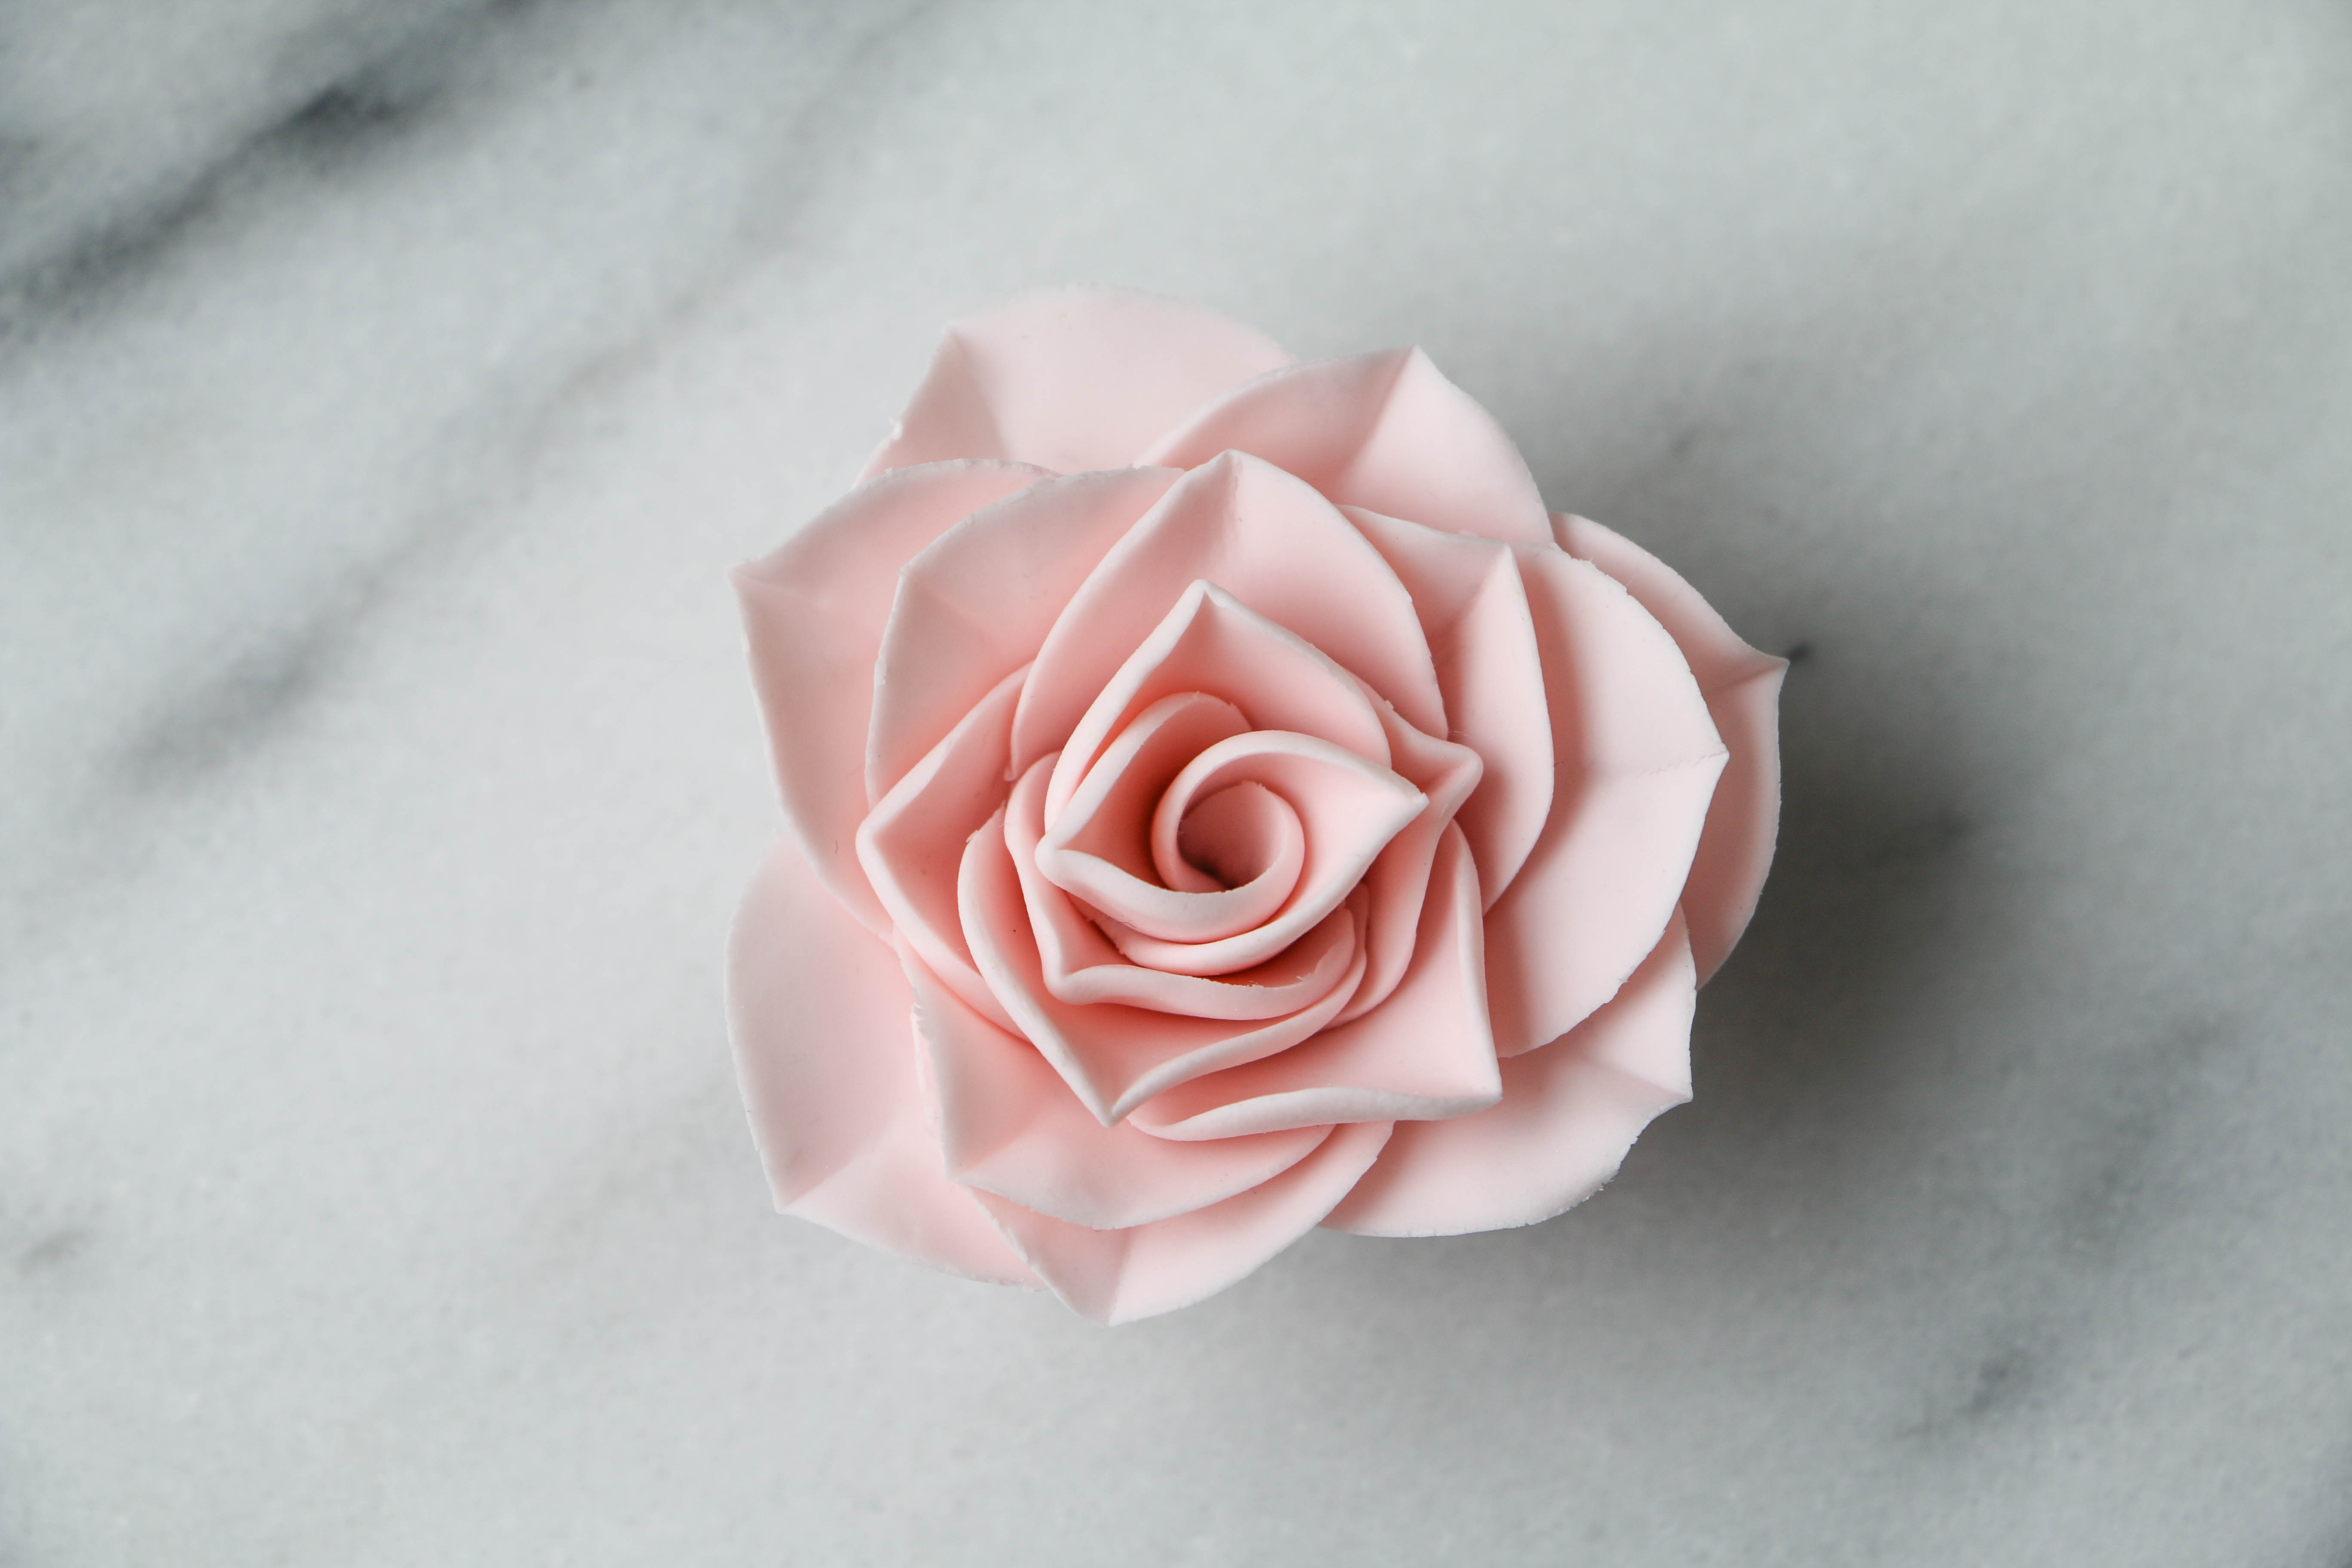
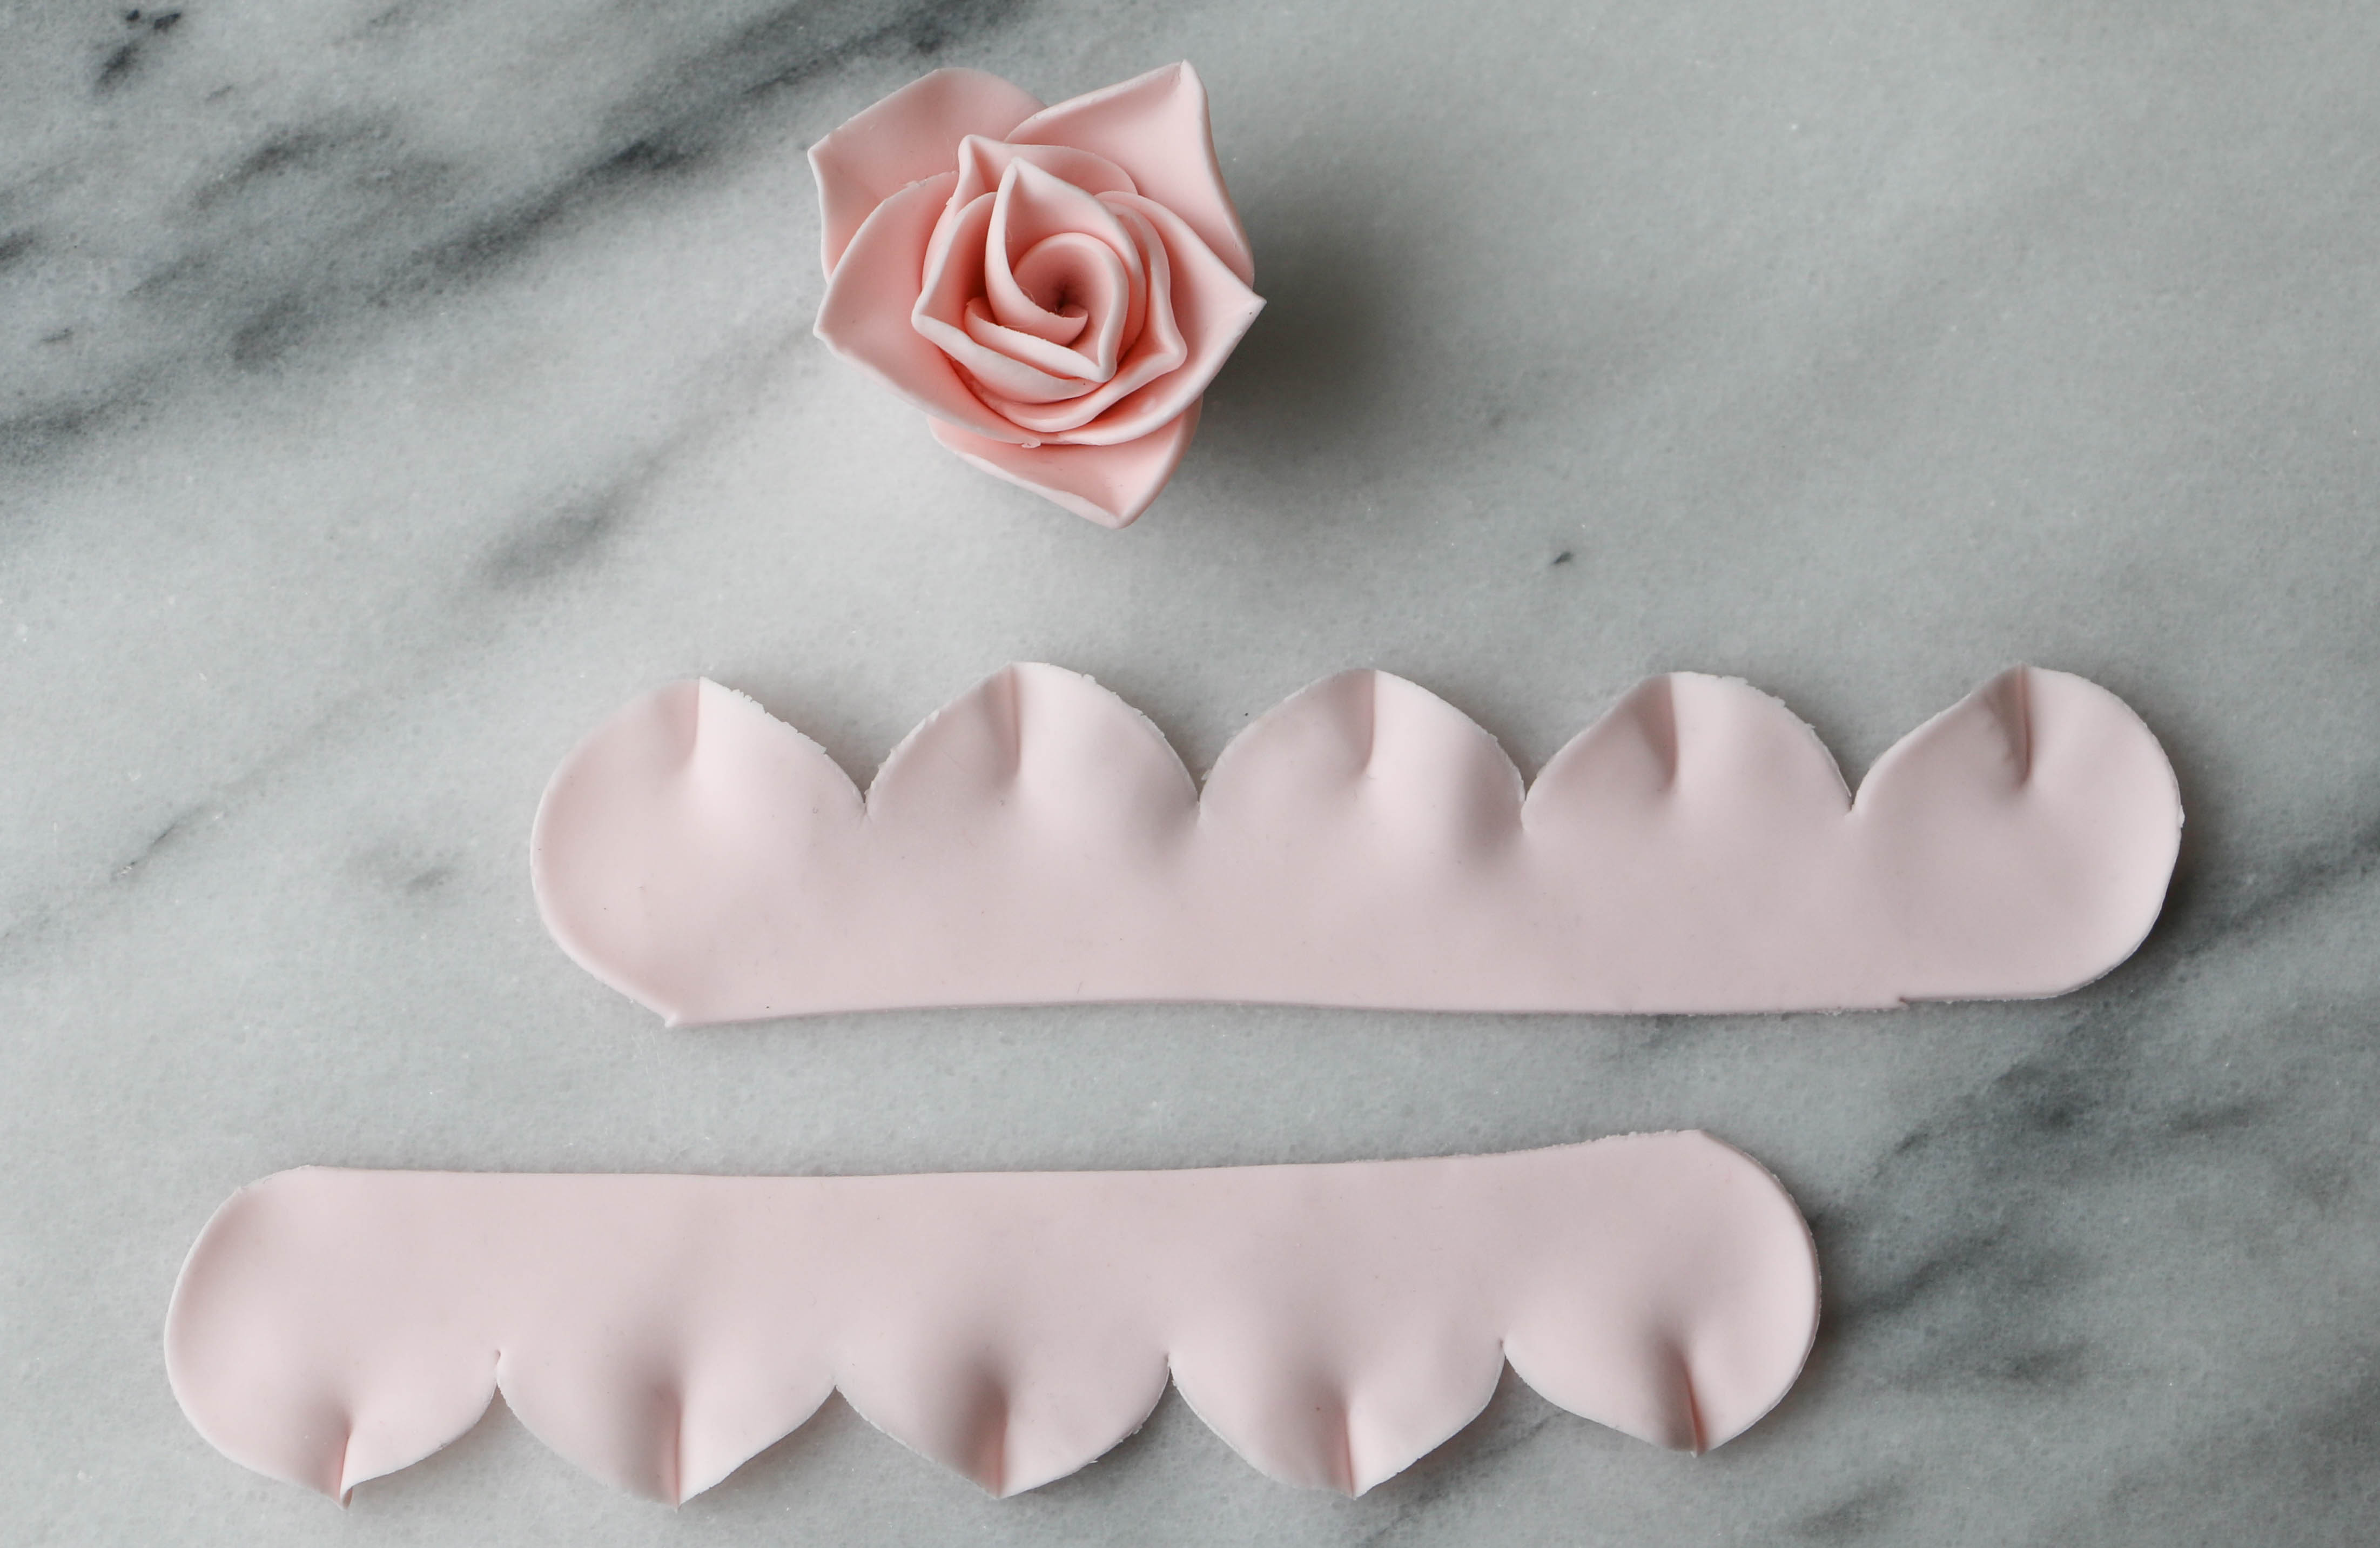
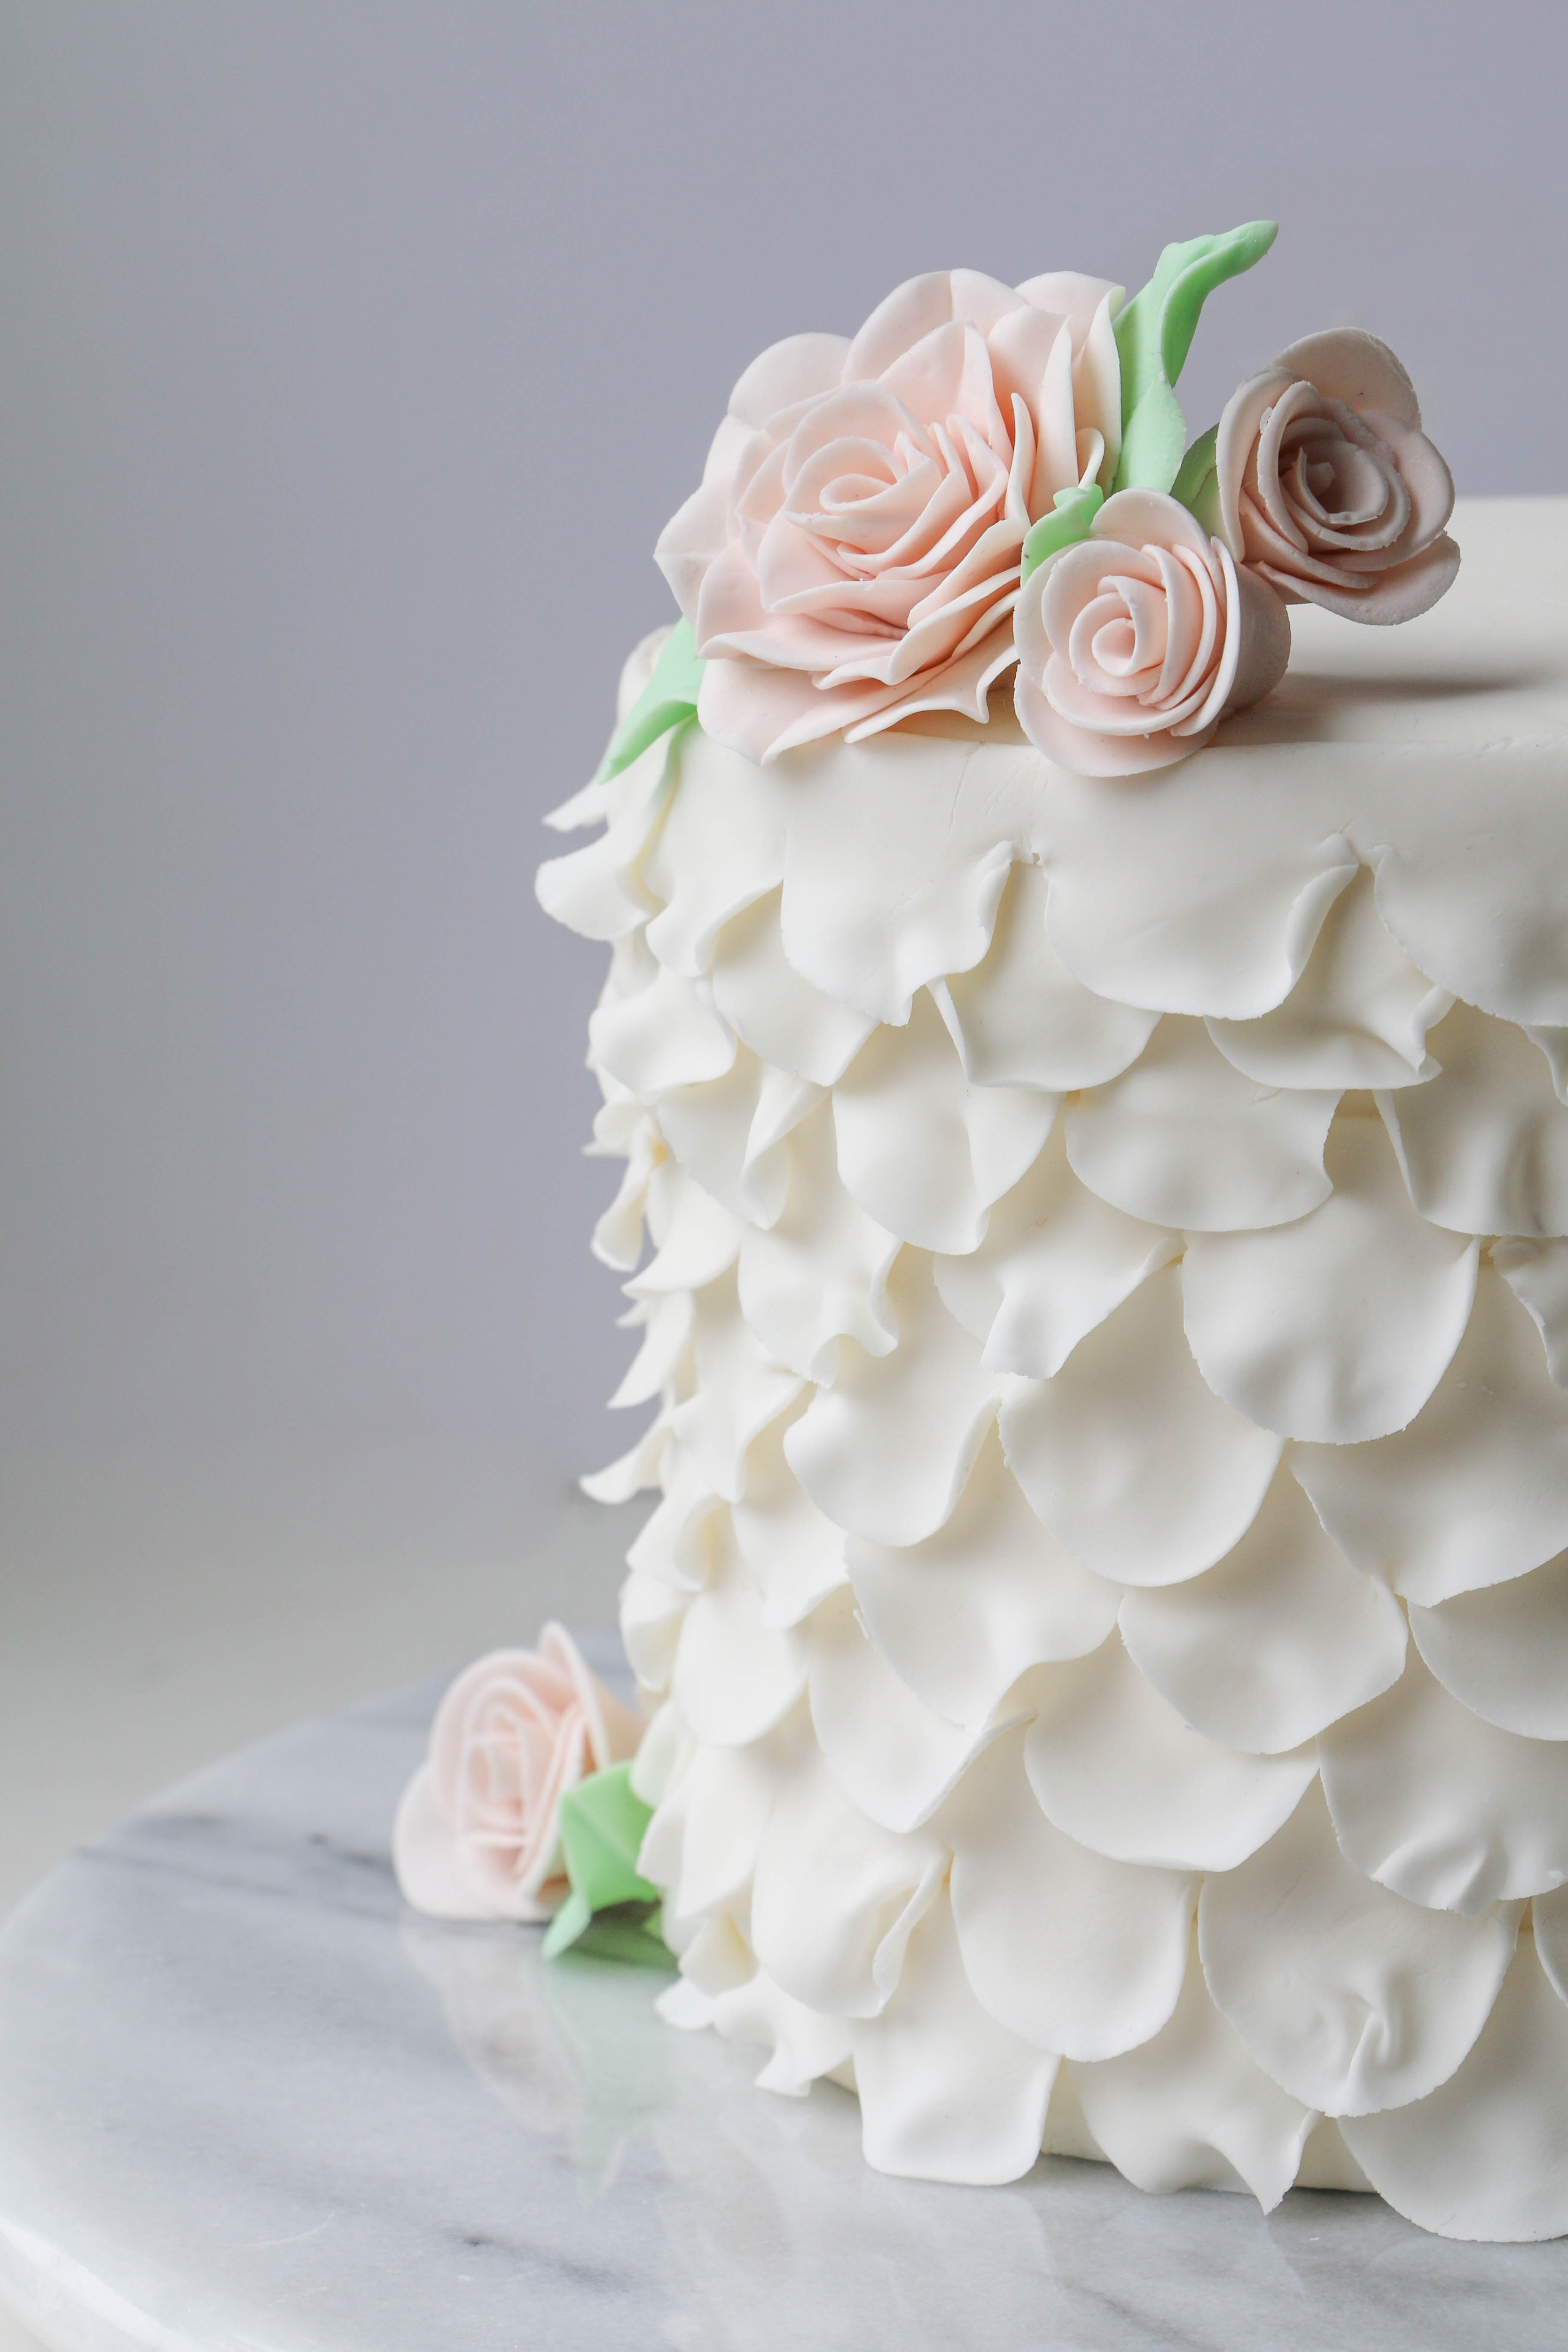
Make a beautiful ruffles and roses cake with this cutter.
Supplies
- Easiest Rose Ever Sugar Flower Cutter (I used the smaller one in this tutorial, but the techniques work with all sizes of this cutter.)
- Plastic rolling pin
- Gum paste (light pink and green)
- Ivory fondant
- Ball tool (or small rolling pin or spoon)
- Spoons
- Foam mat
- Knitting needle or toothpick
- Gum paste glue
- Fine-tipped paintbrrush
- Small knife
- Fondant-finished cake (I used a 6-inch round.)
How to make a simple rose
Step 1:
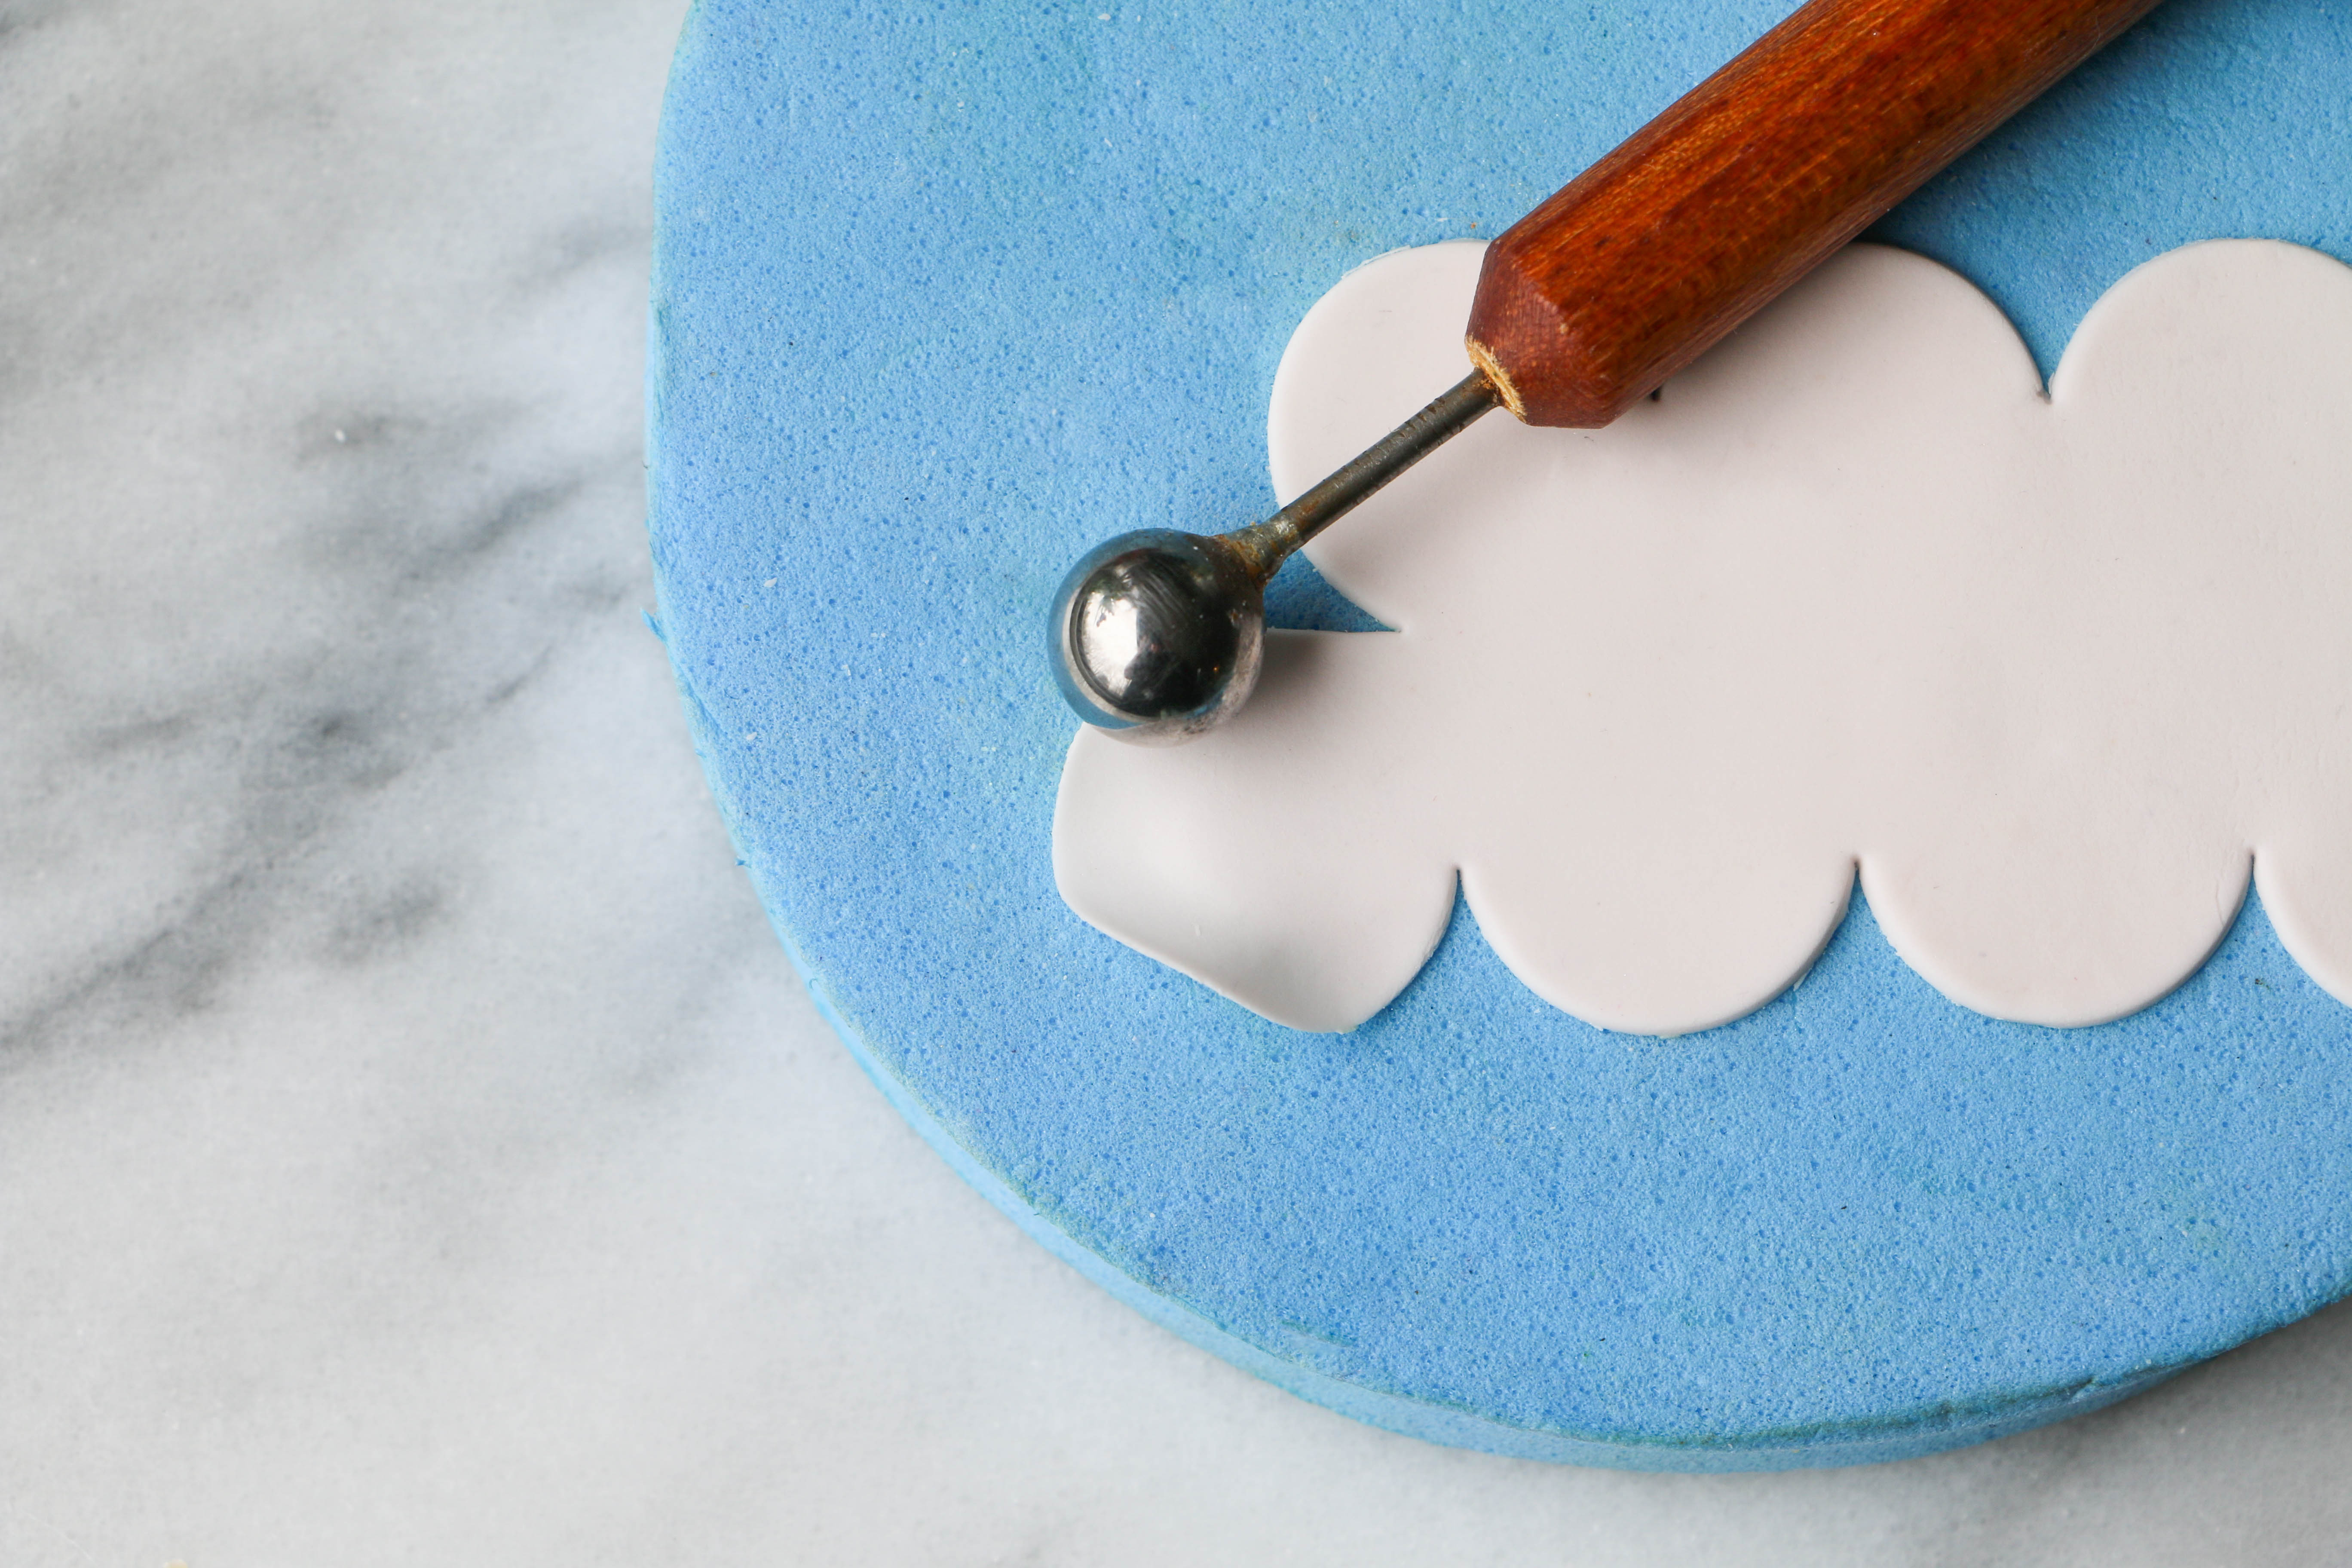
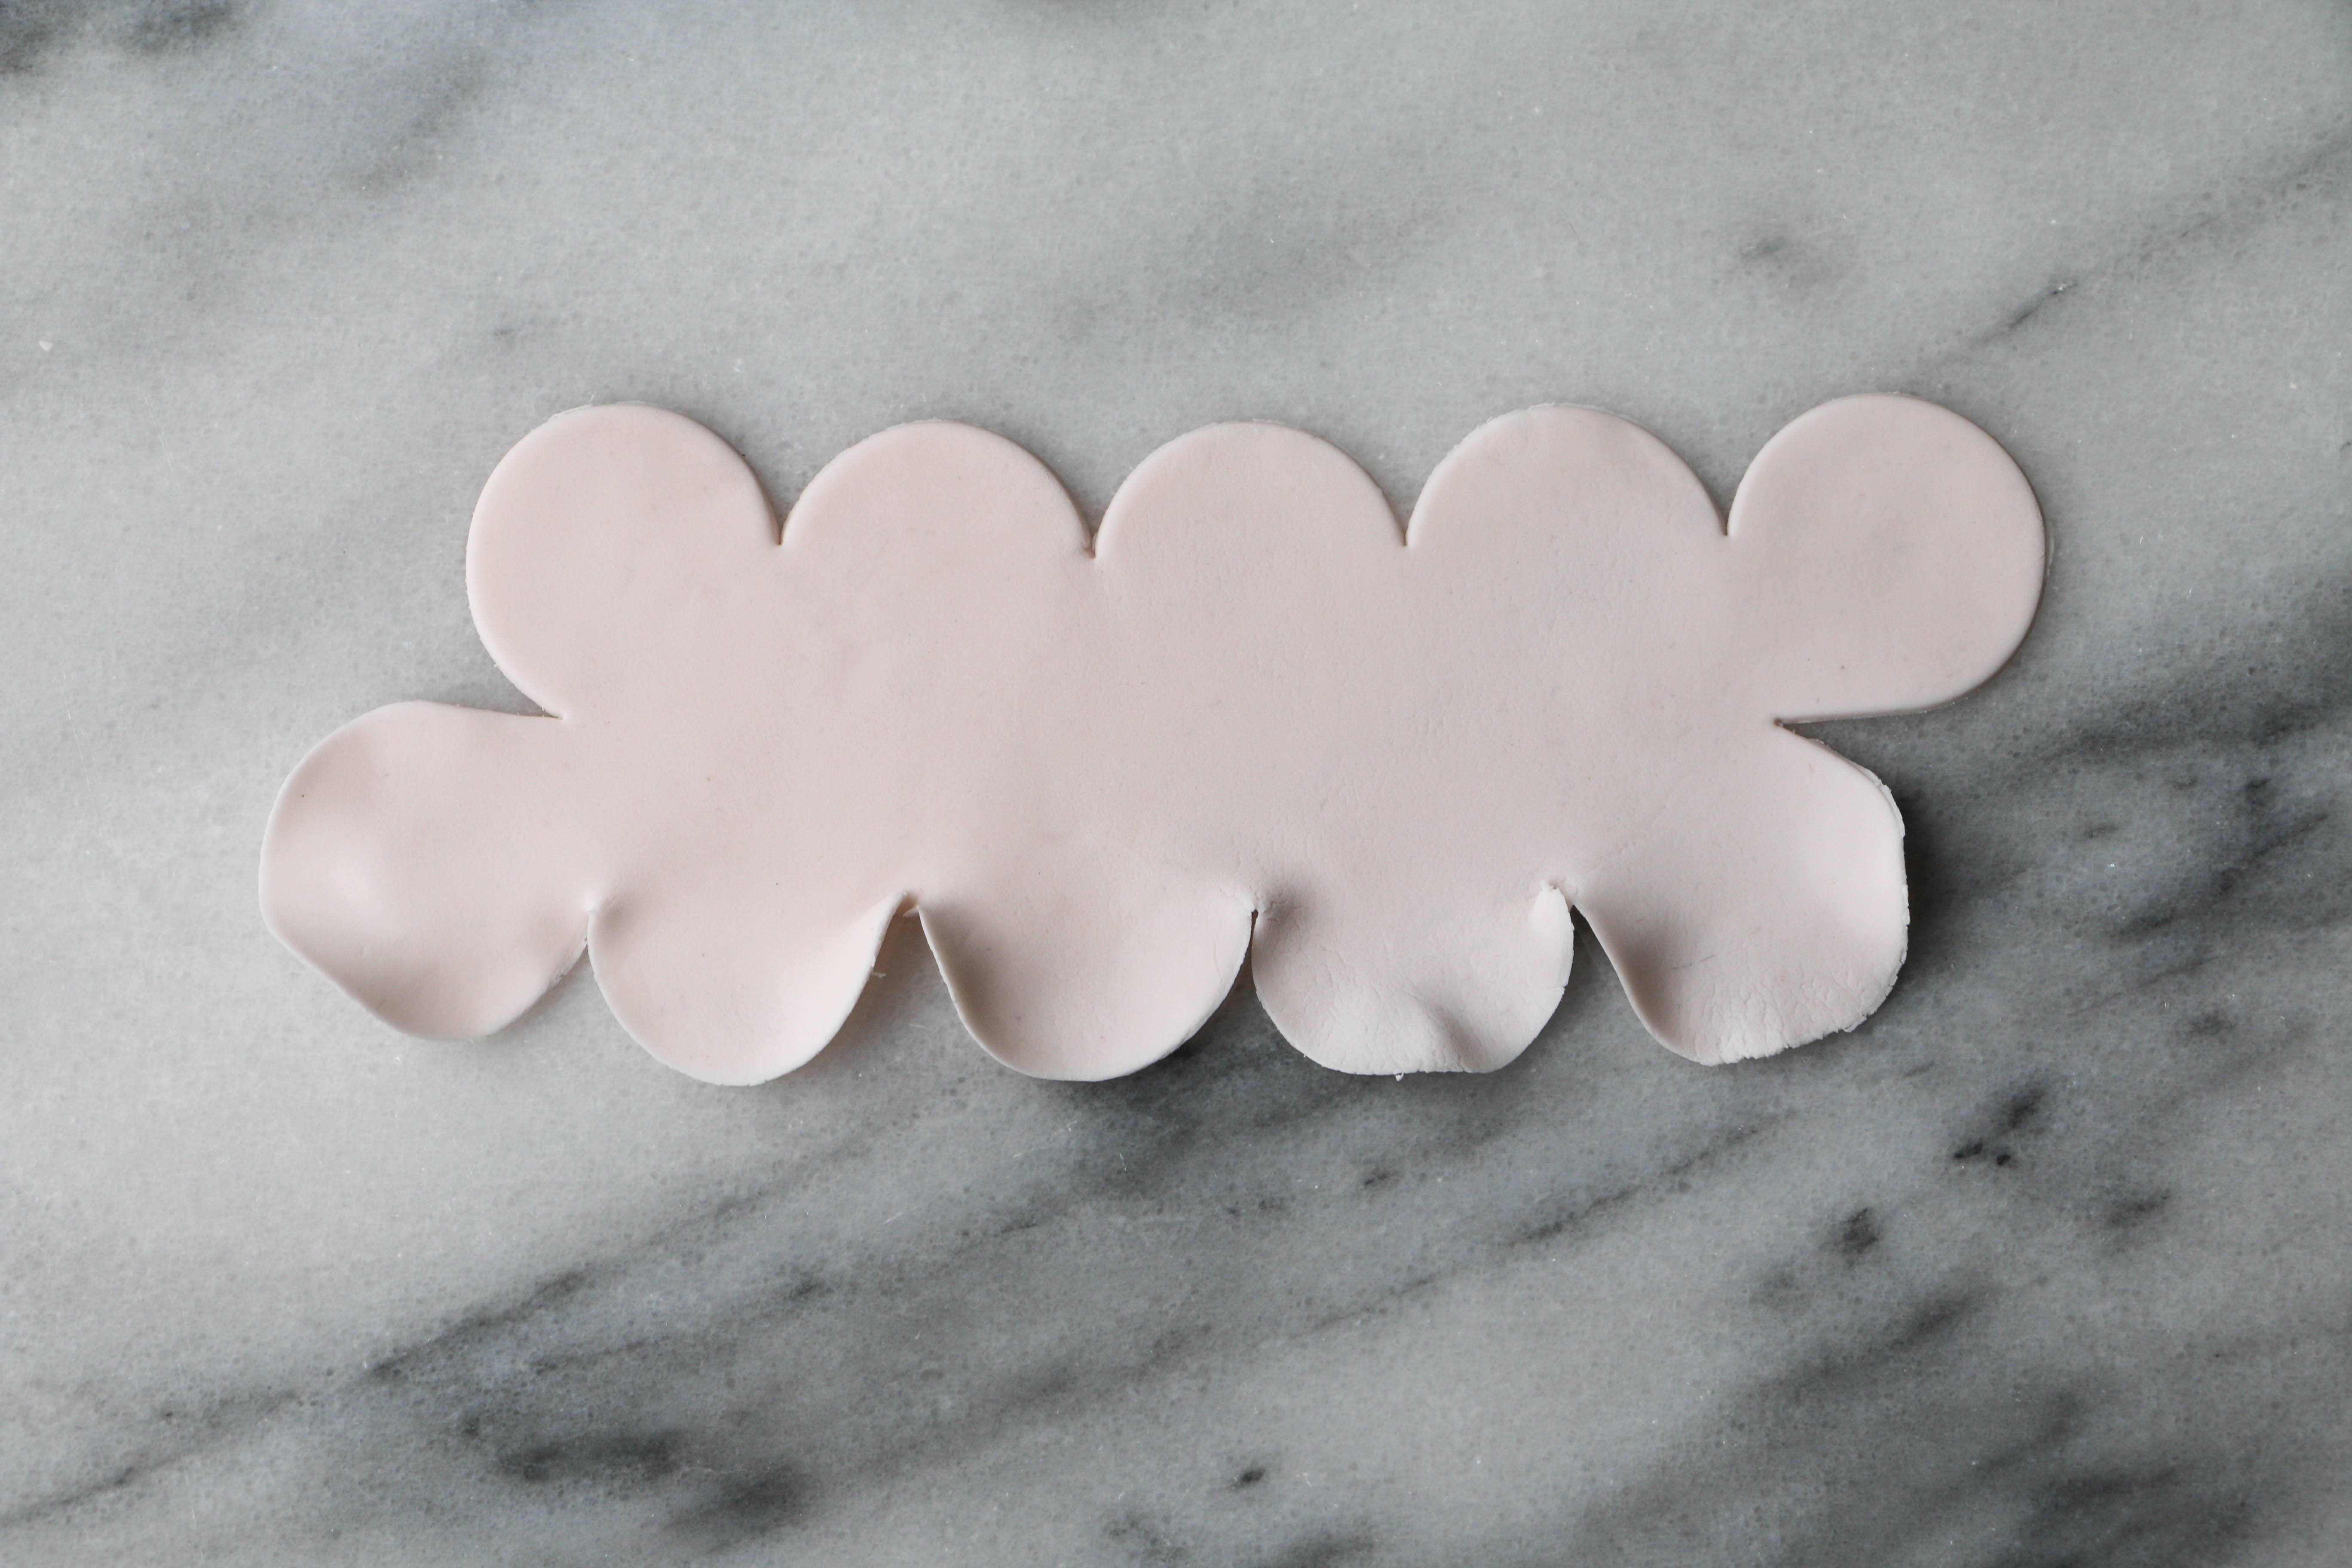
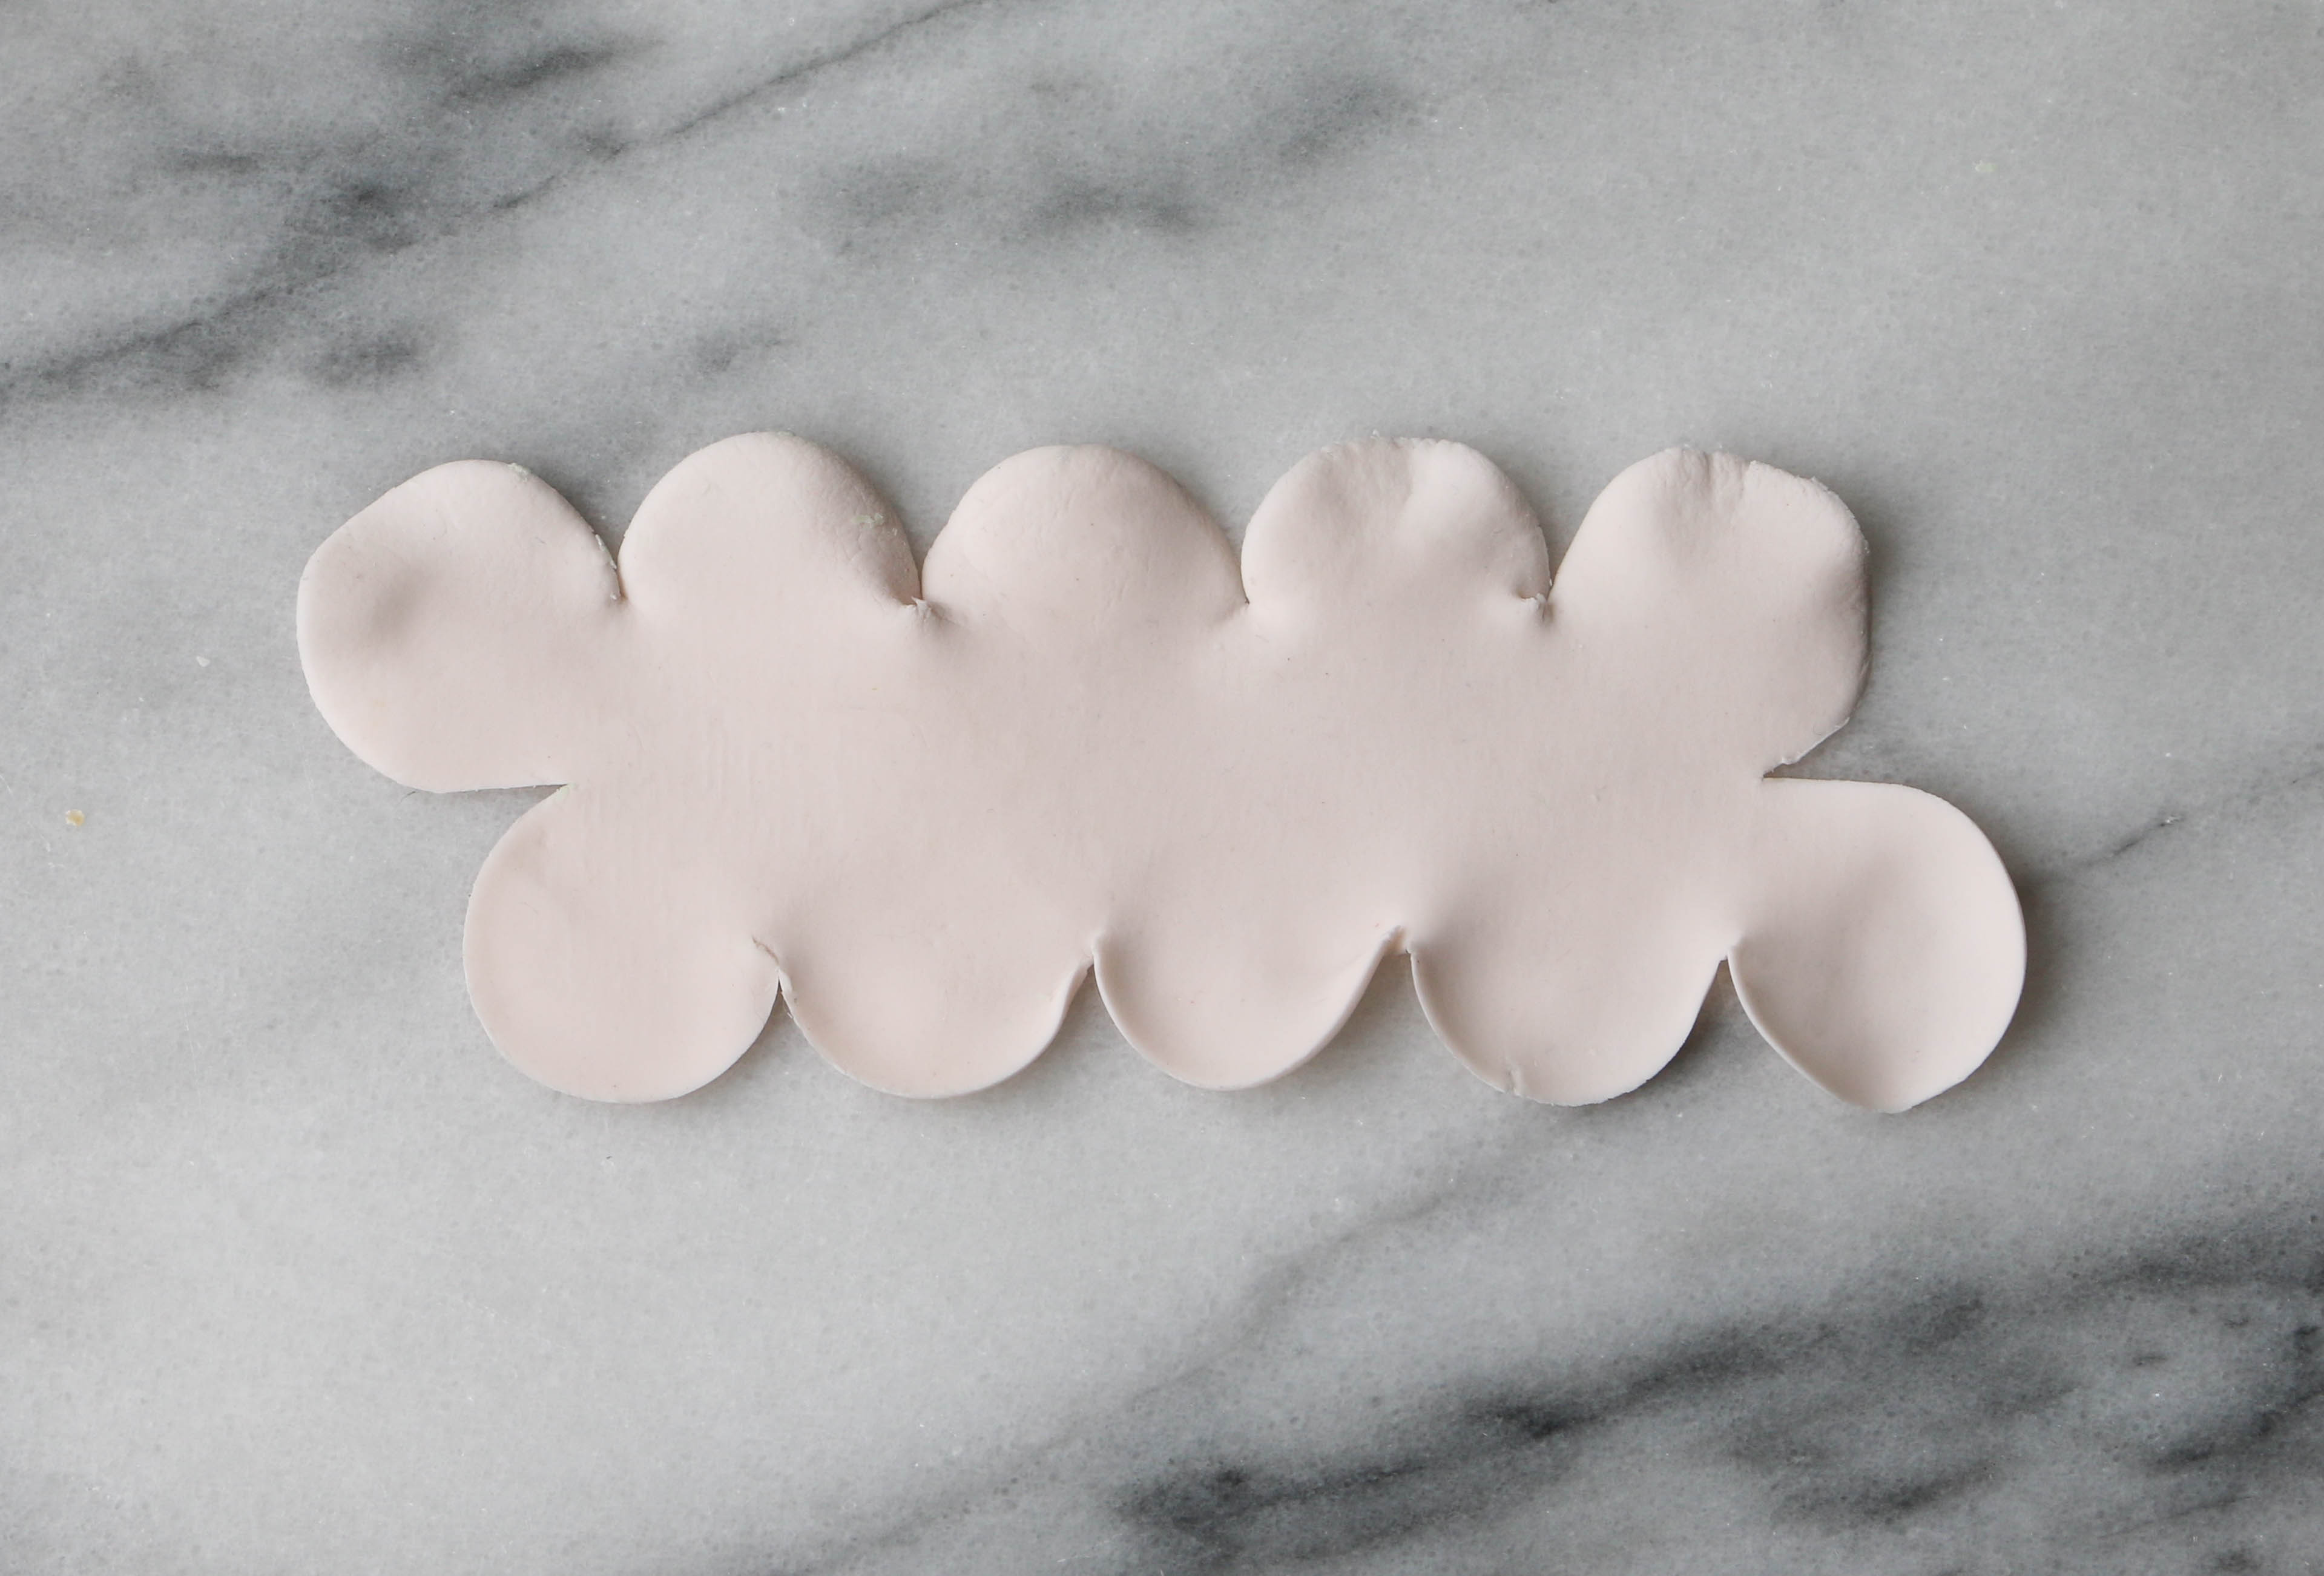
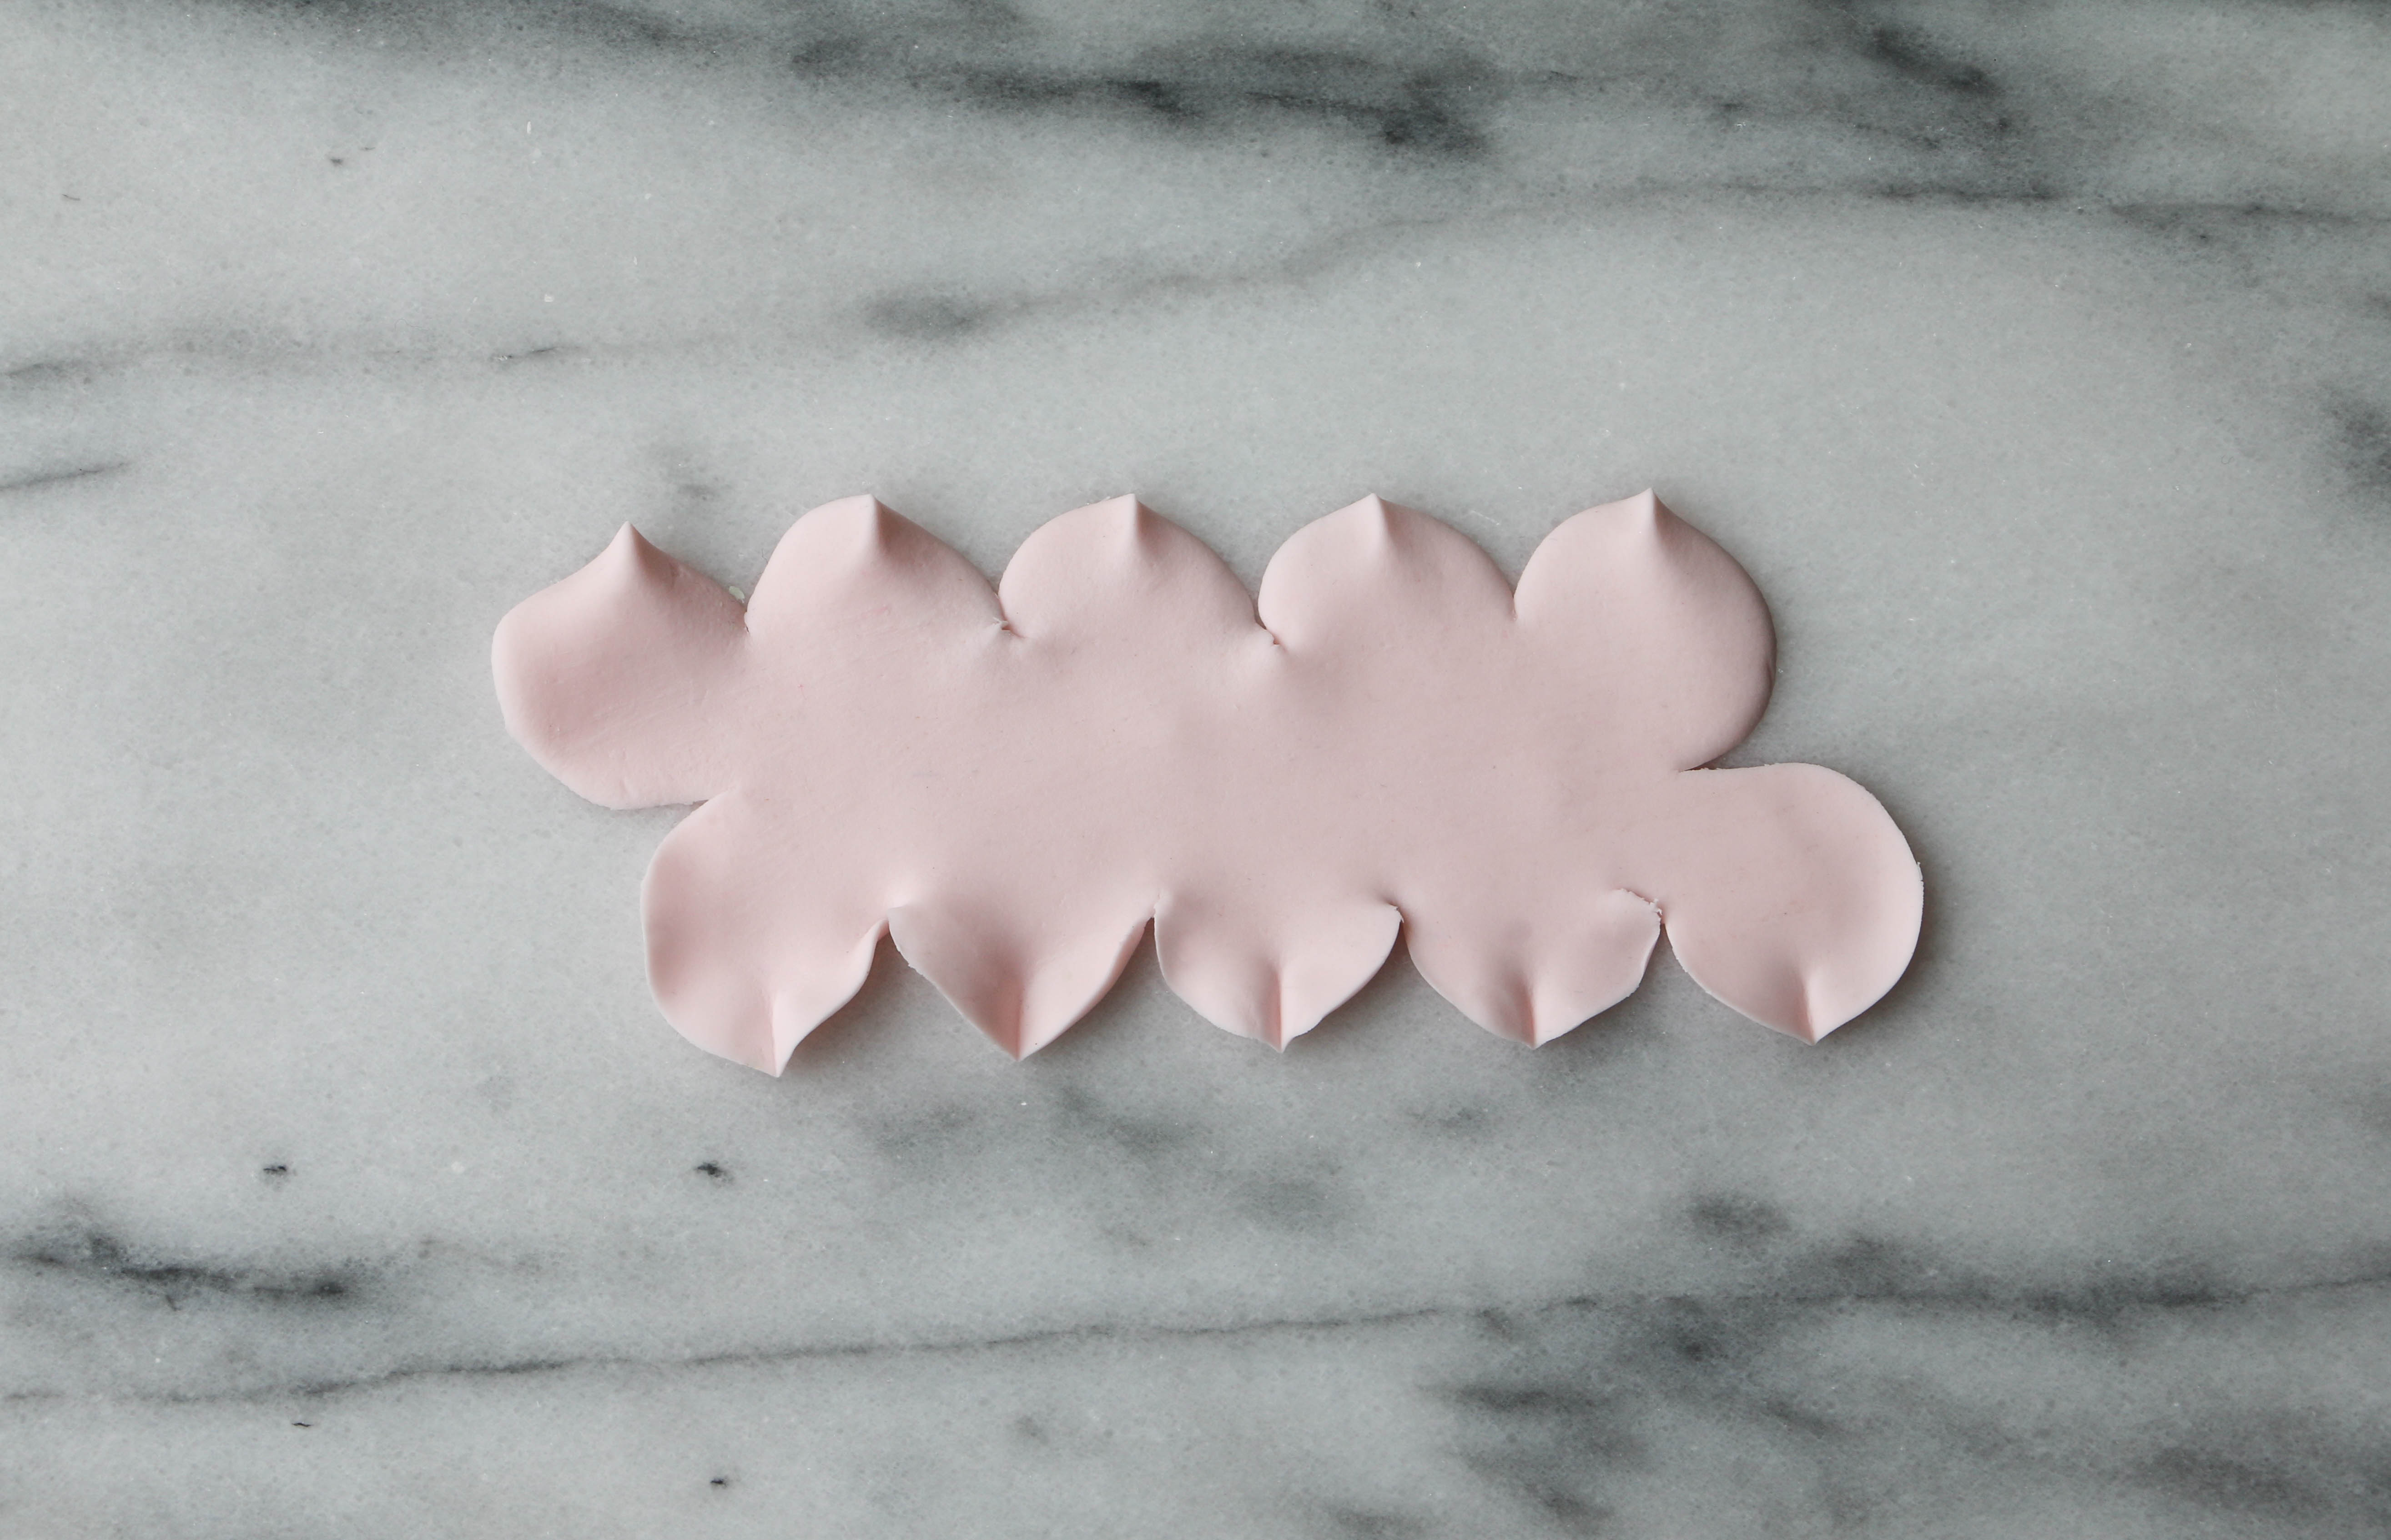
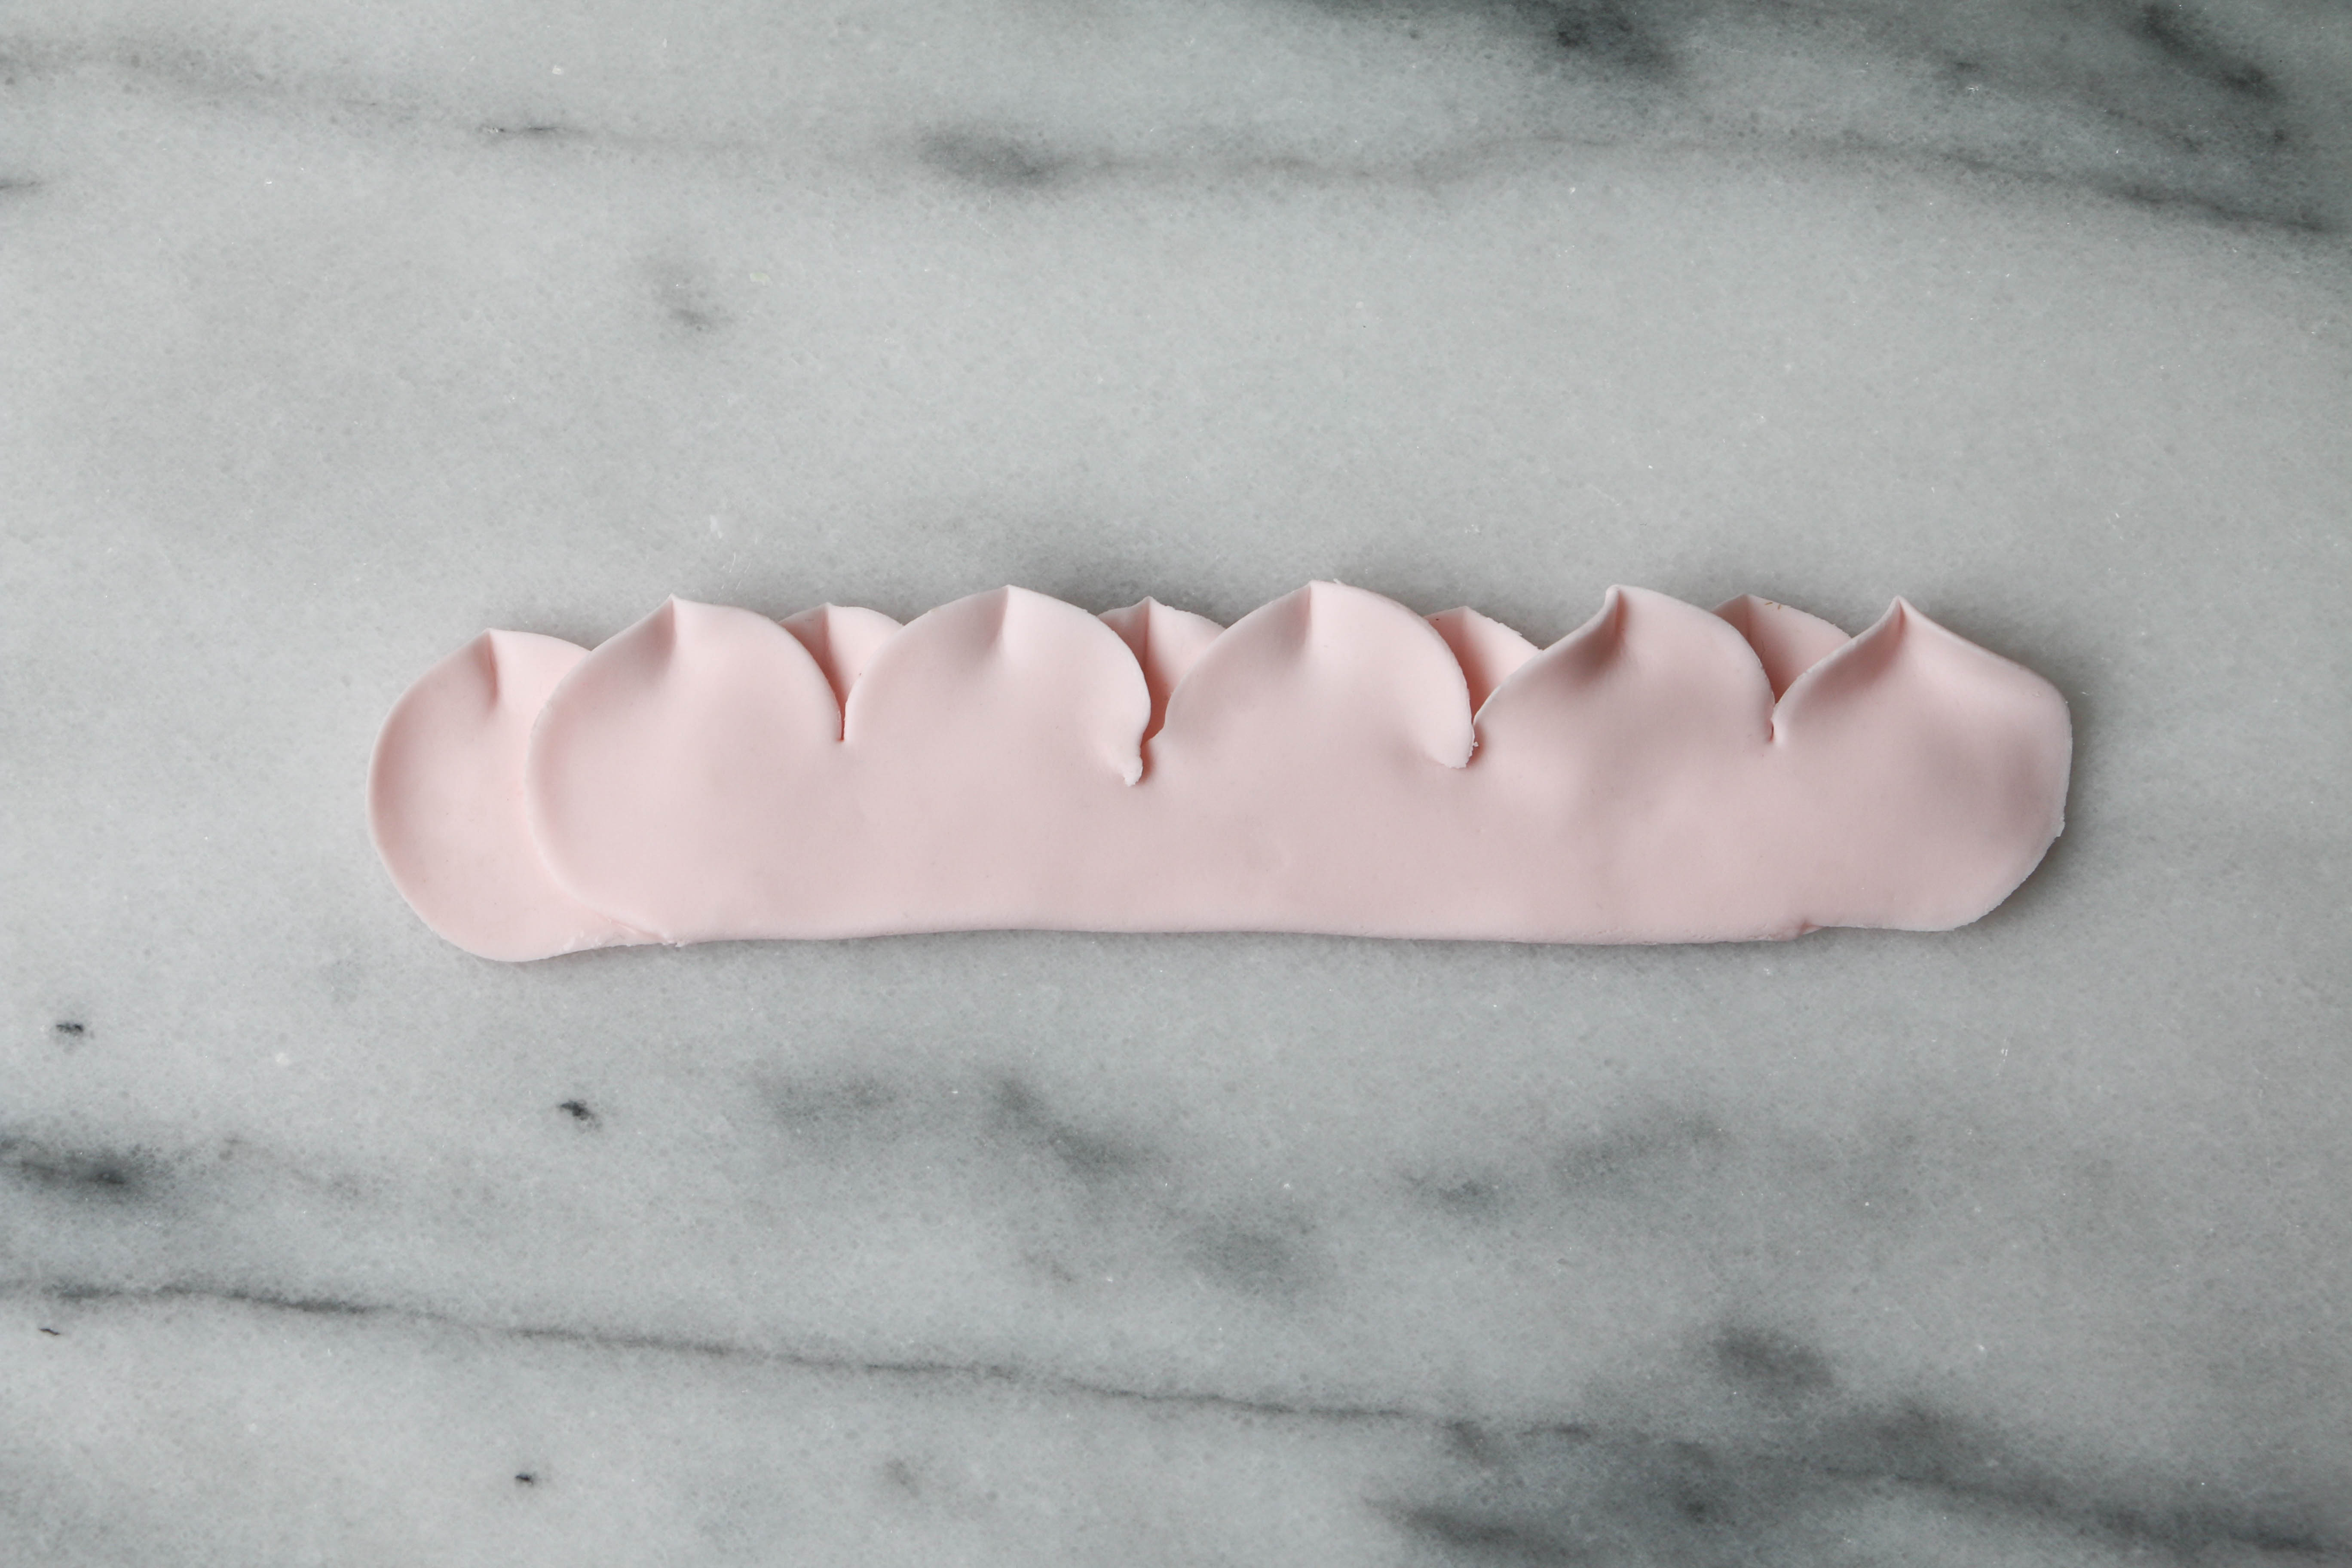
Roll light pink gum paste to less than an 1/8″ thick and cut the gum paste with the Easiest Rose Ever Cutter. Place the cut shape onto a foam mat and lightly thin the edges of one of the scalloped sides using a ball tool (or the end of a rolling pin or even a spoon).
Step 2:
Flip the shape over and use the ball tool to thin the edges of the other scalloped edge. I thinned my petals this way so that all of them would be curling in the same direction when it comes time to fold the paste in half.
Step 3:
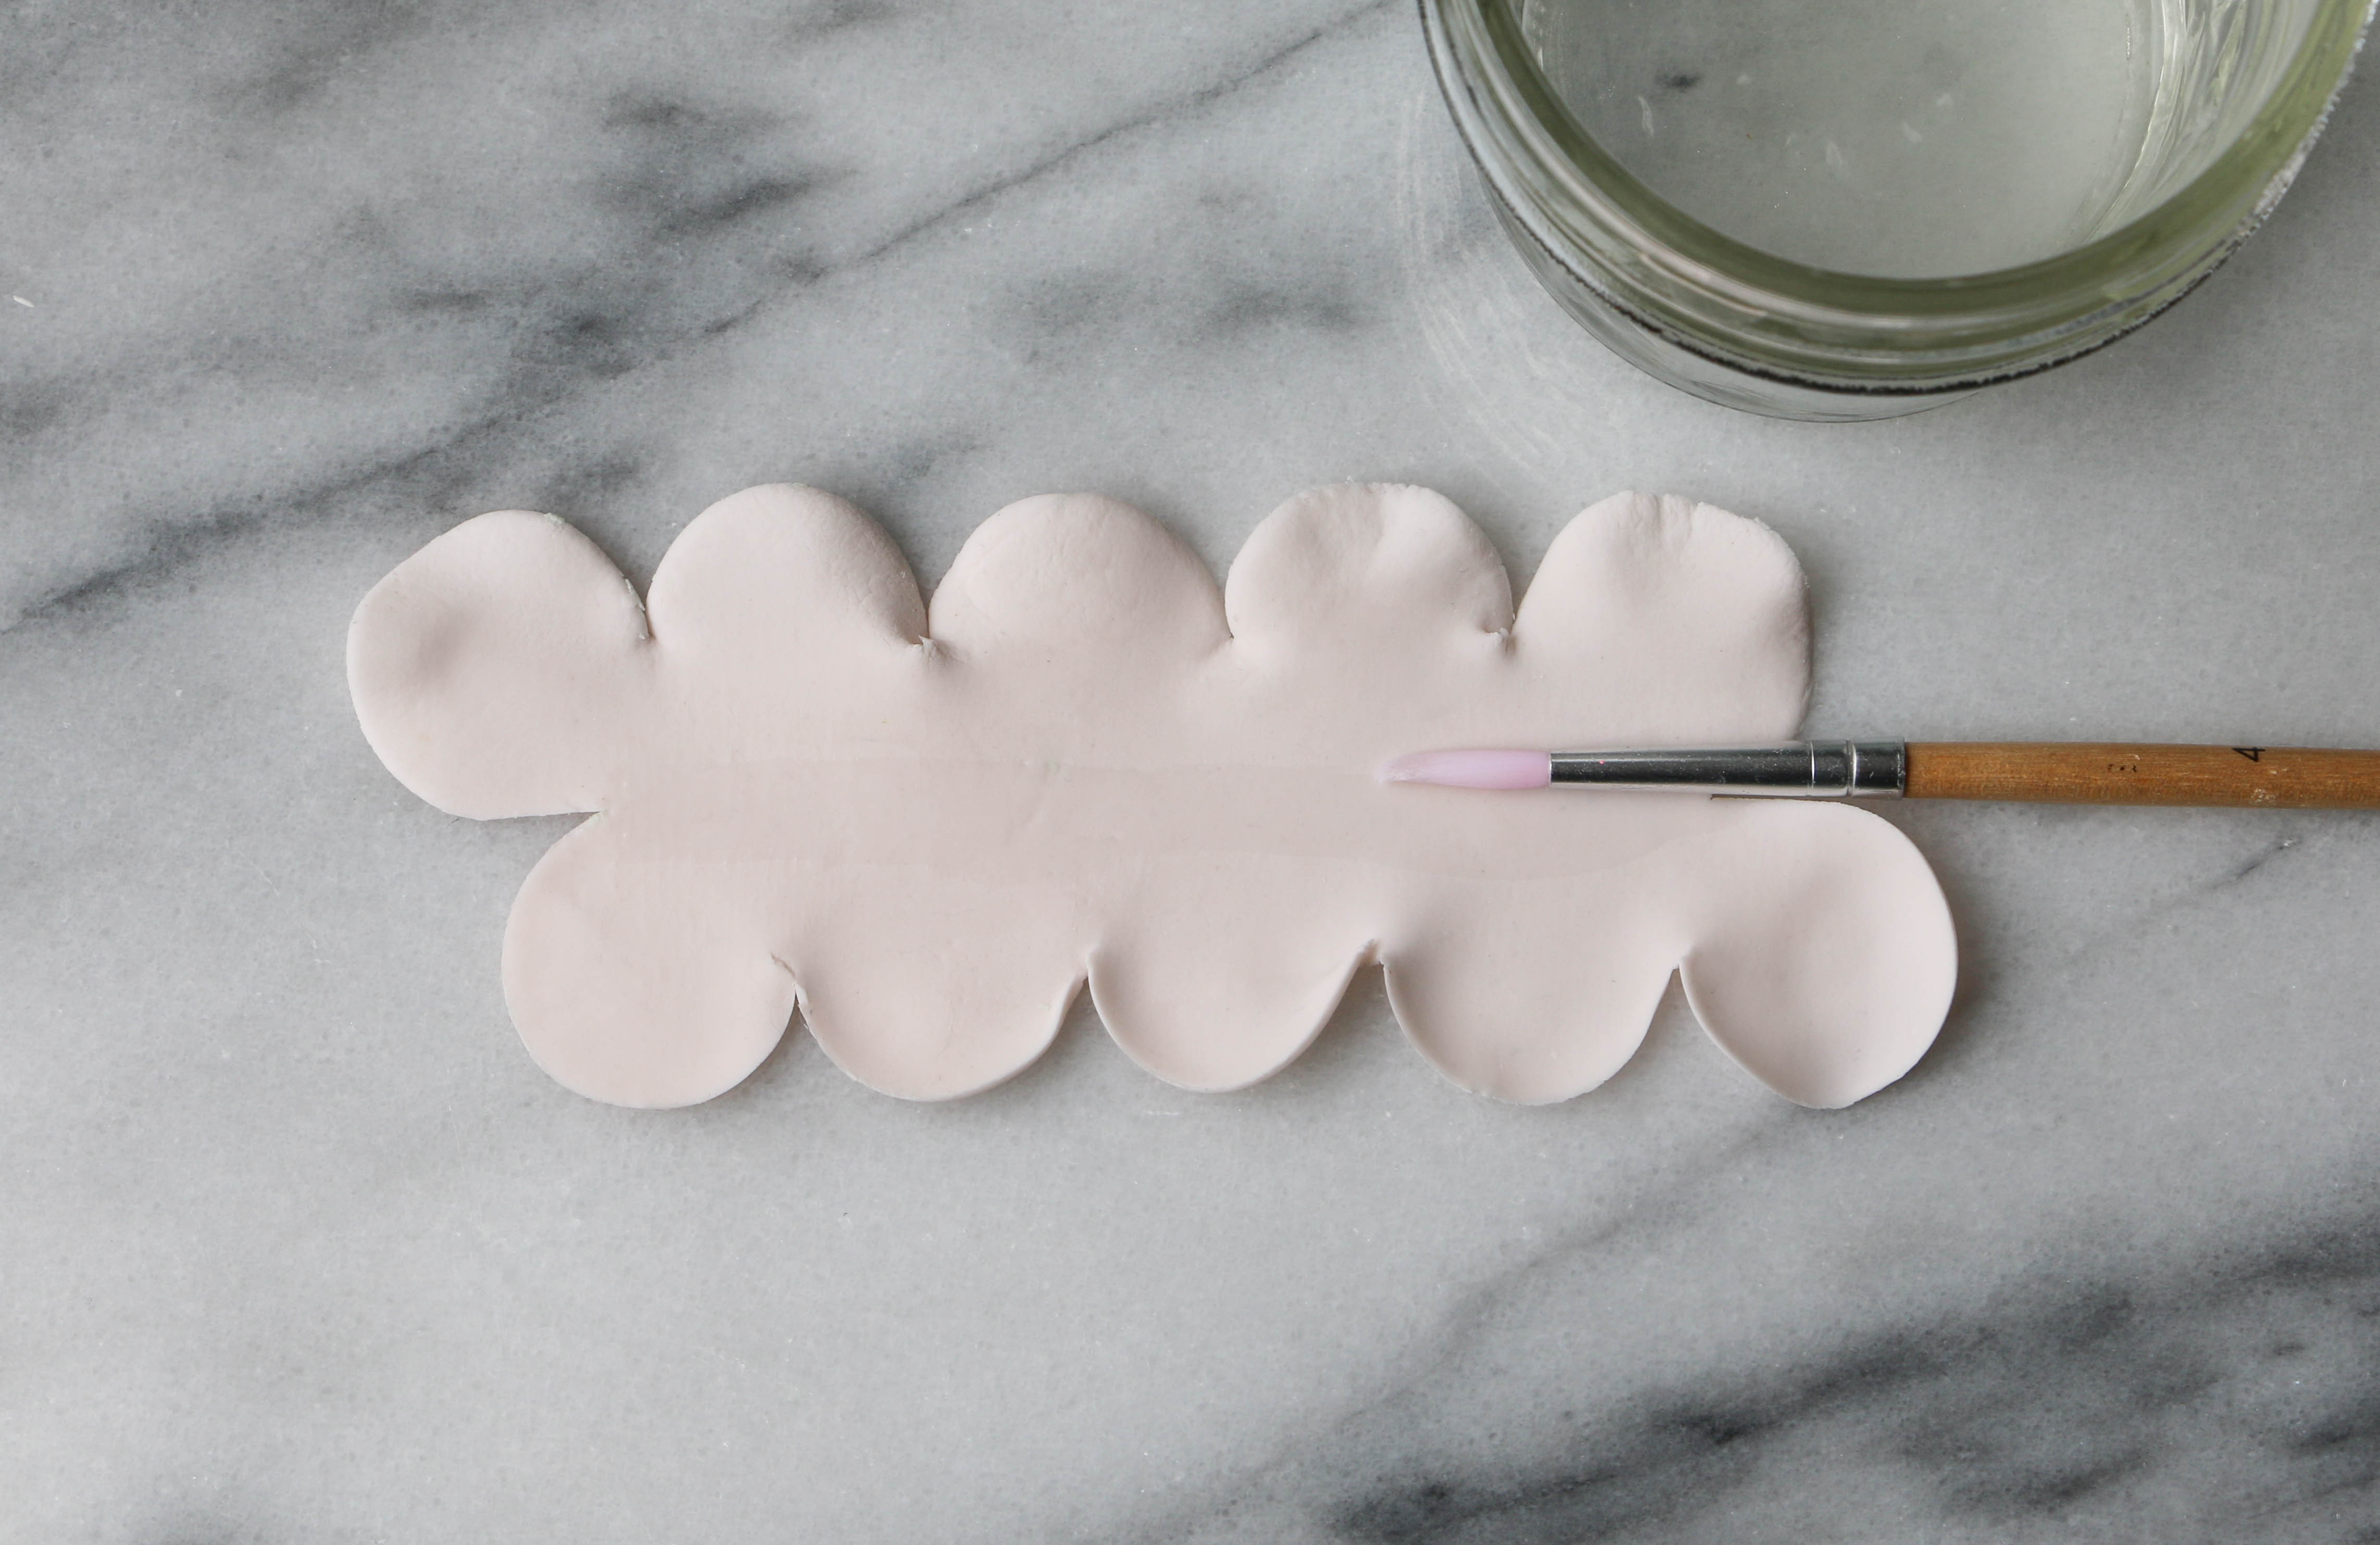
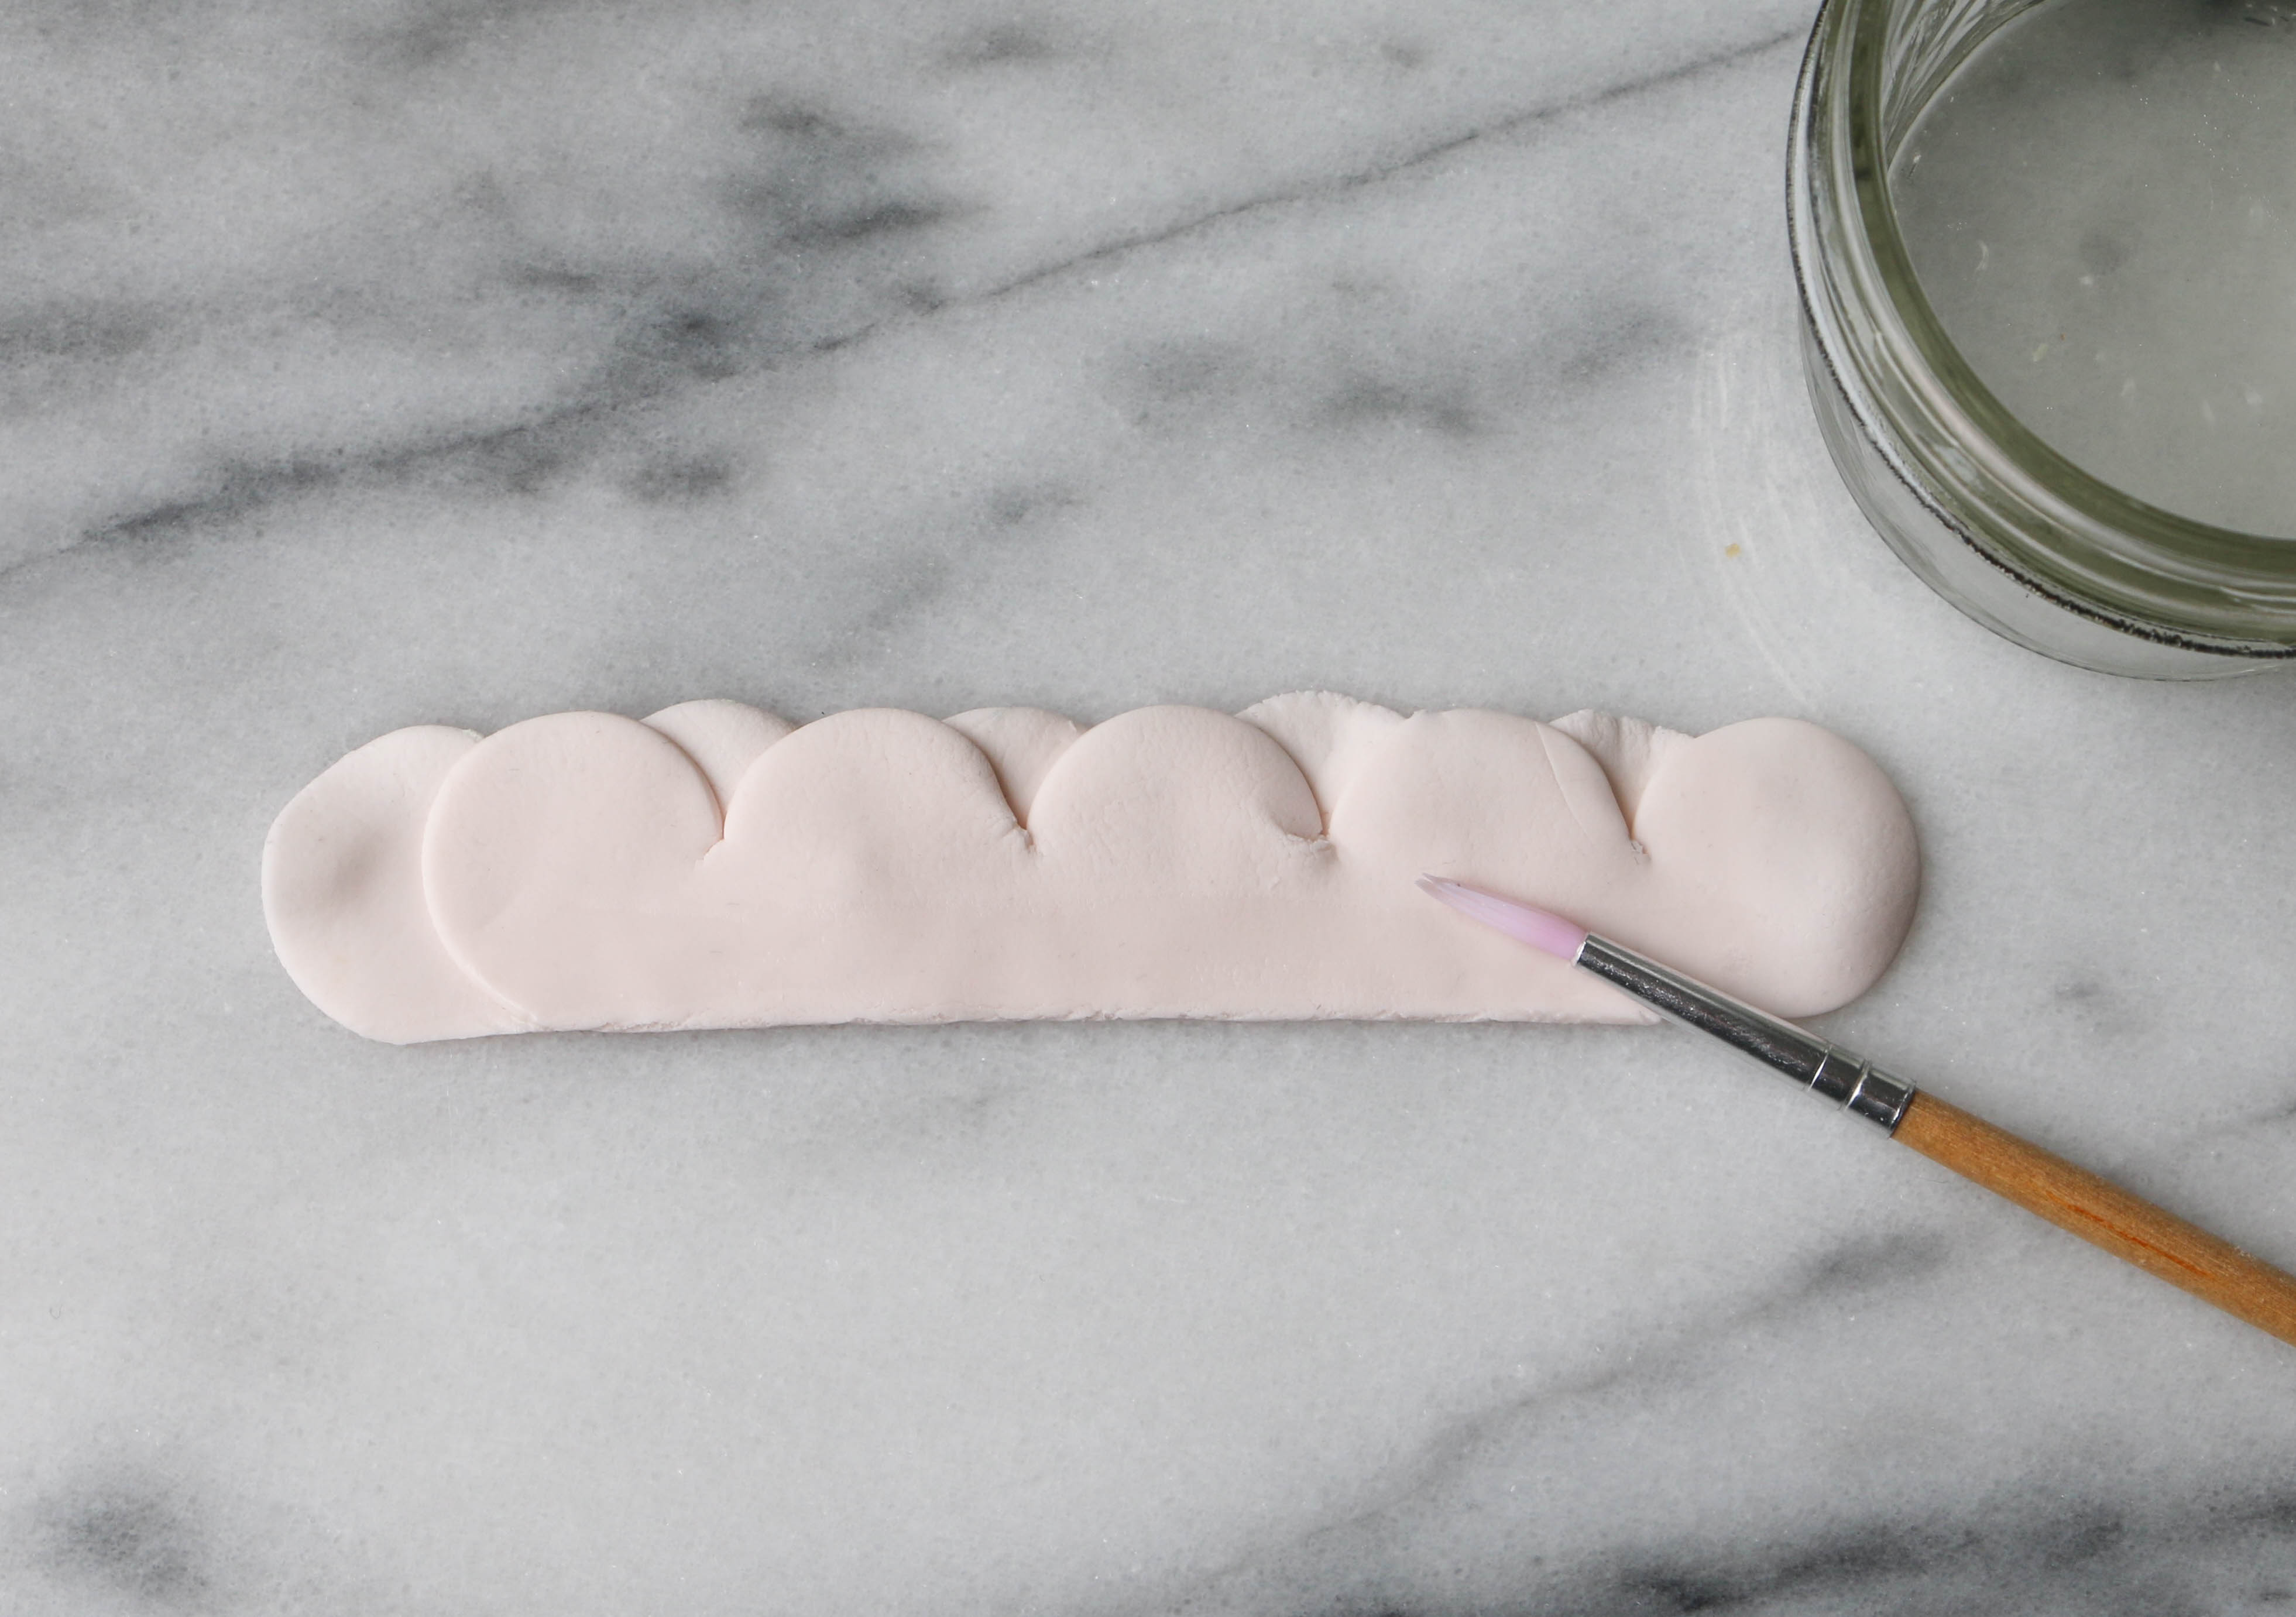
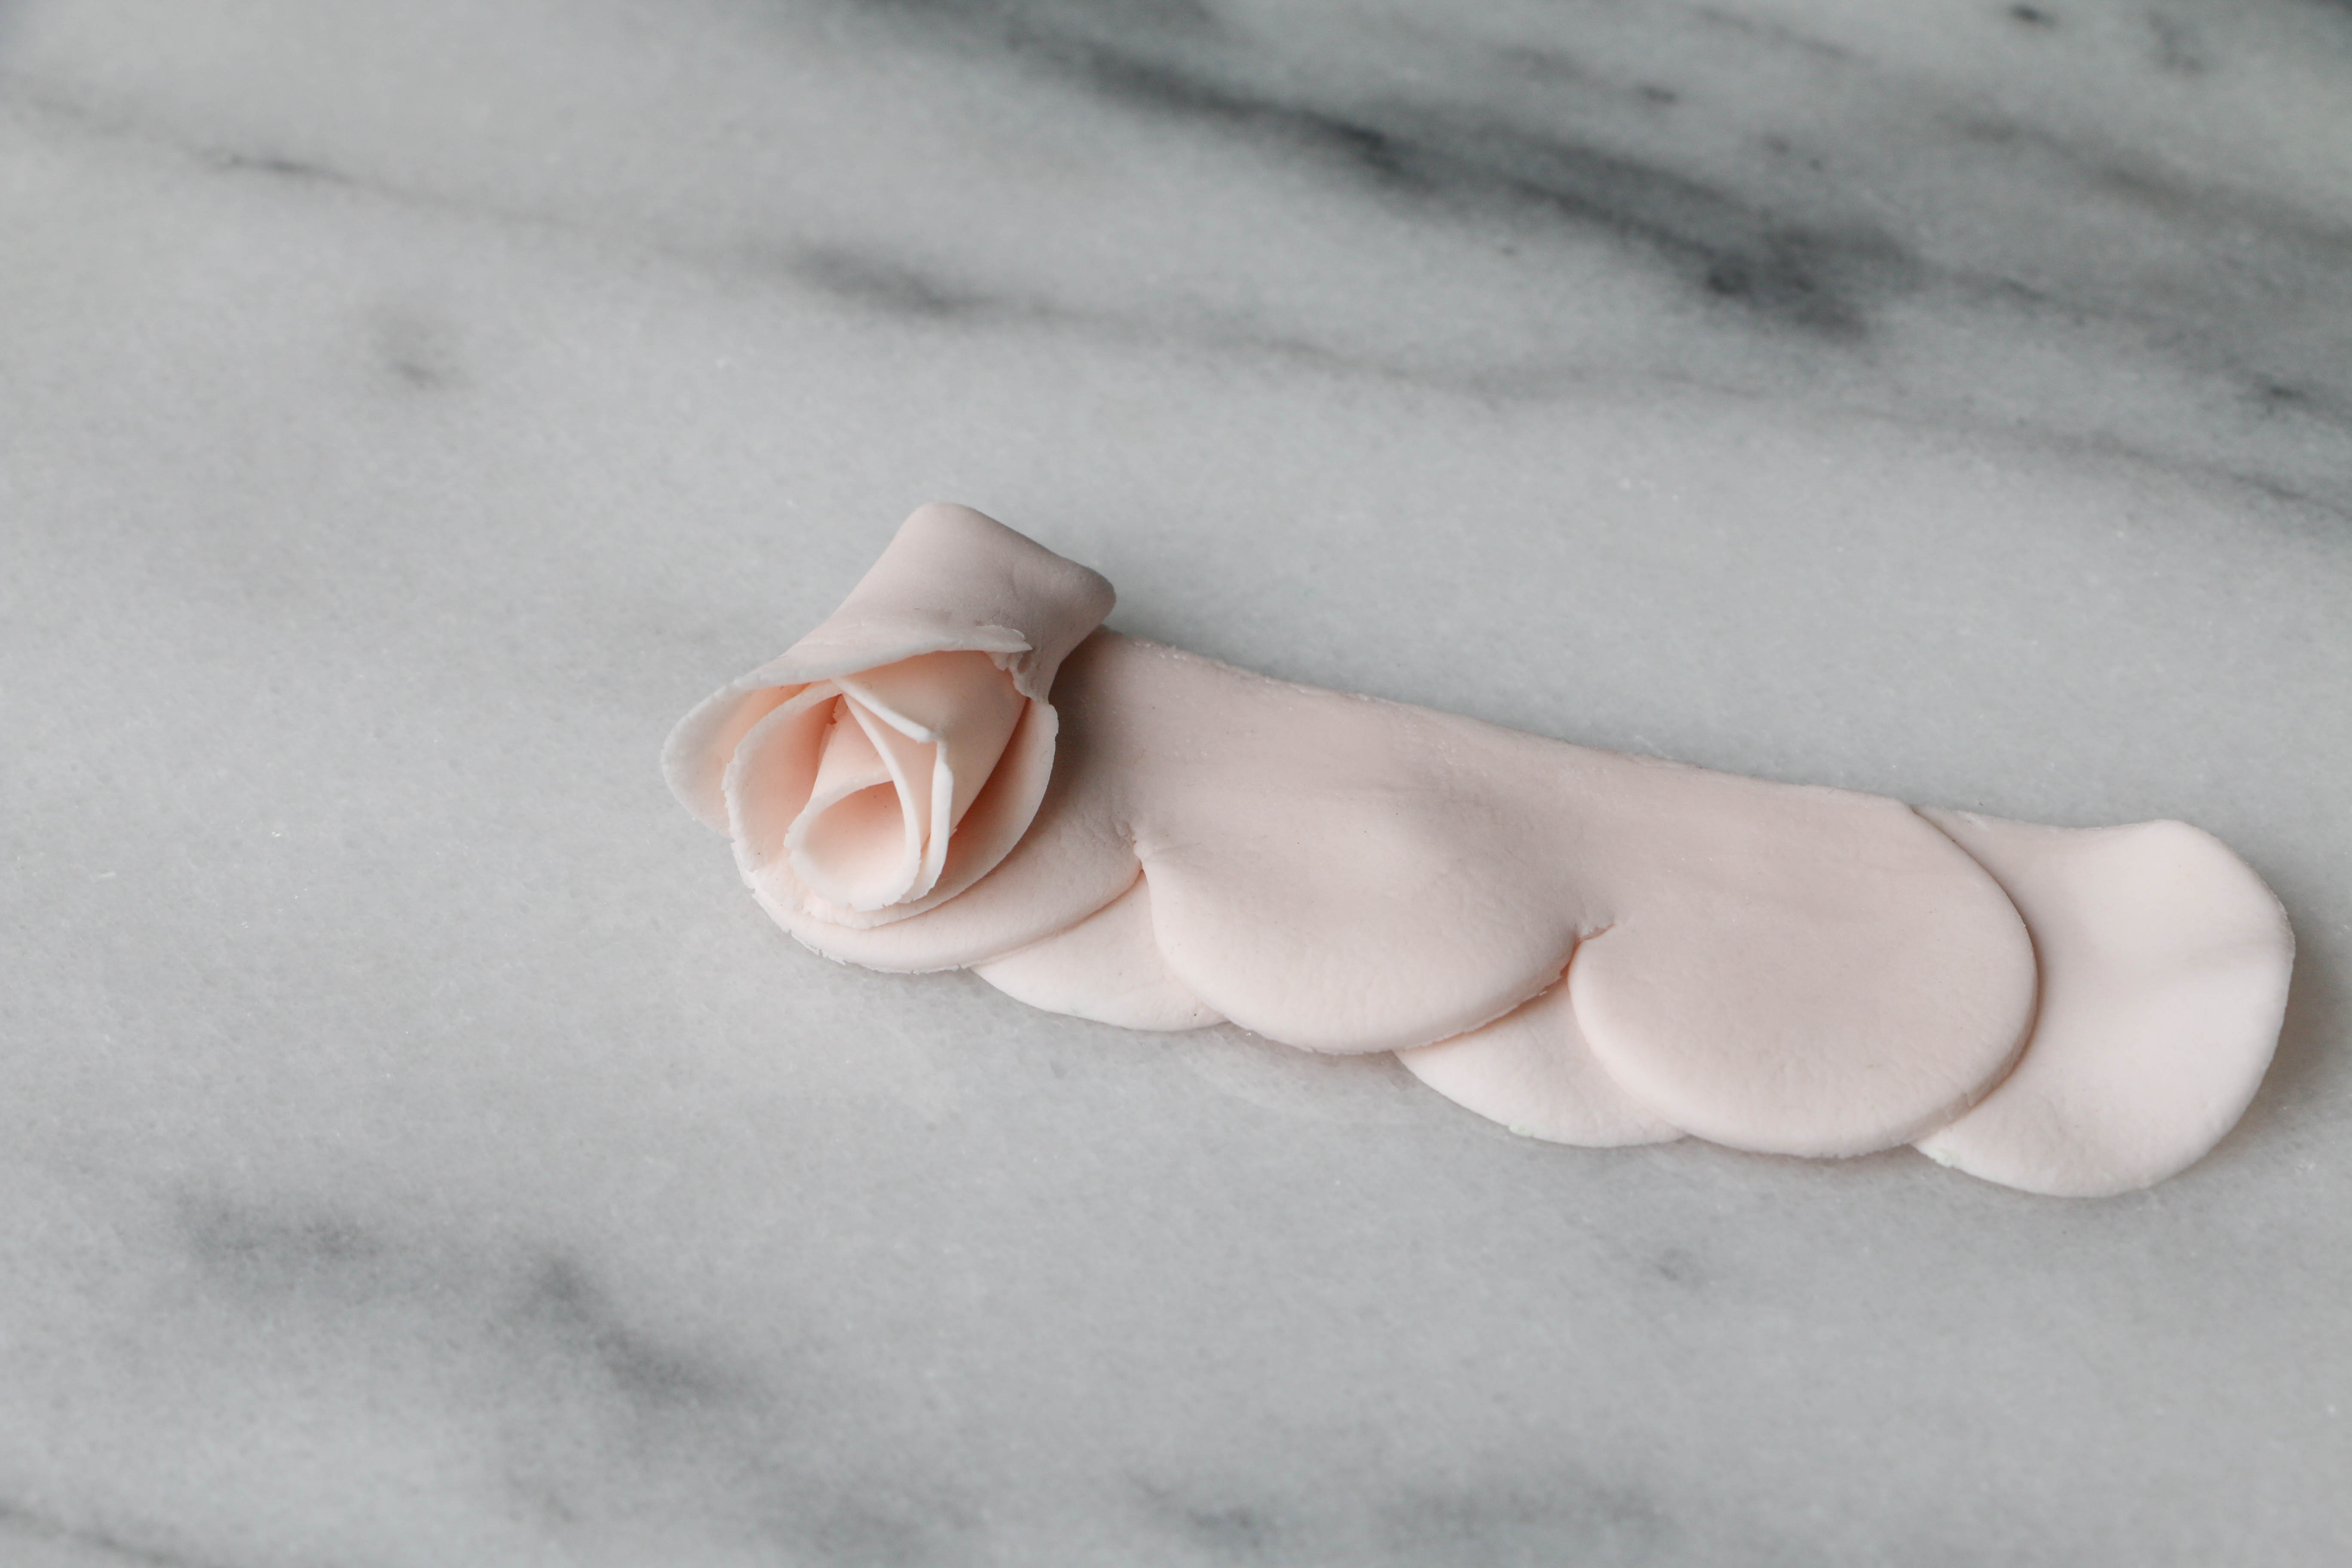
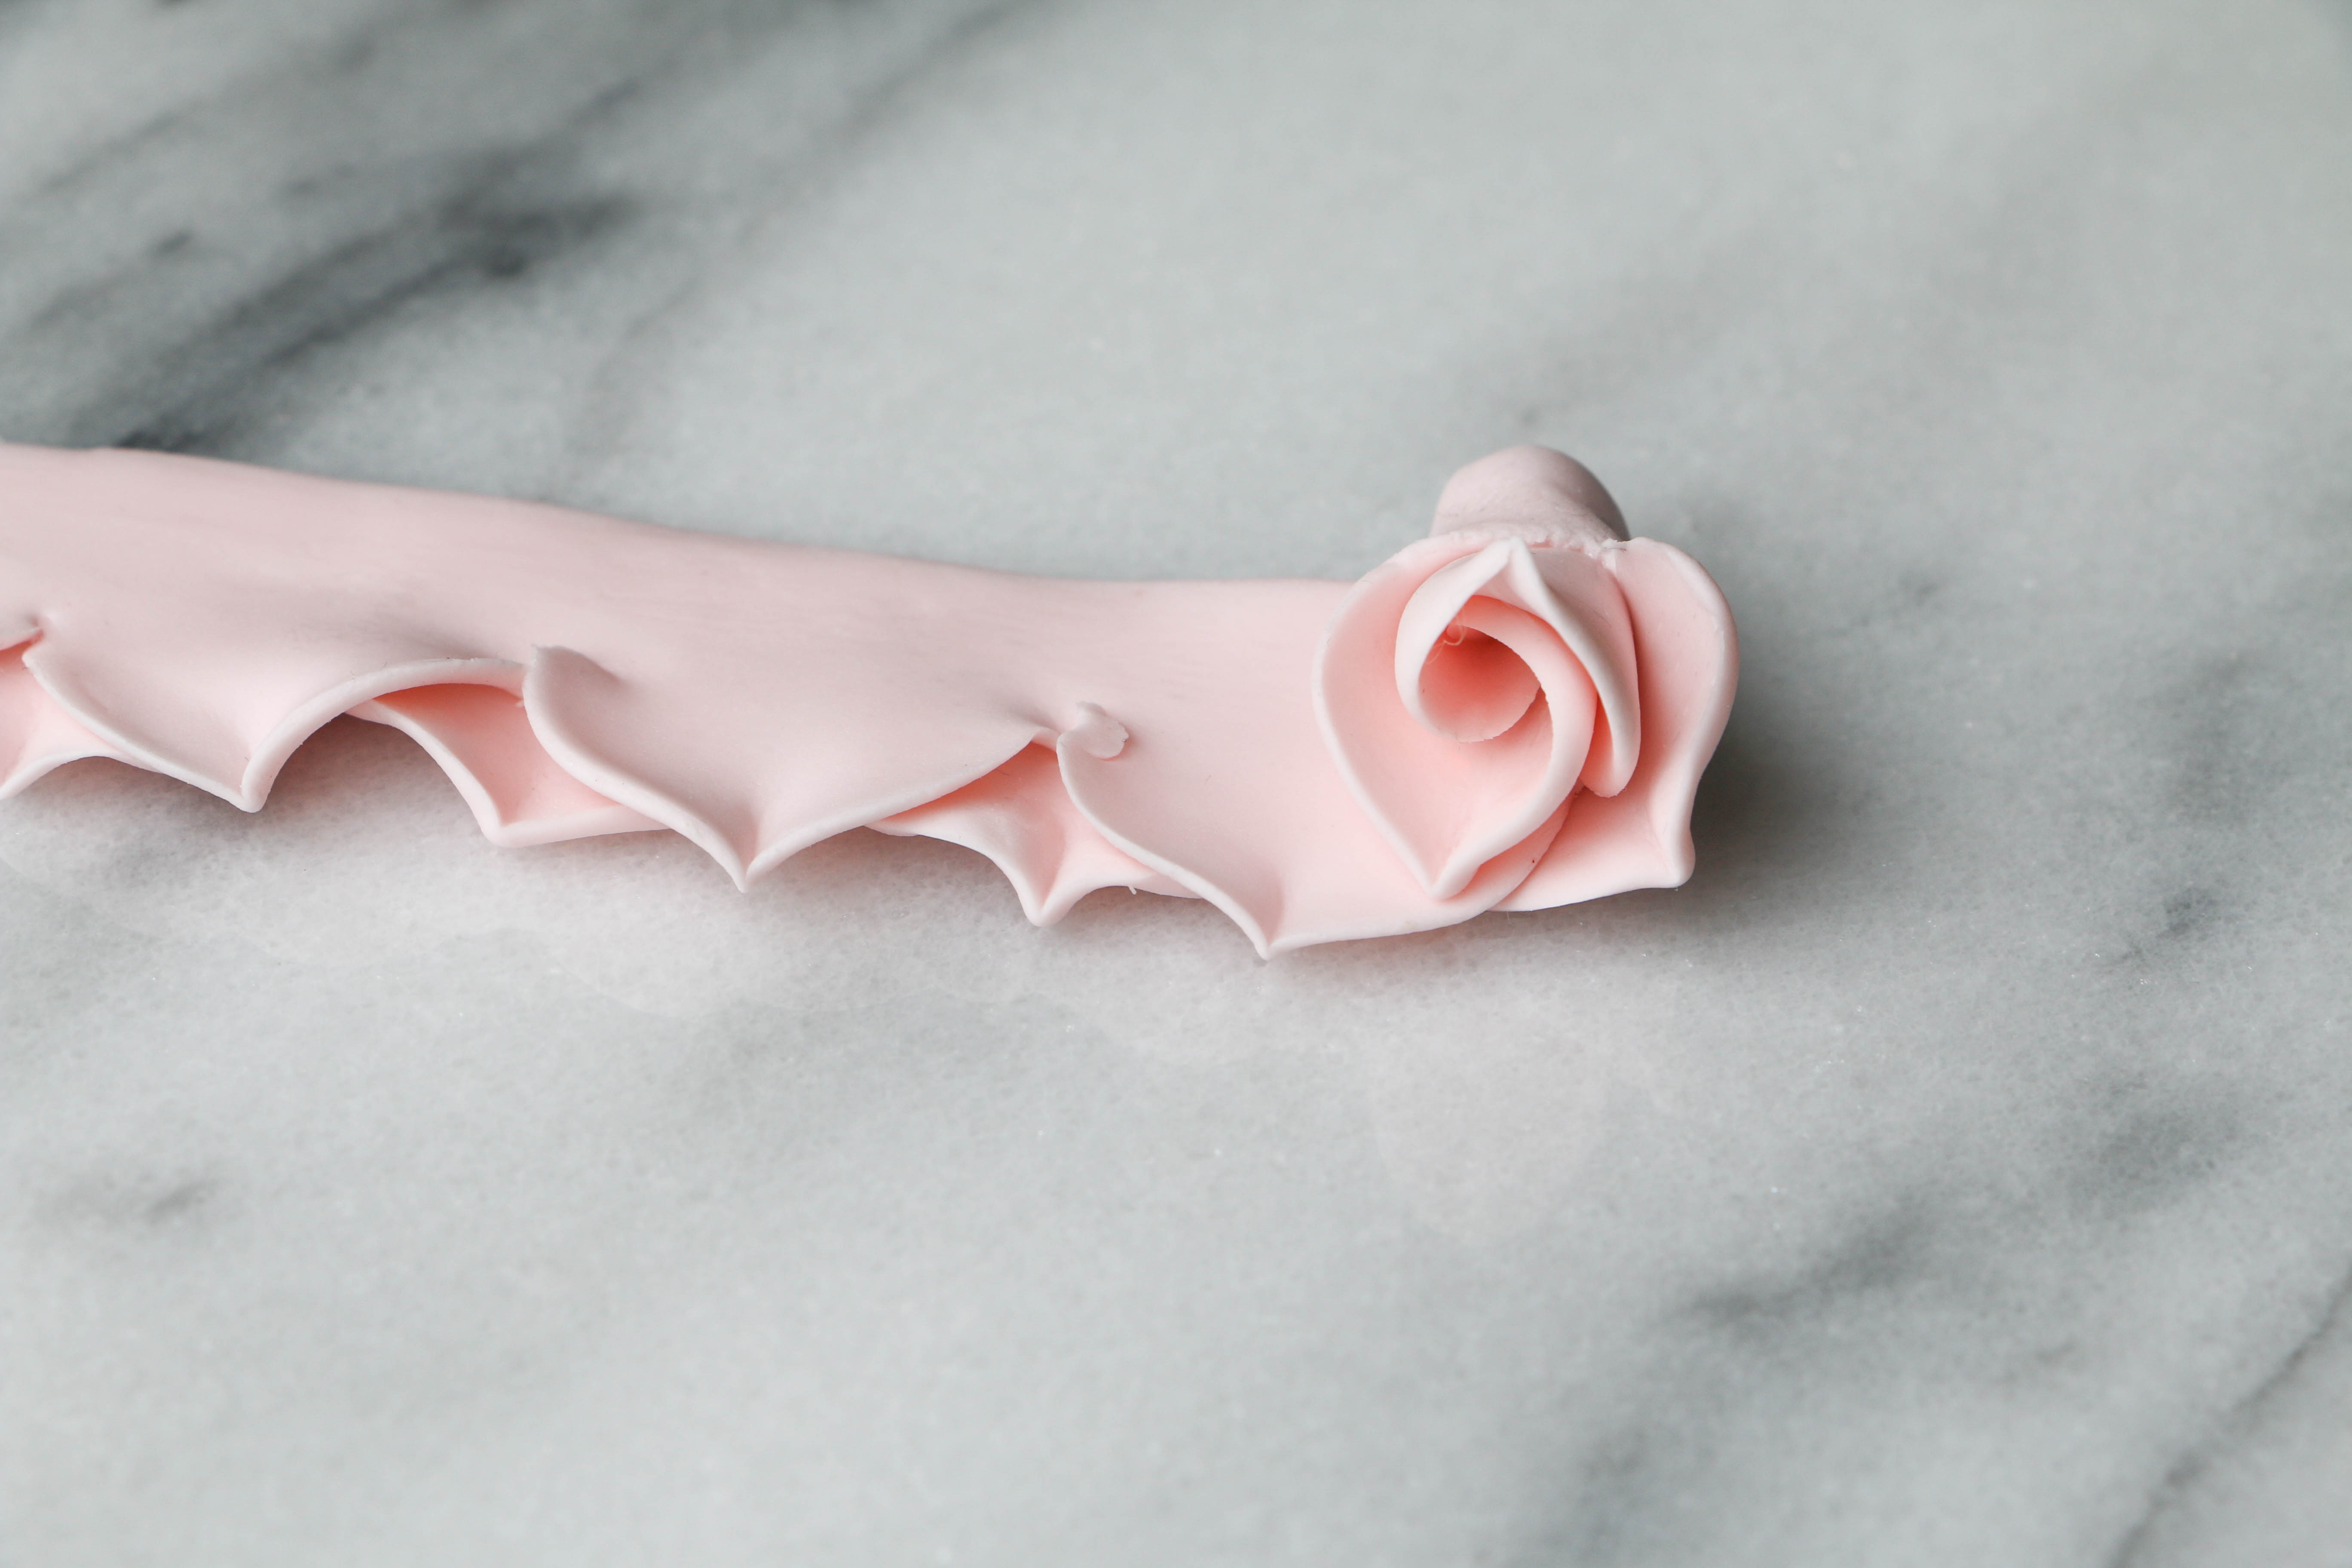
Brush a line of gum paste glue horizontally through the center of the petals. Fold the shape in half, pressing firmly along the crease. Brush another line of glue along the bottom edge of the petals.
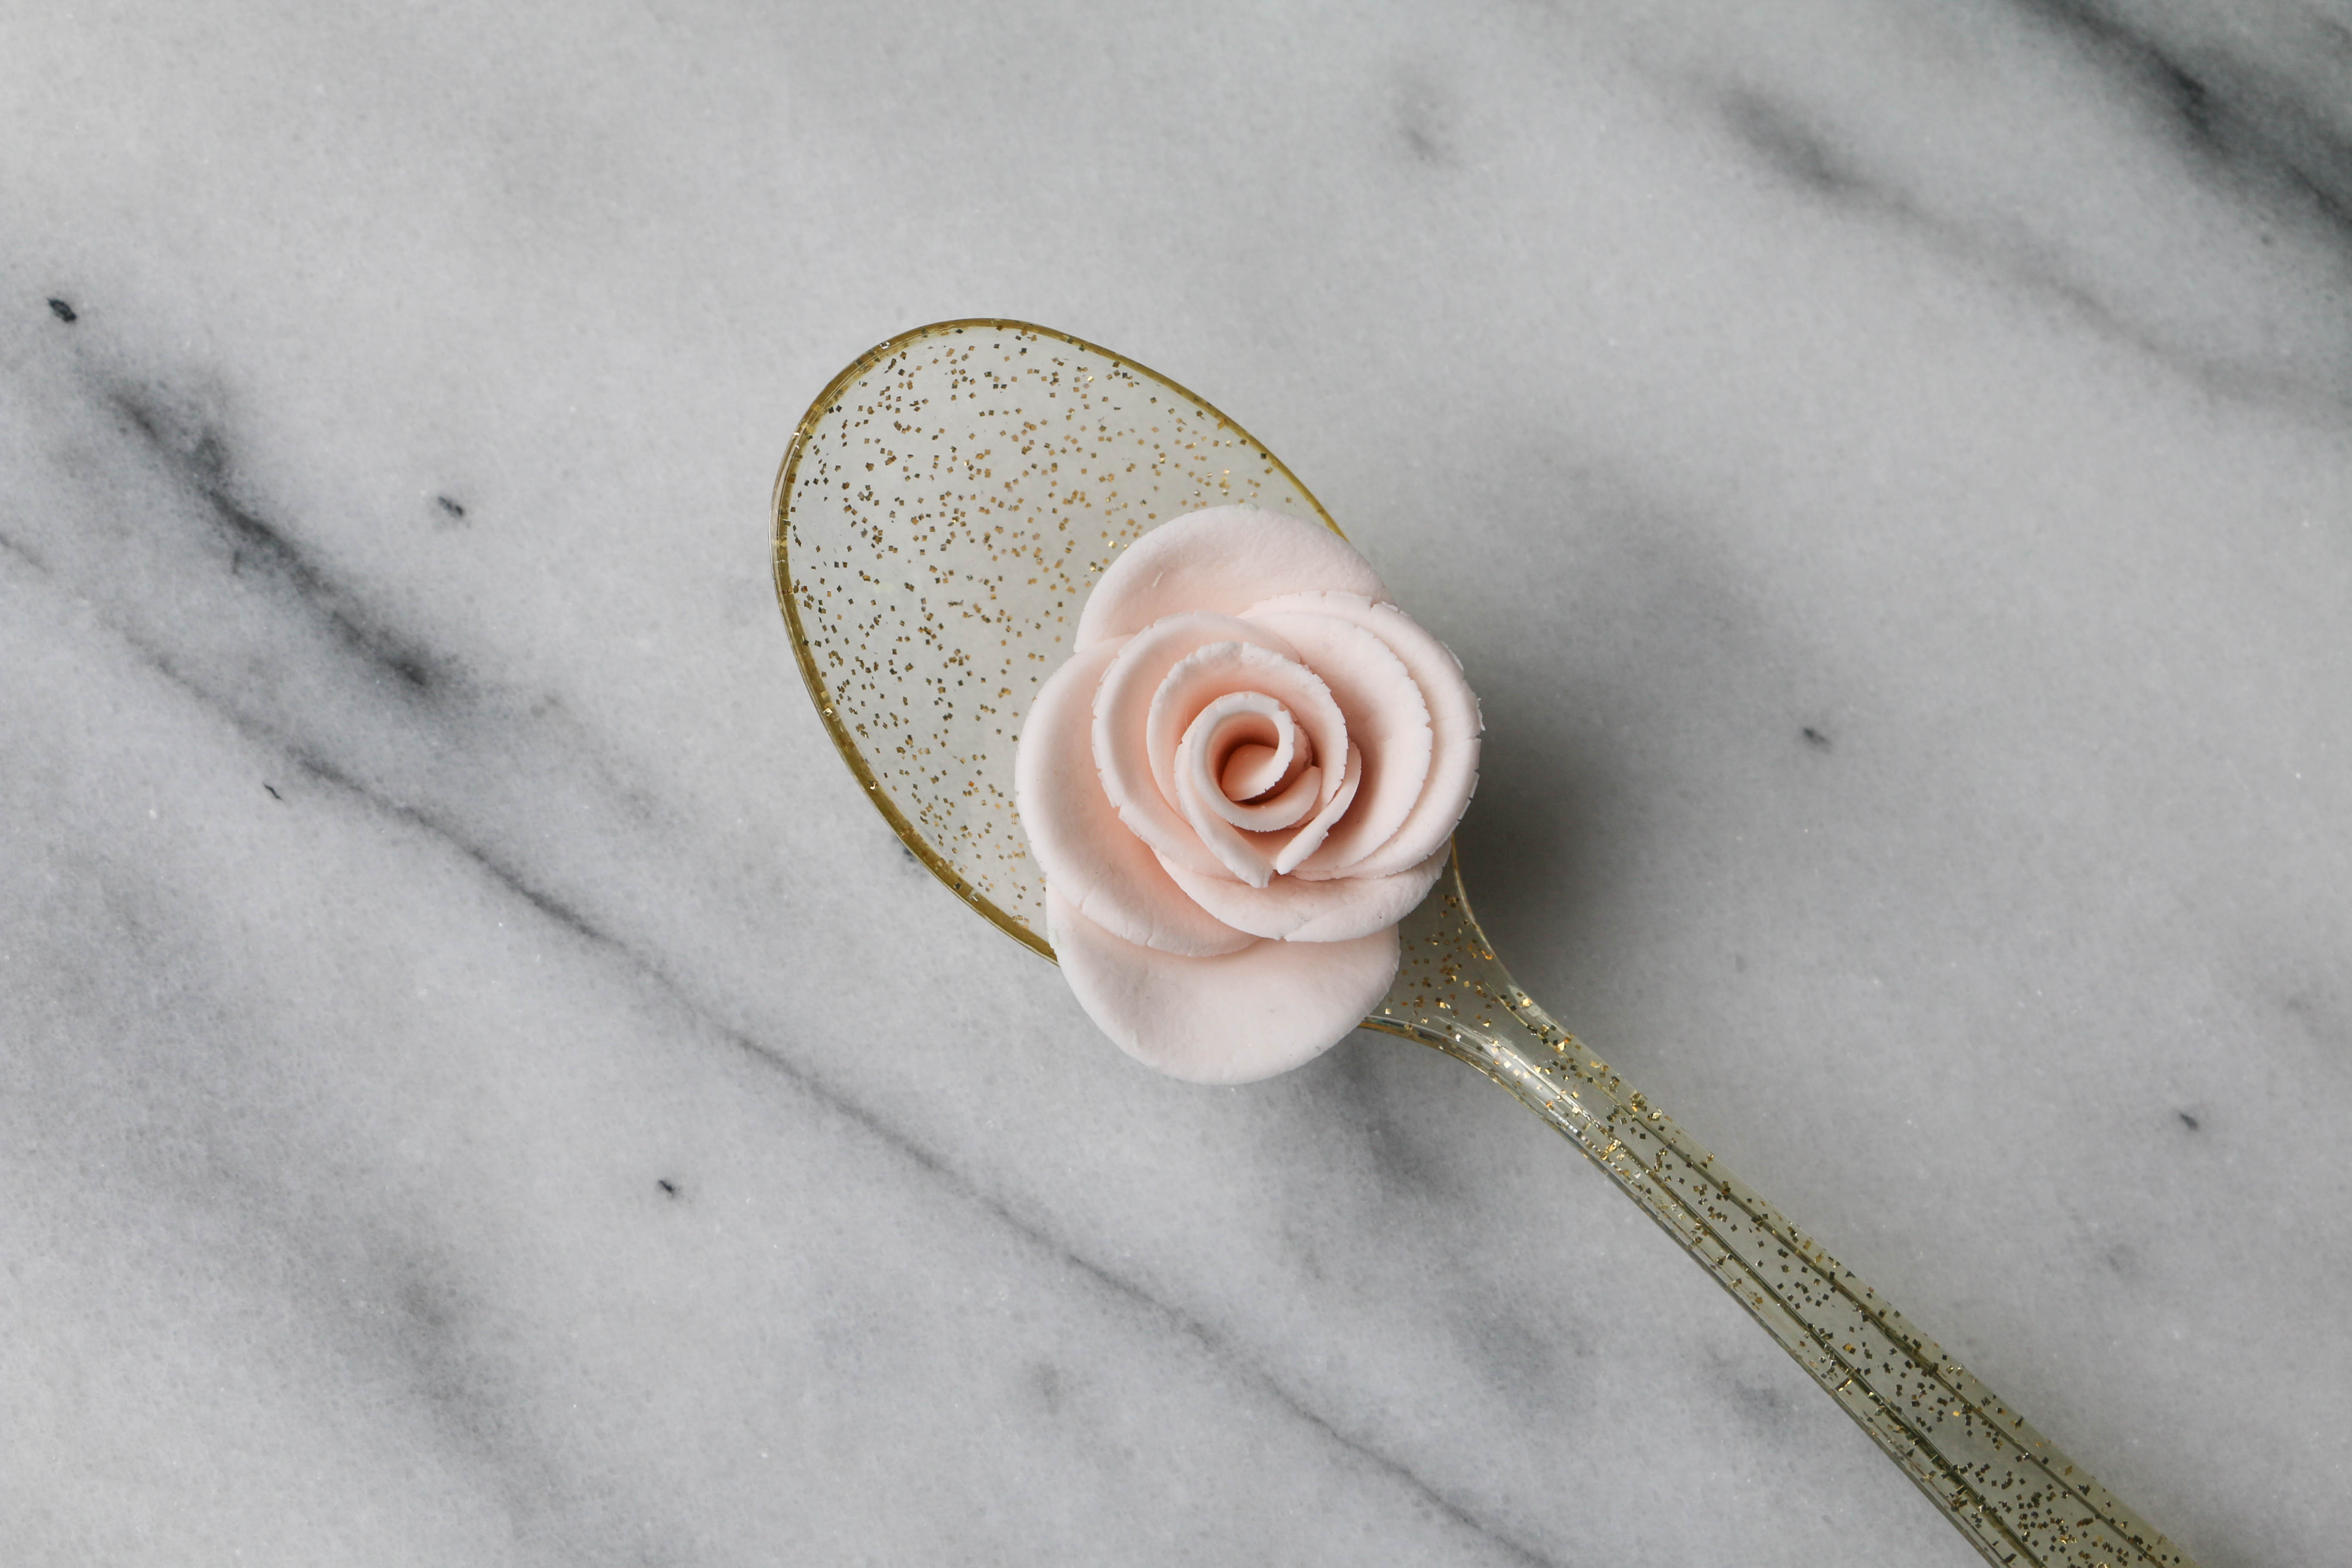
Step 4:
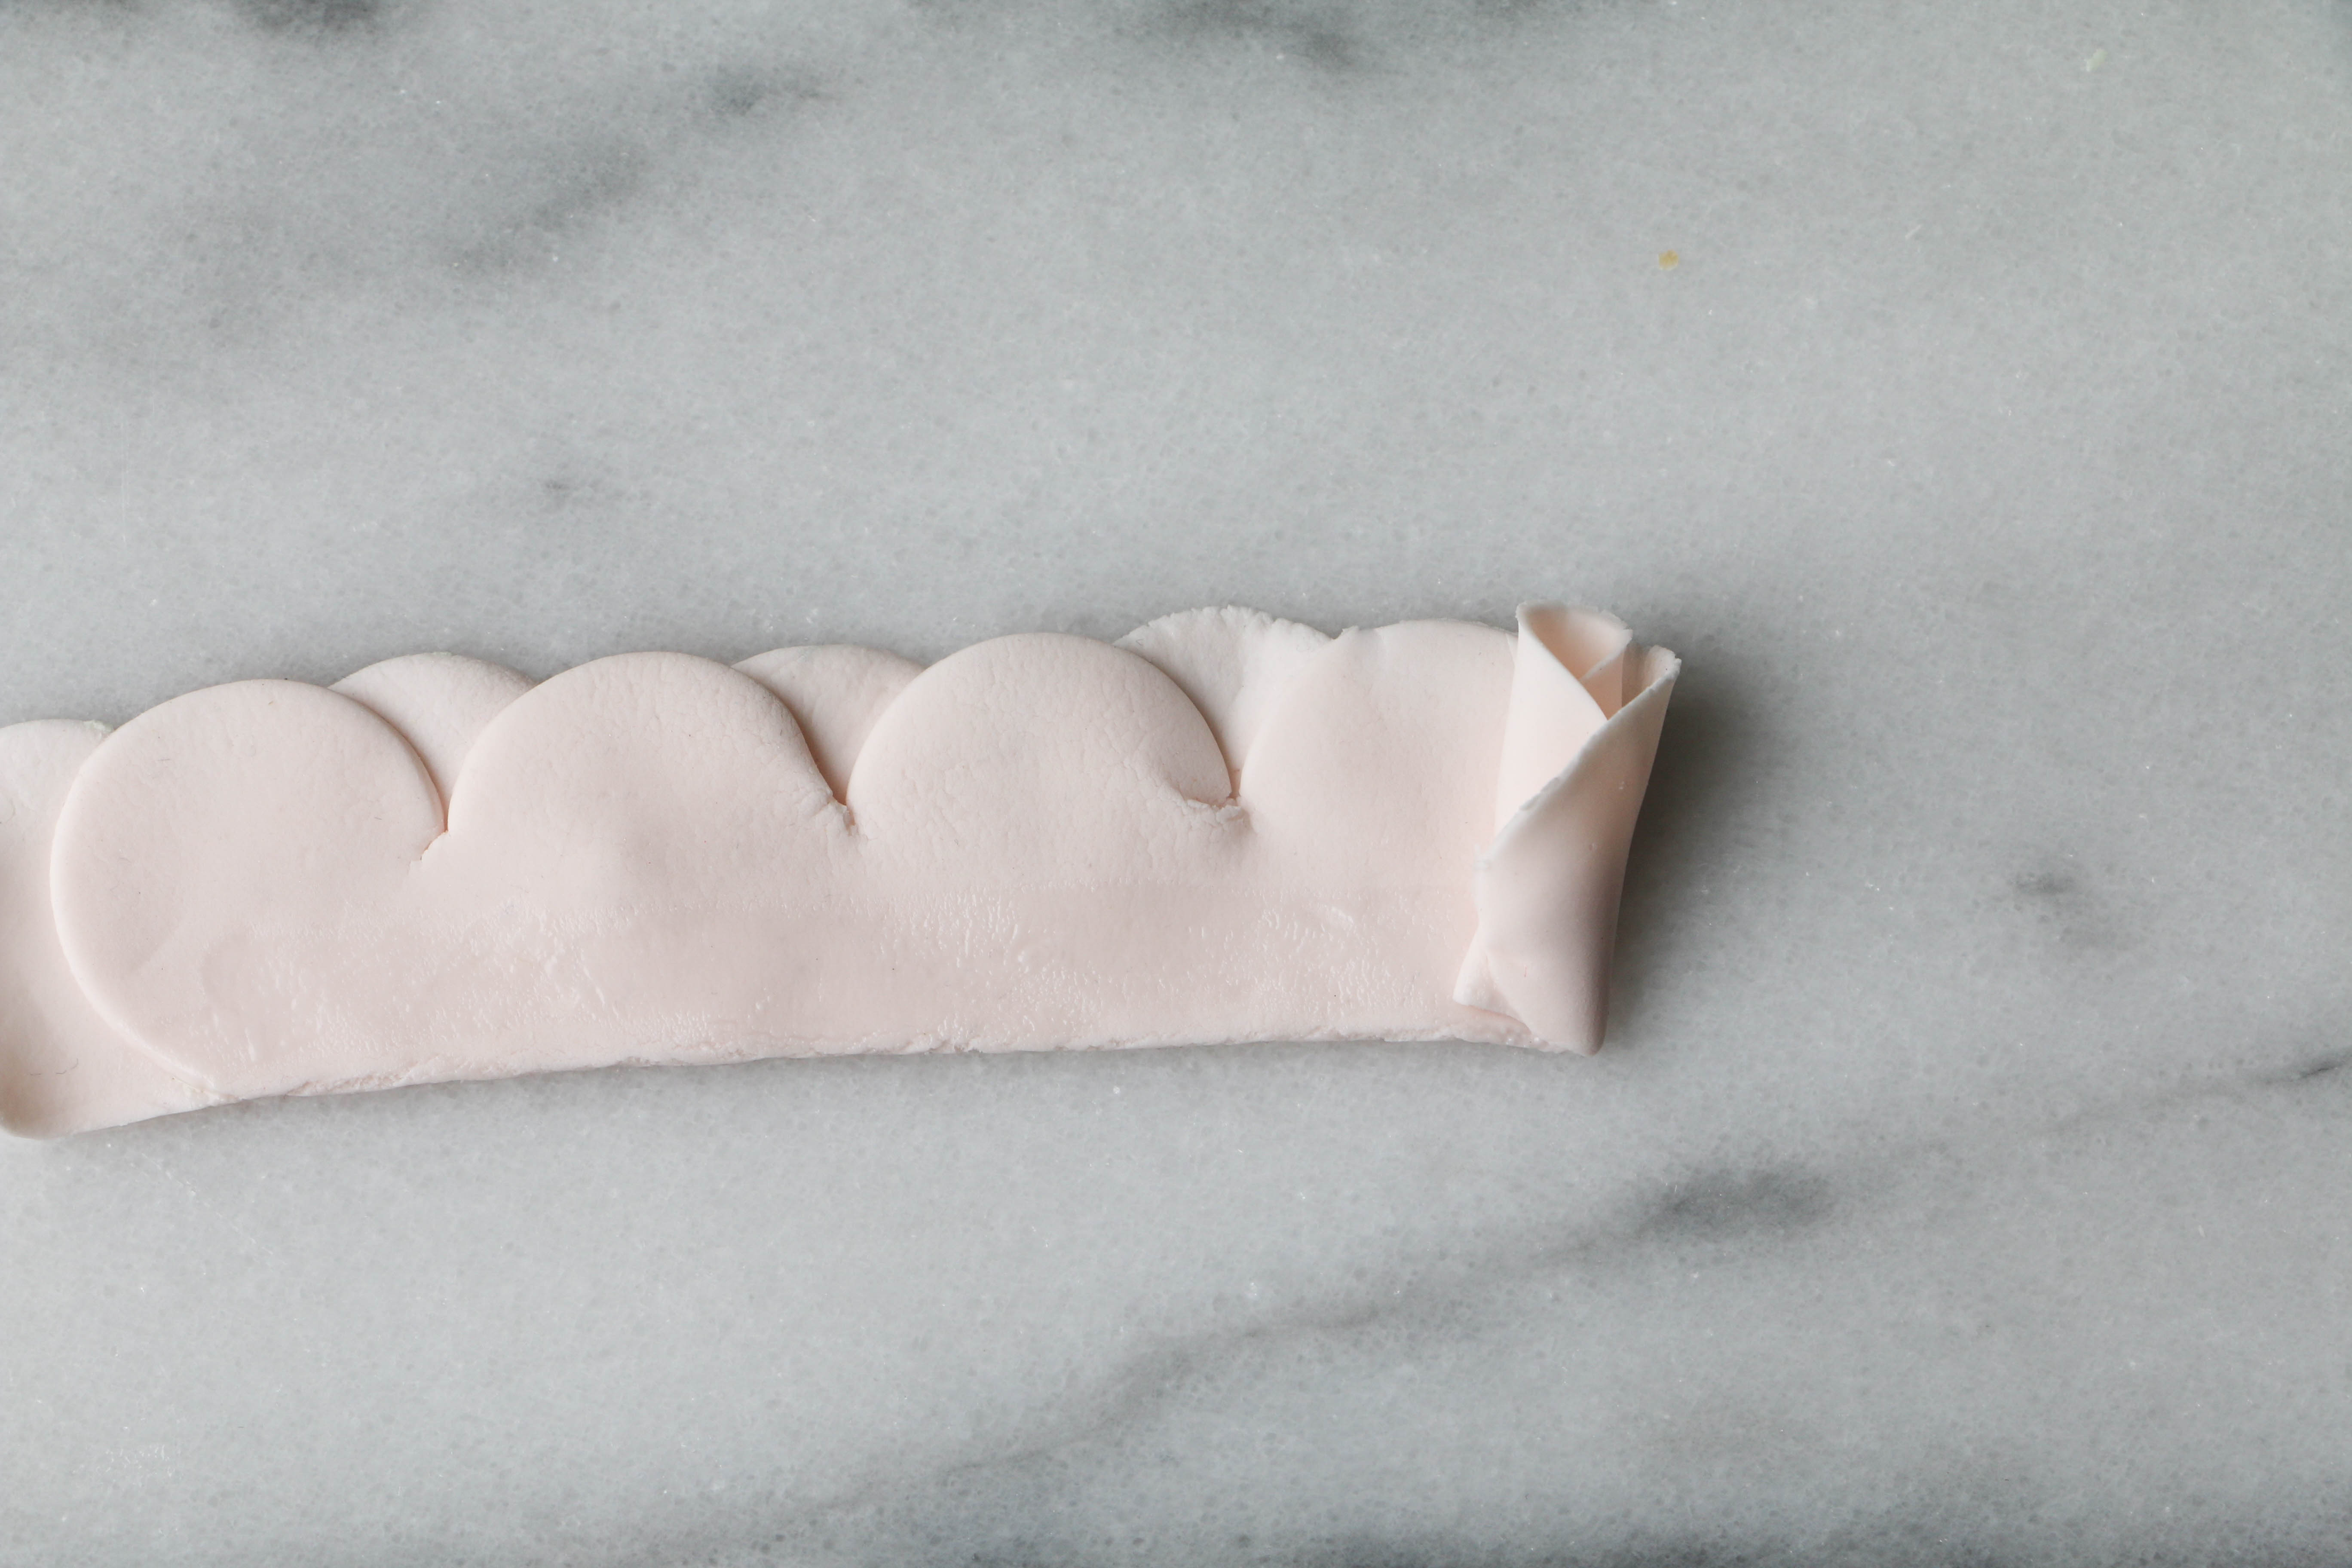
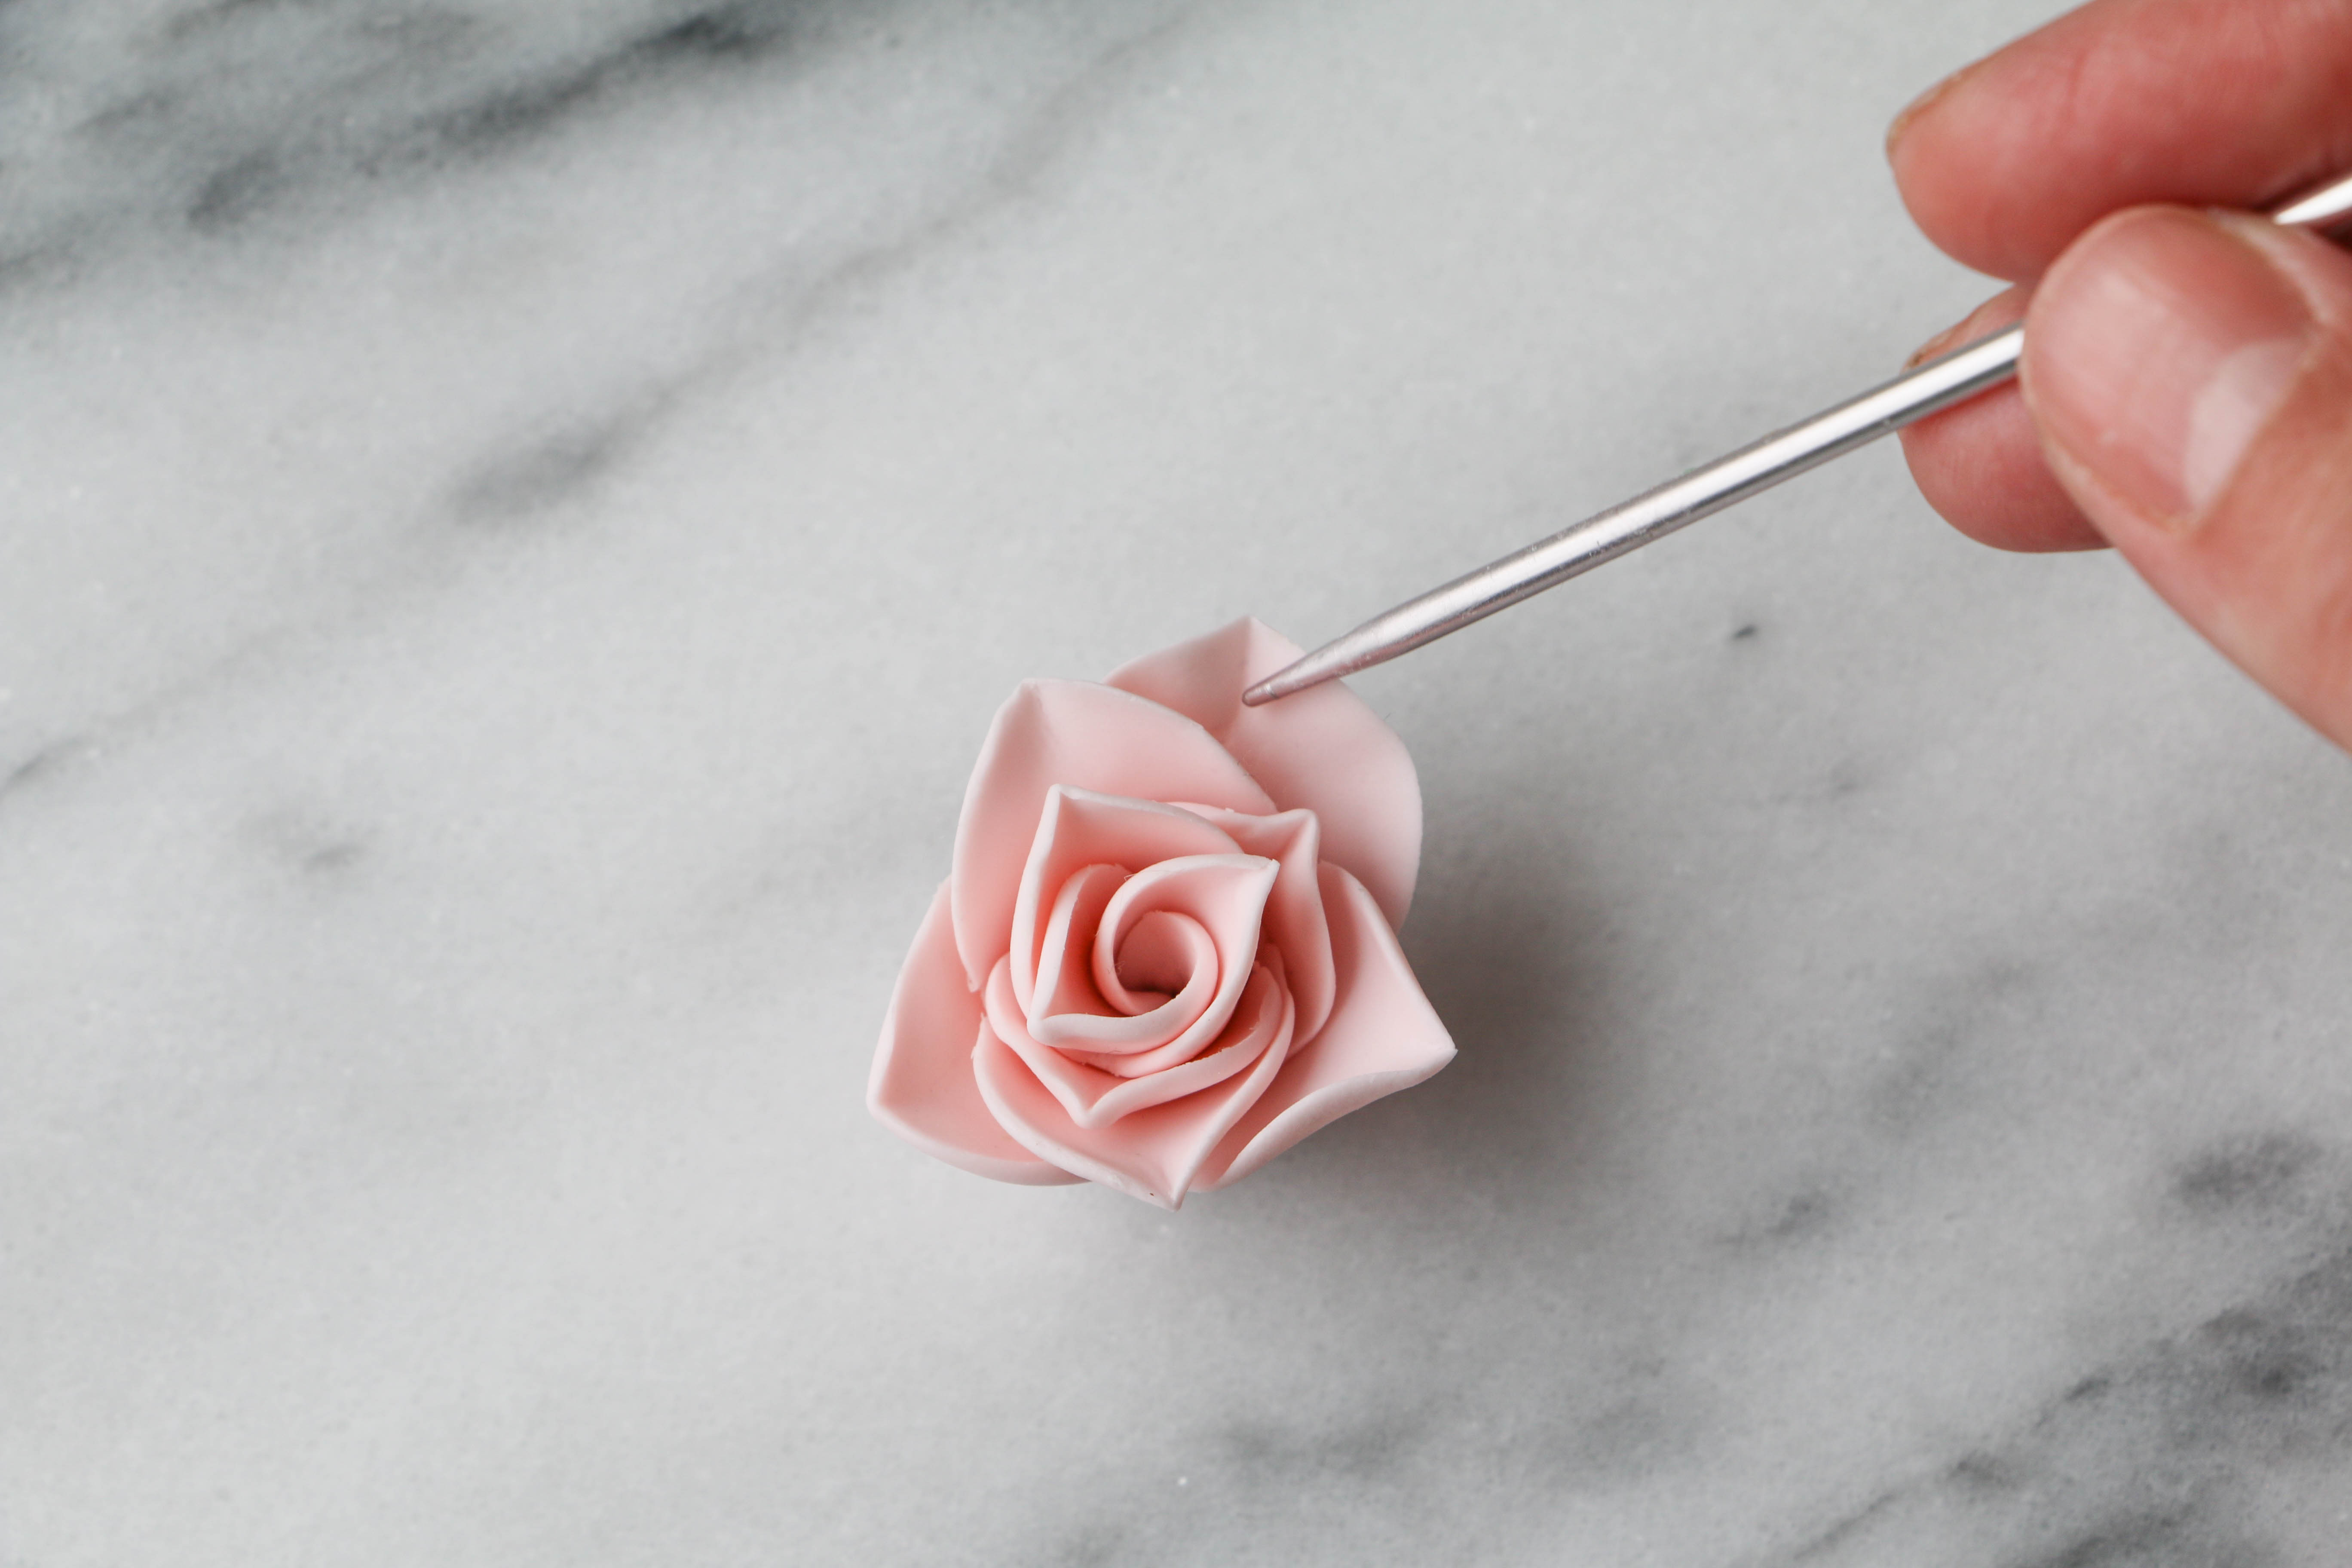
Tightly roll the petals up into a coil. Set the newly formed rose into the well of a spoon to dry.
How to make a larger rose with pointed petals
Step 1:
Roll, cut, and thin your gum paste according to Steps 1 and 2, above.
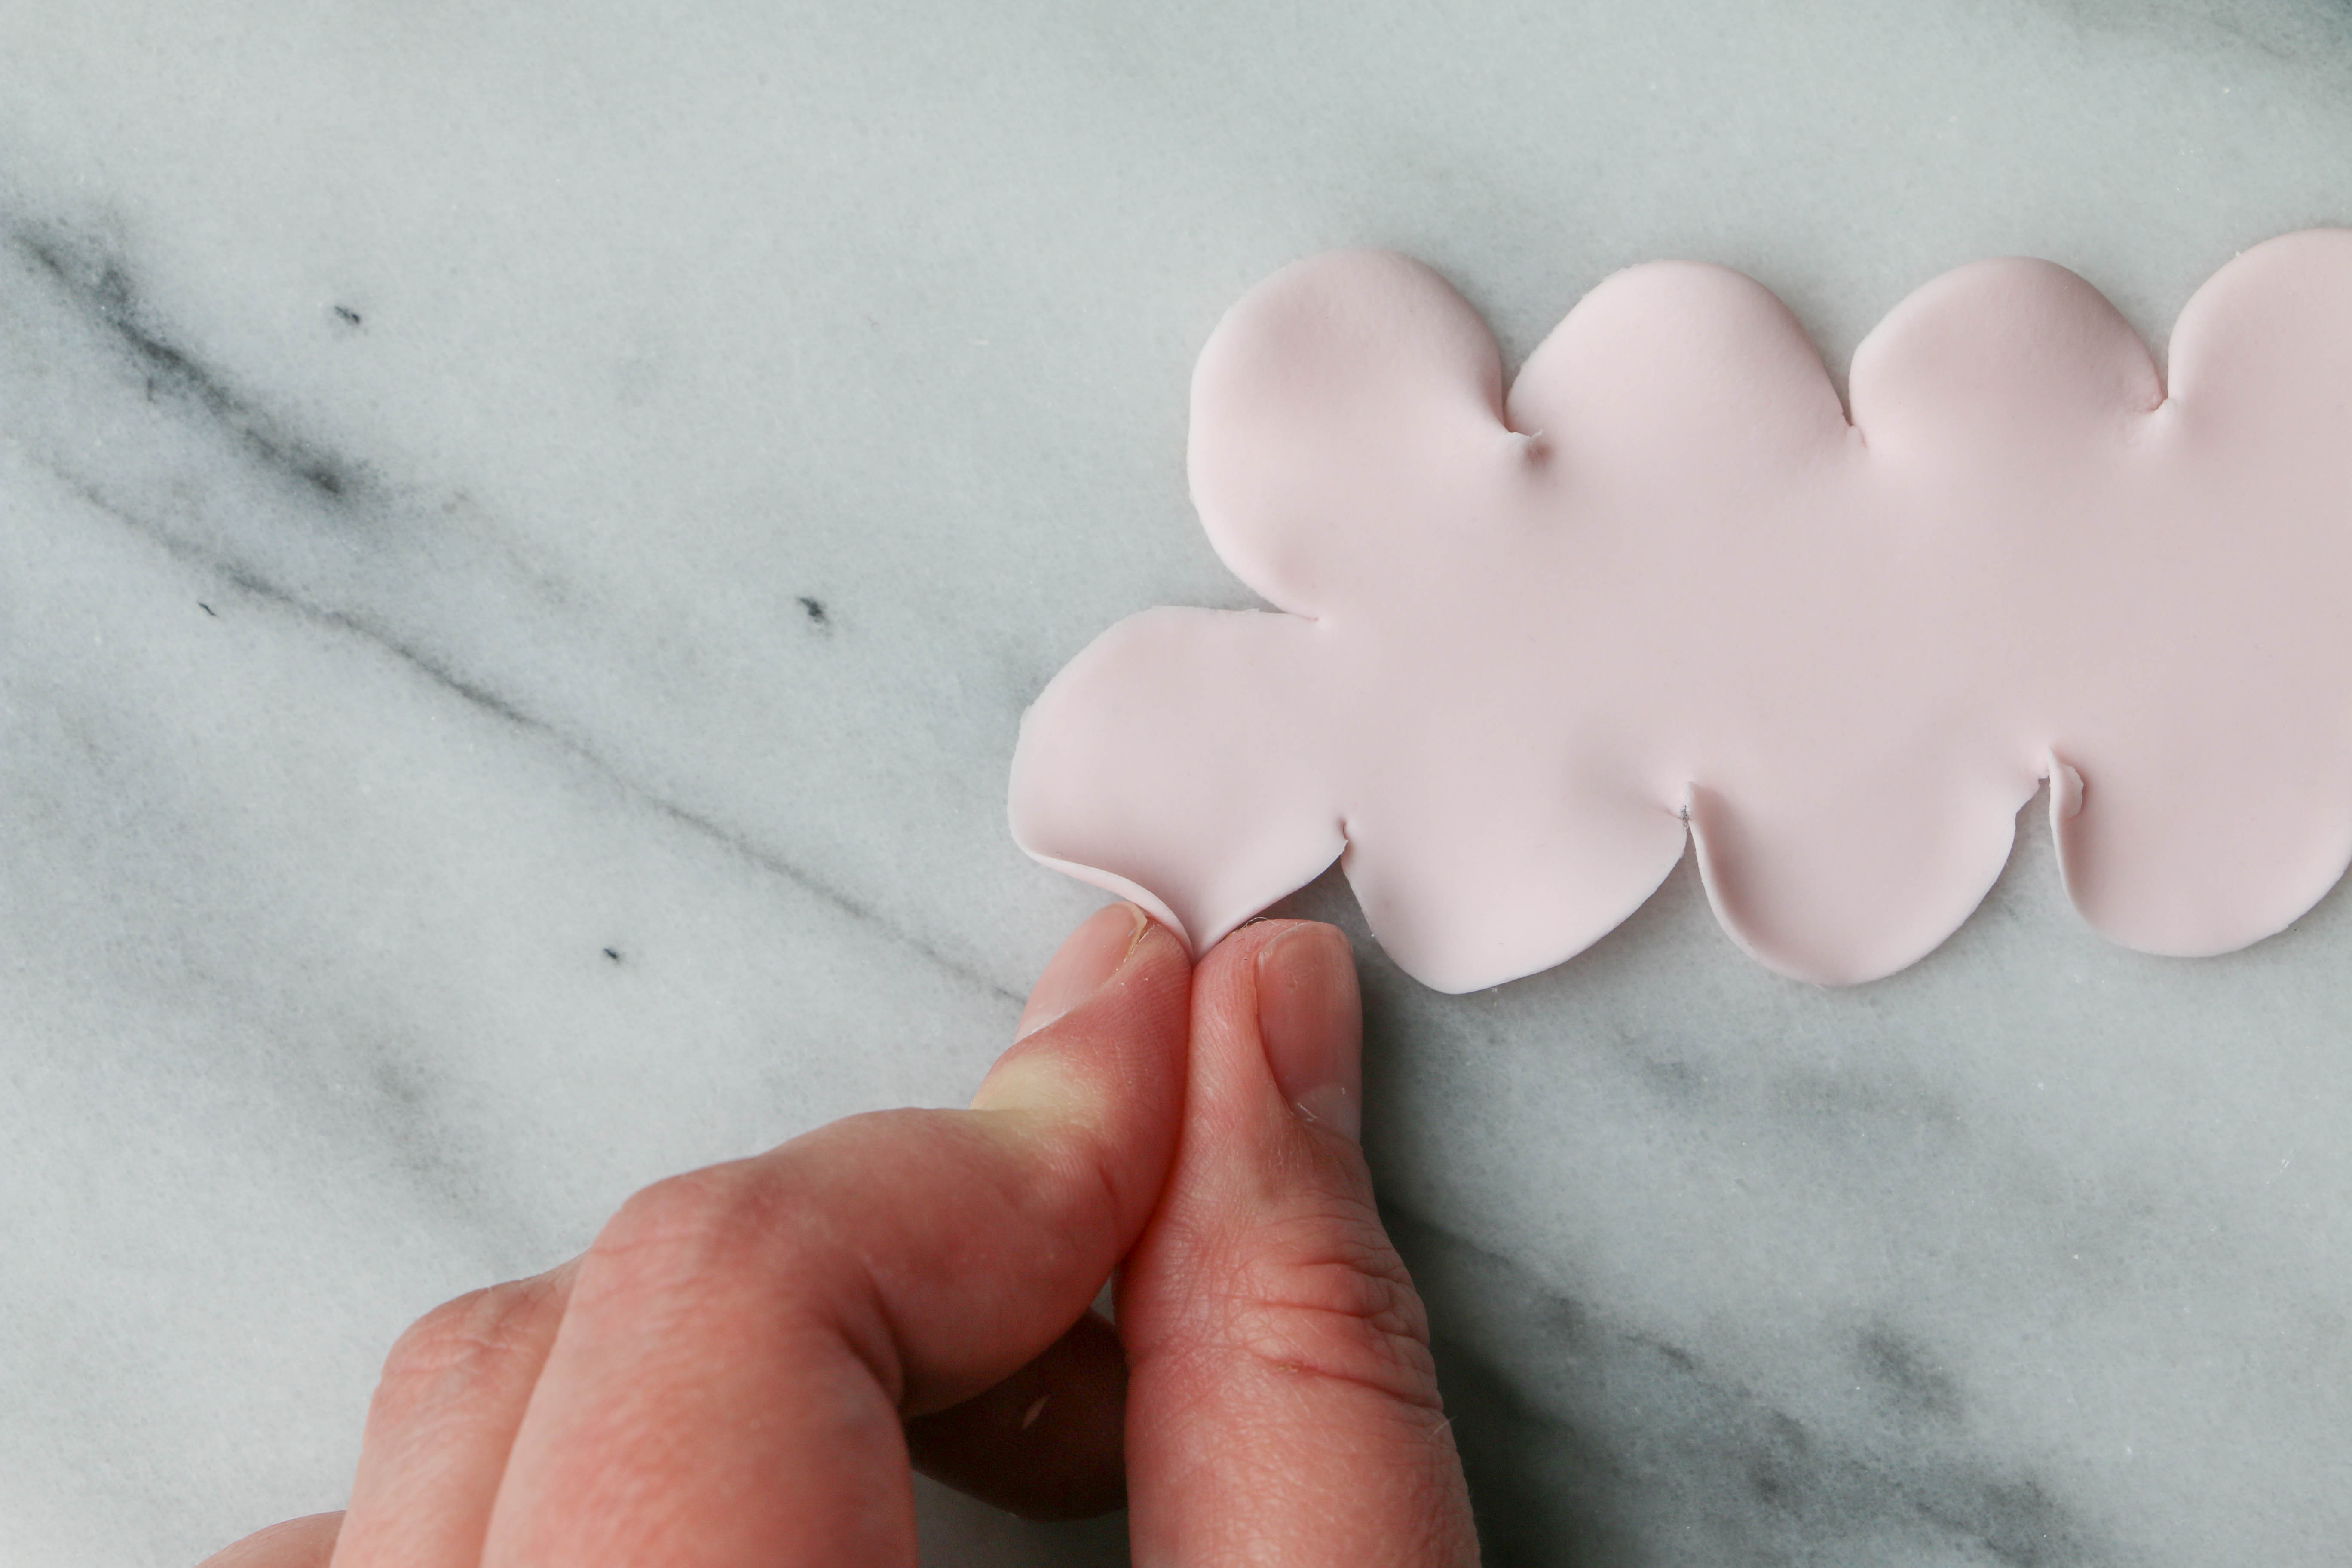
After thinning your petals, use your thumb and pointer finger to pinch the center edge of each petal. Repeat with the remaining petals in the direction that the paste has been thinned. One side should have the pinches facing up, the other side should have the pinches facing down.
Step 2:
Brush a line of gum paste glue horizontally through the center of the petals. Fold the shape in half, pressing firmly along the crease. Turn the shape so that the pinches are facing you and open. Brush another line of glue along the bottom edge of the petals.
Step 3:
Tightly roll the petals into a coil. Set the coil on its bottom, then use a knitting needle or tooth pick to open the petals up.
Step 4:
Roll, cut, thin and pinch another set of petals. This time, cut the petal shape in half horizontally. Flip the strips so that the pinches are open and facing up.
Brush a line of gum paste glue along the bottom edge of each strip. Wrap one of the strips around the coiled center. Repeat with the other strip. Arrange the petals as needed and set the rose aside to dry.
How to Make Rose Leaves
Step 1:
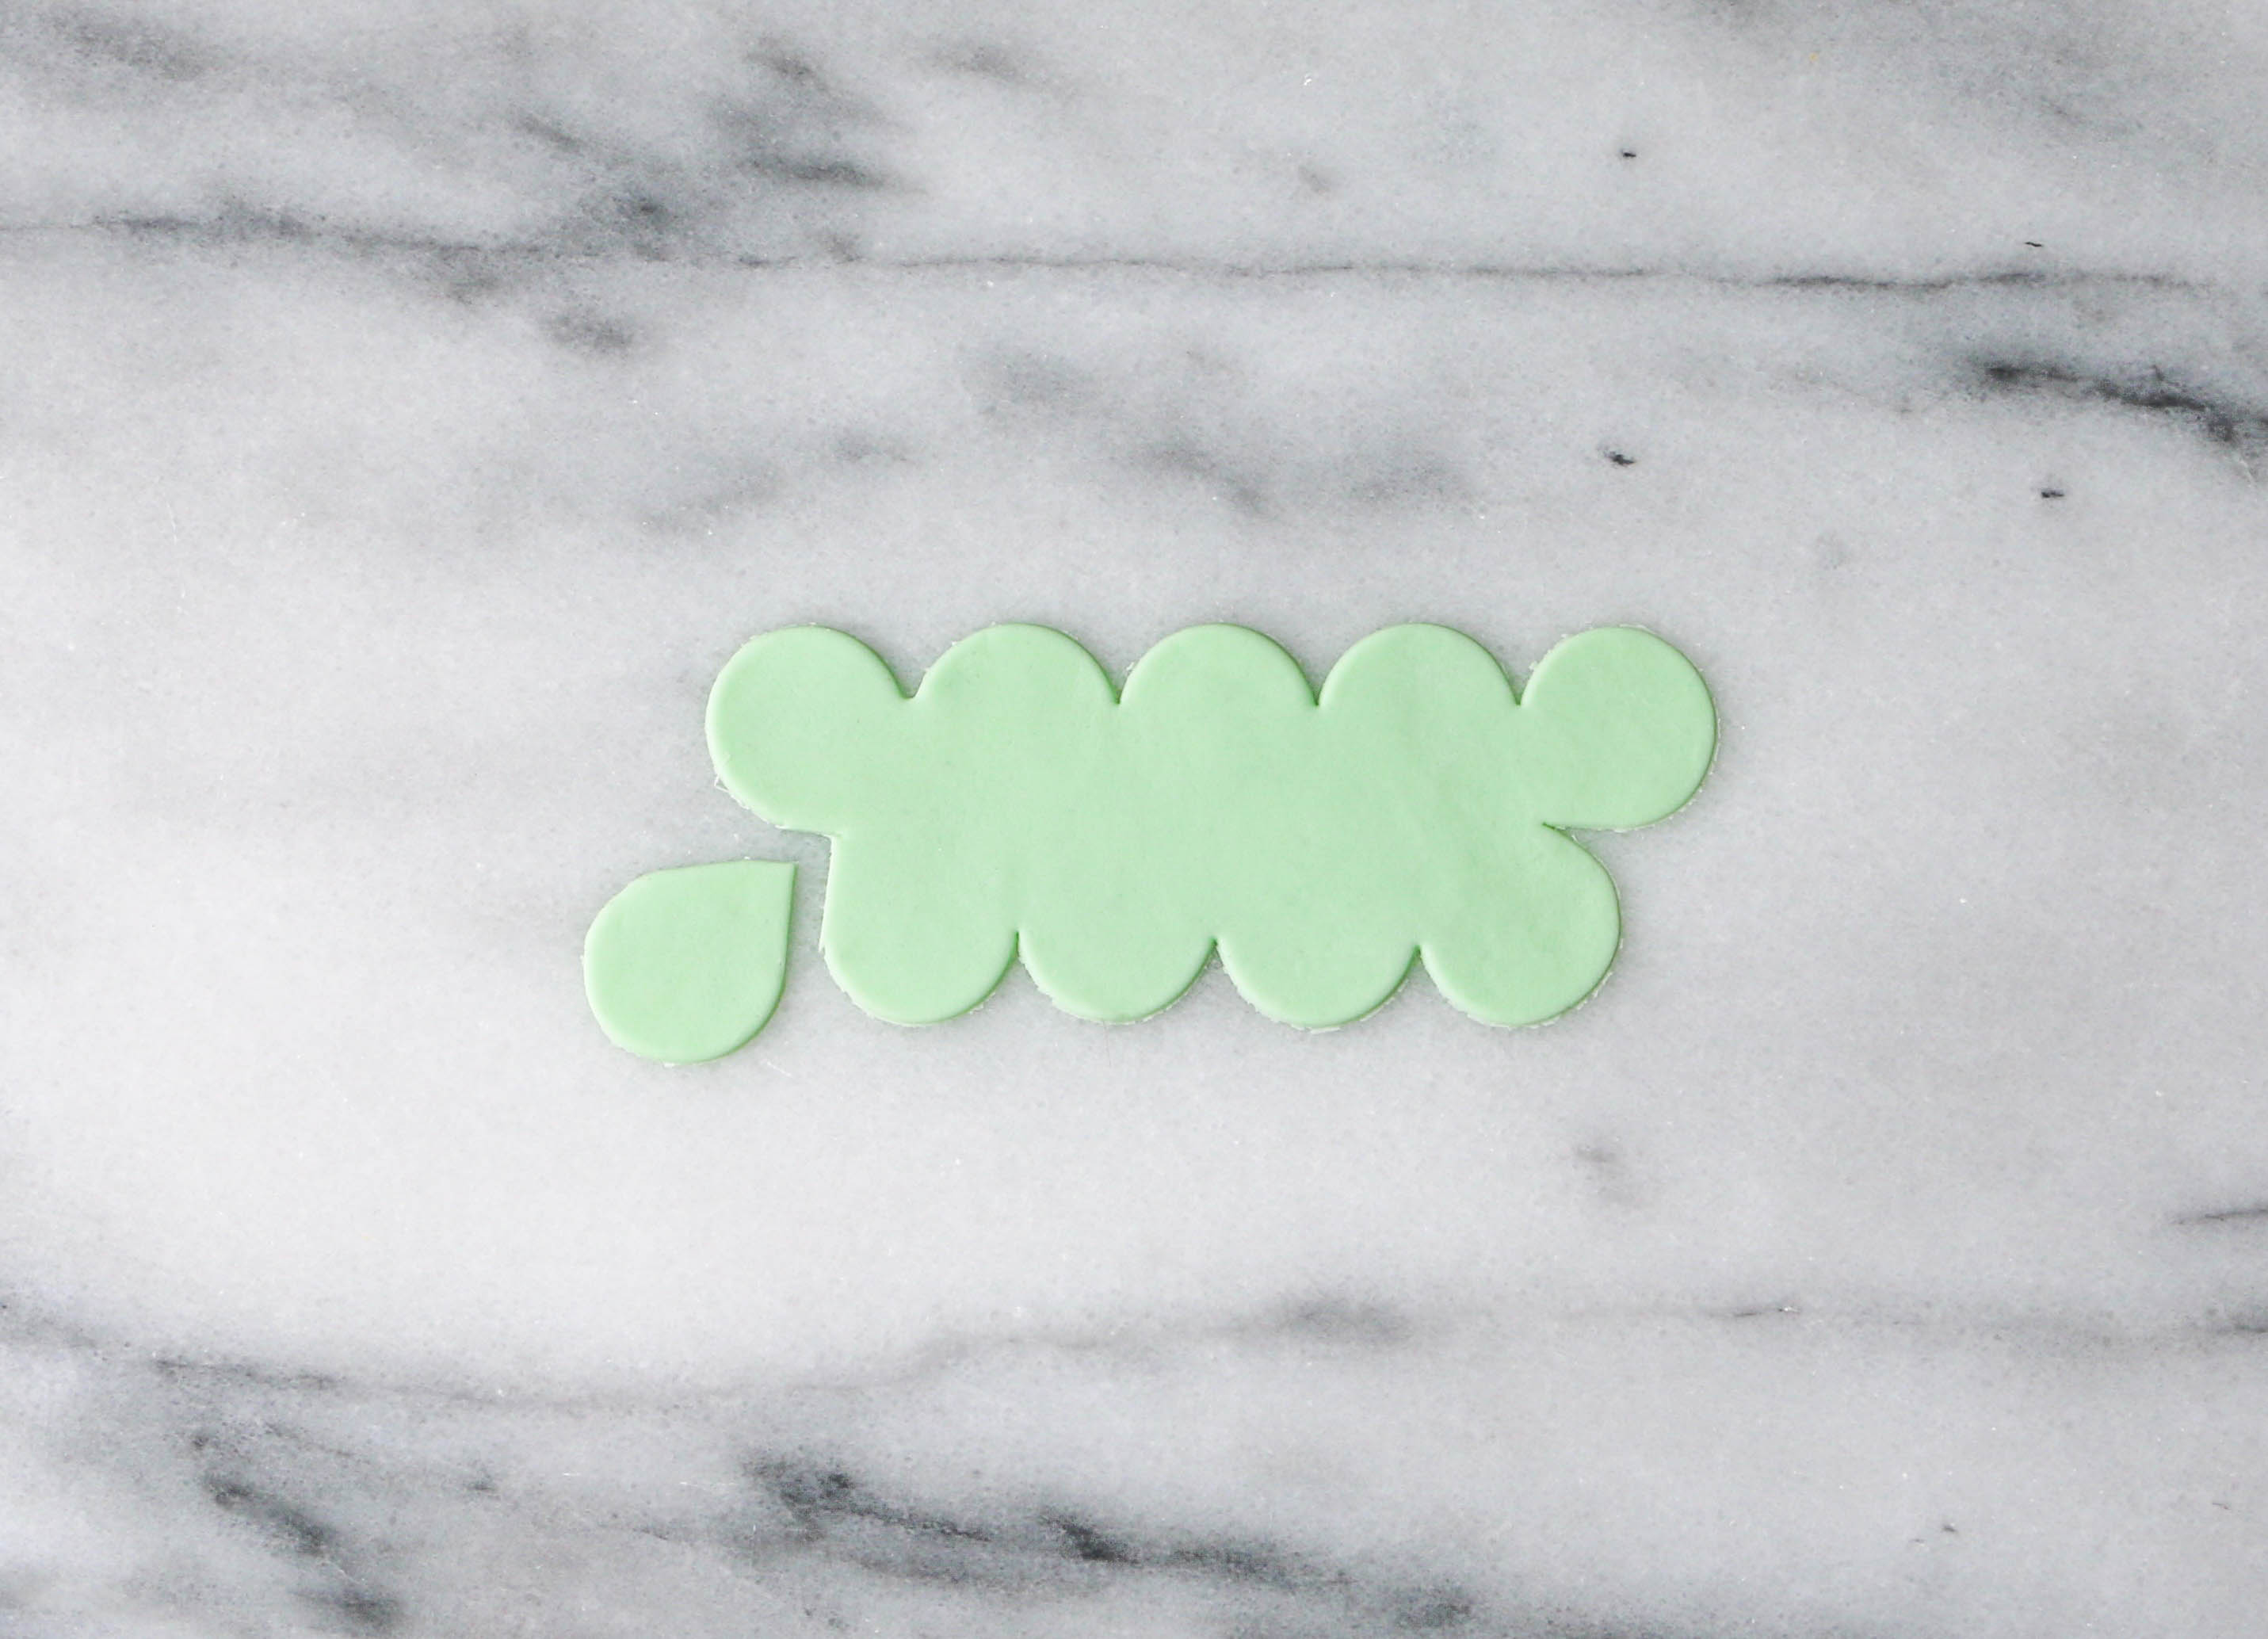
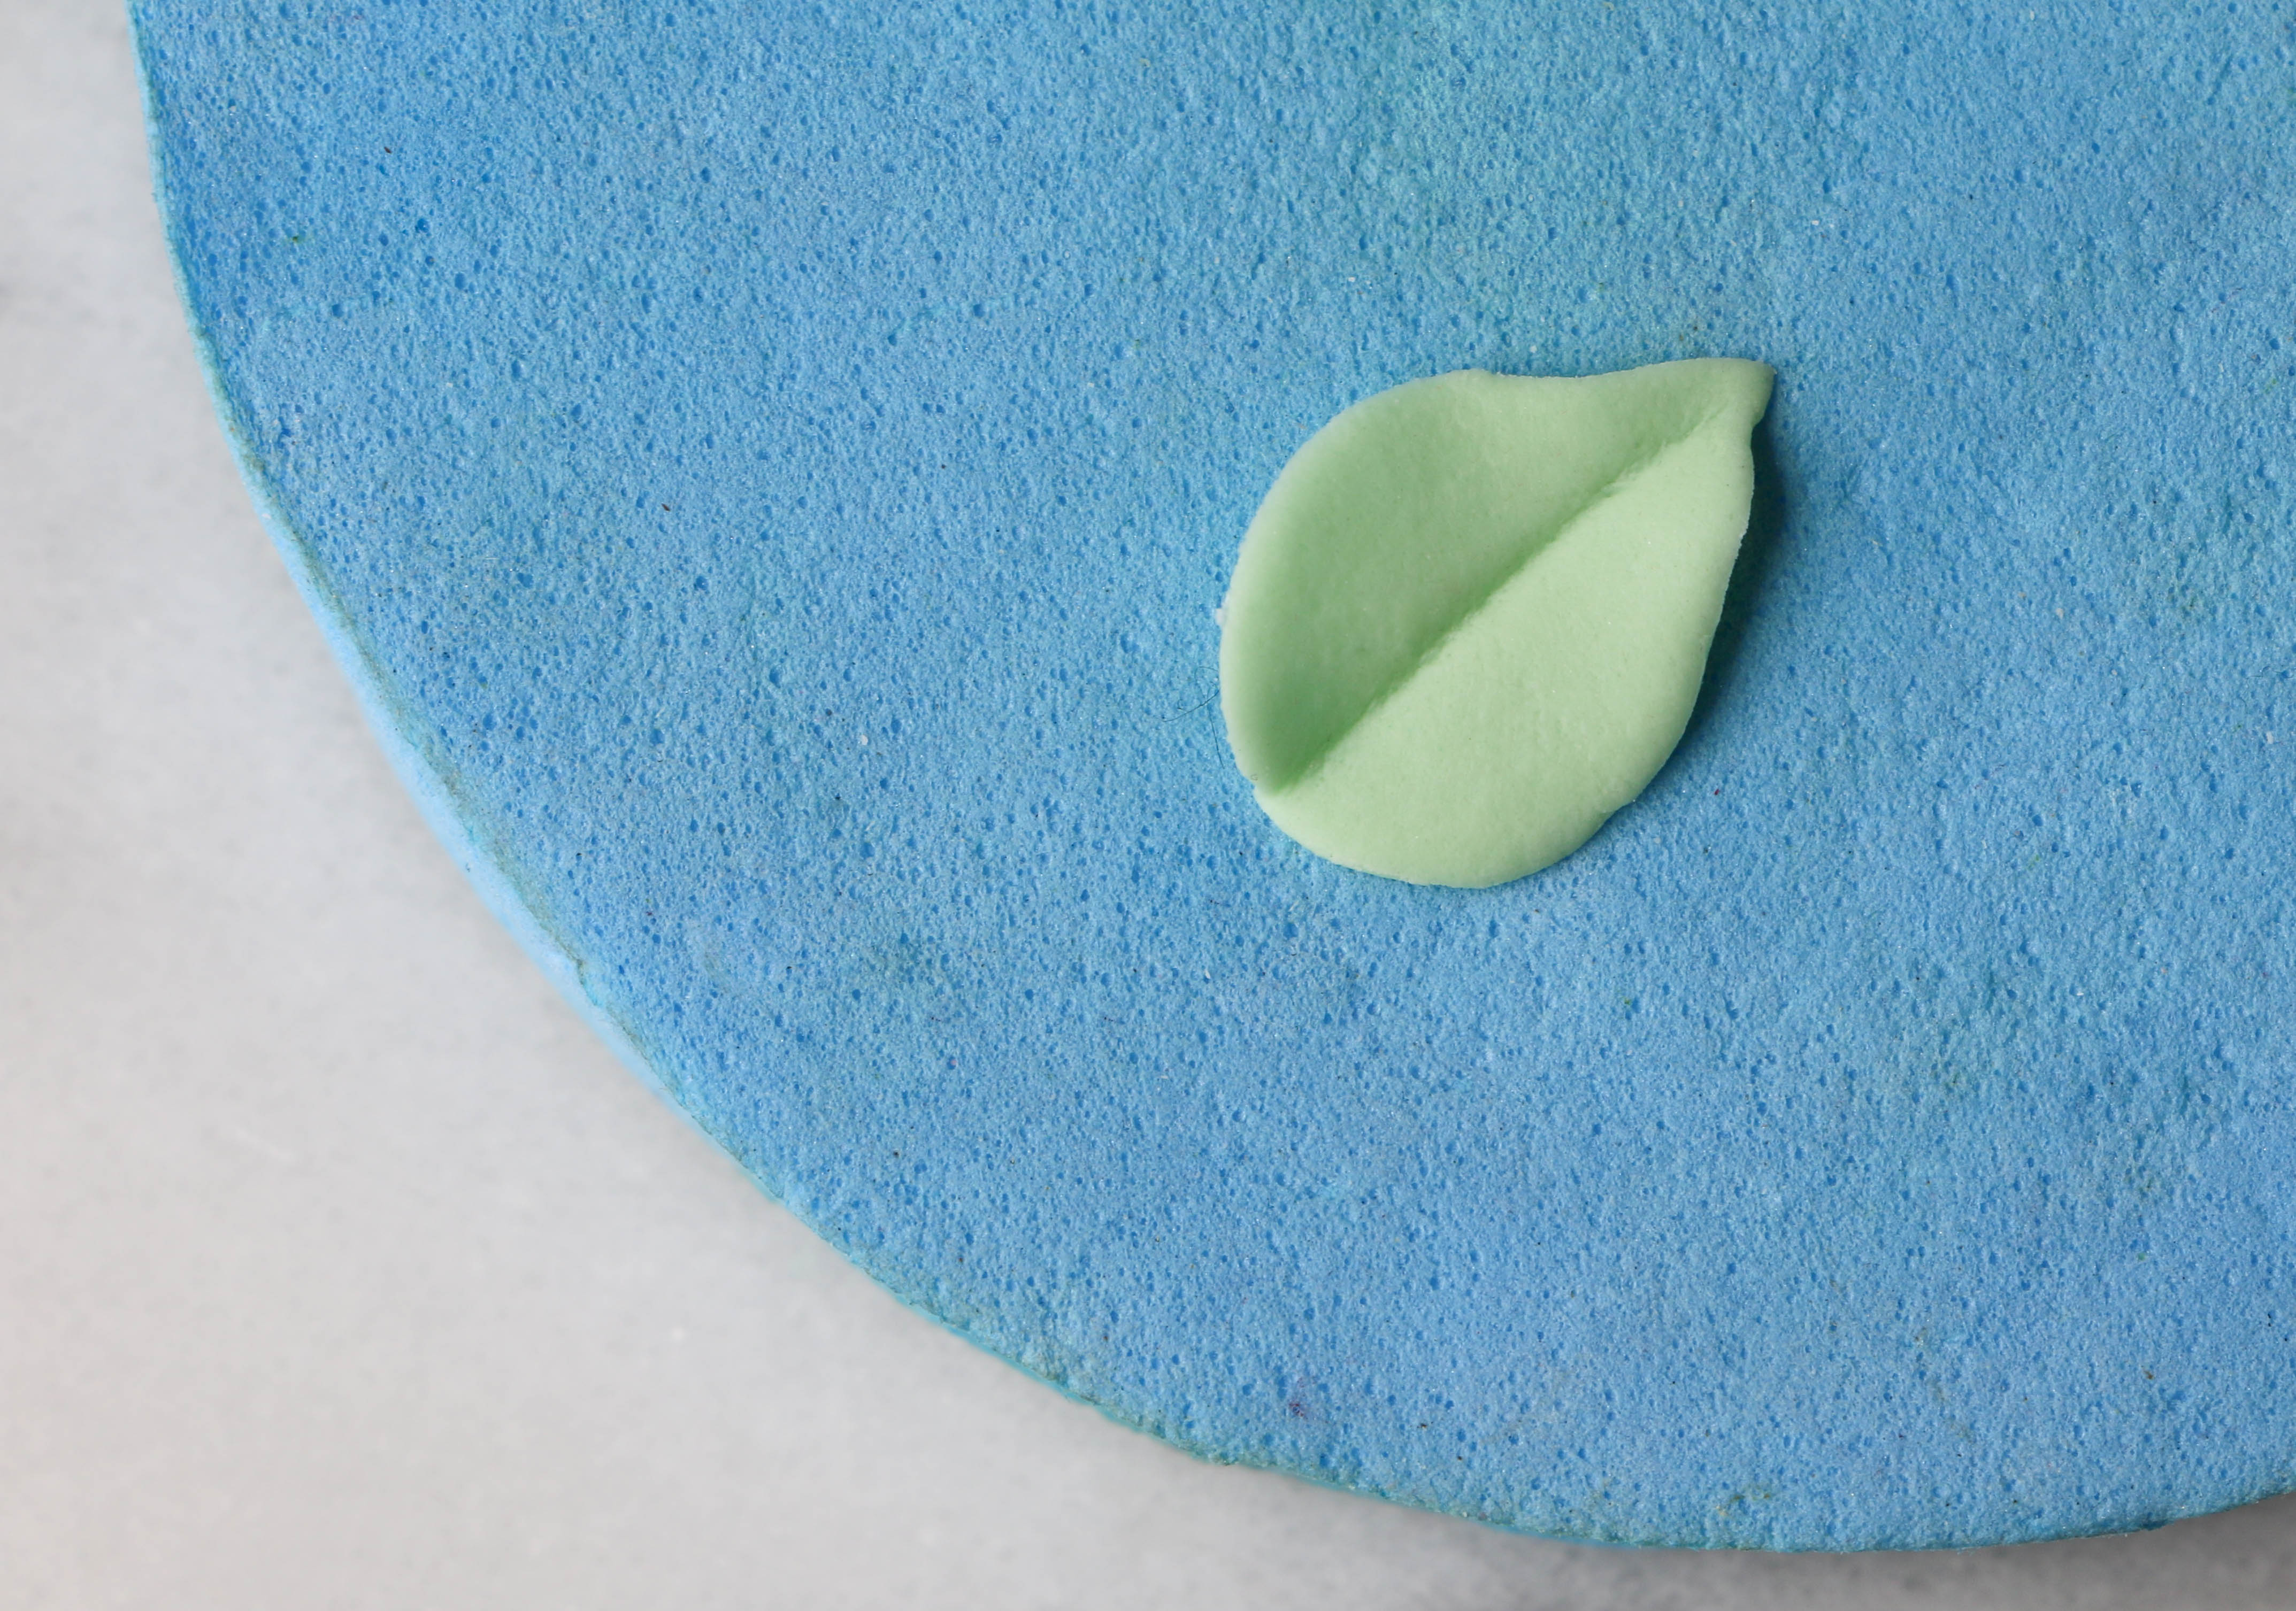
Roll a piece of green gum paste to thinner than 1/8″ and cut out a strip of petals. Use a small knife to make two cuts into one of the end petals, creating a teardrop shape.
Step 2:
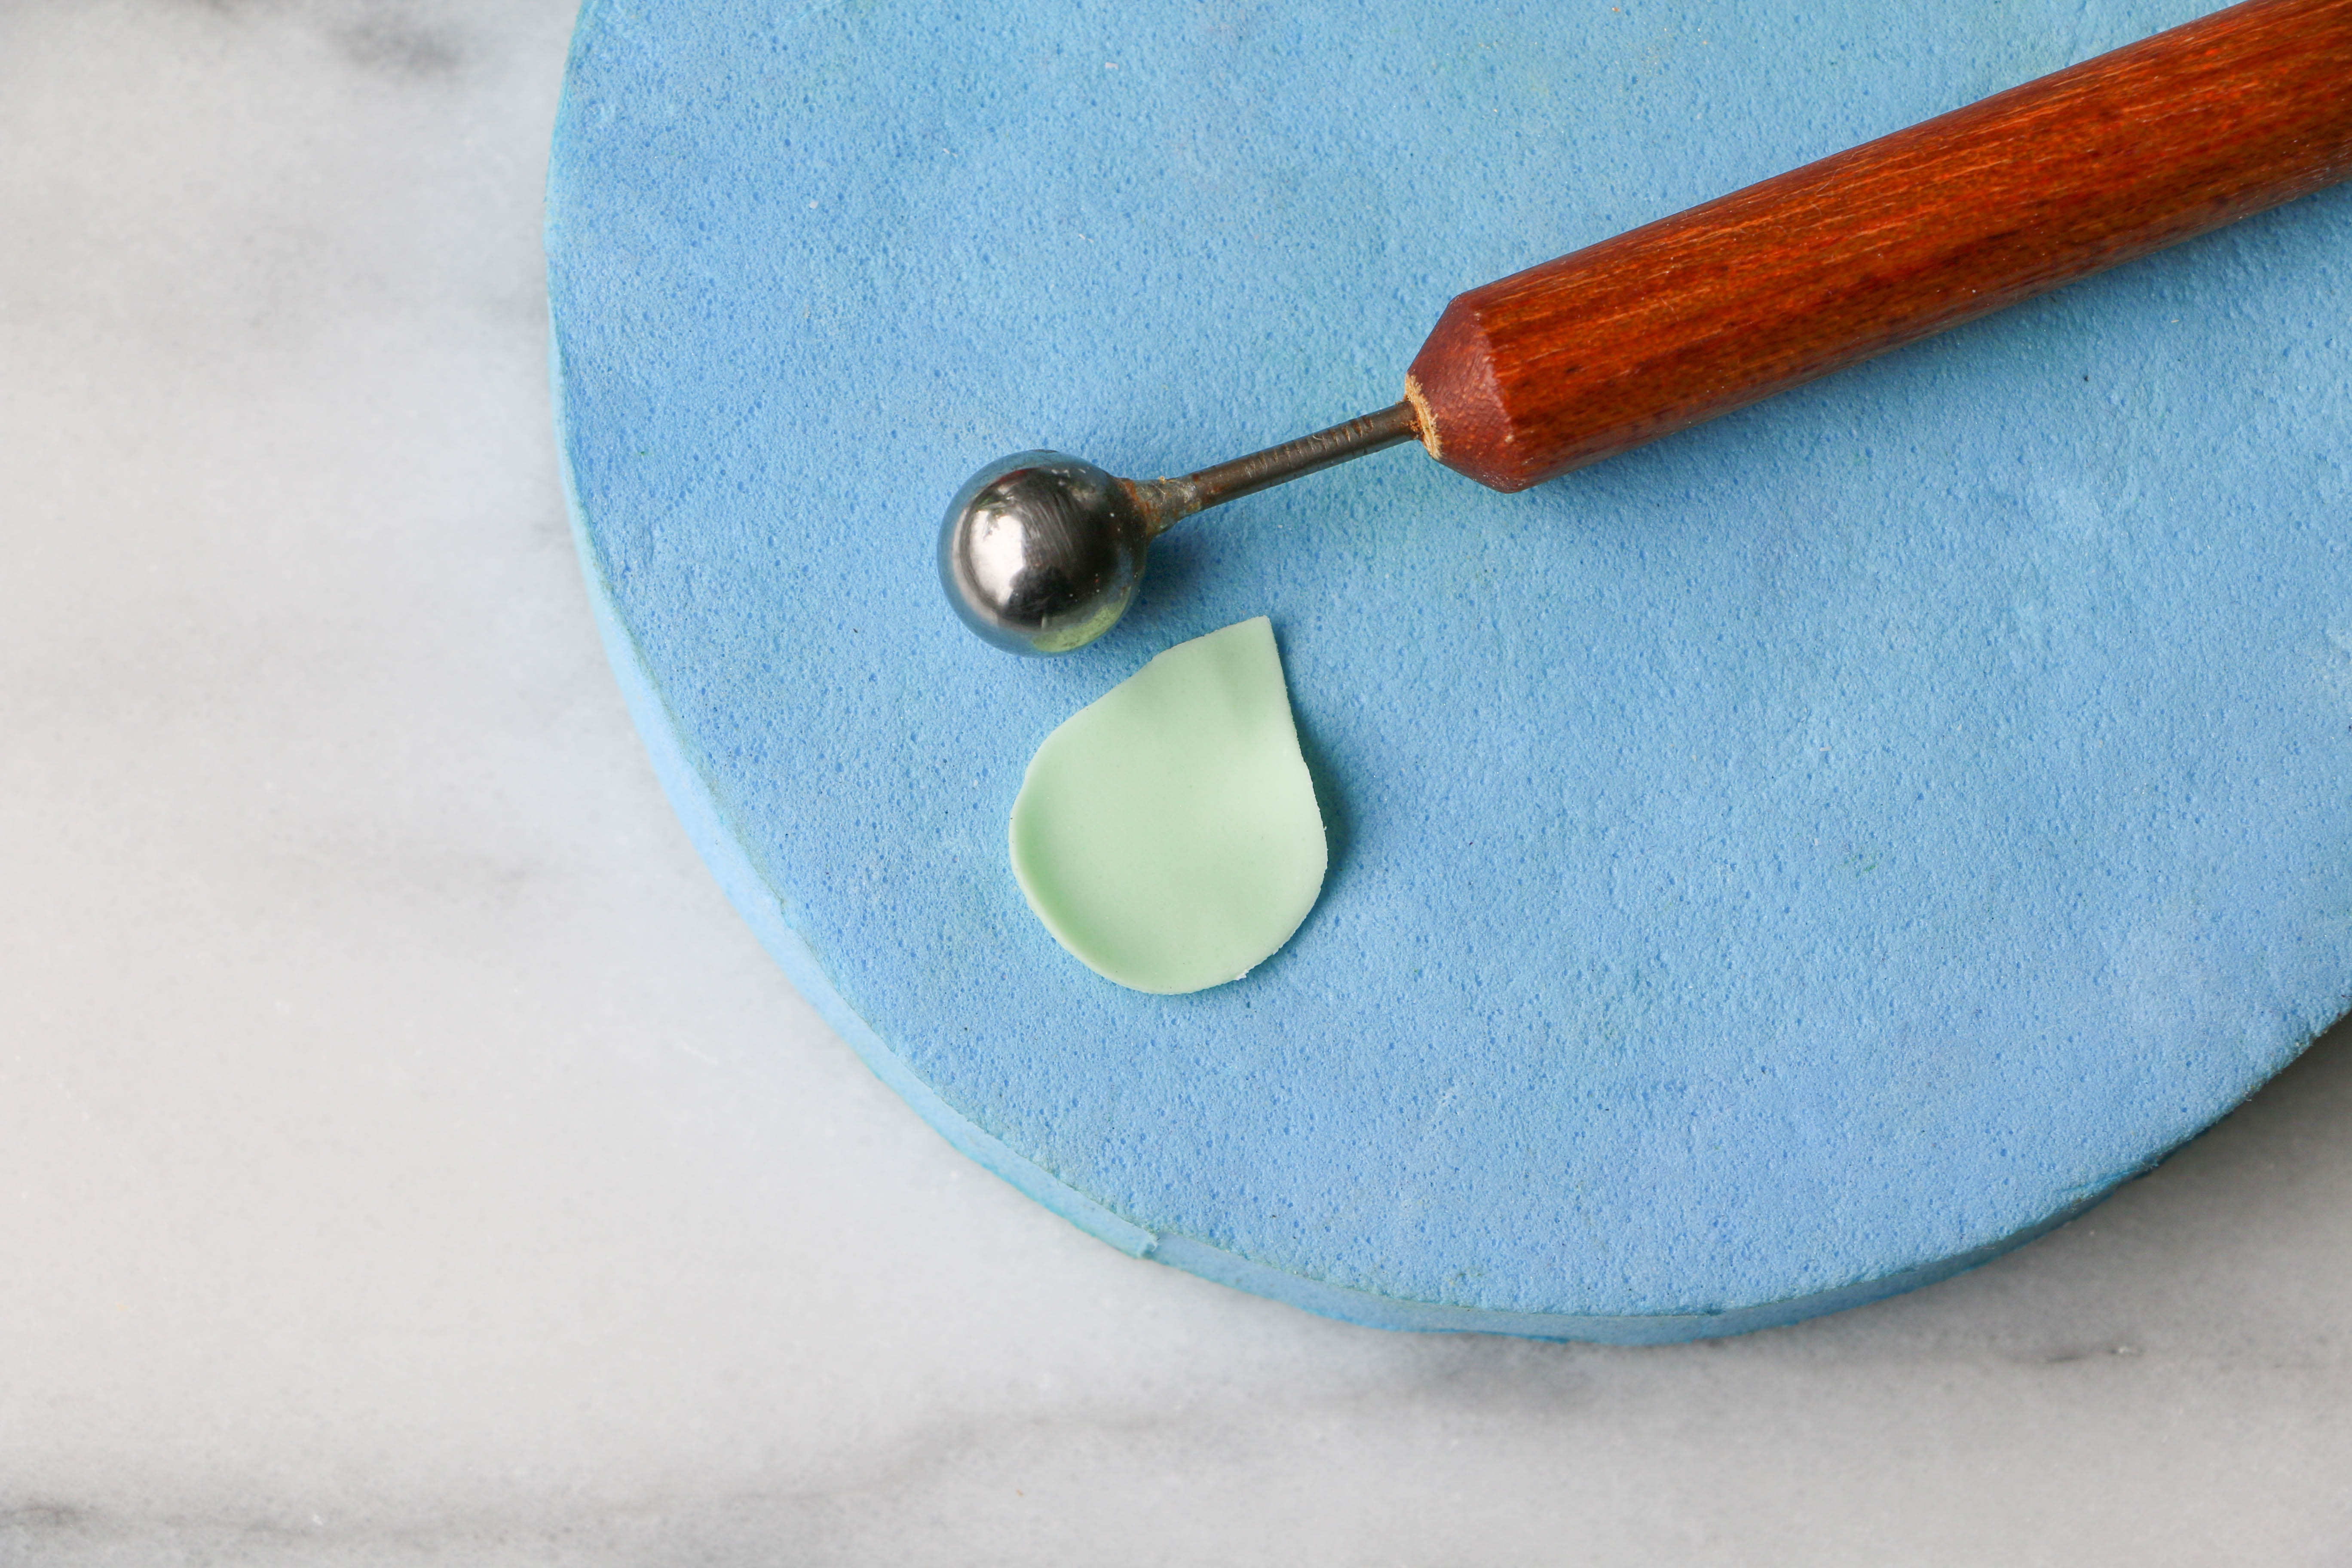
Place the cut piece of gum paste onto a foam mat. Use the ball tool to thin the edges of the leaf.
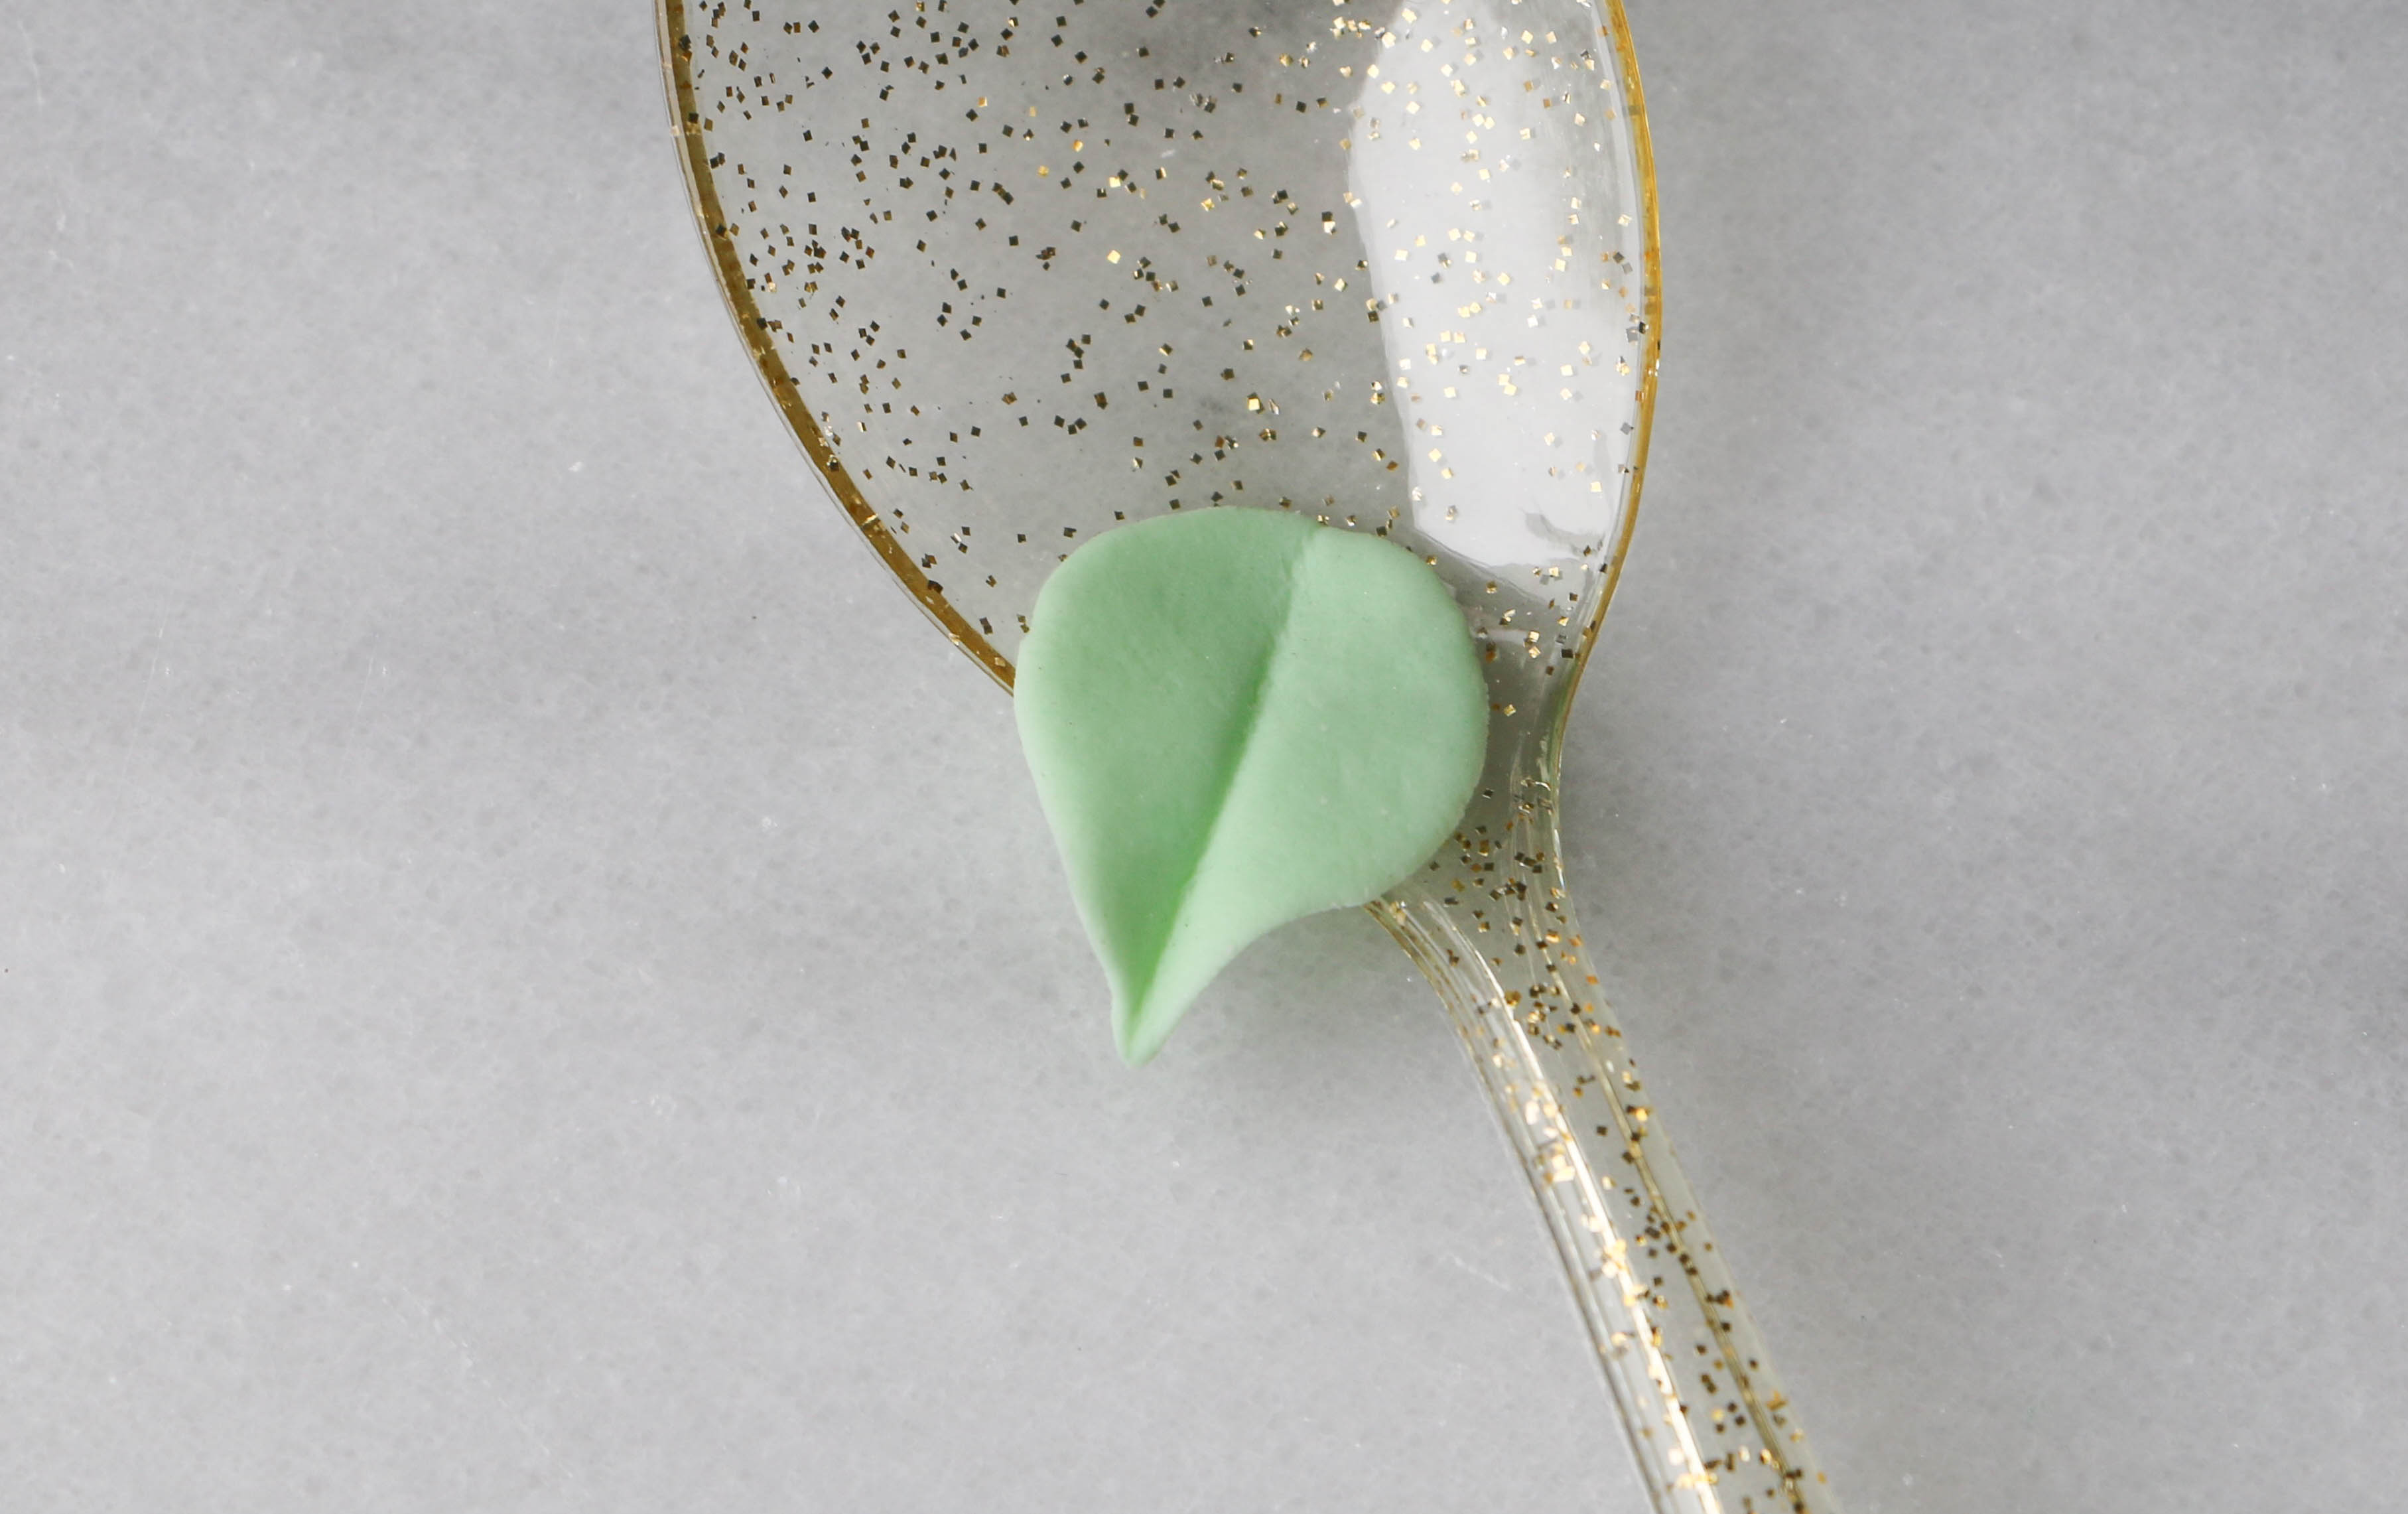
Step 3:
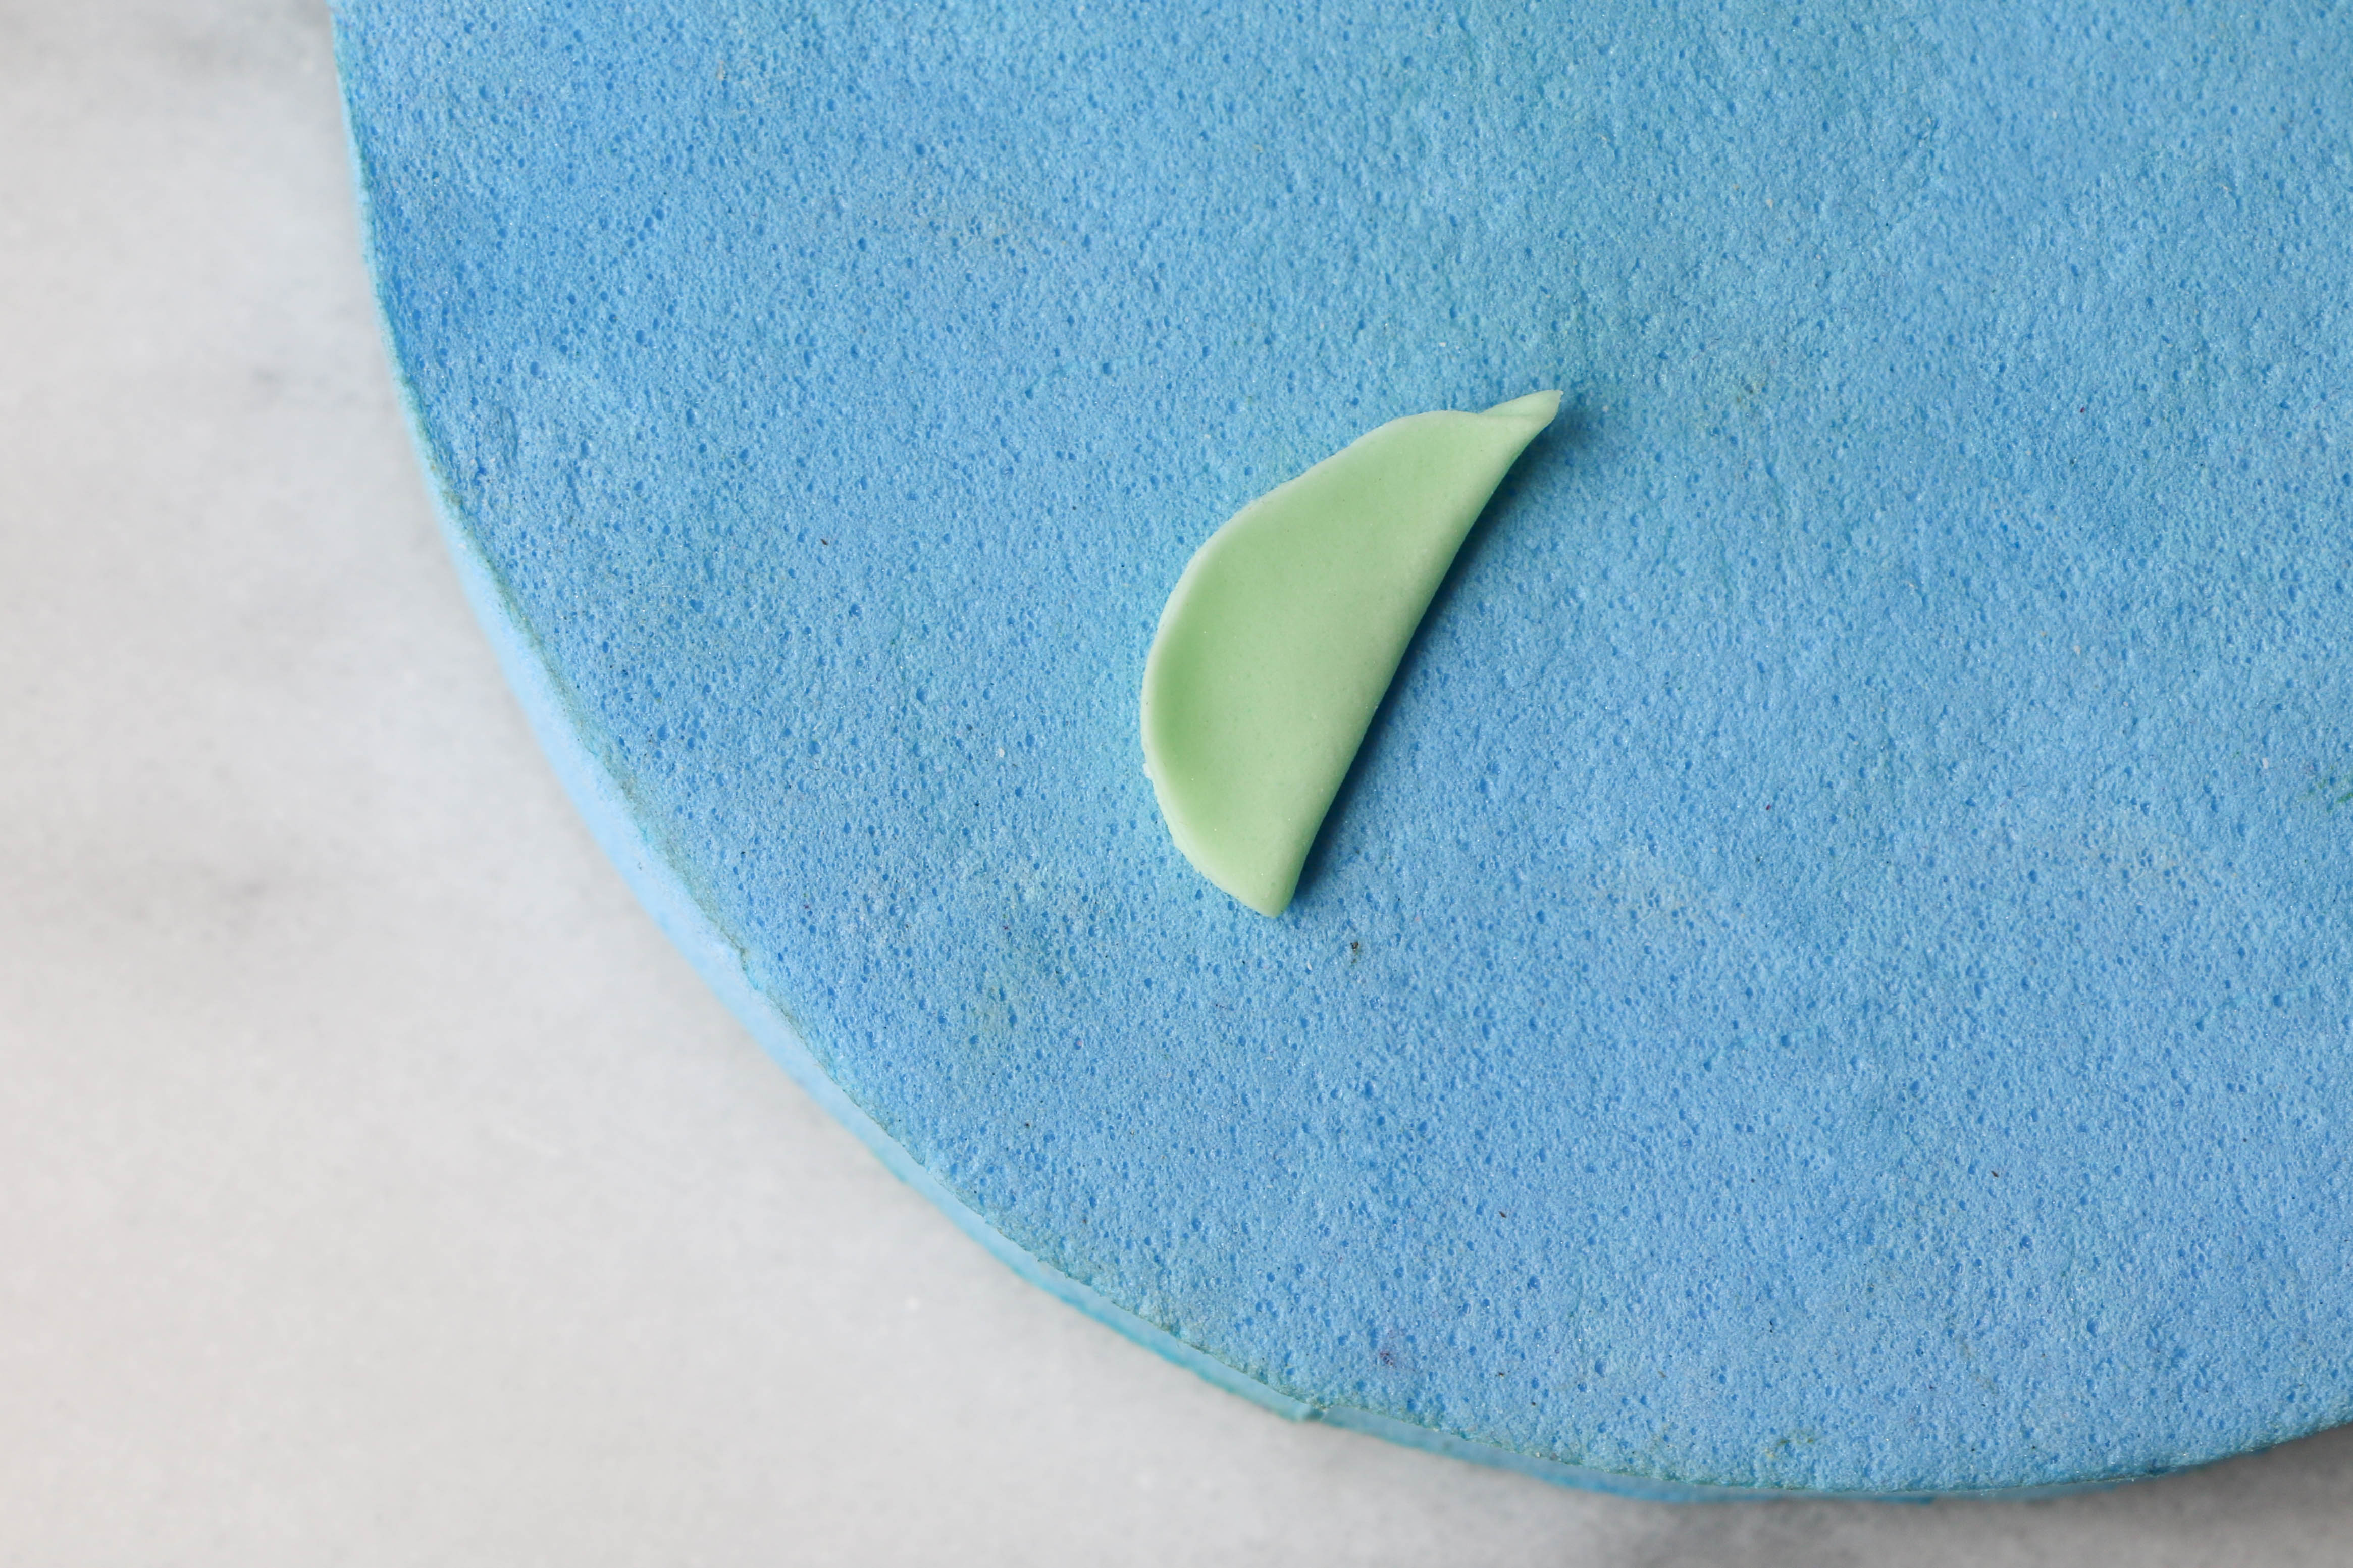
Fold the leaf in half, then open it back up again. Drape the leaf over the edge of a spoon to dry.
How to make fast & easy petal ruffles
Step 1:
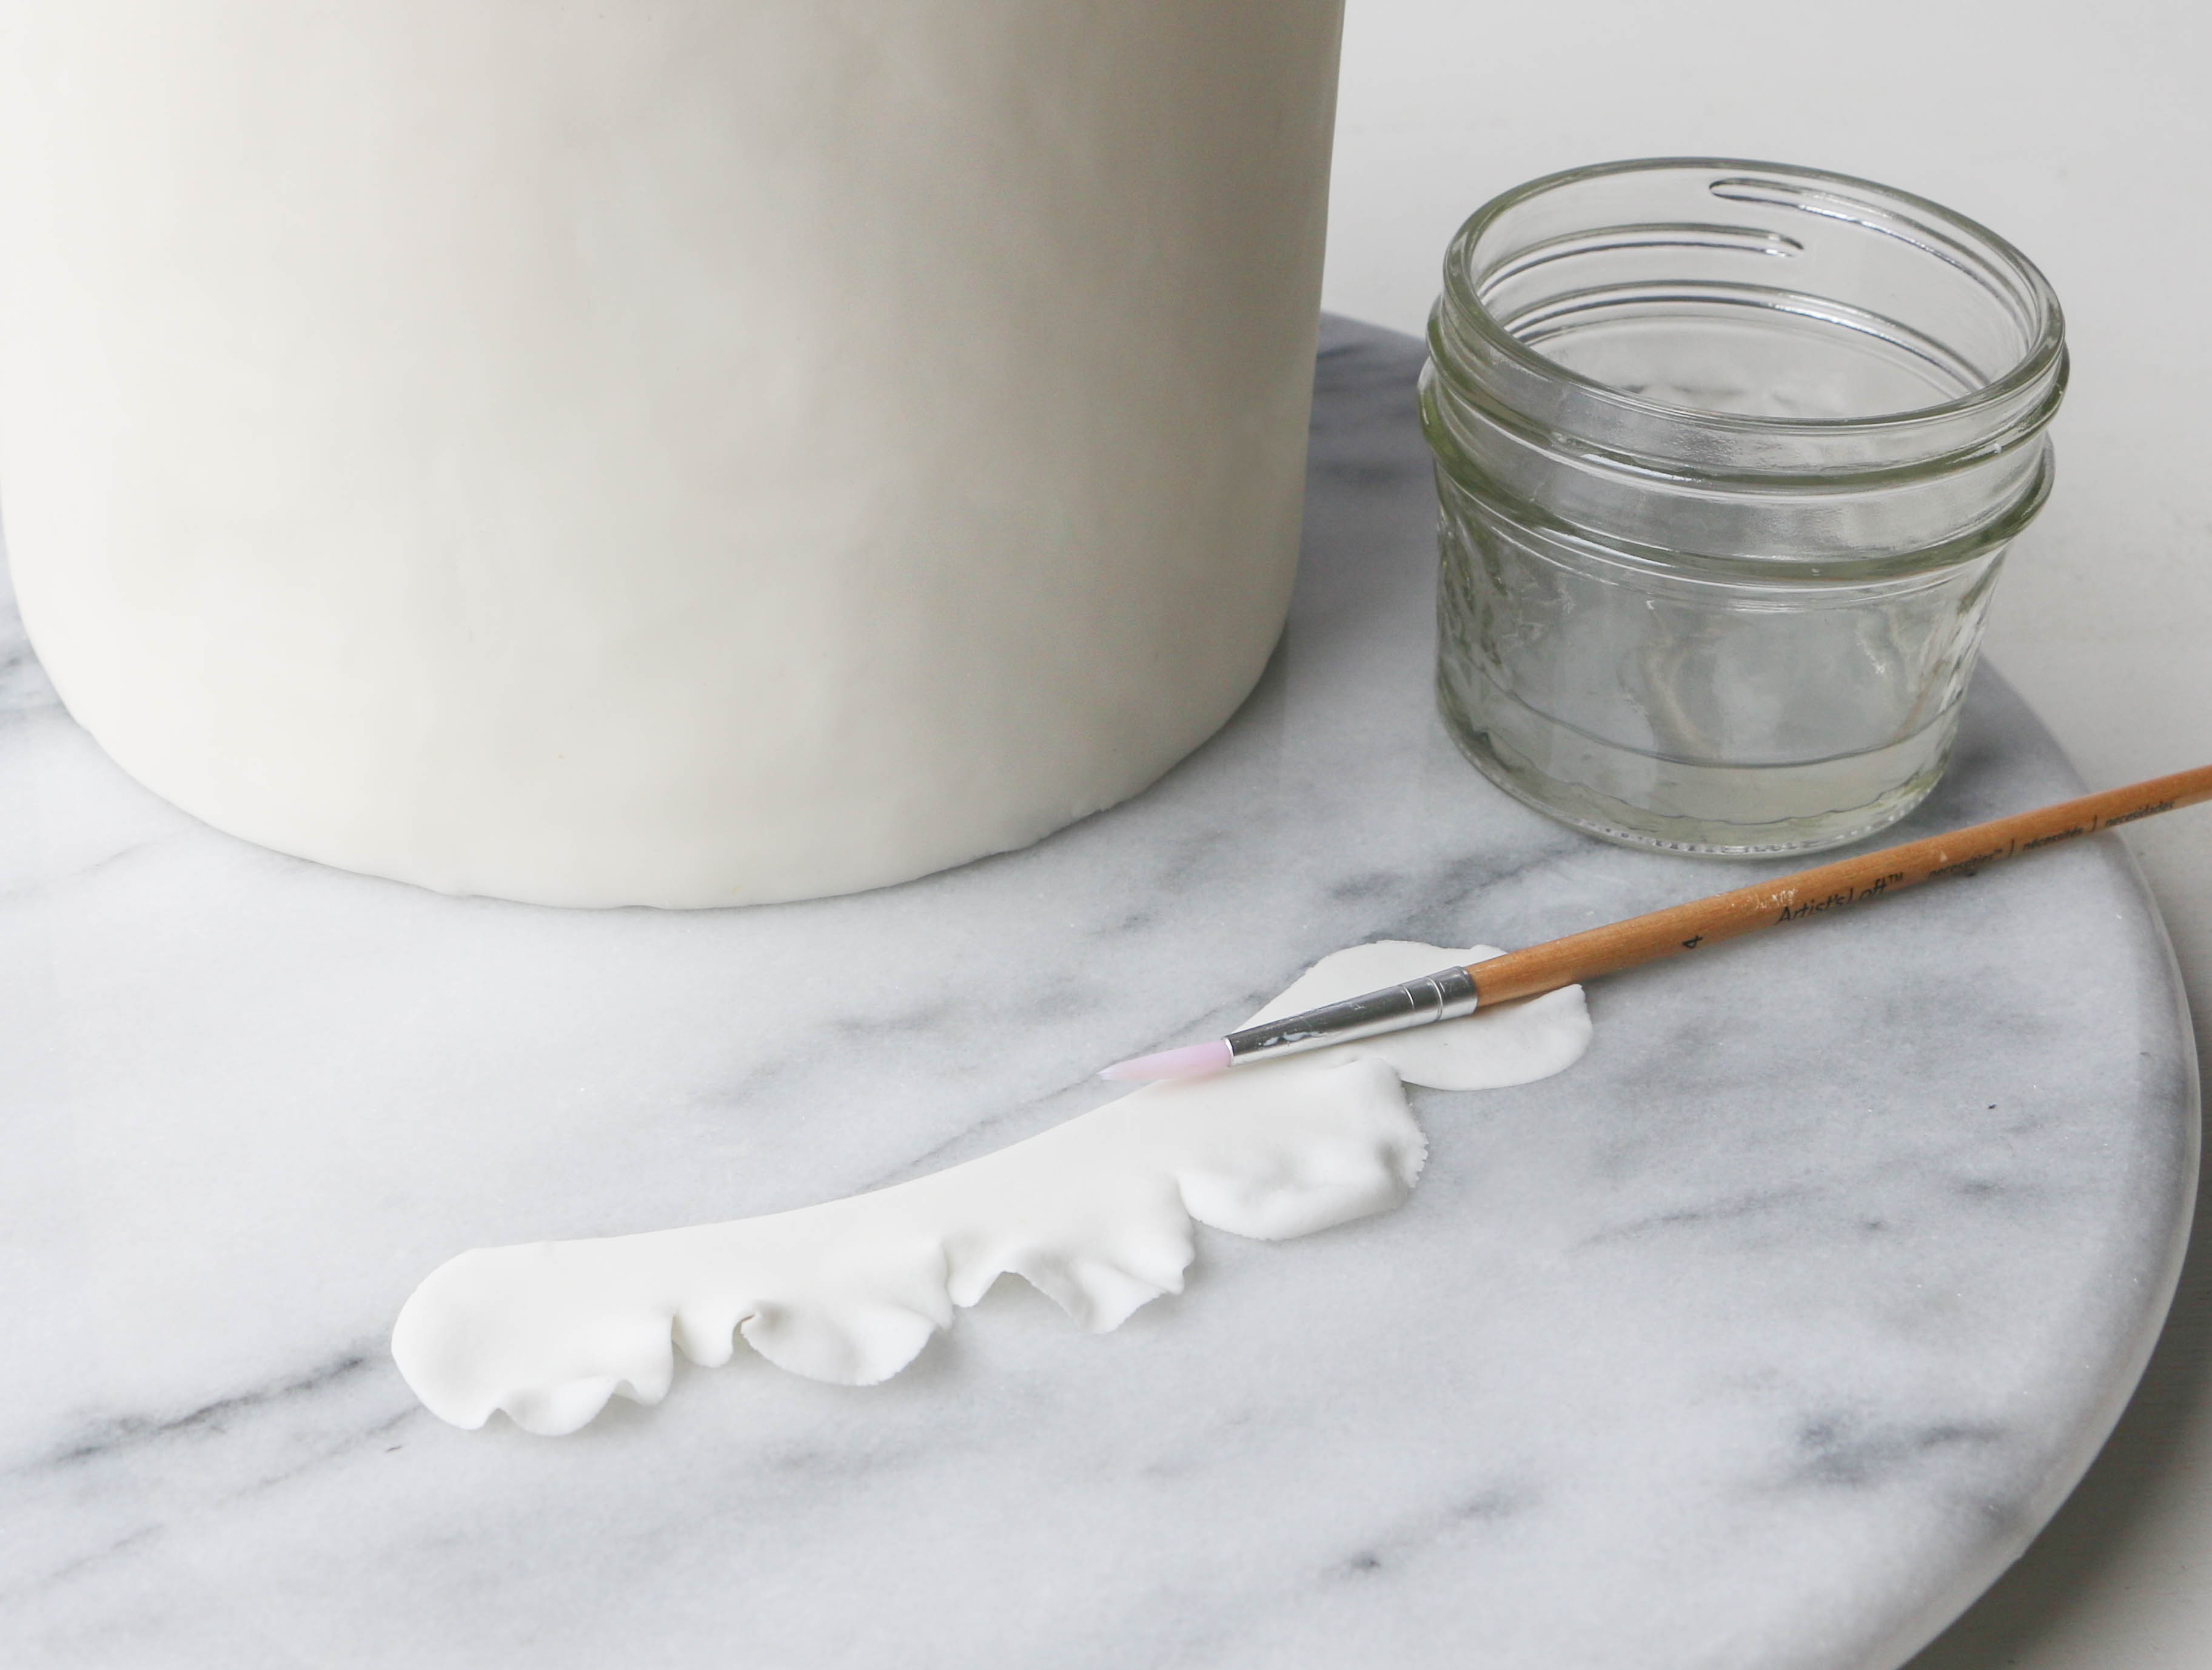
Combine equal parts fondant and gum paste to form a 50/50 sugar paste. This will help your ruffles hold their shape while still remaining pliable and easy to cut through.
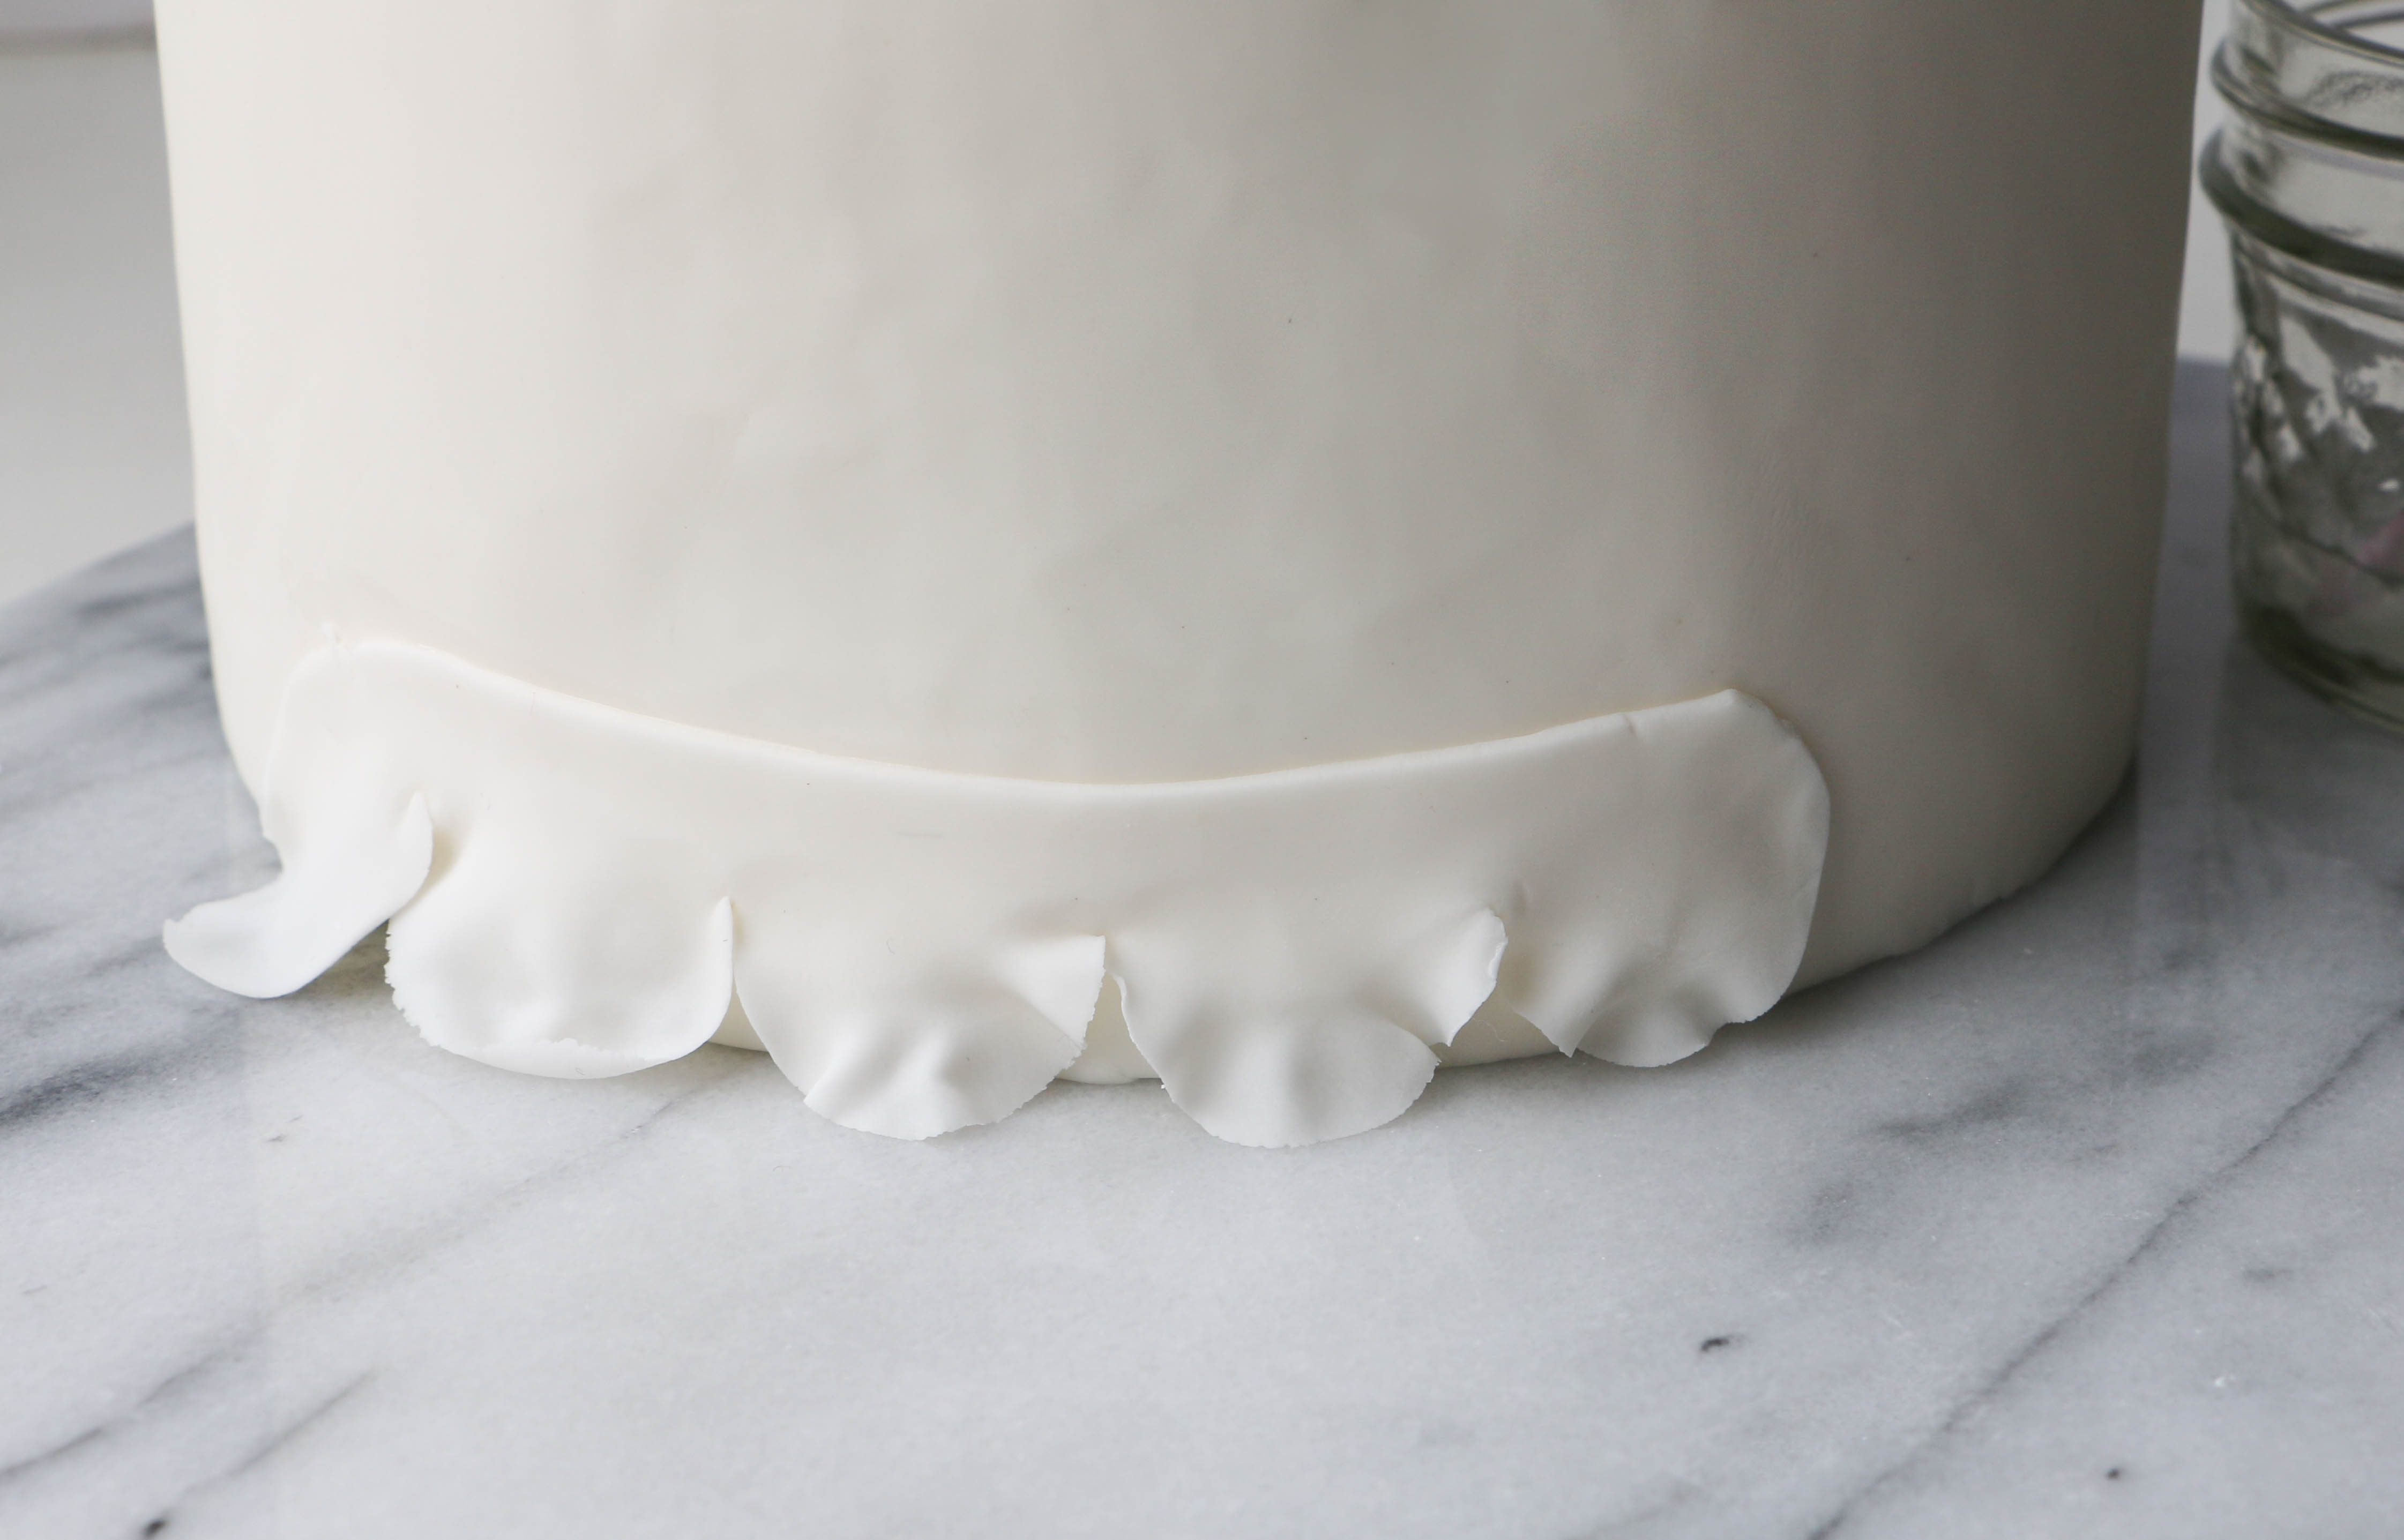
Roll the 50/50 mix to about an 1/8″ thick. Cut a strip of petals and thin the edges all the way around. Cut the strip in half horizontally and brush a line of gum paste glue along the straight edge.
Step 2:
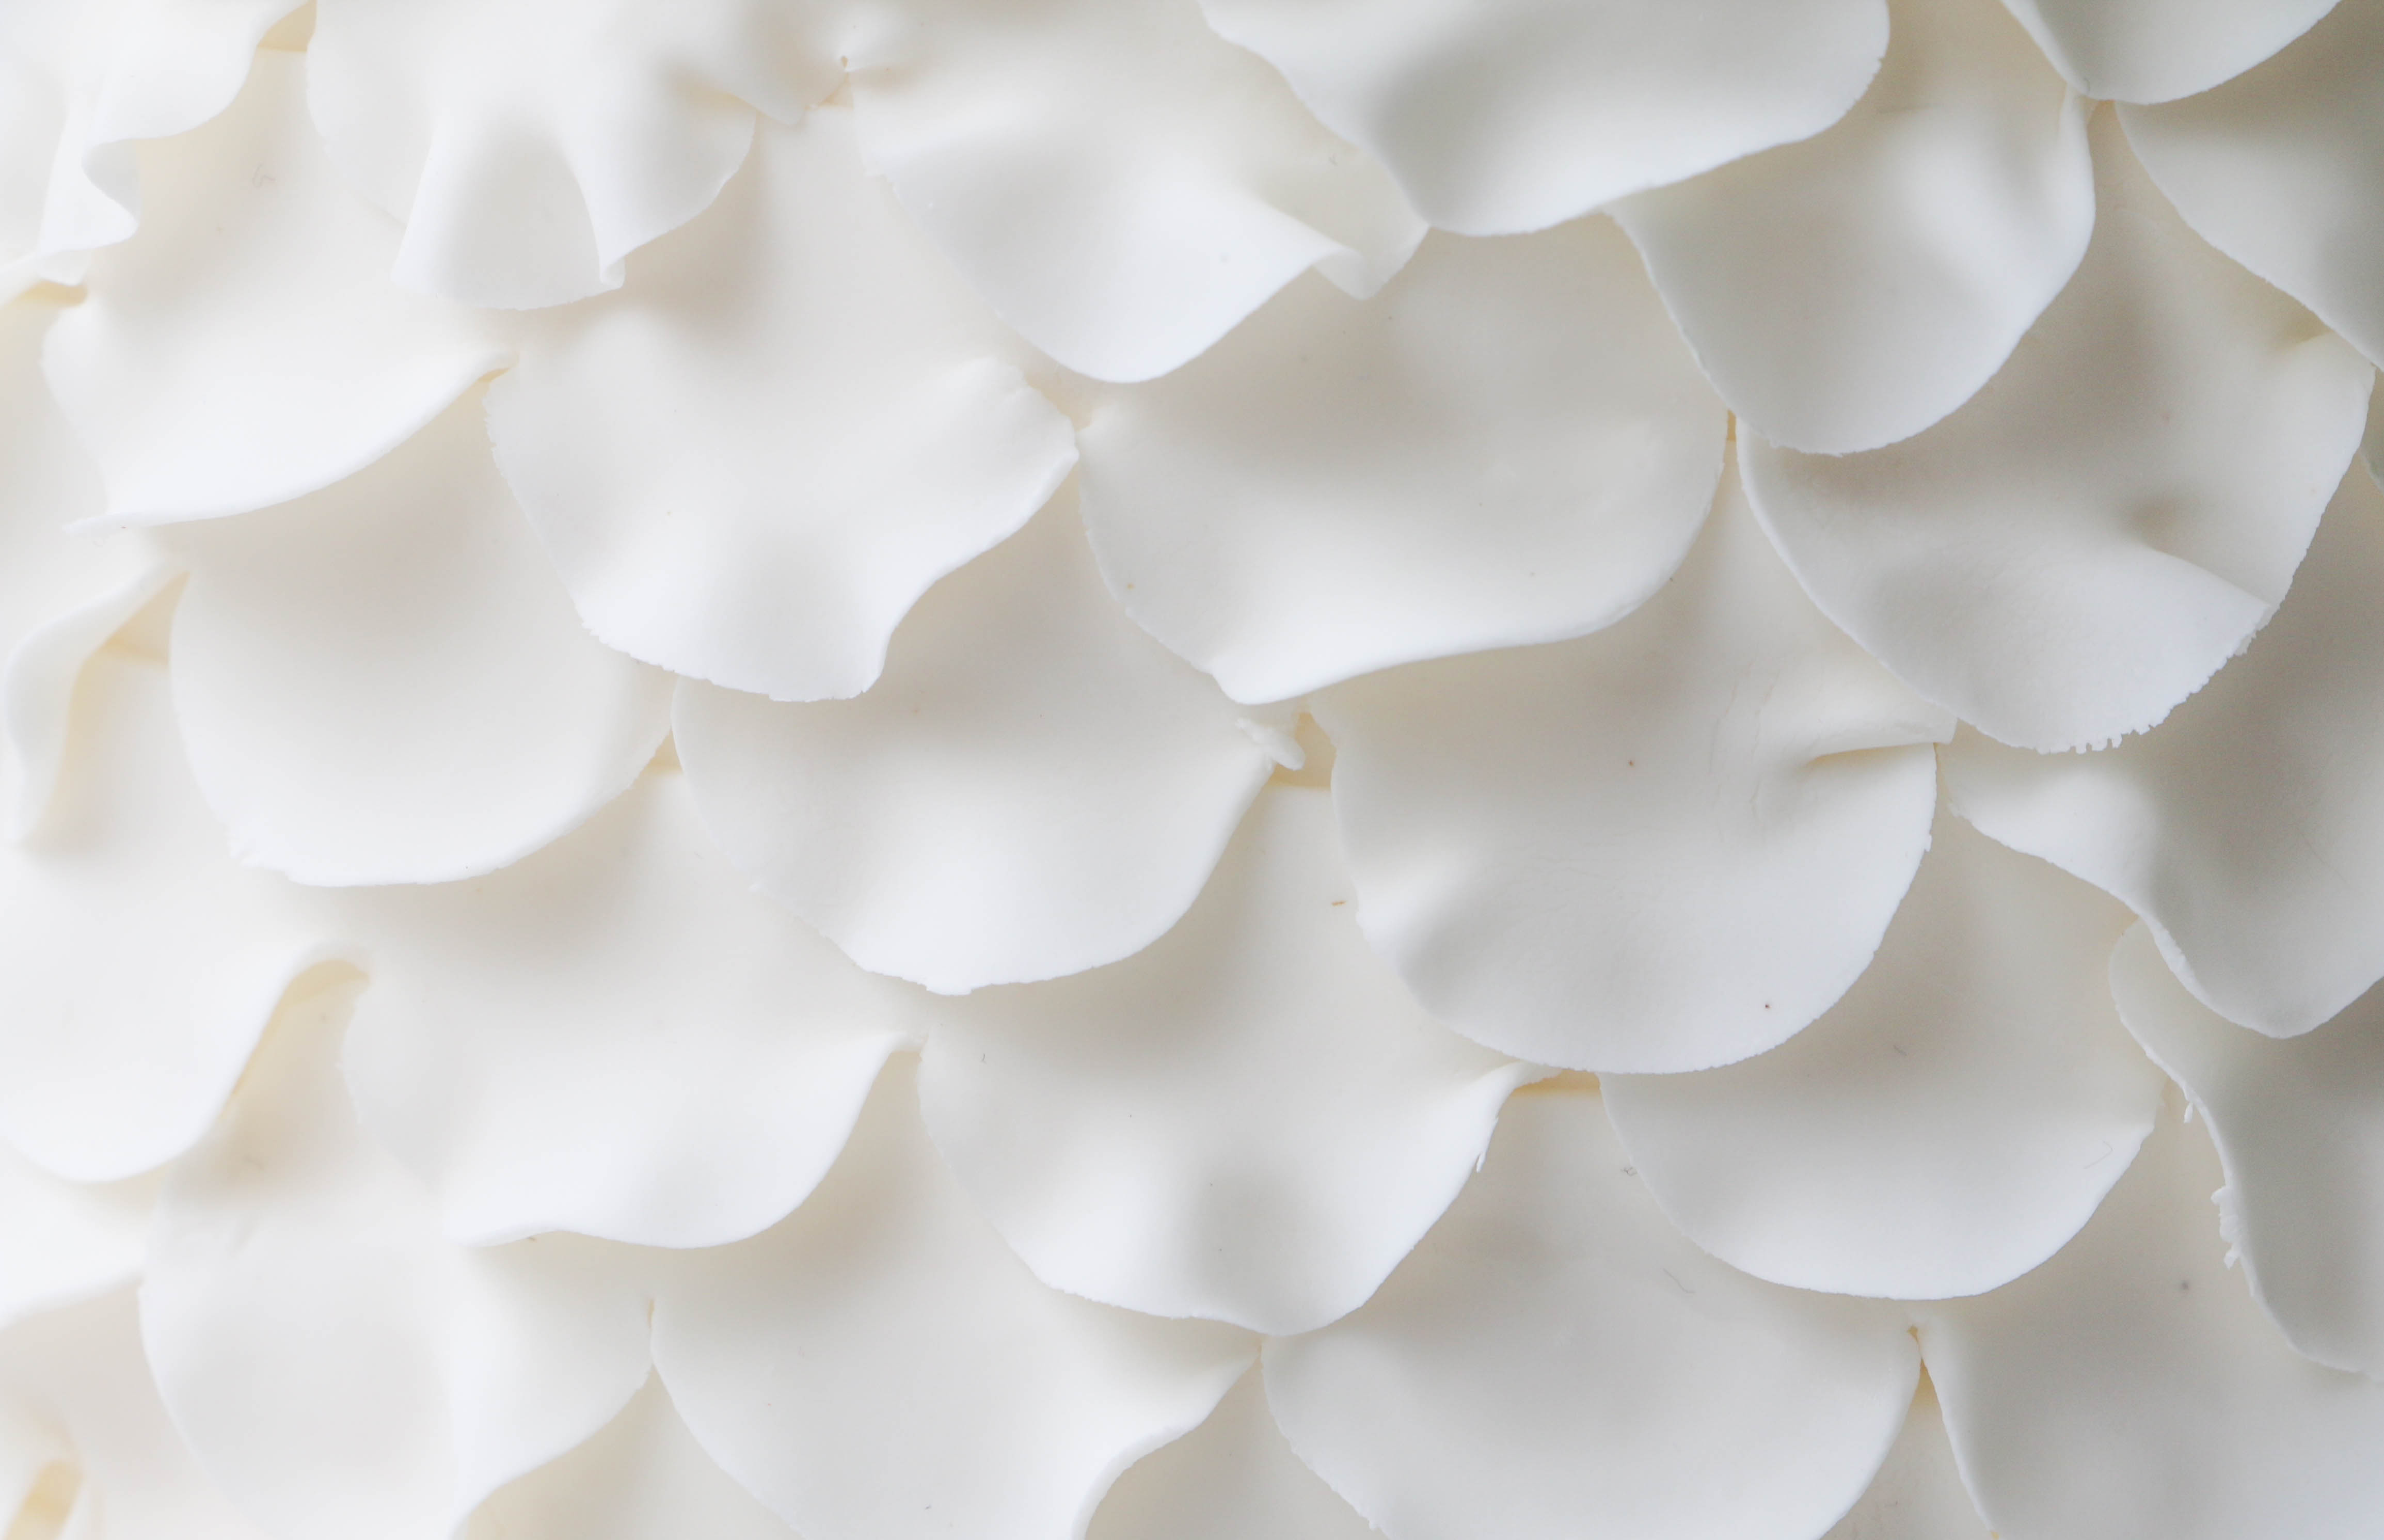
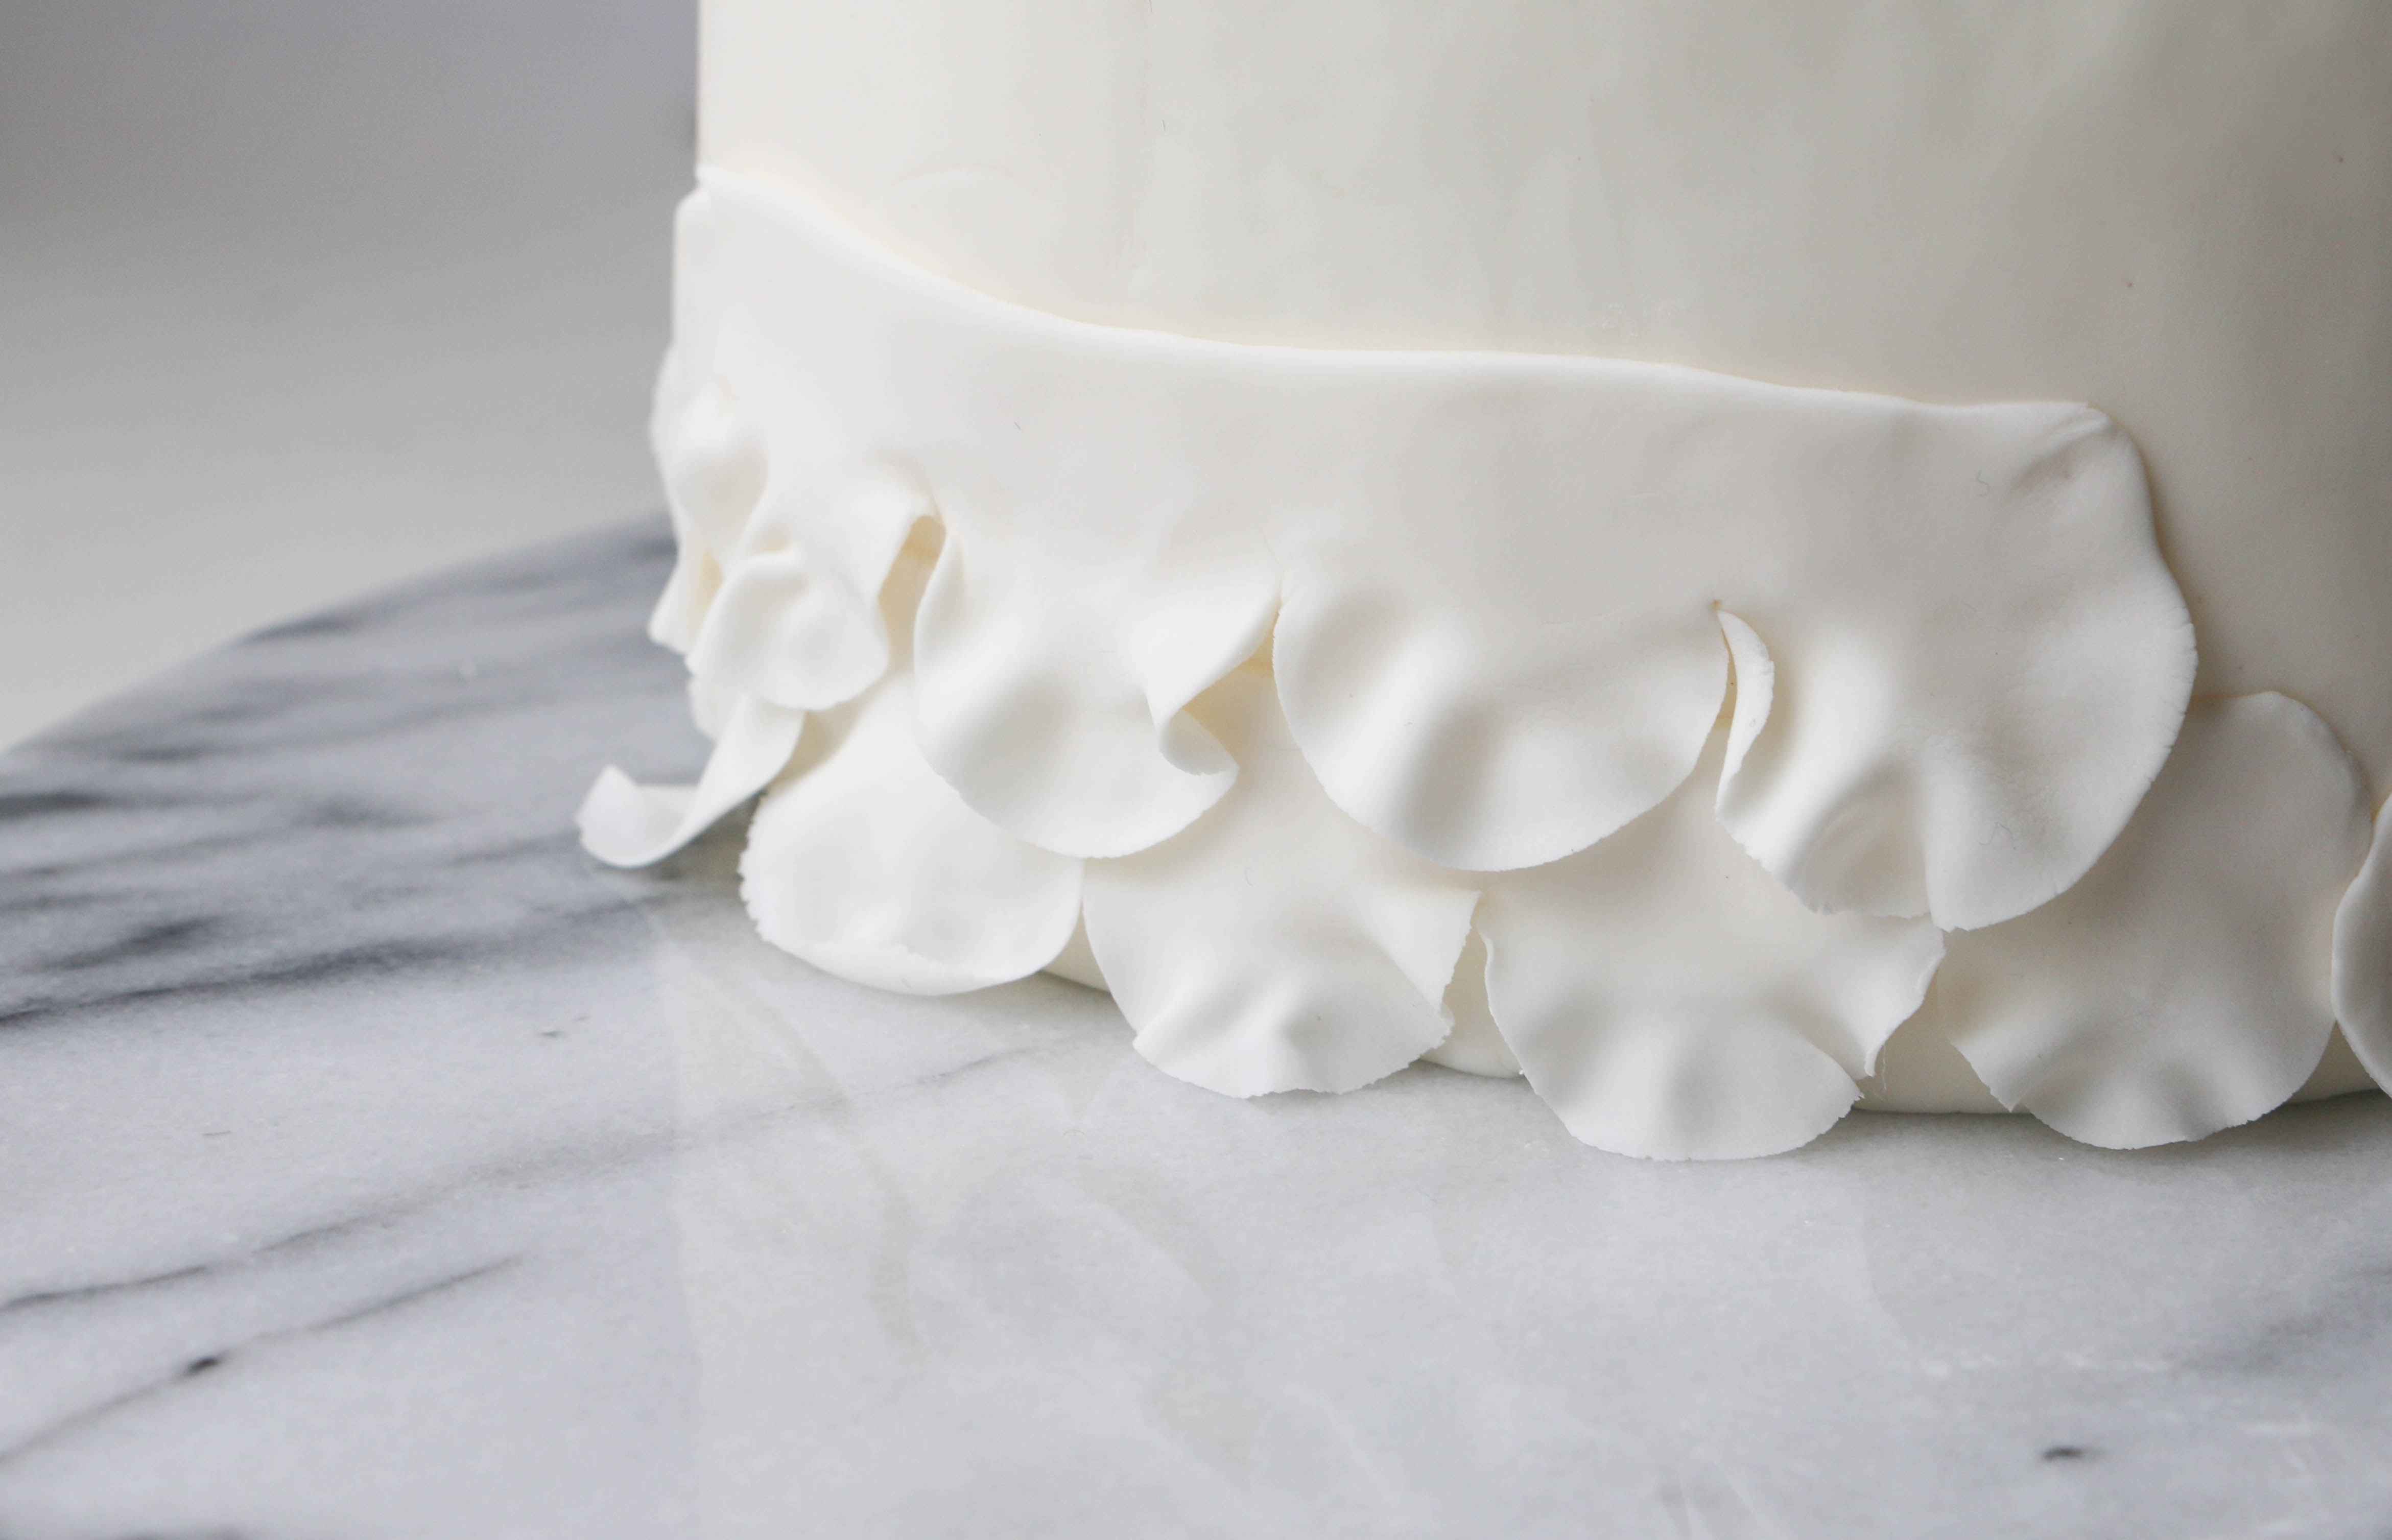
Apply the ruffle to your cake, pressing firmly along the straight edge. Repeat with more strips all the way around the cake.
Apply the next row of petals so that the rounded edges are offset with the strip below. Repeat with more rows of petals until there is about 1/4″ of space left at the top of the cake.
Step 3:
For the top row of ruffles, we’ll do it just a little differently.
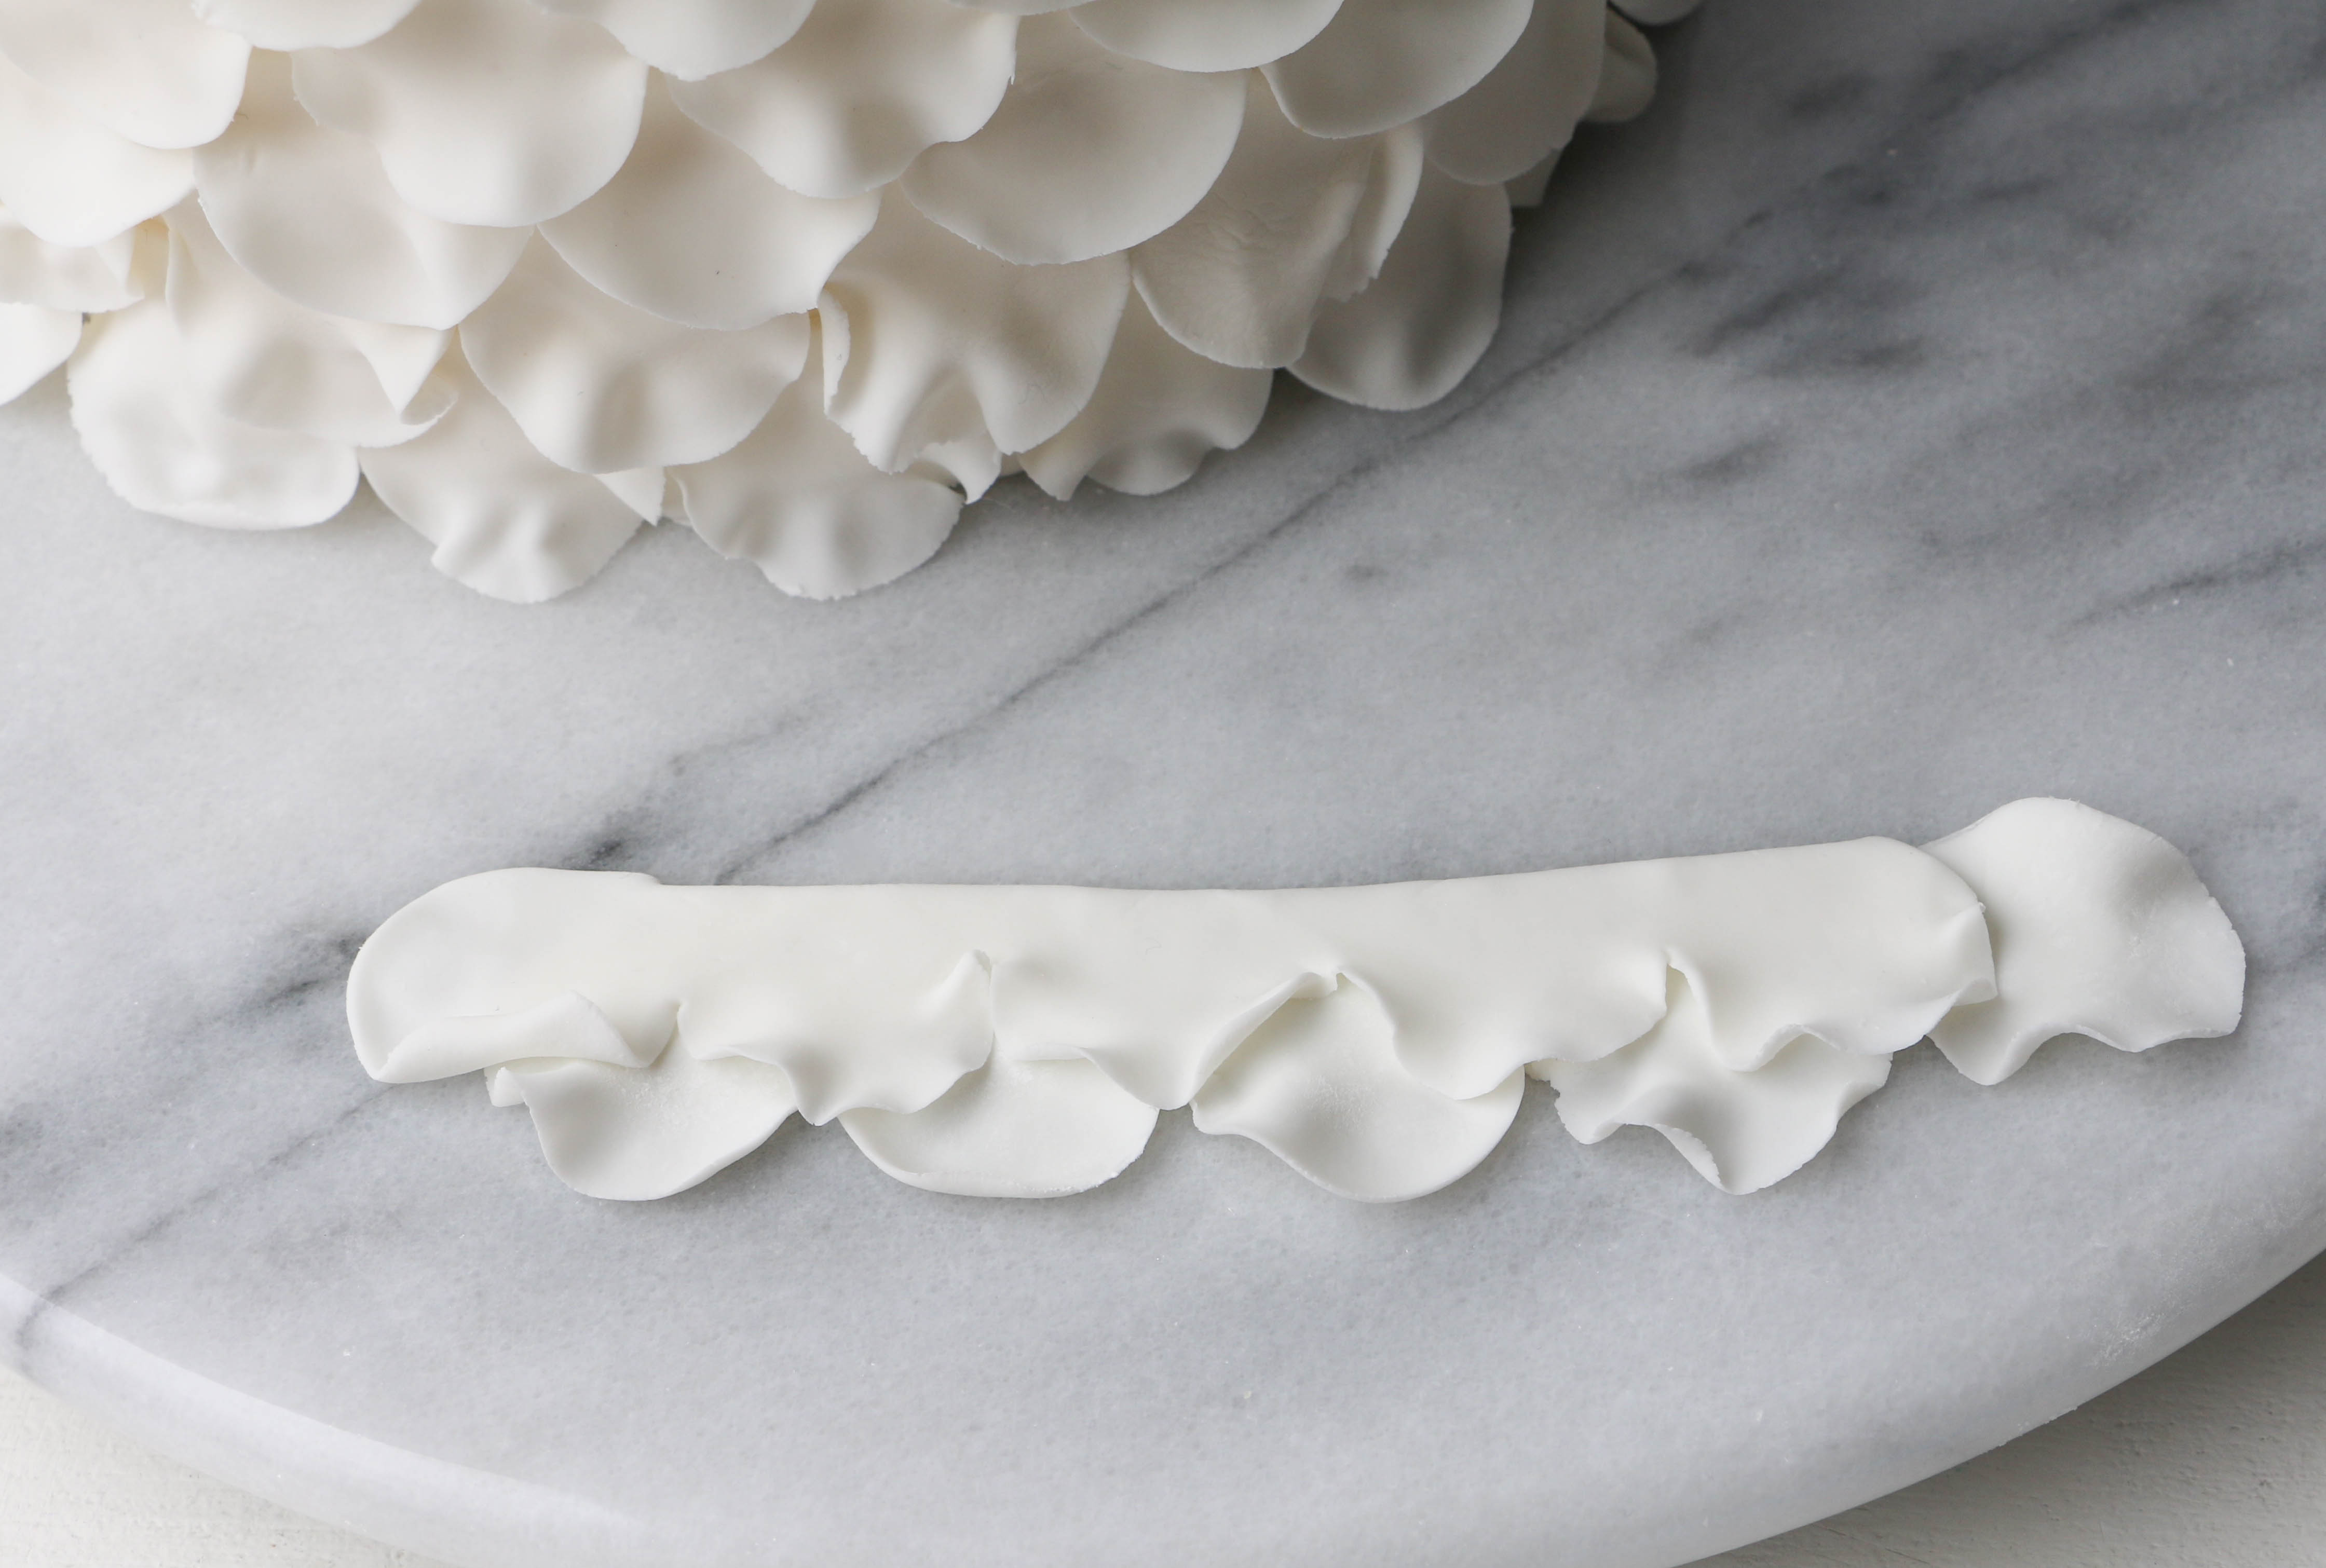
Roll, cut and thin a strip of petals as usual, but don’t cut the piece in half horizontally. Brush a line of gum paste glue a little higher than half way up the center of the strip of petals. Fold the strip about 3/4 of the way up, so that the petals mimic the layering effect that you’ve created on the sides of your cake.
Flip the strip over and brush a line of glue along the back of the folded edge. Apply the last layer of ruffles so that the clean, folded edge lines up with the top of your cake. Repeat until the ruffles are finished all the way around.
Share tips, start a discussion or ask one of our experts or other students a question.
No Responses to “How to Use This 1 Tool to Make Roses, Ruffles & More”