
We all make mistakes. One of the most annoying weaving mistakes is a skipped thread, especially if it’s one you don’t see until after you have taken the cloth from the loom. At this time of year, when we are often weaving holiday gifts, there is a deadline, too — no time to re-weave! Fortunately, it is not too late to fix it this thread weaving mistake.
 Why does this happen?
If you accidentally pass your shuttle over a warp end when it should have gone under, you will usually notice this on the face of the cloth in time to unweave and correct yourself. However, if you do the opposite — accidentally pick up a warp thread from the bottom of the shed and pass your shuttle under it — then it can be very difficult to see.
Naturally, weavers aim to avoid this happening in the first place.
- A good, even tension across the warp is essential, as any loose thread is an ideal candidate for skips.
- When you are weaving with a yarn that is “sticky” or with a very dense sett, then make sure that the shed is clear before you throw the shuttle.
- Your “throwing action” is also a contributing factor: Check that you are not inadvertently angling the shuttle downwards into the bottom of the shed.
Taking a close look
Inspecting your woven fabric is an important step in the finishing process. If you have to fix any skips, it should be done before washing. So after you have taken your cloth from the loom, lay it out flat on a table under good light and make a methodical inspection, working steadily from one end to the other. Any time you see a skipped thread, mark it with a pin.

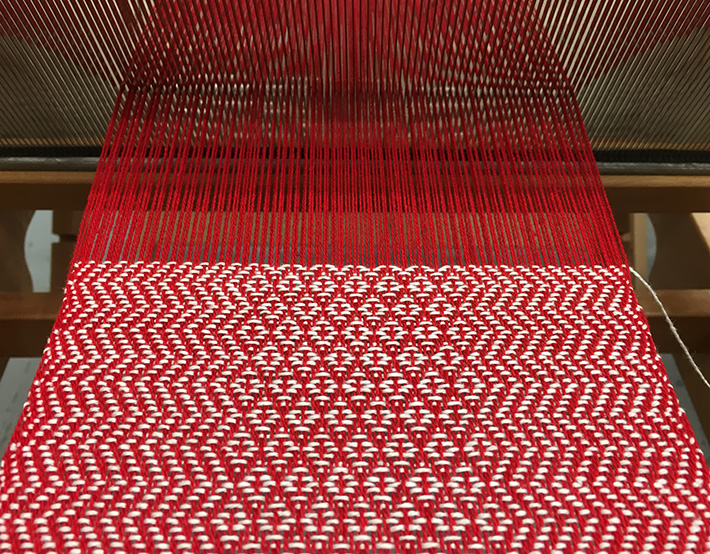
An unwanted float where the weft has skipped a few warp ends.
If you find that you have skipped one or more warp ends as described above, then you can replace the wayward piece of weft with another piece following the correct path. You will need:
- Extra weft yarn
- A tapestry needle
- A sharp pair of scissors
And, depending on the relationship between your eyesight and the thickness of the yarn, you may also find a craft magnifier useful.
Mending the mistake
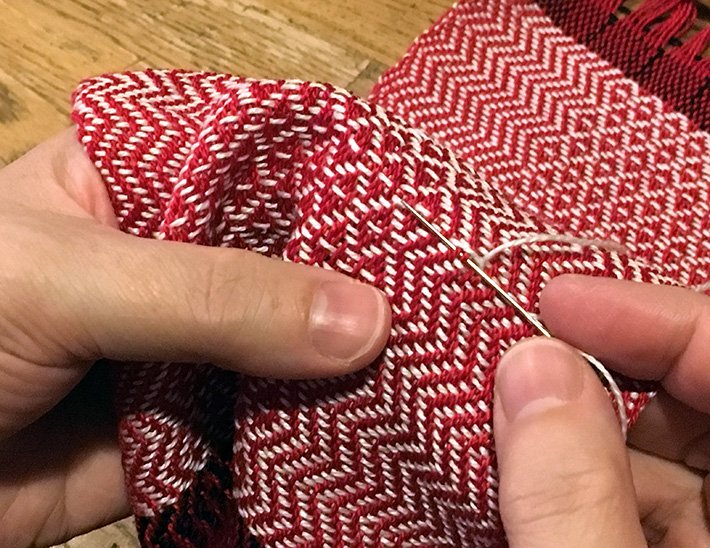
To replace the weft, start about half an inch away from the error. Slide the needle in alongside the correctly woven part…
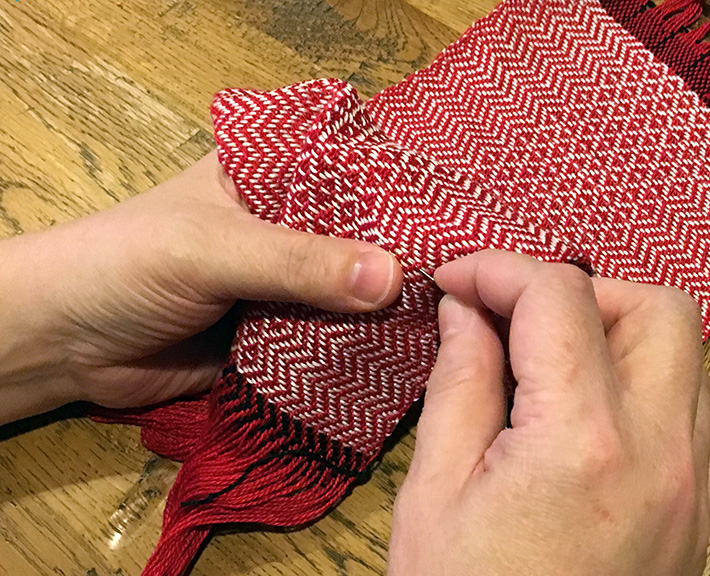
…and pull the thread through, leaving a short tail on the surface of the cloth.
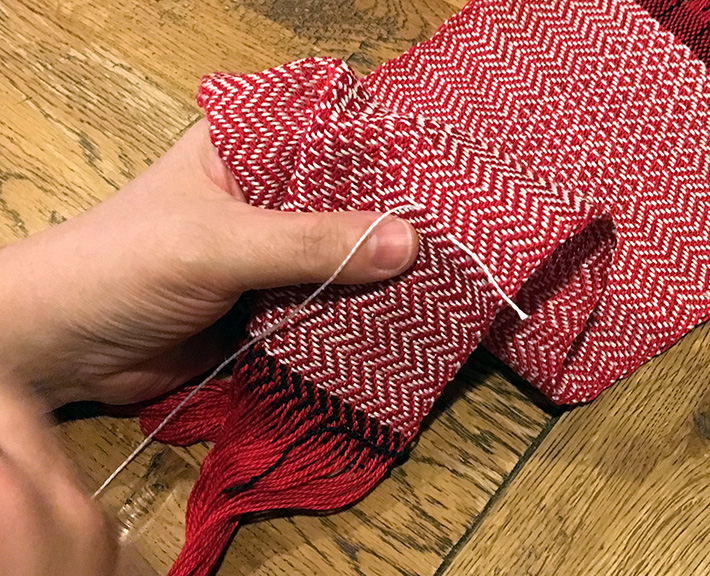
Push the unwanted weft float out of the way so that you can see the warp threads, and use the tapestry needle to weave the correct interlacement. If the pattern is straightforward, as in this twill design, then the easiest way to proceed is to look at the adjacent weft pick for guidance. If the pattern is more complex, then it may help to look at the next repeat of the pattern and copy the correct pick thread by thread.
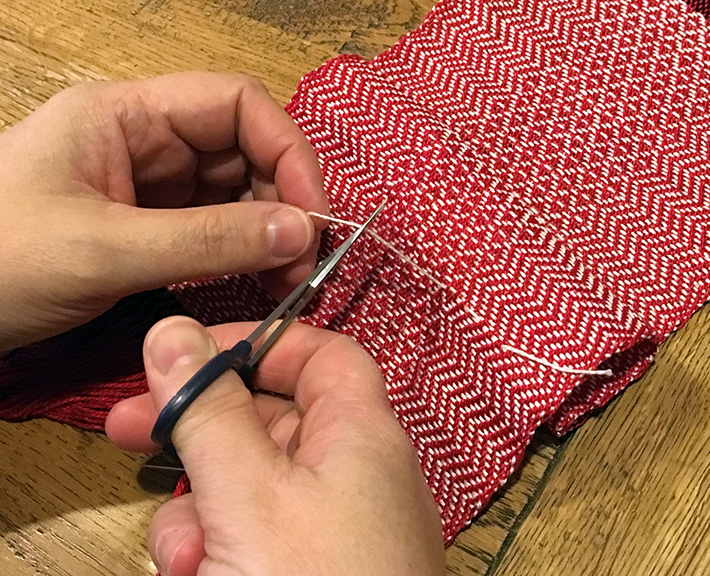
Once you have made the correction, continue alongside the original weft for another half inch or so.

Then cut the replacement yarn, leaving another tail.
Finishing
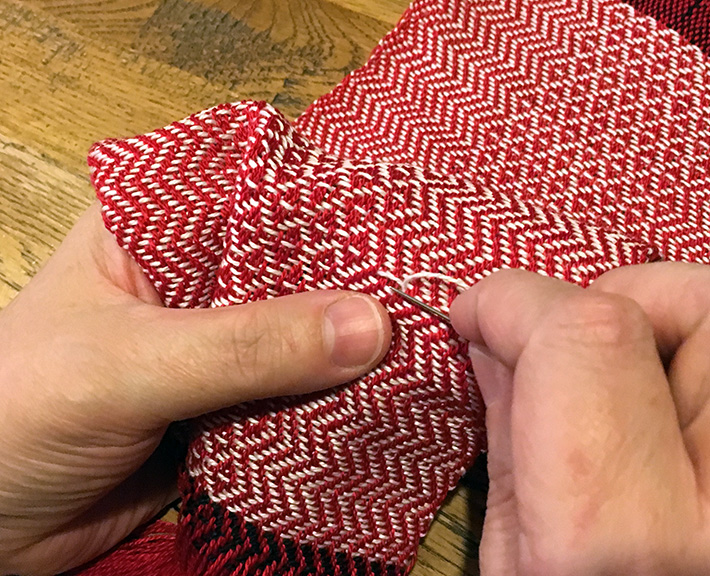
Once you have made all the corrections, wash and press your cloth as appropriate to your project. When you come to the mended areas, cut off the loose ends and cut out the float, trimming close to the surface of the cloth. Press firmly to secure and voilà! It’s the perfect fix.
Share tips, start a discussion or ask one of our experts or other students a question.
No Responses to “Essential Fix: How to Mend Skipped Threads”