
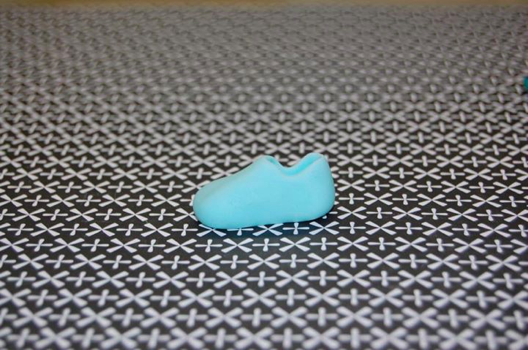
These tiny fondant baby shoes cake toppers are the perfect addition to baby shower confections. In pink, blue, or perhaps white for babies that are still a surprise, they are sure to elicit an “awww!” from party guests. And they also make a cute keepsake for the parents-to-be! Overall, they’re great to add to your cake decorating bag of tricks.

Photo via The Royal Bakery
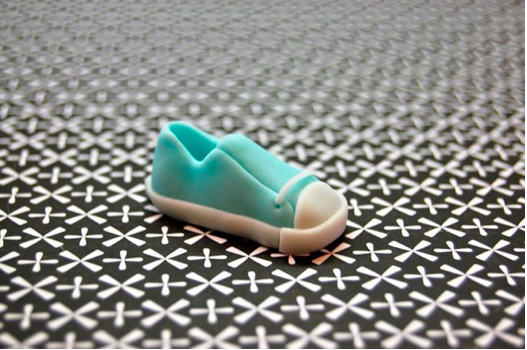
Fondant baby shoes tutorial
There are a number of wonderful how-tos around for making life-sized baby shoes, but this fondant baby shoes tutorial shows you how to make truly tiny ones, and will help you to perfect your advanced fondant techniques. The main shoe part is made from a single ball of fondant, and no template is needed.
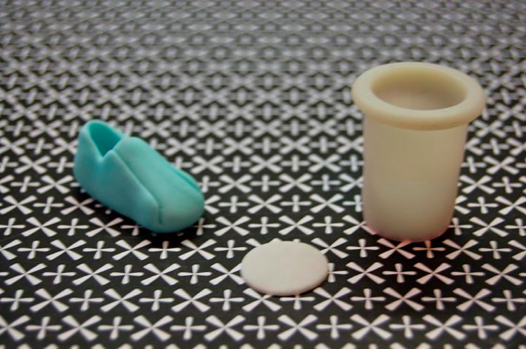
Step 1:
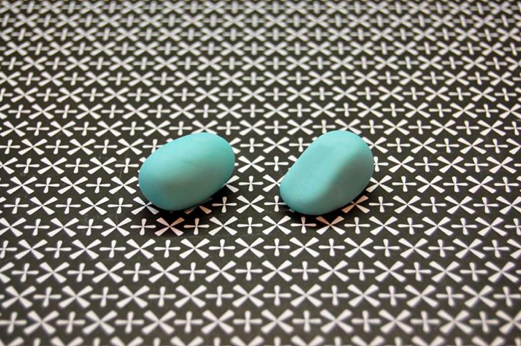
Roll around half an ounce (15g) of fondant into a ball. The color is up to you, but this will be the main color of your finished sneaker. Cut it in half to get two equal shoe-sized pieces.
I’ve put a piping bag coupler in the photo to show the size of the ball.
Step 2:
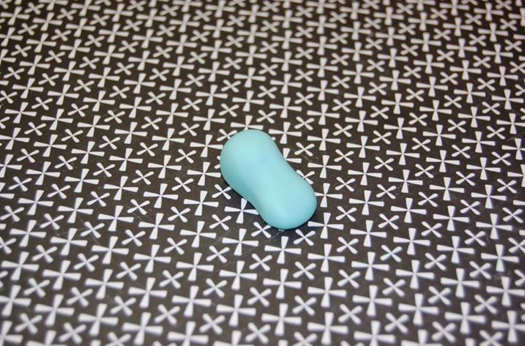
Roll each piece into a short, fat sausage, then slightly squash one end into a slant to make the toe.
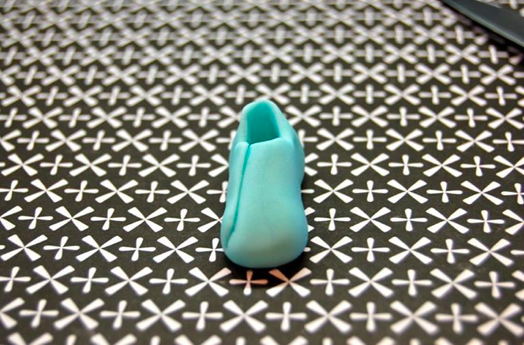
Step 3:
Pinch the center of the shoe a little to give a soft hourglass shape.
Step 4:
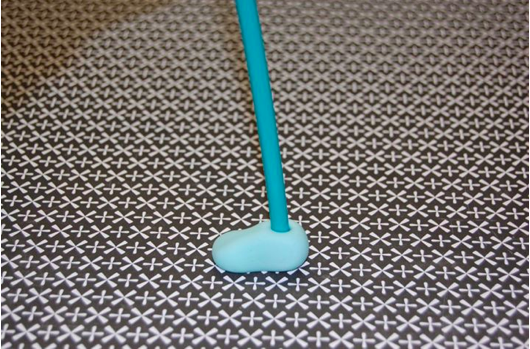
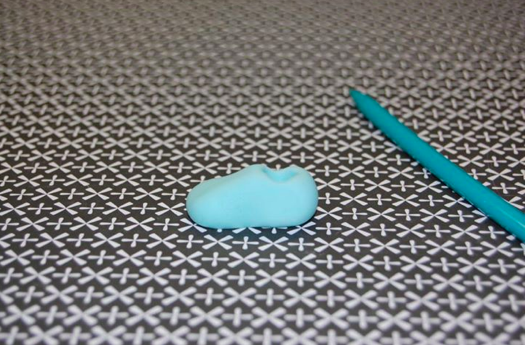
Use a Celstick or the end of a paintbrush to make a hole in the back of the shoe.
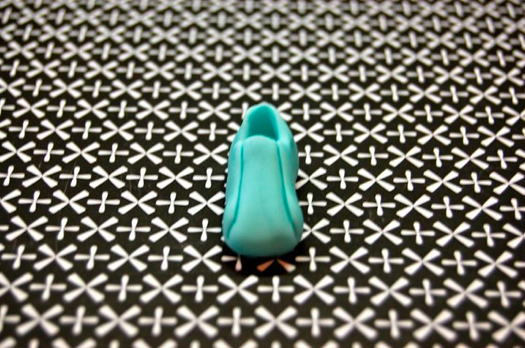
Step 5:
Use the Celstick to work the fondant down inside the sides of the shoe. You’re aiming for a slightly curved shape that’s lower than the front and back.

Step 6:
Use the Celstick to pull up the fondant inside the back of the shoe to create the raised heel shape. Gently roll the Celstick inside the hole at the back pressing on your fingers on the outside to thin the fondant and create the right shape.
Step 7:
Repeat Step 6 in the front of the hole to pull up the tongue. Press the Celstick a little way into the toe of the shoe.
Step 8:
Now take a sharp knife and score a line that separates the sides of the sneaker from the tongue. This runs from the side of the shoe at the front, to the top of the tongue. You could refer to a real sneaker or a photo for a better idea of the shape.
Step 9:
Now lay the knife flat and insert the edge into the scored line. Gently rub the knife up and down while applying a little pressure — you’re aiming to raise the side up a little bit and flatten the tongue so that the sides and the tongue look like two separate pieces. Repeat on the other side.
Step 10:
Now cut a circle of white fondant to form the toe cap. Mine was about 3/4″ (1-1/2cm) in diameter. At this point you can add some stitching detail along the edges of the two sides and around the hole if you like, using a stitching wheel, or the end of a toothpick.
Step 11:
Moisten the end of the shoe and attach the circle. You need to place it so that it butts up against the two score marks you made earlier.
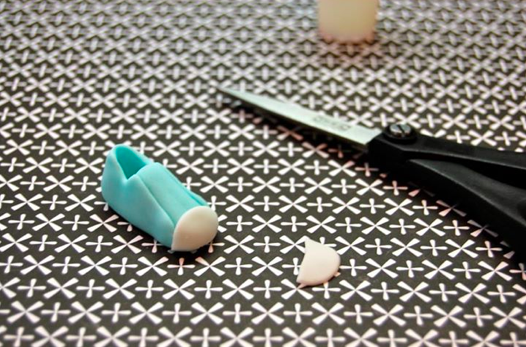
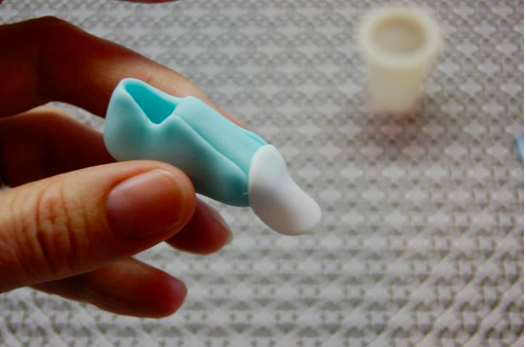
Step 12:
Use scissors or a knife to trim off the excess level with the bottom of the shoes. This doesn’t have to be neat, you’ll be covering the edge later.
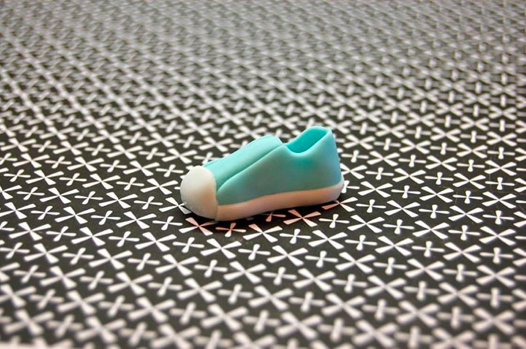
Step 13:
Cut a strip of white fondant about 1/8″ (1/4cm) wide. This strip runs from the toecap on one side, all the way around the back of the shoe to the toecap on the other side. You can do this in two pieces and have a join at the back if you prefer.
Brush a little water onto the shoe to attach the strip. If you moisten the strip, you might find it too soft and sticky to handle.
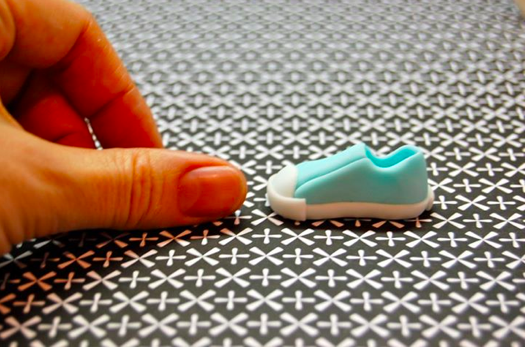
Step 14:
Cut a shorter strip of white fondant, just slightly wider than your 1/8″ (1/4cm) piece. This covers the bottom edge of the toe cap and overlaps the joint between the toe cap and the previous strip. There’s my thumb for a size comparison.
Step 15:
Cut or extrude extremely thin strips of white fondant for the shoelaces. Make eyelet holes in the shoe with a Celstick or toothpick, and moisten it slightly with water. Lay a fondant strip from one hole to the other and poke the ends in using the toothpick. If you poke hard enough, you should be able to break off the excess fondant just by pulling it.
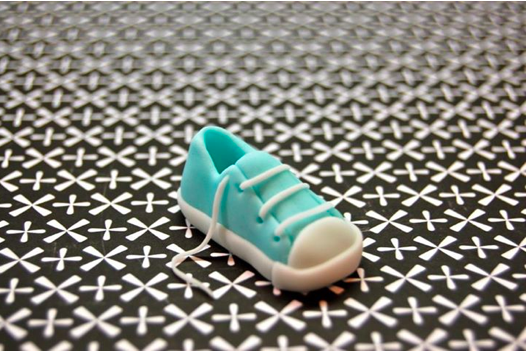
Step 16:
Repeat as many times as you like. I do three cross pieces and then two loose laces dangling from the final two holes.
Step 17:
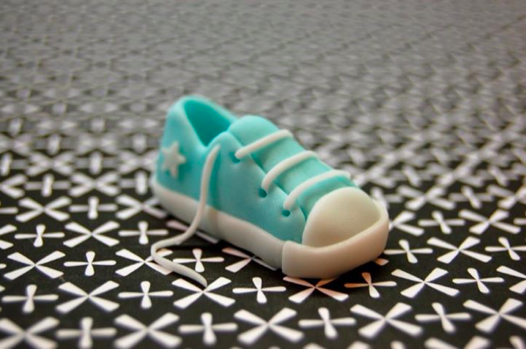
Add a little star to each side for a Chuck Taylor look, if you like. A final strip up the back of the shoe is also effective.
Share tips, start a discussion or ask one of our experts or other students a question.
No Responses to “Make the Cutest Fondant Baby Shoes With This FREE Step-by-Step Tutorial!”