
This is a guest post from Laura Nownes, instructor of the Craftsy class Improve Your Quilts: 37 Troubleshooting Techniques. Enroll in her class today to unlock an array of tips and tricks that will transform your quilts from good to great. Join now »
Last week we had the exterior of our house painted. The painting crew did four days of prep work and two days of actual painting. I couldn’t be more pleased, as the house looks amazing. This experience reminded me of the importance of taking the necessary time to prepare for the successful completion of a project. Anyone starting on a new project always wants to reach the end with a successful outcome. As beginners, we don’t always know what the necessary steps will be to avoid bumps and disappointments along the way.
Here are a few of my top hints for quilting beginners…
Cutting
If the fabric is not properly folded, the cut strips will have a bend, as shown in this photo.
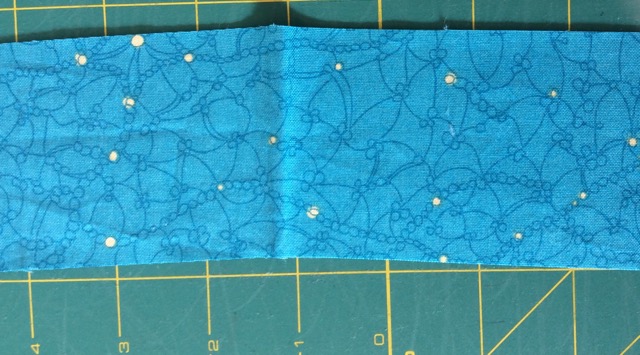
There are two important steps to watch for to prevent this from happening.
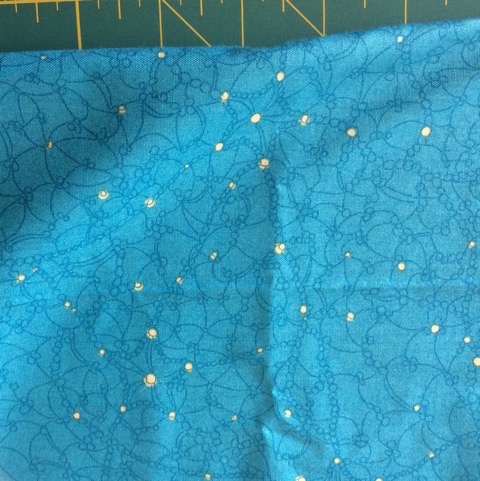
First, make sure that the selvage edges are evenly aligned before making the cuts. The photo shows mis-aligned selvages on the left side and evenly aligned on the right side. Selvage edges should be even with each other across the entire length.

Second, once the selvage edges are even with each other, check to see that the fold on the bottom is smooth, and without ripples. The photo shows a rippled folded edge. If rippling occurs, re-position the selvage edges, keeping them even with each other until the folded edge is smooth.
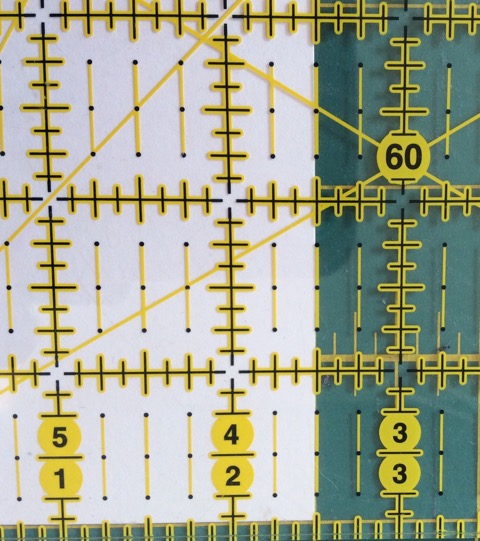
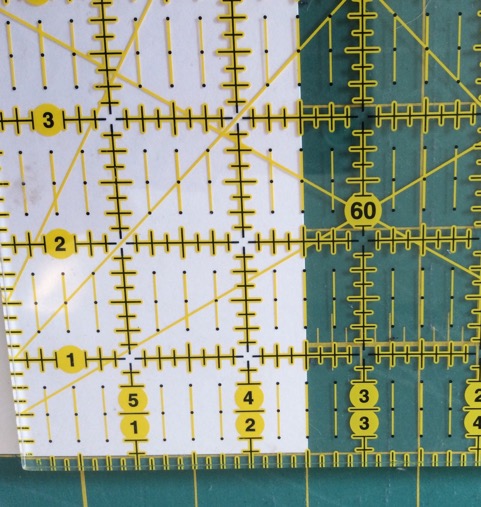
Small discrepancies in cutting can result in finished units or blocks that are not the right size. To avoid mis-cuts, make sure that the ruler is placed over the fabric so that the clean-cut edge of the fabric fills in the open spaces between the lines.
If you look closely at the two photos below, you will notice that the placement of the first one is slightly off. The more seams a pieced block has, the more important it is to strive for accurate cutting. The second photo shows accurate placement. If you think it looks picky, you are correct…but with a bit of practice and attention you will hit the mark every time and avoid disappointments. Give it a try.
Sewing
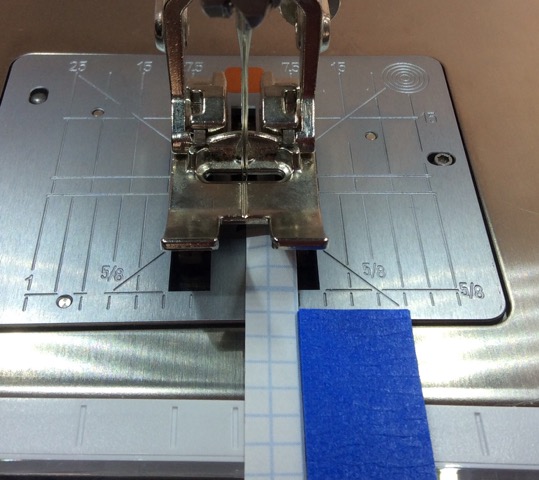
For best results, an accurate and consistent 1/4” seam allowance is important. Small variations will make a difference in the overall size of your blocks. Many machines have 1/4” patchwork presser feet. It is helpful to use one, if available. You can simply align the right-hand edge of the fabric with the edge of the presser foot to achieve the 1/4” seam allowance needed for piecing.

If you are using a general purpose presser foot, a guide or piece of graph paper is helpful in determining the exact 1/4” distance from the needle position. Several layers of masking tape can be used to mark the placement. This guide will be used to keep your fabric pieces running evenly under the presser foot.
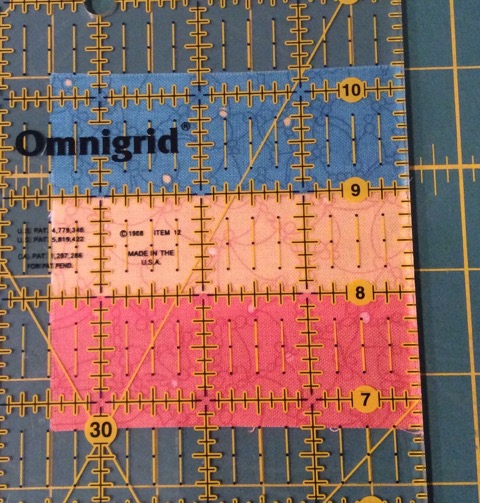
Before starting to sew on your project, it is a good idea to check the accuracy of the setting you plan to use for the 1/4” seam. Make a sample guide by cutting three 1 1/2” x 3 1/2” pieces of fabric. Stitch them together, then press. Place a ruler over the sample piece. It should measure 3 1/2” x 3 1/2” and the distance between the seams should measure exactly 1”. If it does, you should feel confident starting on your project.
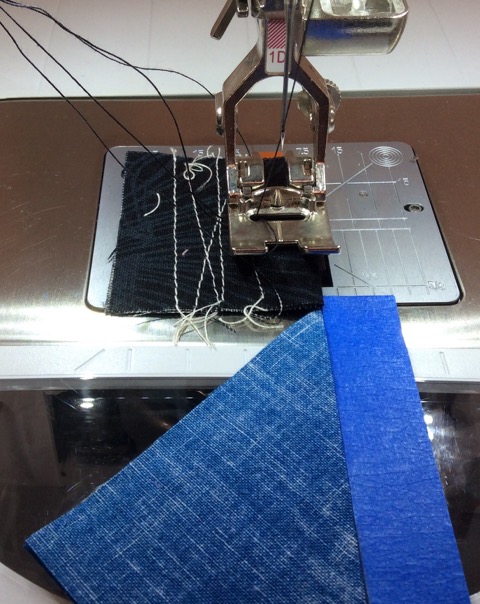
Avoid “hungry” sewing machines. Many machines like to eat or chew the tip ends of points of fabric pieces, especially triangles.
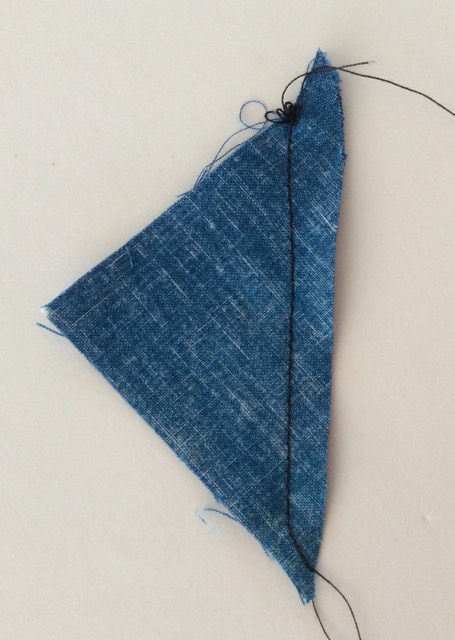
Try using a scrap piece, often called a leader. Begin stitching onto the leader piece and then without leaving a gap, sew directly onto the fabric piece. The machine will not have an opportunity to grab the tip causing it to jam and/or pucker.
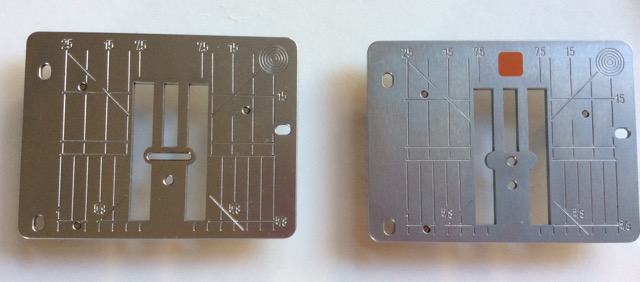
Another option for dealing with this situation is to use a straight stitch throat plate. The photo below shows a standard plate on the left. Notice that it has a large horizontal space allowing the needle to make a variety of decorative stitches. The plate on the right has only a small hole, designed for straight stitching. With this plate, there is no chance of grabbing and pulling the fabric into below the plate. If you choose to change the plate, just remember to replace the original before working any decorative stitches. Otherwise, you will have another problem…a broken needle.
Take time to prepare, and you should have successful results…most of the time.
Learn more helpful quilting tips from Laura in her online class Improve Your Quilts: 37 Troubleshooting Techniques.
About the author
 Laura Nownes has been quilting since 1979, has co-authored 7 best-selling books on quiltmaking. Follow her blog See How We Sew and visit her website to see the variety of patterns she has designed.
Share tips, start a discussion or ask one of our experts or other students a question.
No Responses to “Prepare for Success: Helpful Tips for Quilting Beginners”