
 As with many sewing techniques, the key is to understand the steps involved up front and to do the proper preparation before the first stitch is sewn. Proper marking, positioning and basting all help to ensure zippers are centered properly, stitching is straight and even; and, they start and finish where they are supposed to. For some, zippers are an intimidating technique to execute. Yes, every type of zipper application has its own rules and techniques for inserting them, but there are a few standard tips that will help ensure they are all done properly and look right on the project.
5 tips and tricks to ensure a well-sewn zipper
Tip #1
Buy a zipper that is longer than required. What makes many zipper applications look bad is the stitching that appears on the public side of the project. The biggest problem contributing to this is that darn zipper tab that gets in the way when sewing the final stitching. Nothing looks worse than a stitching line that is not straight or goes wonky as a result of having to go around the zipper tab. One of the best ways to avoid that problem altogether is to buy a zipper that is 2” longer than required. Placing the top of the zipper well above the zipper opening takes the tab completely out of the line of stitching, so sewing can be done easily. Once the zipper is sewn in place, the extra portion can be removed. The usual facings or waistband that follows will keep the zipper from running off the project.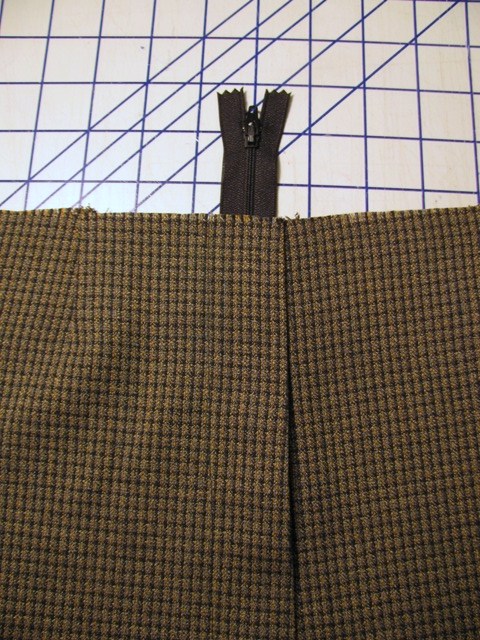 Longer than required on a fly-front zipper
Tip #2
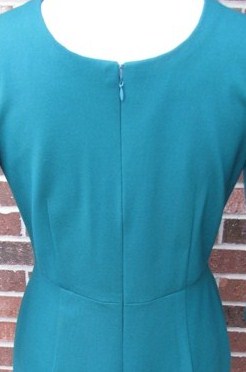
Accurate measuring and marking – prep work makes all the difference. Some zipper applications are more straightforward than others. The conventional zipper, for example, at first glance looks like it requires a rather simple and straightforward application. Place the zipper under the seam opening and stitch around the zipper to secure it in place — done. You’d think that was easy. Think again. Getting the zipper to stay centered within the opening and sewing straight and even stitching lines around the zipper is no easy task, not even for this experienced sewer. The secret is in the prep work that needs to be done before any real sewing begins. Accurate measuring and marking can help make the process simple and easy. Before a zipper is pinned in place, mark or draw guidelines to make sure stitching lines are straight and even. Accurately measuring helps to make sure zippers are positioned properly and align at the top properly. The devil is in the details when it comes to sewing zippers. Taking the time up front to prepare the zipper opening will ensure stitching is done right the first time. Railroad zipper marked for sewing
 Properly mark placement on an invisible zipper
Tip #3
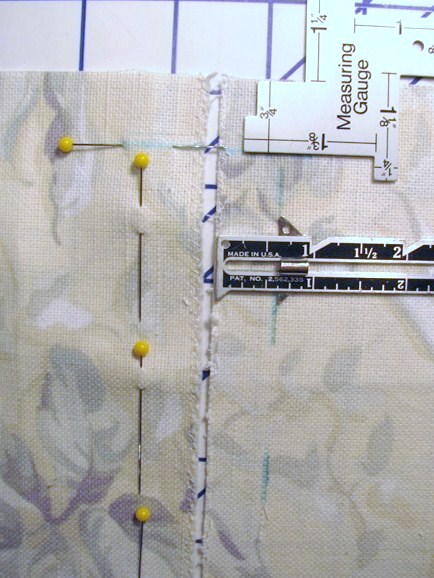
Baste to ensure precision and to hold zippers in place. Hand basting before sewing is always a good thing. When it comes to applying zippers it has many benefits. It prevents the top fabric from stretching or shifting about so stitching lines are straight and don’t pucker. It also helps to keep the zipper teeth properly centered within the seam opening. The best part, if your stitching needs to be redone, no repining is necessary. This is a great tip for those applying a zipper for the first time – it’s just good insurance.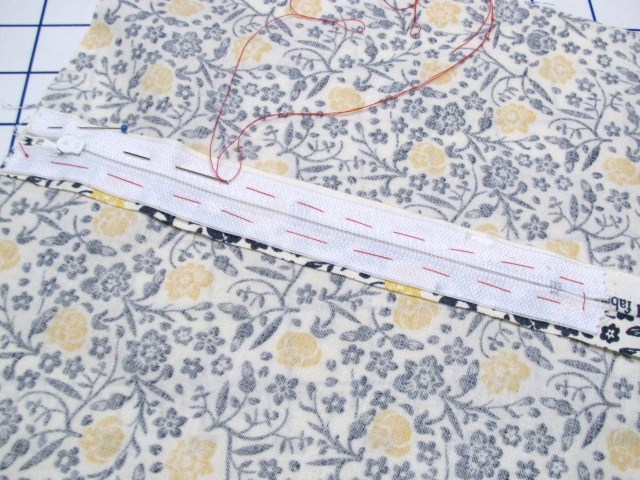 Hand-baste a railroad zipper to keep it centered

Share tips, start a discussion or ask one of our experts or other students a question.
No Responses to “5 Must-Know Tips for Sewing Zippers Perfectly”