
This is the third and final post in our Appliqué 6 Ways series for the Craftsy embroidery blog. We already touched on machine embroidered and electronic die-cut appliqué and free-standing and shadow appliqué, this week we will take a closer look at trapunto appliqué, lace shaping appliqué, and Madeira appliqué.
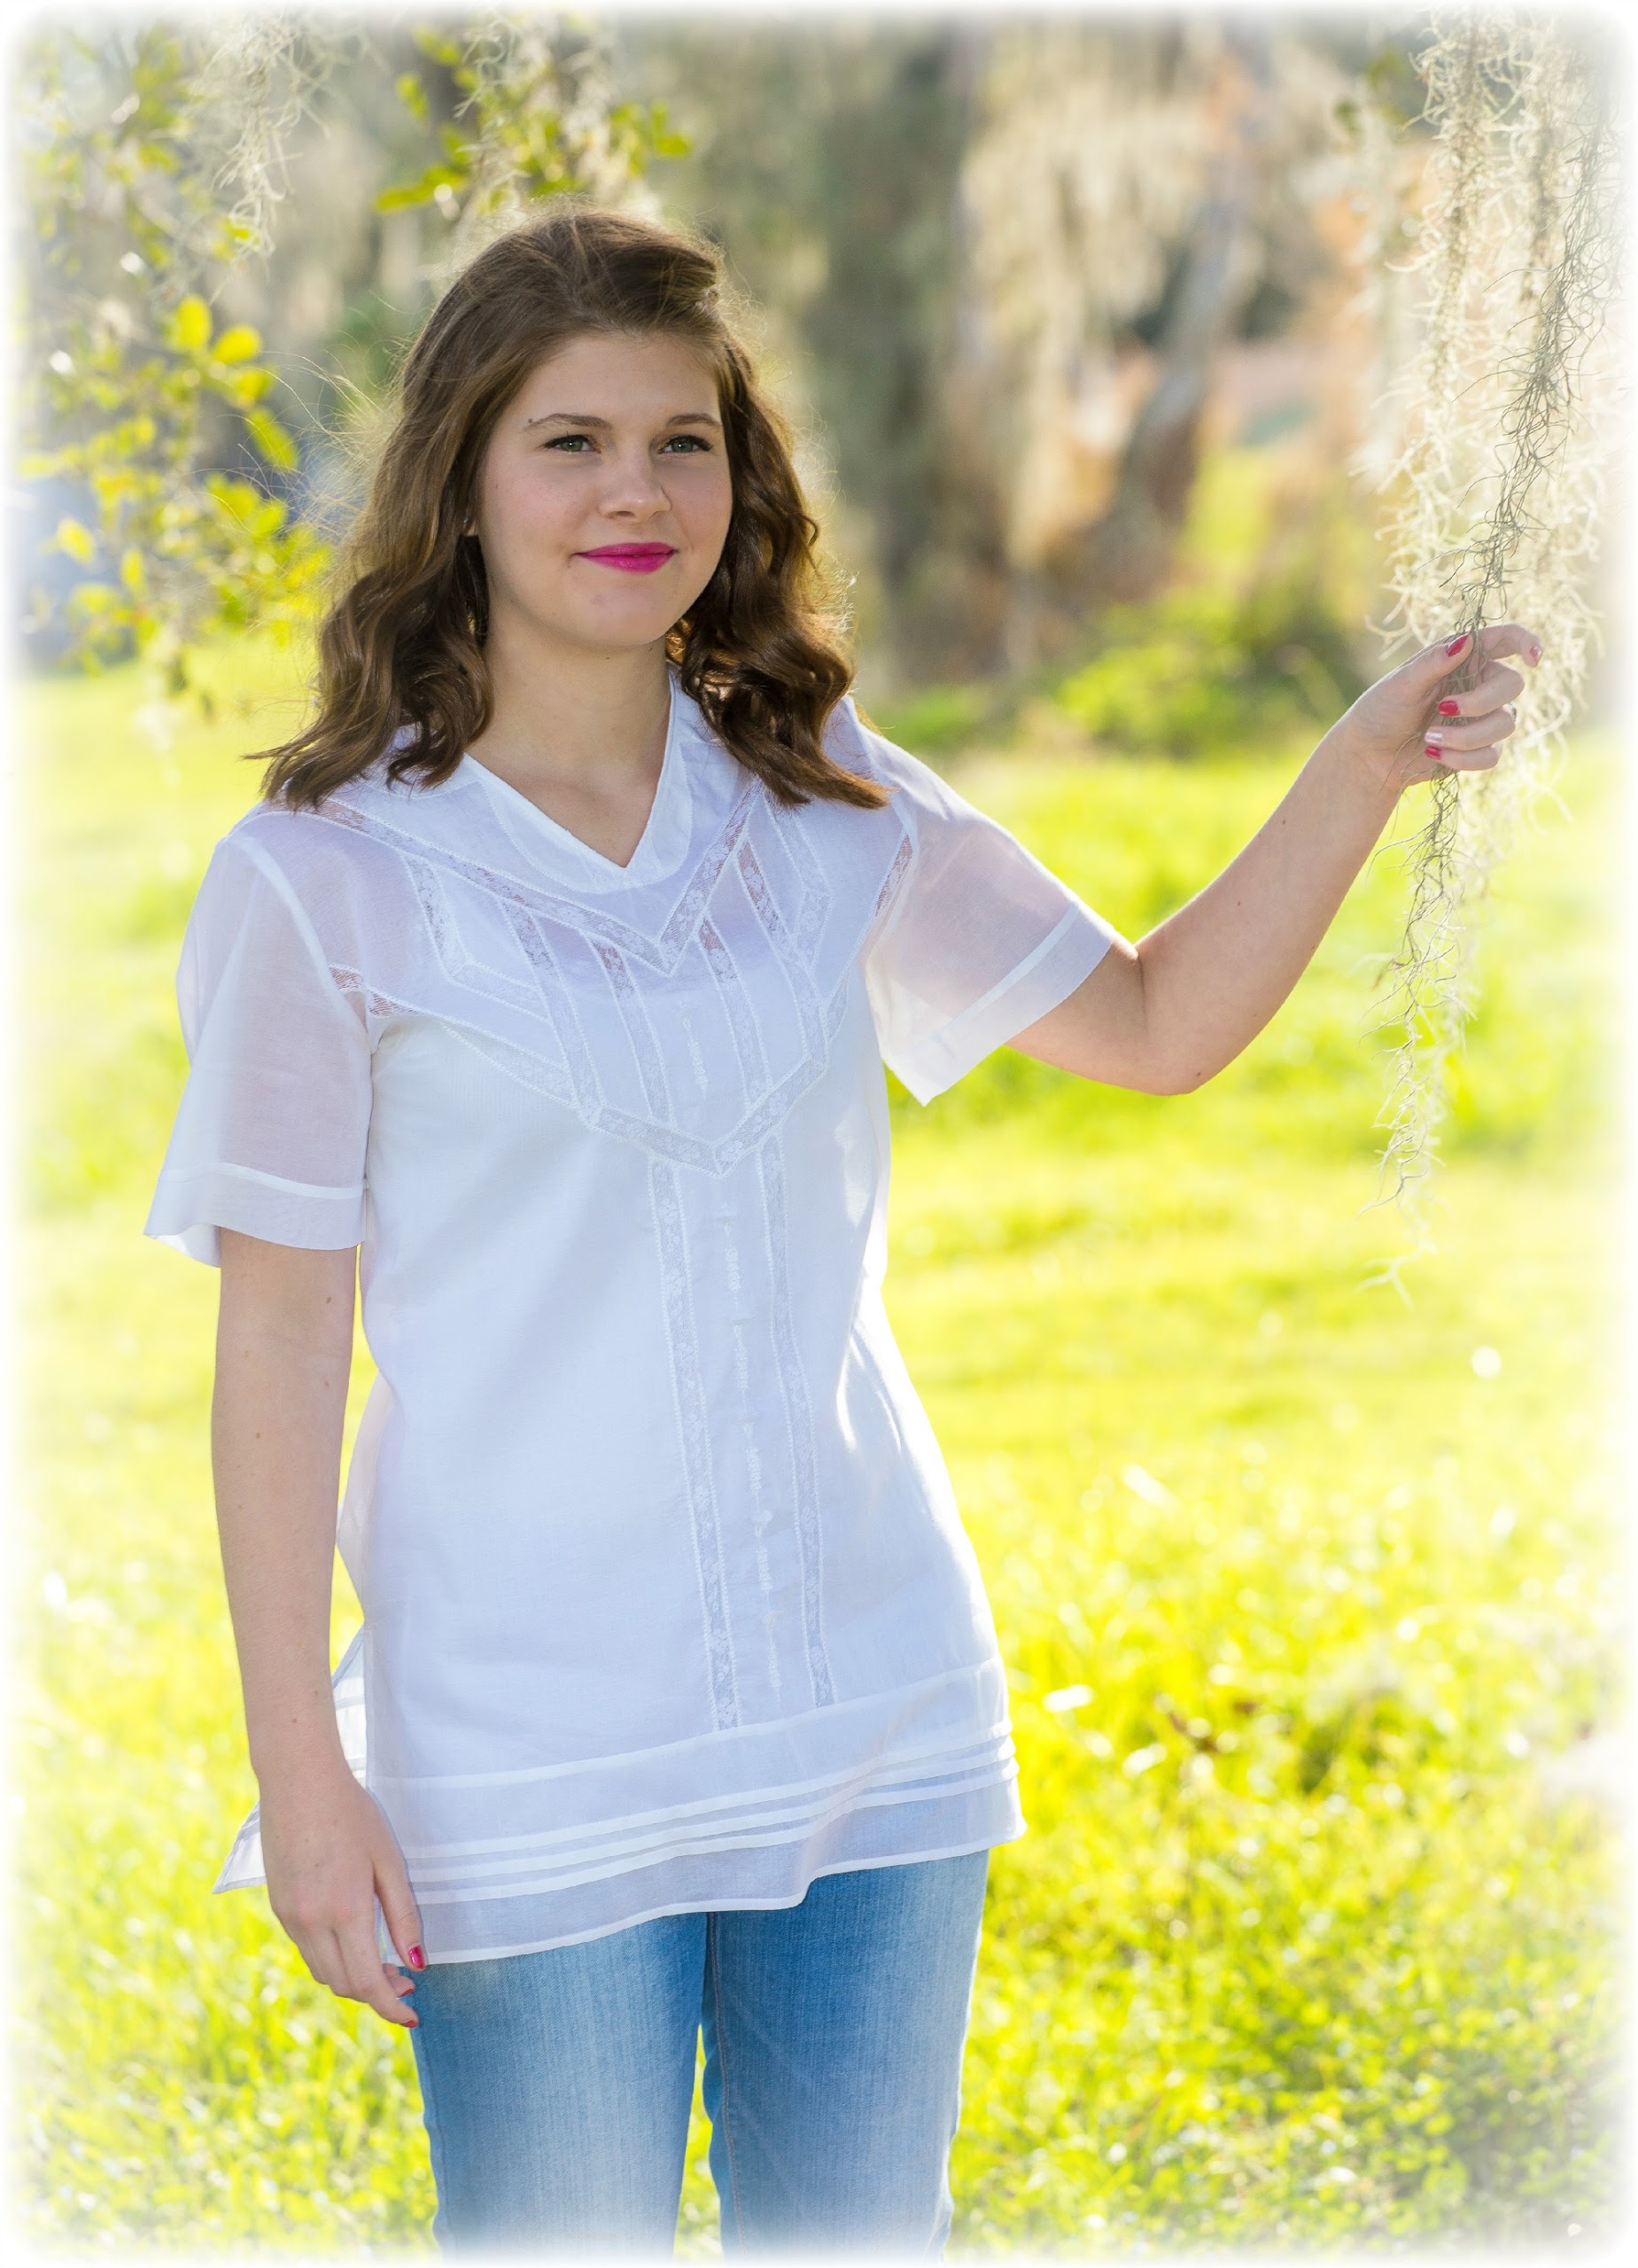
I must confess, I LOVE heirloom techniques, lace and anything vintage. I got my start in this industry by teaching heirloom classes in my local sewing machine store. I still teach heirloom workshops, which include traditional lace shaping techniques as well as machine embroidered reproductions. Above is a recent project I made to teach at Martha Pullen’s School of Art Fashion in February. That is my daughter modeling the blouse, which has a modern feel with its longer tunic length. Let’s take a look at this sample as it also combines Madeira appliqué created in the hoop (neckline).
Lace shaping
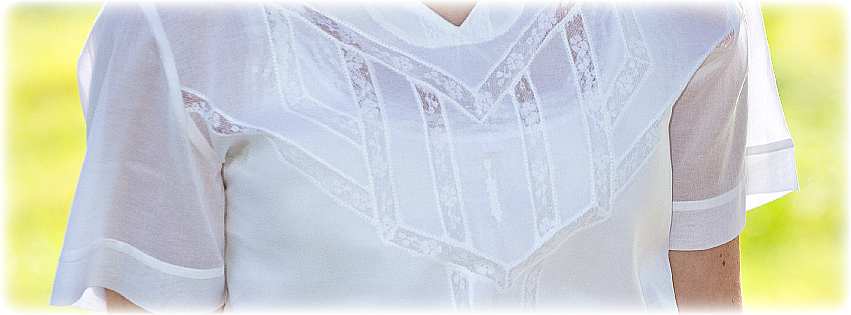
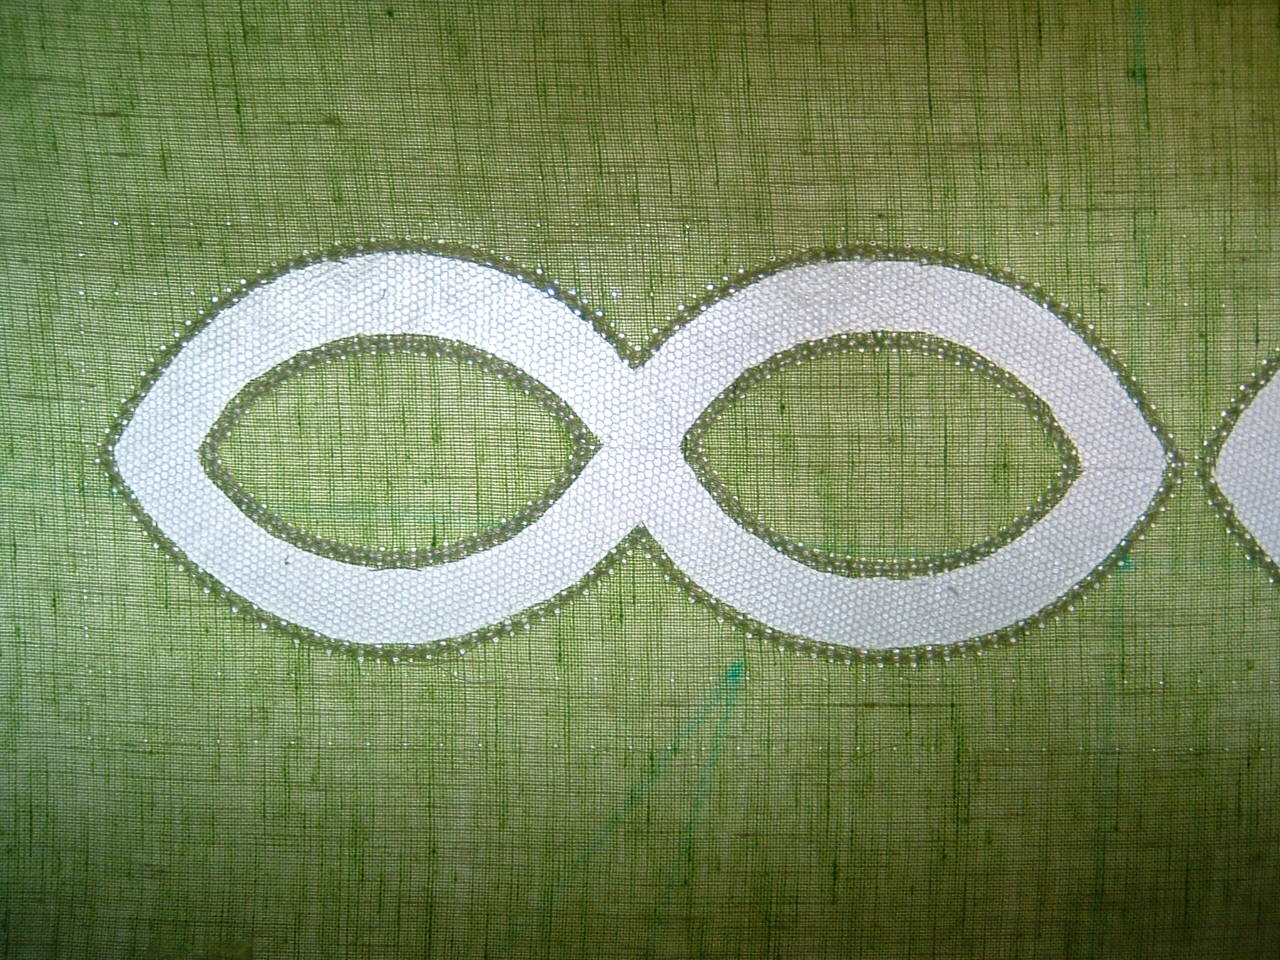
Here is a closeup of the traditional lace shaping that is not done with an embroidery machine.
Here is another one of my samples showing a traditional “flip-flop” lace shape bow on the back and sleeve.
I just love heirloom sewing, but to be honest, it does require a bit of practice and lots of time. For anyone who owns an embroidery machine, we tend to want to do everything in the hoop when possible. I think it kind of justifies our large investment of money in the machine itself.
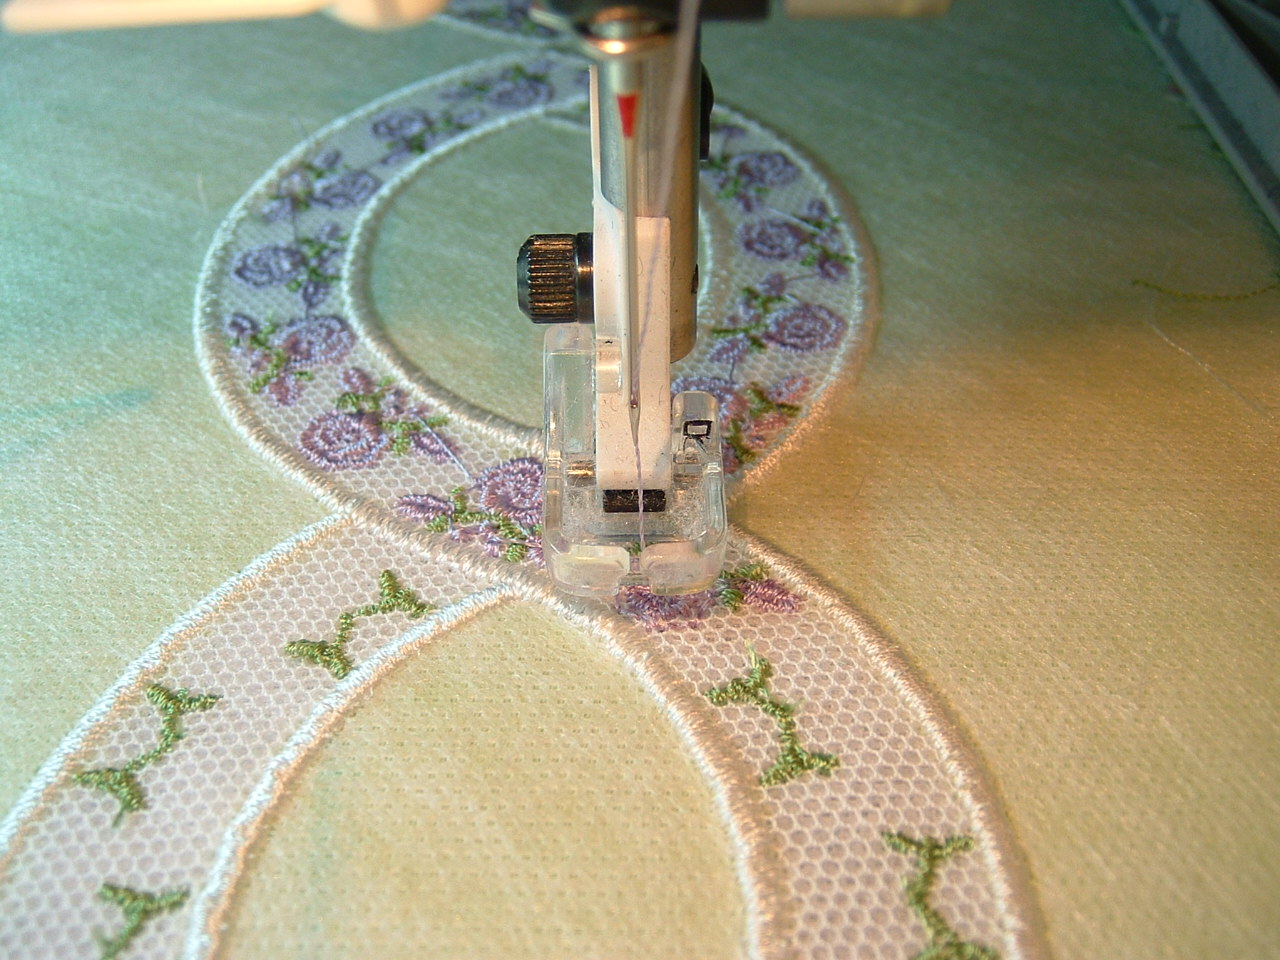
Here is a sample I created using a fast in the hoop lace shaping technique.
The center ovals are embroidered using English cotton netting, which is what a lot of the heirloom lace is created with. Cotton netting, sometimes called bobbinet, has the same feel and look that you might find on christening gowns.
Here is a quick overview of how this was created in the embroidery hoop:
-
Use 100% natural fiber fabric, such as cotton, linen, silk, batiste or voile. Use a mesh style water-soluble stabilizer and hoop the fabric. Hoop the stabilizer on top instead of under the fabric.
-
The first embroidery stitches will be of the shape and serve as a placement line showing you where to lay a block of starched English cotton netting.
-
The second color will be a tackdown holding the netting to the foundation fabric. After this, trim the netting very close to the stitching line. Then, turn the fabric over to the wrong side and trim out the foundation fabric, leaving the netting and stabilizer inside of the lace shape.
-
Continue on with the rest of the embroidery.
-
Then, when you wash away the stabilizer, you are left with pretty embroidery inside of the delicate English cotton netting, which looks similar to traditional lace shaping.
-
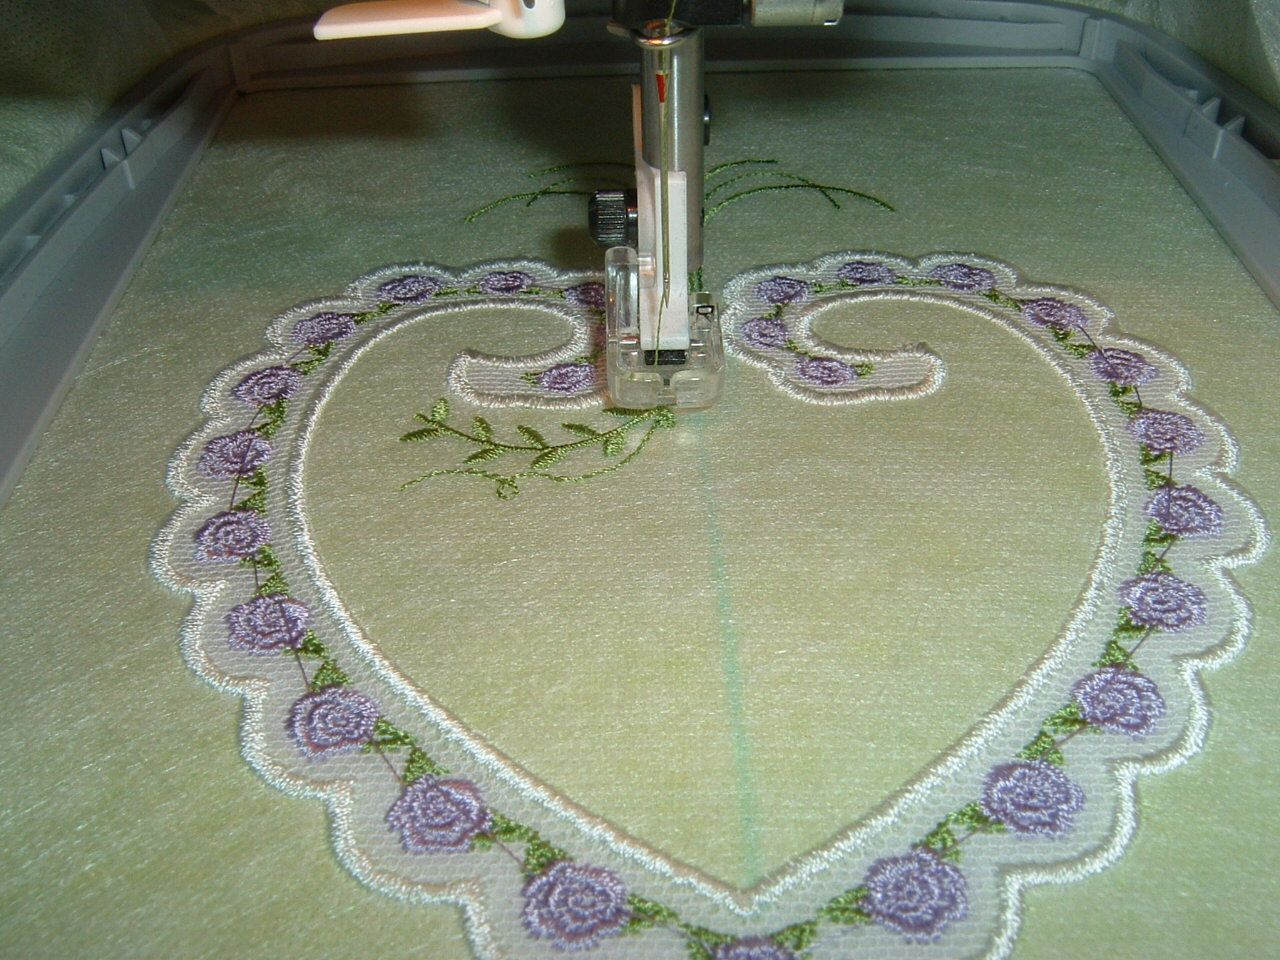
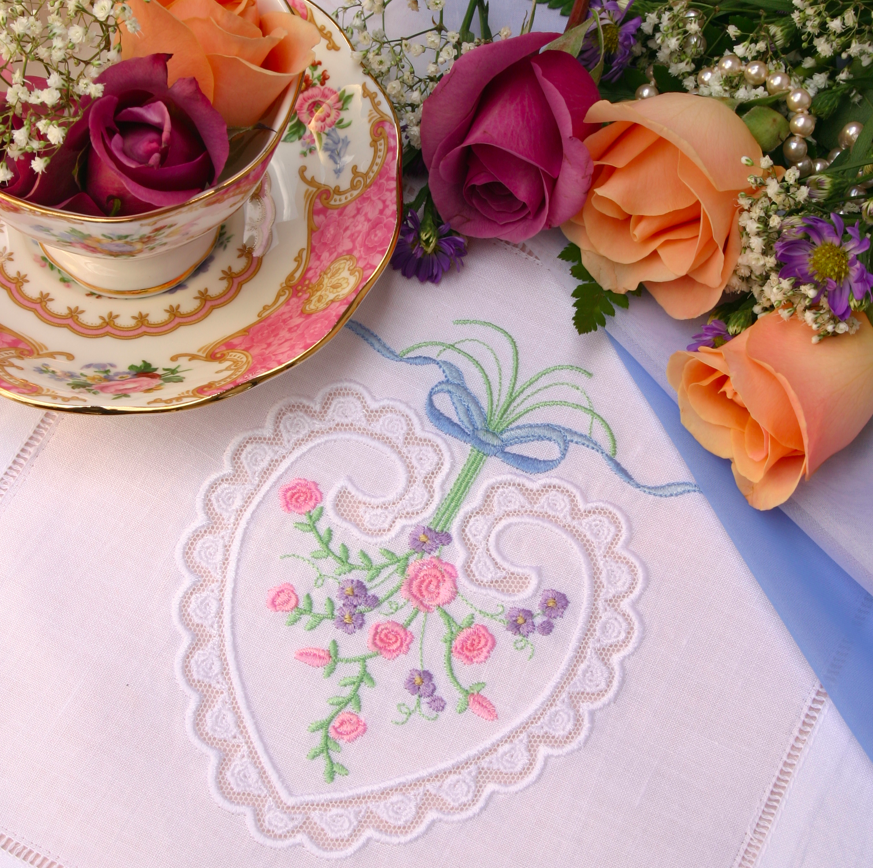
Try embroidering a design in all white thread for a more traditional look. Below are two images using the same embroidery design and different threads. The all white heart, while created entirely in the embroidery hoop, looks more like the blouse my daughter is wearing in the first photo of this post.
Madeira appliqué
You may not be familiar with this terminology. This technique originated in Madeira, Portugal, hence the name, and was created by hand. The technique results in a pretty, curved turned-under edge border that was created with a needle and thread. If you have done hand-turned appliqué (quilting), it is somewhat similar. Later the technique was adapted on a sewing machine using water-soluble basting thread. You would start by drawing a template on sheer fabric, such as batiste. Then you fold the fabric in half and sew a short stitch length over the drawn template.
After teaching this technique for years, I decided I would re-create it in the embroidery hoop so I didn’t have to draw the template. By embroidering the template, I wouldn’t be limited to using only see-through fabric that requires me to see through the fabric to trace the lines.
The red line is embroidery stitches formed on stabilizer only and serves as the placement line showing you where you lay your fabric
Next, the curved template is embroidered through two layers of fabric, starting and stopping on the foldline. Some, trimming, pressing and turning creates a beautiful finished turned-under edge border that can be topstitched onto a foundation fabric. The green silk piece is the Madeira border that was created in the hoop.
Here is another sample that shows the black polka dot Madeira appliqué border.
Trapunto appliqué
The last appliqué design in this series is taken from a traditional quilting technique that was created using a whole piece of cloth and stuffed with batting to create a lot of texture and raised dimension. This technique was very time-consuming. It can be re-created in a flash if you own an embroidery machine.
Learn how to digitize your own designs in my post “Creating In the Hoop Trapunto Blocks.”
To try the hoop method for yourself, hoop stabilizer and embroider the placement line. Lay three layers of high loft quilt batting over the embroidery placement lines.
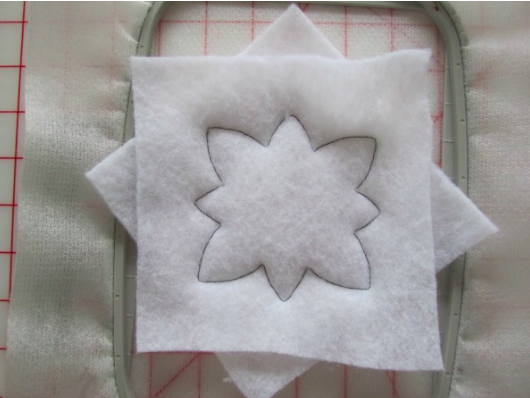
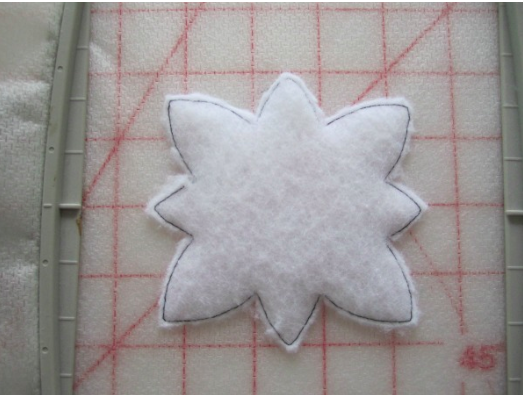
When indicated, trim and add another layer of cotton batting and top fabric.

Micro stippling helps “puff” the center batting and then stitches are embroidered throughout the “puff” to create a trapunto effect.
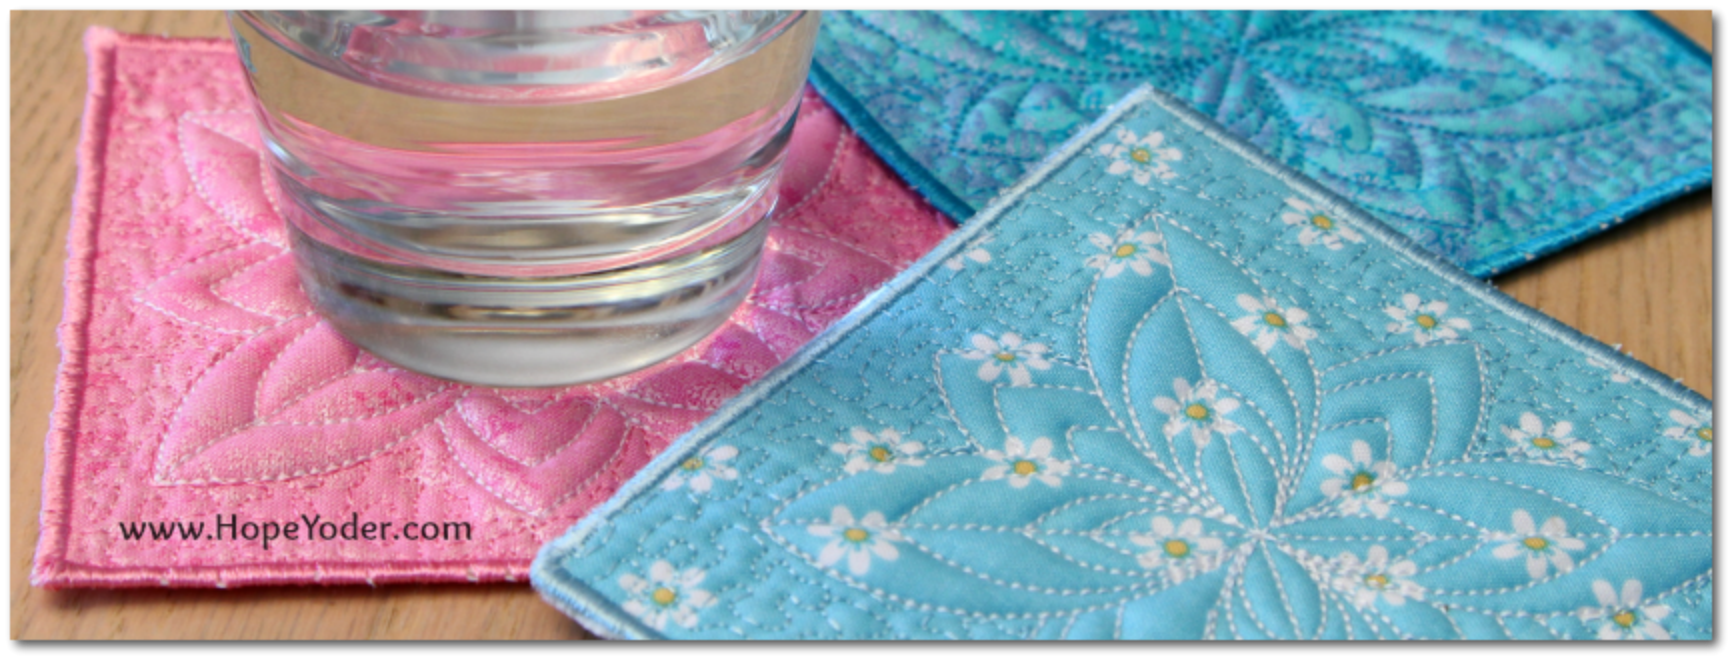
While trapunto isn’t necessarily appliqué, it still uses machine appliqué techniques. By adding the satin stitch border around each block, it makes a great finished project that can be embroidered in a matter of minutes. This is a great way to get rid of your smaller pieces of fabric.
Share tips, start a discussion or ask one of our experts or other students a question.
No Responses to “Appliqué 6 Ways: Trapunto, Lace & Madeira Appliqué”