
One of the most fun and varied items you can turn on a lathe is a lidded box. In the photo below you can see that there are several designs, usually related to how the lid fits to the box. There are an almost unlimited number of designs when creating a turned, lidded box. Not bad for such a simple little project. Lidded boxes are also a quick seller at everything from craft fairs to art galleries, so they can also be quite profitable.

The photo above shows several lid orientations and also the use of multi-media. The method I will describe isn’t shown in any of the examples above. An interesting feature of the type I will describe has, if carefully crafted, a “hidden” joint between the lid and the body. The wood is initially turned between centers so, because of the grain orientation, is often referred to as an “end grain ” box, meaning that the grain will be aligned vertically and the hollowing will require end grain cutting techniques. The good news for some of you is that scraping is one acceptable or even preferred method — if you don’t have a specific tool for the job — when hollowing the inside.
Turning a lidded box
Step 1:
The vertical grain lines are going to be a defining part of the appearance.The more the grain varies from the vertical, the more obvious the joint between lid and body will become. For this reason, a piece with straight parallel grain is the best choice if you want the closed box to appear as if there is no break in the grain at the joint.
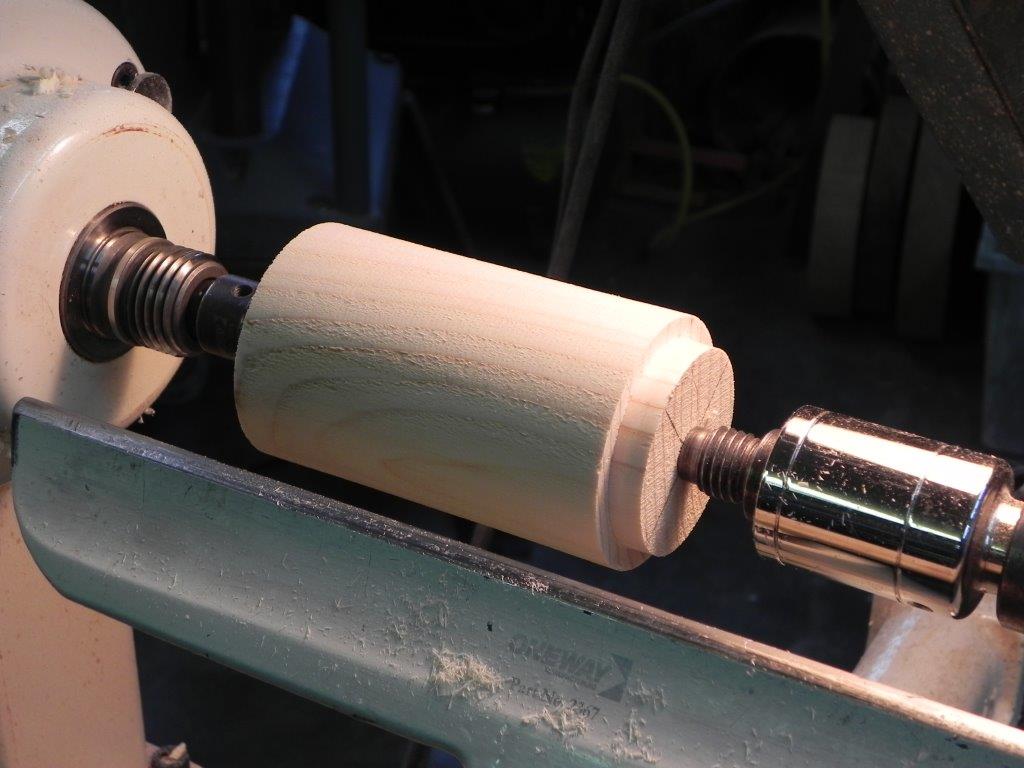
Turn your piece between centers, roughing the major diameter and create a tenon for holding in a chuck. This end will be the top of the box.
Step 2:
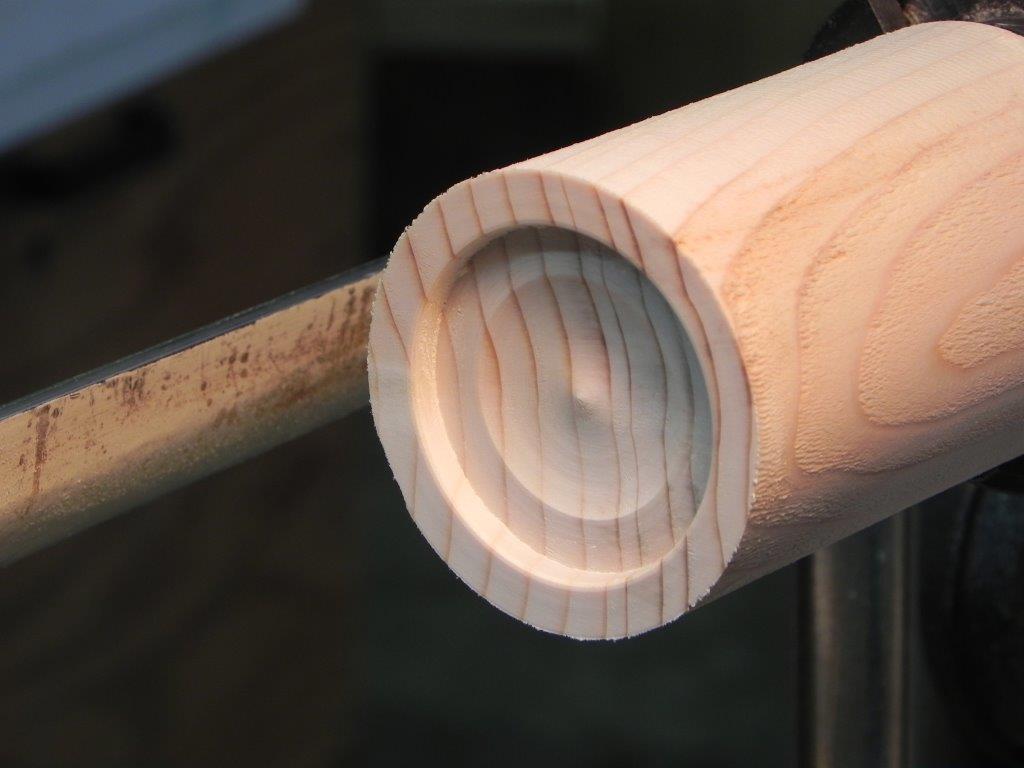
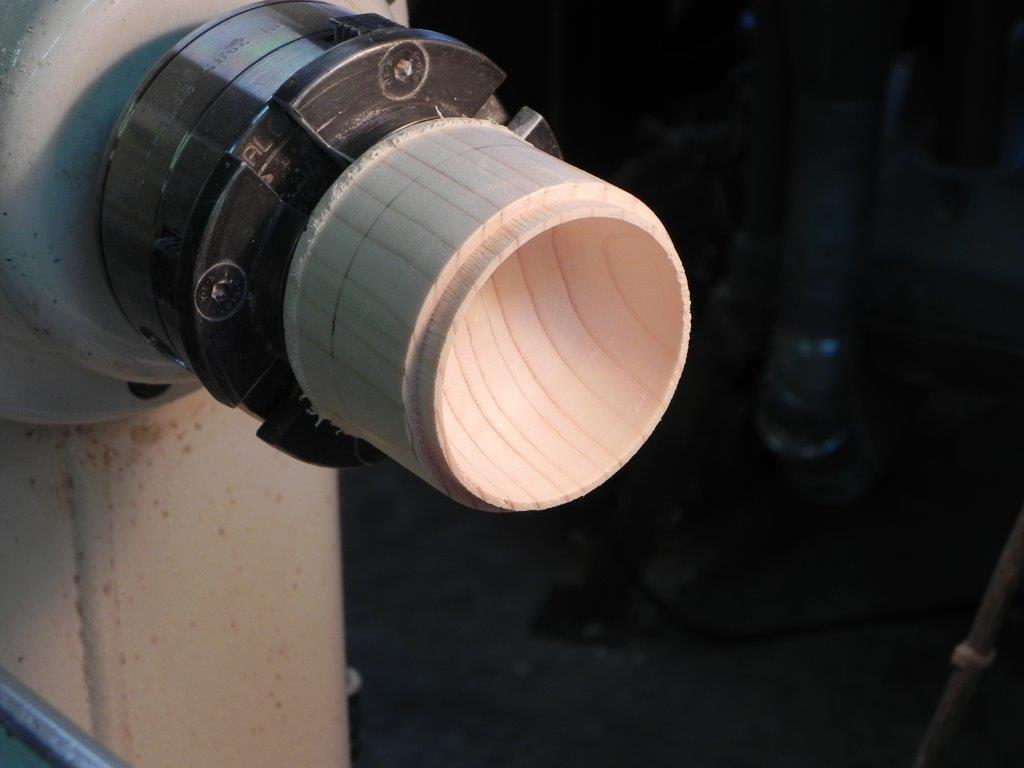
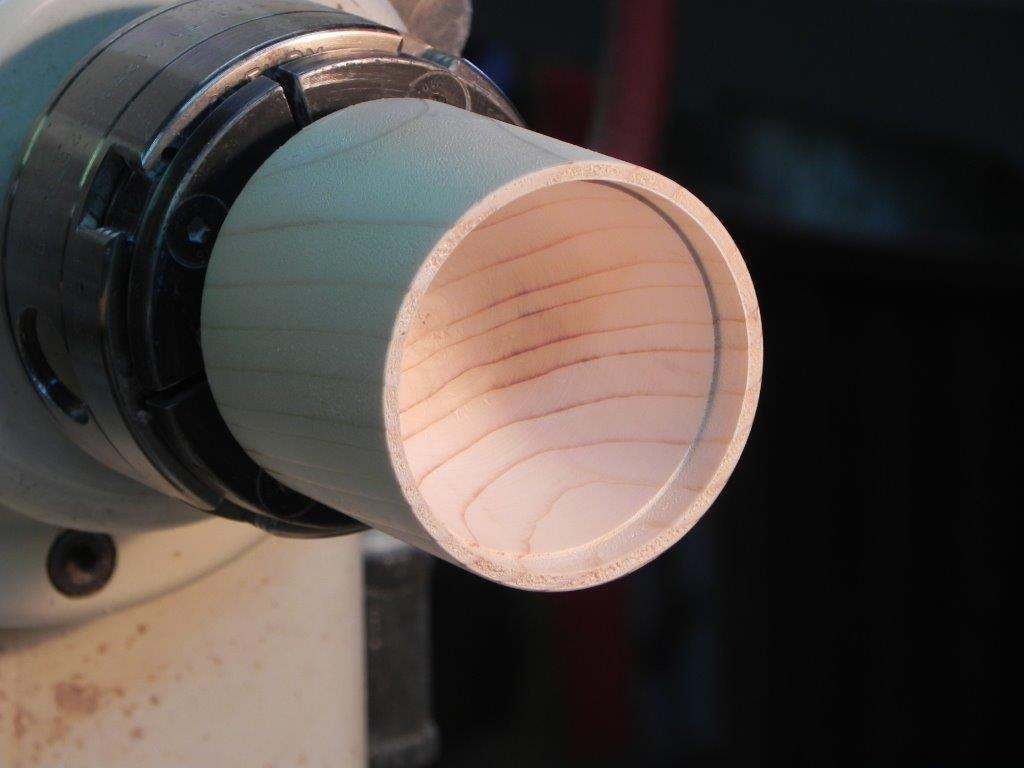
Set the piece up in a chuck, holding it by the tenon as in the photo below. Create a recess on the other end for holding the work in the chuck using the expansion feature. This end will be the bottom of the box.
The photo below shows the cutting being done with a scraper using a shearing cut (rather than a pure flat scrape), leaving a finely cut finish. Since the piece will be held by the recess for hollowing the body, consider a design short enough that vibration will be reduced or eliminated when hollowing. The recess will be part of the finished piece, so using care in creating the recess at this point will reduce the amount of finish turning in the end.
Make the diameter small enough to leave enough material between that diameter and the outside diameter so that the piece can be mounted securely without breaking from the outward pressure of the jaws.

The photo below shows the recess completed with a bit of decorative work. The jaws will leave minor tooling marks on the inside diameter of recess. These are easily removed once the piece is complete by creating a jam chuck for holding with a piece of waste wood.
Step 3:
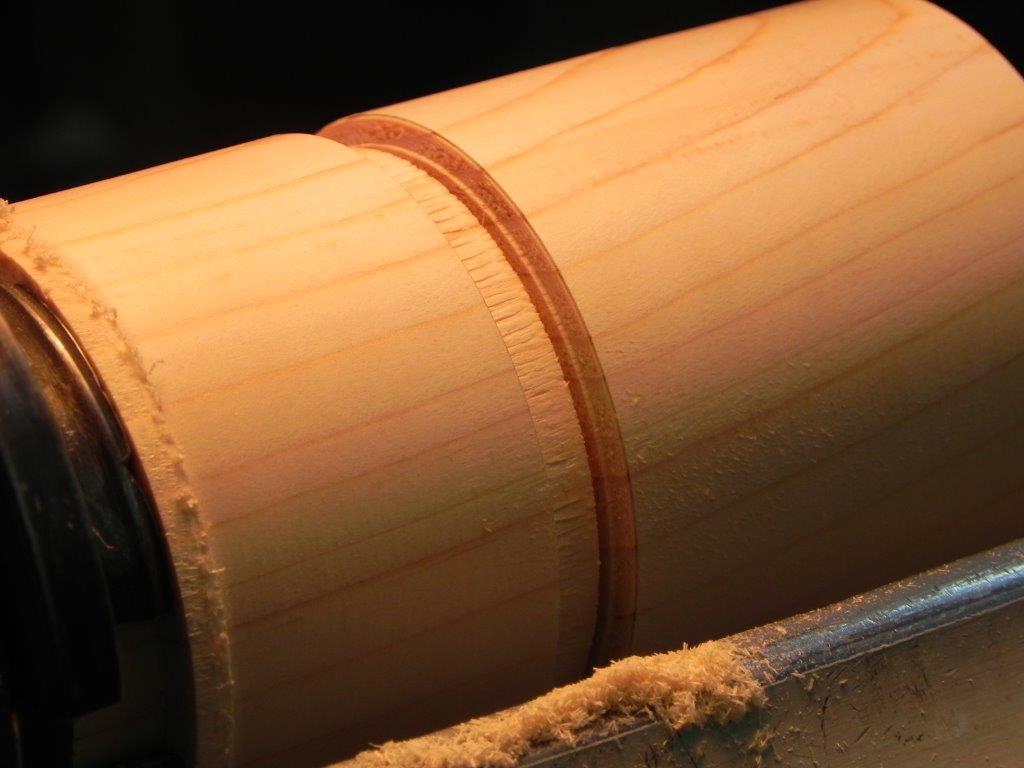
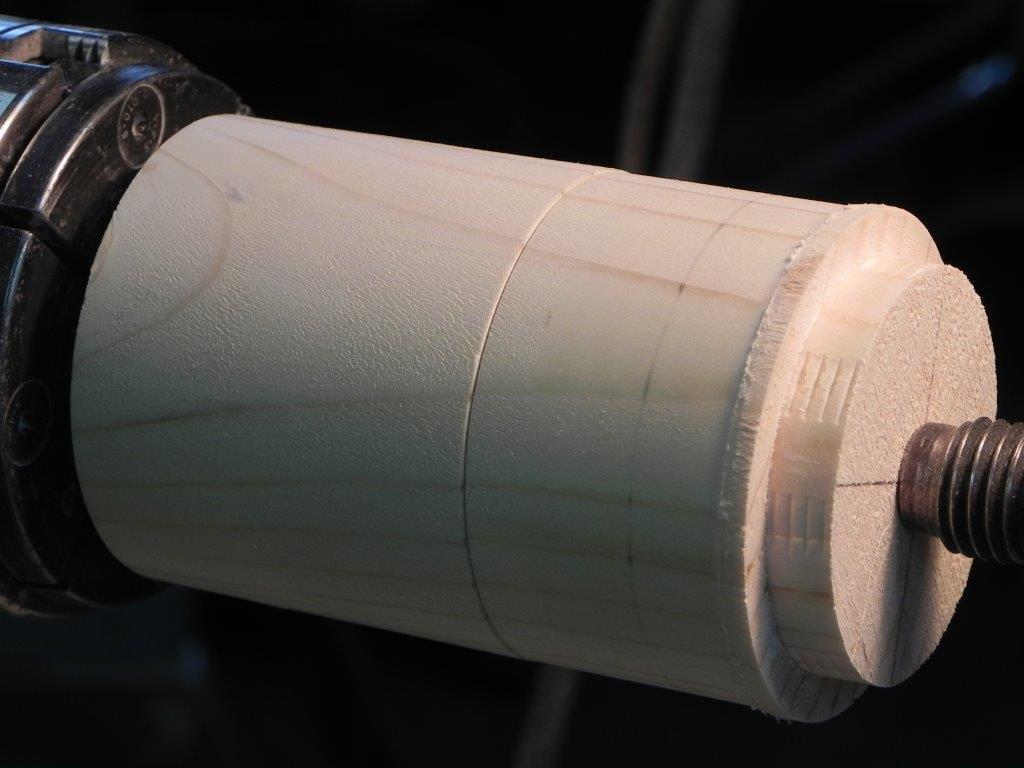
Mark the location for the separation between the top and bottom of the piece, as indicated in the photo below. Use a skew chisel to incise two lines on either side of the line as shown. A parting tool will be use to cut a reduced diameter between the cuts and the cuts will stop any chipping of the wood into the finished portion of the piece.
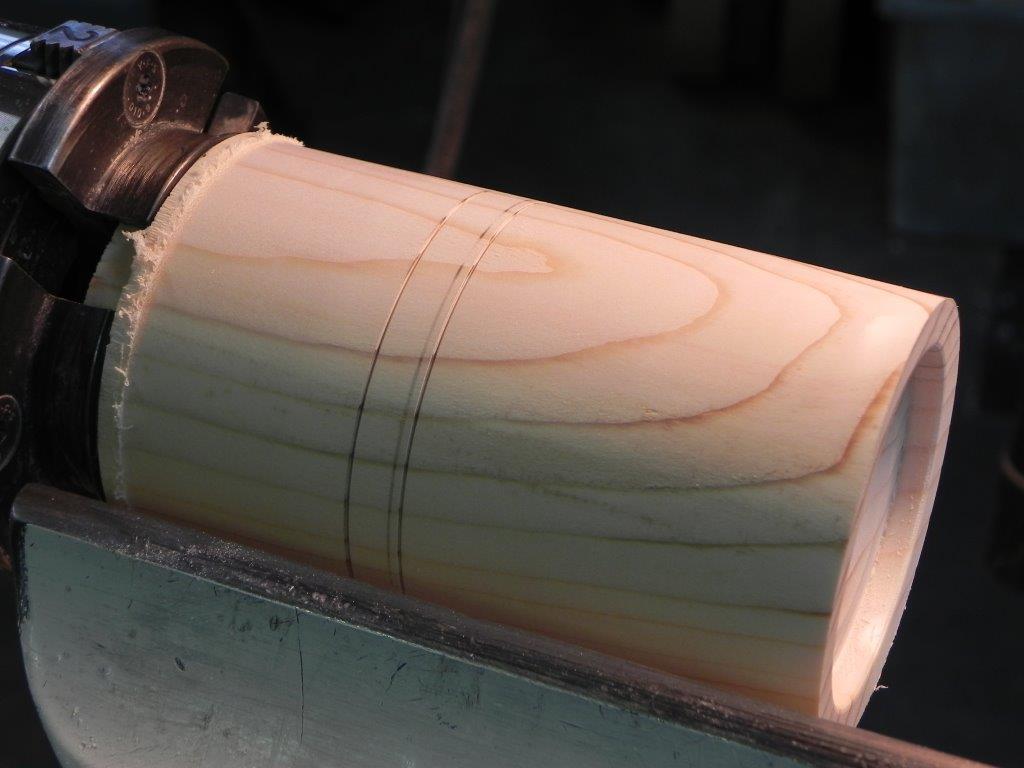
Use a parting tool to size the tenon of the box joint (higher quality wood would have allowed for a better finish in this case). The portion of the piece on the left in the photo below will be the top. The short tenon will extend into a matching recess (or mortice) in the bottom (right) created when that portion is turned later.
Ensure that the bottom of the main cut is square to the sides. The very thin parting cut is where the two pieces will actually part company. By using the thinnest parting tool possible you will reduce the amount of material used in creating the joint, which will reduce any discrepancy in the grain lines at the joint. The thin parting tool used in this case was a re-purposed kitchen knife. The pieces can be separated with a saw if you are uncomfortable using a thin tool for cutting to the center (not a bad idea at all).
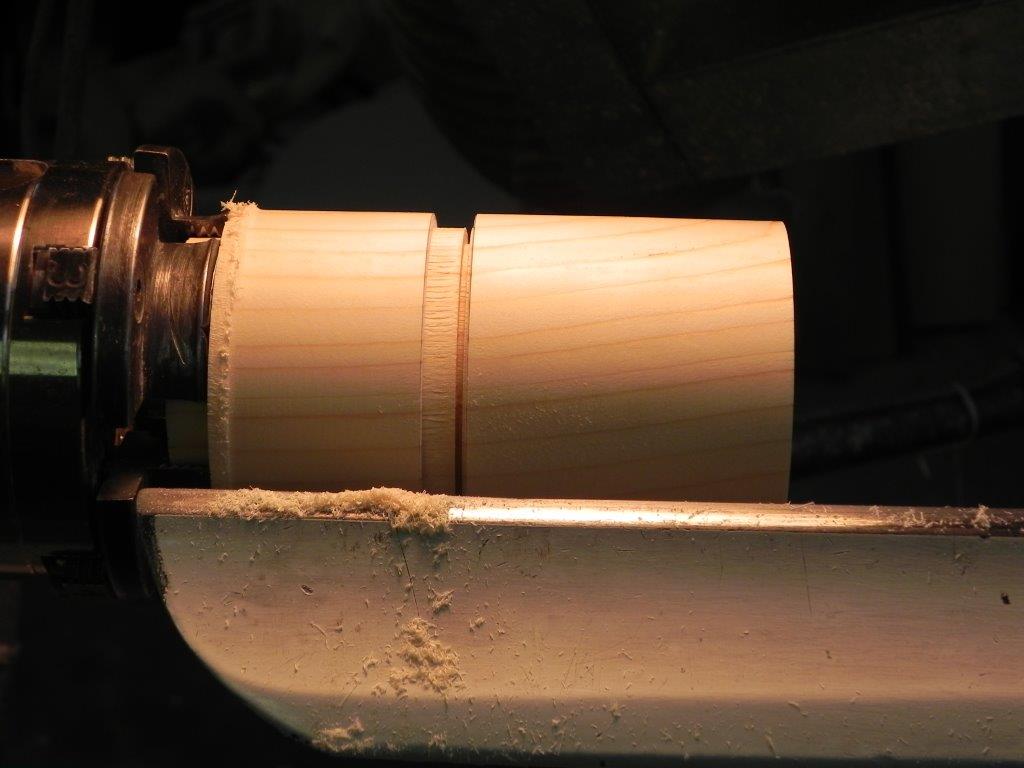
The view below shows the parting cut made just slightly away from the bottom portion. Because the bottom of the cut was square to the sides, the ring left will indicate the exact diameter required to accept the tenon without any measurement. This is important because once the bottom portion is completed it will become the jam chuck for completing the top, so it must be a tight fit.
Step 4:
Part the bottom from the top, leaving the top in the chuck. Hollow the the top and sand the inside.
Because you will be hollowing end grain, one acceptable method of removing the wood is scraping. There are several tools available specifically for this procedure but a simple scraper sharpened on a grinder leaving a clean burr as the cutting edge will do a nice job. This edge is not strong so will need to be refreshed often and as in all cases, make the finish cut with a freshly sharpened tool.
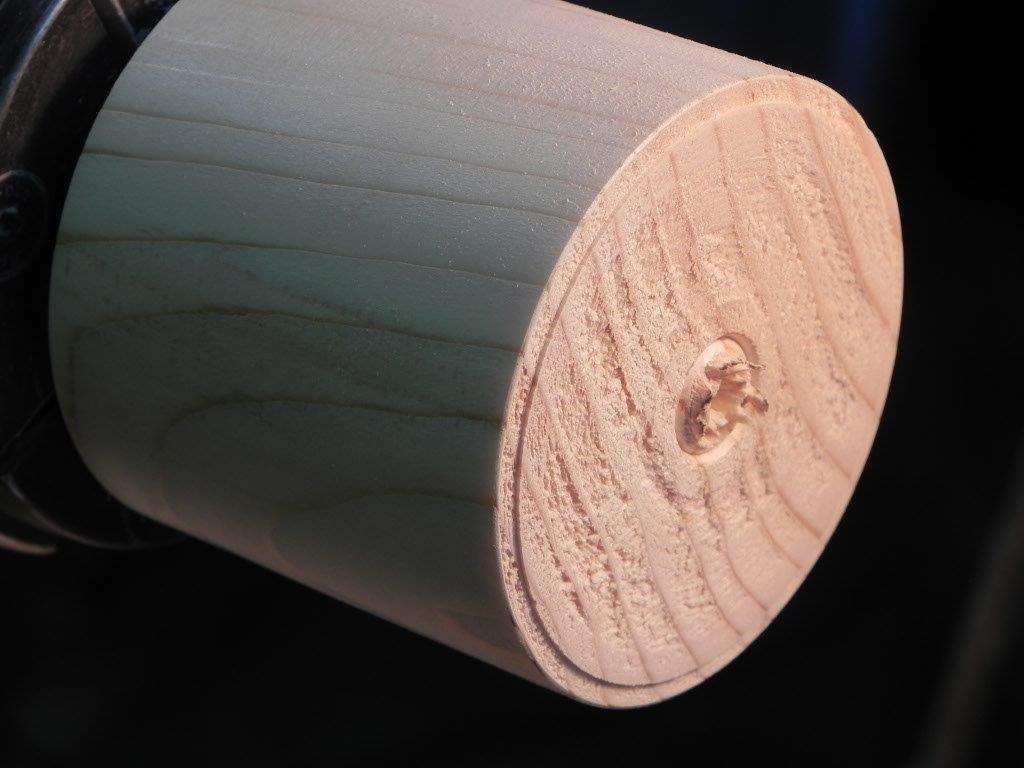
In this example the handle will be created as part of the top so material was left to do that as part of the last step. It is always an option to turn a separate handle to add later if you prefer.
Note the pencil line on the outside diameter. This indicates the depth of the hollowing when working the top later.
Step 5:
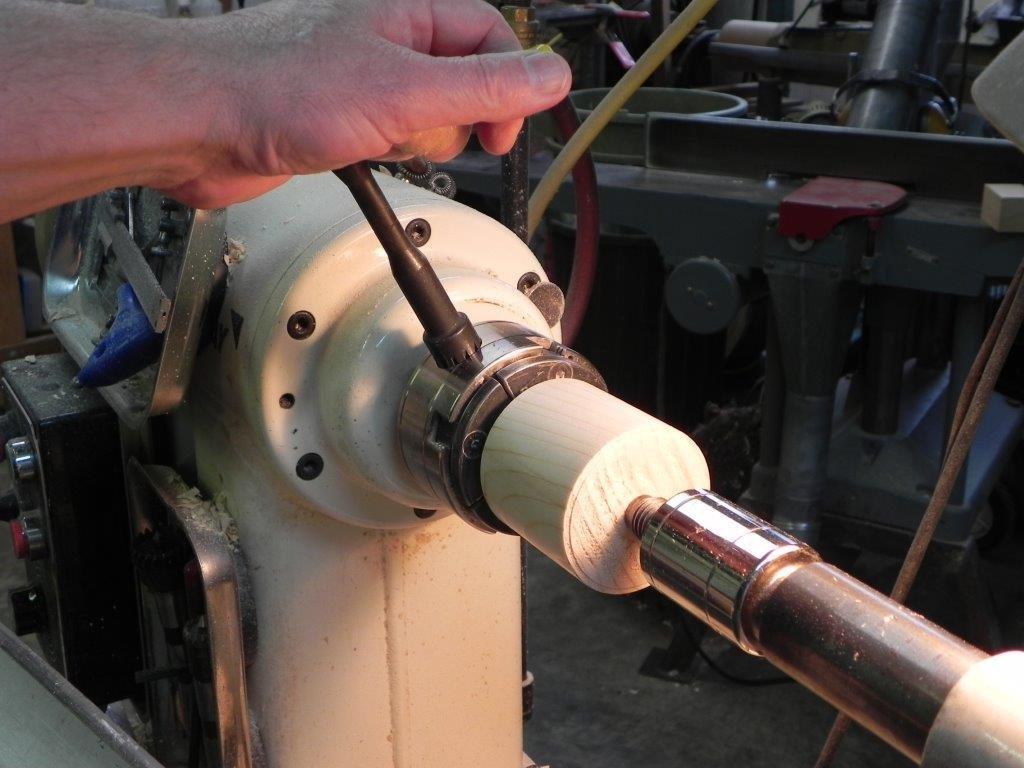
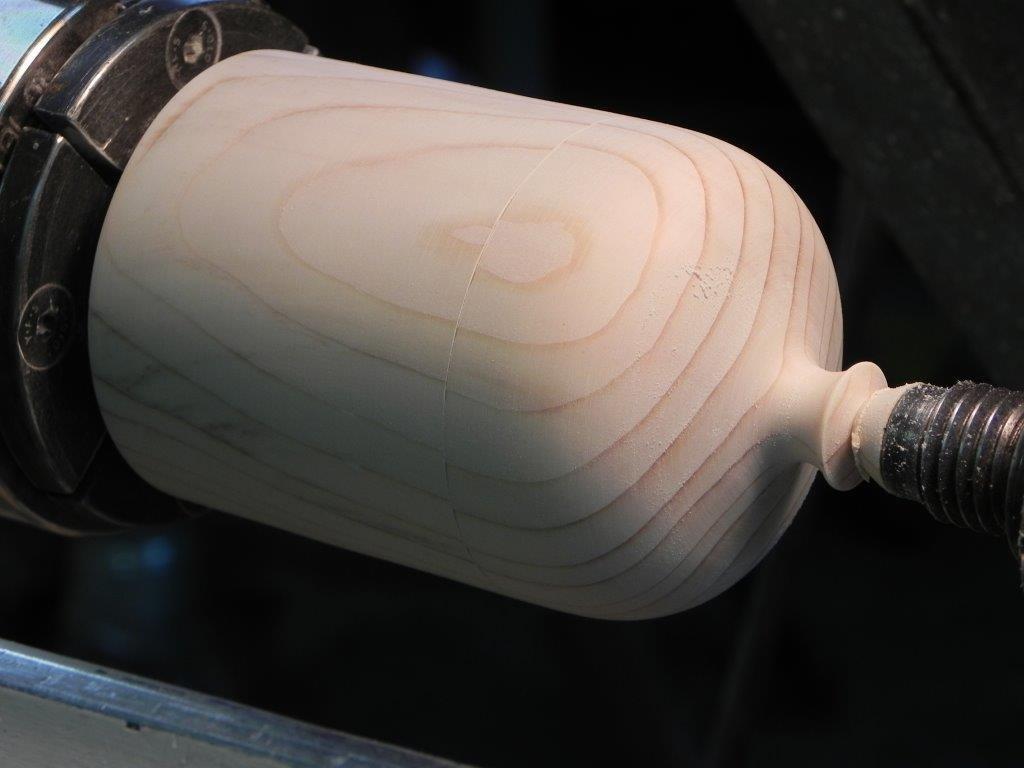
Remove the partially completed top from the chuck and put the bottom in the chuck using the jaws in expansion mode as shown below. Use care when tightening so the piece is secure but also that you don’t break it with too much outward force.
Note that the tail stock has been brought up and used to apply axial force on the piece. By applying a force on the end of the piece you will guarantee the piece will be seated squarely and solidly against the end of the jaw faces. This is a much better practice than just holding the piece with your hand, resulting in less vibration and a truer running piece.
In the photo below the slim portion of the reduced diameter of the box joint is evident. Use this as your guide when creating the mortice portion of the joint.
As in the photo below, hollow out the bottom of the box. It is perfectly acceptable to hollow the piece right out to the diameter of the mortice once it has been completed. I have chosen in this case to leave a thicker wall separate from the joint so that the two will be clearly evident. By keeping the joint portion separate from the box portion it is also easier to create a tight fit as described below.
Hollow the bottom at least deep enough to create the mortice portion of the joint. At this point we are actually creating a jam chuck to hold the top for finish turning, so it needs to be a tight fit. Use a bowl gouge to perform the next step, using the nose of the gouge to cut in line with the grain over this short distance. Using the raised ring as a guide, cut a slight taper inward so the the top just fits into the recess at the opening but goes no further. Gradually expand the taper so that the top can be forced into the bottom and held securely for turning (the tail stock will be used to further secure the top when doing this).
Finish sand the inside of the box portion but do not sand the joint.
Step 6:
The next photo show the top held in the bottom. The fit is secure enough to drive the top while it is being worked and the tail stock prevents the piece from coming out. Now you can see the importance of the pencil line on the top portion indicating the depth of the hollow inside.
All that remains is to create a handle (or finish the top to accept a separate handle) and finish turn the outside diameter. In this case it is a simple straight side. If you planned to have a more decorative shape, a much thicker wall would have to be planned in the beginning.
The nub left on the top of the handle will be carved away later off the lathe. In this case be sure to leave enough wood to cut away the hole in the wood left by the point in the live center.
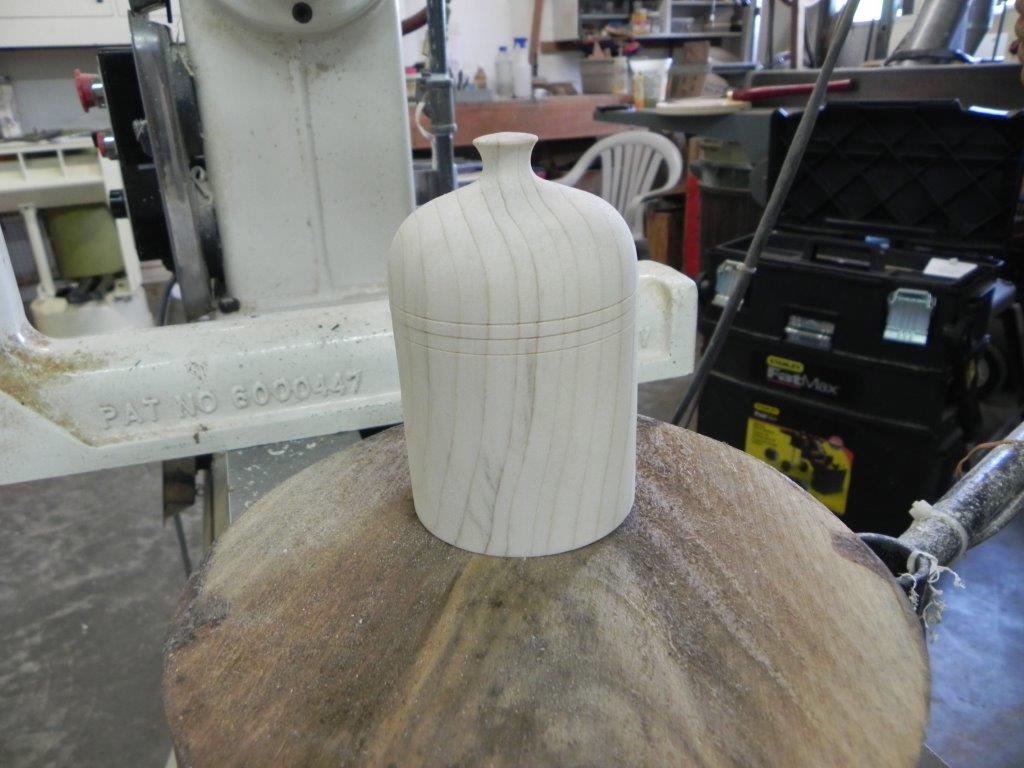
The joint between the top and bottom is fairly clear in this case but depending on the grain pattern it can be quite difficult to detect. Another option in this case is to make a slight vee cut right on the joint line and a matching cut just to the left or right, hiding the actual joint in plain sight.
Remove the top from the bottom and sand the mortice portion of the joint to make it loose enough to make a nice fit with the top so it is neither sloppy nor too tight. The photo below shows the completed box (except for a finish). You can see that I added a couple of vee cuts on either side of the joint and they truly do hide it in plain sight. Despite the slanted grain the variation caused by the material removed for the joint, the grain alignment is still quite good.
At this point you can create another jam chuck from waste wood to hold the bottom to remove any marks made in bottom recess made by the chuck. I would recommend holding the bottom by the outside diameter. Holding the piece by the inside diameter in a jam chuck will put the wood in tension and likely break the piece.
When sanding the joint to fit, consider any finish you will be applying. It is completely acceptable to not apply any finish to the joint if this will cause problems with the fit later. A bit of wax applied to both surfaces of the joint somewhat seals the wood and makes it look similar to the finish on the rest of the piece.
Share tips, start a discussion or ask one of our experts or other students a question.
No Responses to “Turning a Lidded Box: FREE Step-by-Step Tutorial”