
Turning tools come handled or unhandled, meaning of course, with or without a handle. A ready-made handle is fine but it may not suit the turner’s preference, turning style or needs. My preference is to make my own and I like them to be wood. I prefer a wooden handle over metal because I like the feel in my hand, the balance of the tool and quite frankly, the appearance.
I’ve turned with purely metal handles and metal handles covered with PVC tubing, and although the PVC cover eliminates the “cold” feel of the metal, they are always straight and I prefer my handles to not be straight. Perhaps I’m a purist, but I like my swept wooden handles that fit my hand and body. Strike me down for being practical, but what you will spend of a ready-made handle will get you another useful gouge.
So, why not turn your own handles? We already have the machine to do the job.
Turning a handle
The wood used for handles should be sound, strong and flexible. Not that they bend like a baseball bat, but they shouldn’t be brittle. Some woods are very brittle so are prone to cracking. My dad always disliked acacia for handles because it is so brittle, so one time I made a hammer handle out of acacia. It cracked. I like to hear a ring in the wood when it is struck (I learned that from a bagpipe maker) indicating it is sound (pun intended) with no cracks or voids. It should be hardwood, obviously, but also a wood that machines nicely. These are tools, not showpieces so is no place for fancy figured grain: straight grain only, for strength.
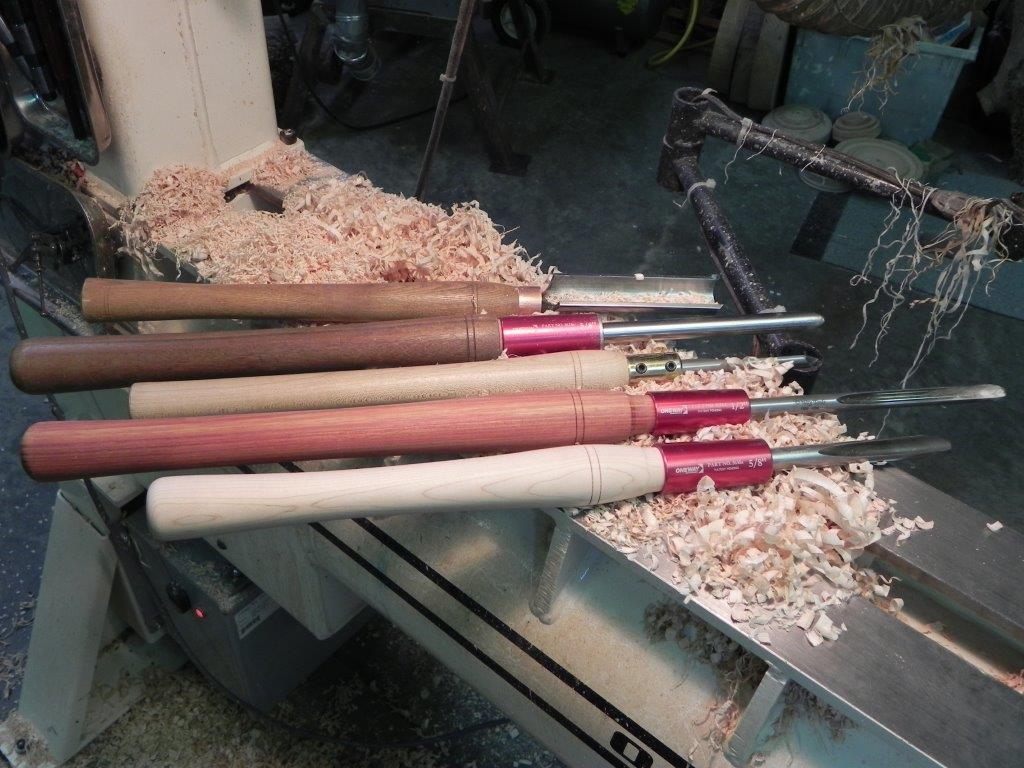
The copper ferrule is pressed on and has been in service without moving for ten years at least. The gold colored ferrule in the picture above is a Hosaluk ferrule that glues into the handle. In the end, it fails to provide the same strength as a proper ferrule because it does not encircle the wood (and actually I just noticed that this handle is cracked). The red ferrules are from Oneway and have a tapered female thread that holds the ferrule on the wood and also compresses the wood as does a proper ferrule. Hidden in the picture, they also have two set screws to secure the tool.
A handle needs a ferrule to prevent it from splitting. Wood is not strong in tension and the lateral torquing of the tool inside the wood during use can provide that tension. Traditionally a piece of pipe, wire wrapping or even string can provide the needed strength. Modern “store bought” ferrules are just dandy in my books because they have set screws to secure and release the tool when desired. These are great for storing the tool in transit (pointy end inside), swapping tools and sharpening (no extra weight and no dodging the handle). Also for travel, a couple handles will suffice for several tools.
A handle may often need a bumper of sorts on the back end to prevent damage if dropped or stored on end. Sometimes a short ferrule will suffice.
Unless there is a particular reason not to do so, the handle should be bored on center and parallel to the axis. This is a key factor in the use of the tool since much of your tool control is attributed to rotating the tool on its center. The last thing you need is a “hinged-in-the-middle” tool that swings rather then rotates or in the case of a parting tool, for example, that points left one time and right the next, depending on which way you picked it up.
1. Boring the center hole
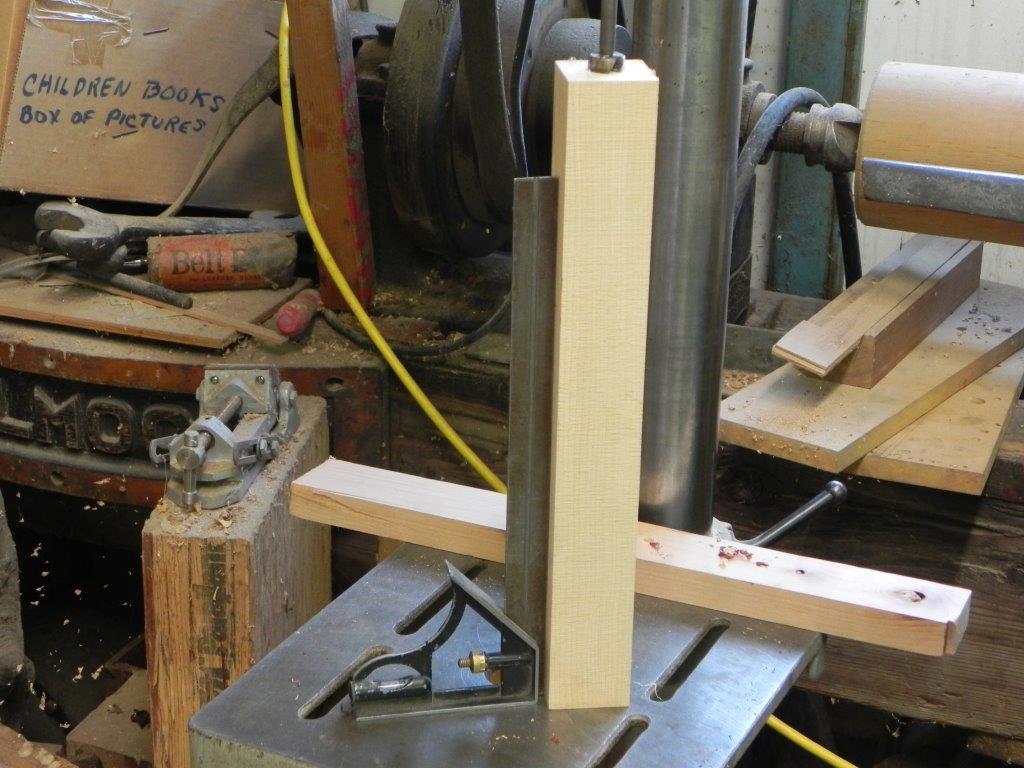
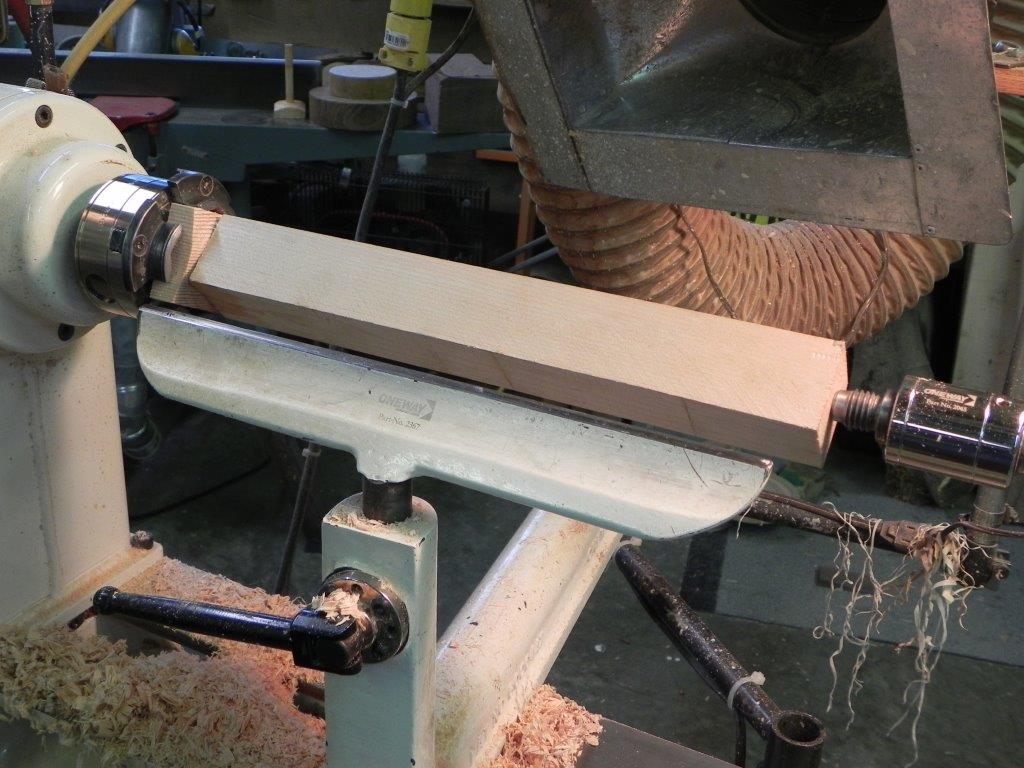
Cut your blank to the dimensions that you require, but make those cuts as square as possible. The bore for the tool is the first operation and should be done in a drill press using one end as the reference. Alternately (and probably better) you can clamp the piece vertically against a 90-degree support fence. The object is to make that bore as true to the lineal axis as possible. This will ultimately determine both centers that you will use for turning. A third choice is to drill the blank in the lathe. This would be my last choice but, if you must, allow for extra waste when sizing the blank because it won’t be as true. Good luck drilling by hand.
2. Mounting between centers
Clamp a waste block in a chuck about 2″ square and as long as the bore is deep, up to about 4″ maximum. Turn the block to fit the bore, relieving the outside diameter in the center portion so that it fits tightly but doesn’t bind. The key here is a tight fit that holds the handle straight on its own. Use this as your drive center. The bore in this handle is for a double ended bowl gouge so is much deeper than normal.
Install the handle on the drive center then bring the tail stock up and tighten the live center into the end of the blank as it rotates at a very slow speed. This will probably not be the geometric center of the blank, but it will be on the natural axis of the blank, ensuring that the handle will be centered to the bore.
Step 3. Turn the handle to shape
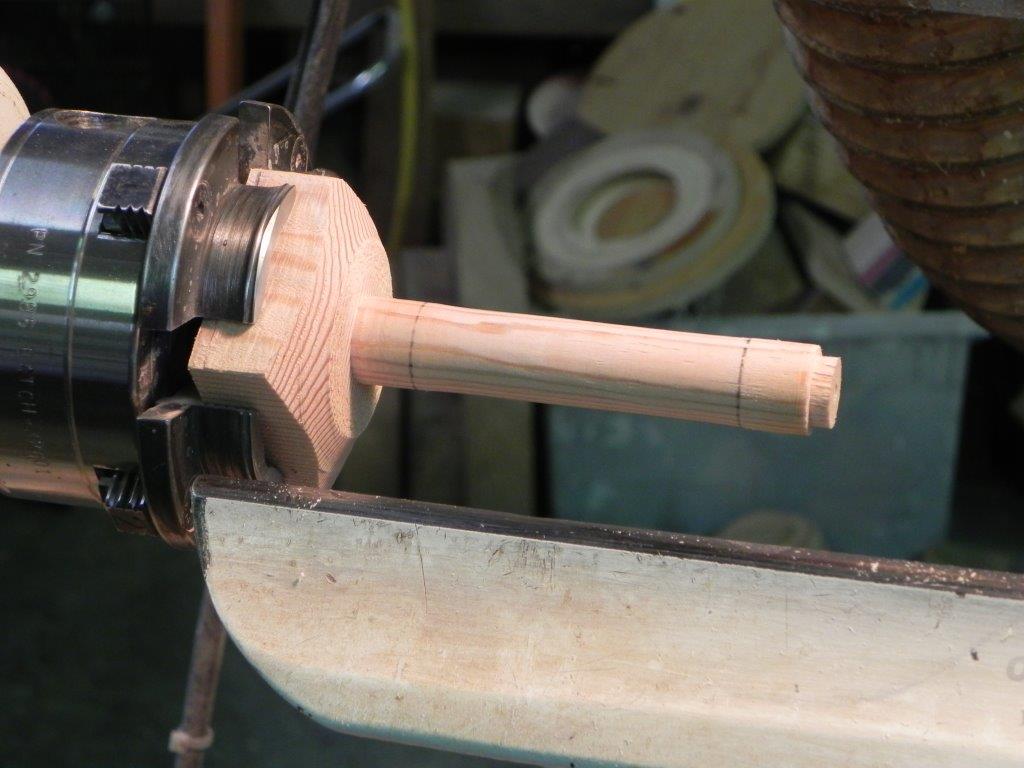
Drive center. Note the squared face and the relieved portion between the pencil lines.
You can make the handle any shape you desire. I prefer mine to have a larger diameter at both ends that fit my grip nicely with a little swail between so that I can slide the tool in my hand by loosening my grip but still not loose the tool from my grasp. The length of this tool is short by my standard for a bowl gouge because I will be using it on a mini lathe where the longer handle gets bound up in the ways.
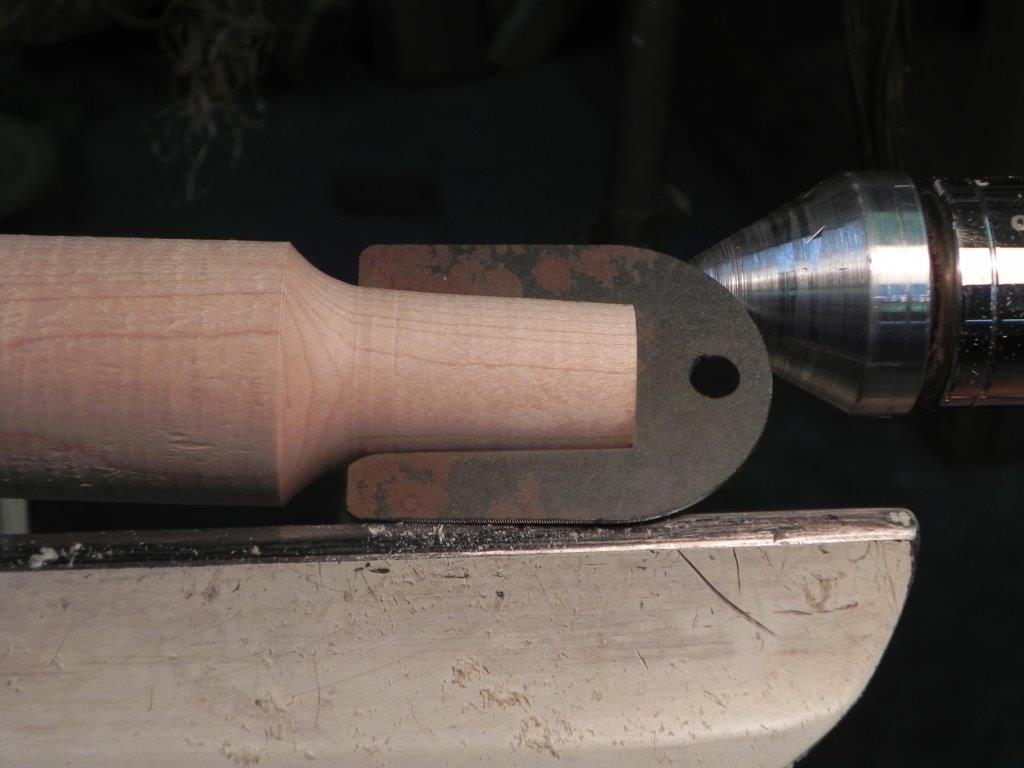
Once the butt end of the handle is marked on center, it can be switched end to end as required. In the case of any type of ferrule, it is good to switch ends so that the ferrule end is at the tail stock for test fitting. I use a large, single-point center in the bore hole for centering. It is wise to turn the ferrule diameter first so that you can blend the handle into that area.
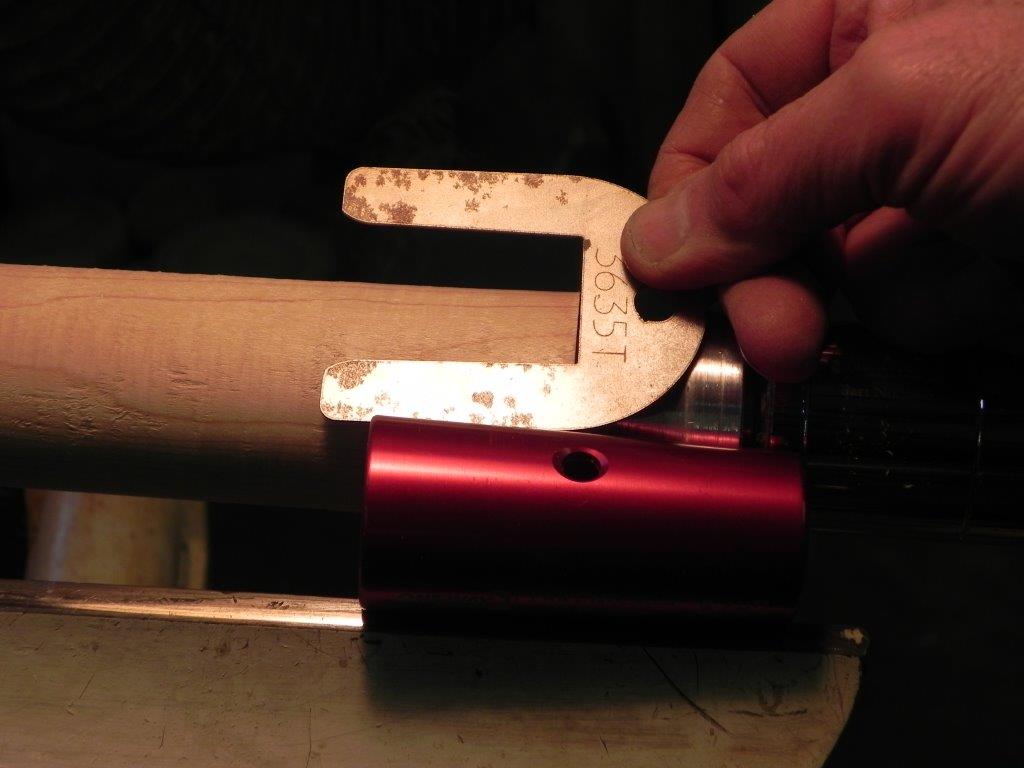
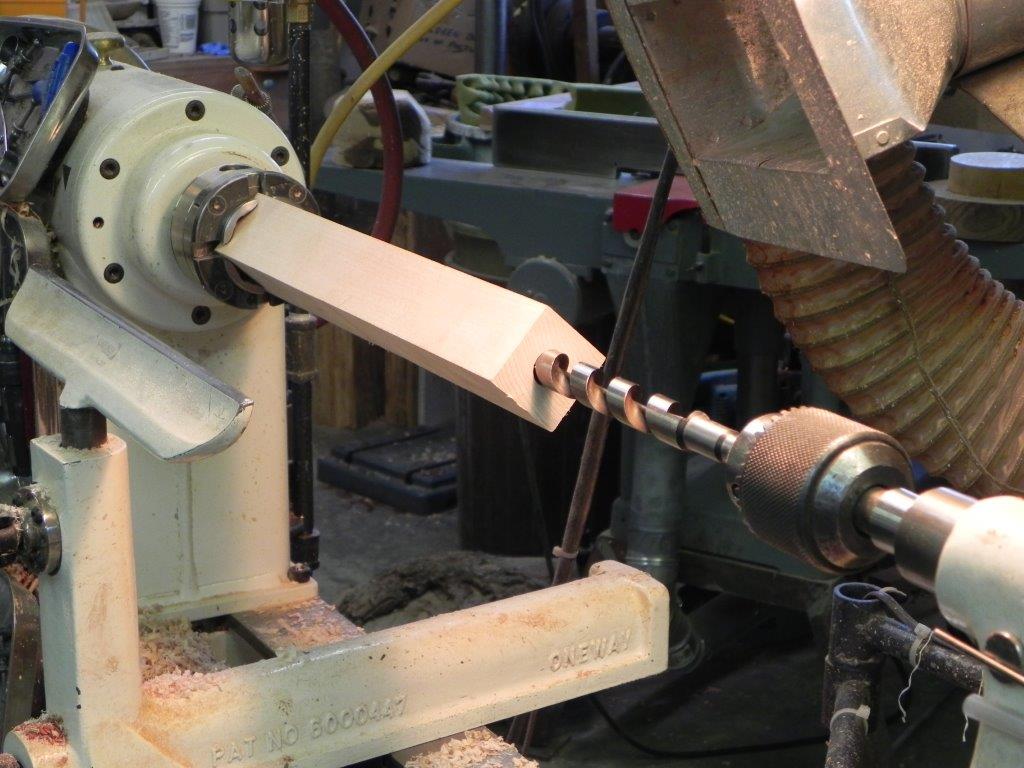
The ferrule that I will be using has a tapered inner thread. It comes with a profile gauge to fit the handle to the ferrule. I have found that these ferrules tend to require tightening fairly often while new until the thread seats into the wood, so I have allowed extra taper for cutting off as the ferrule advances.
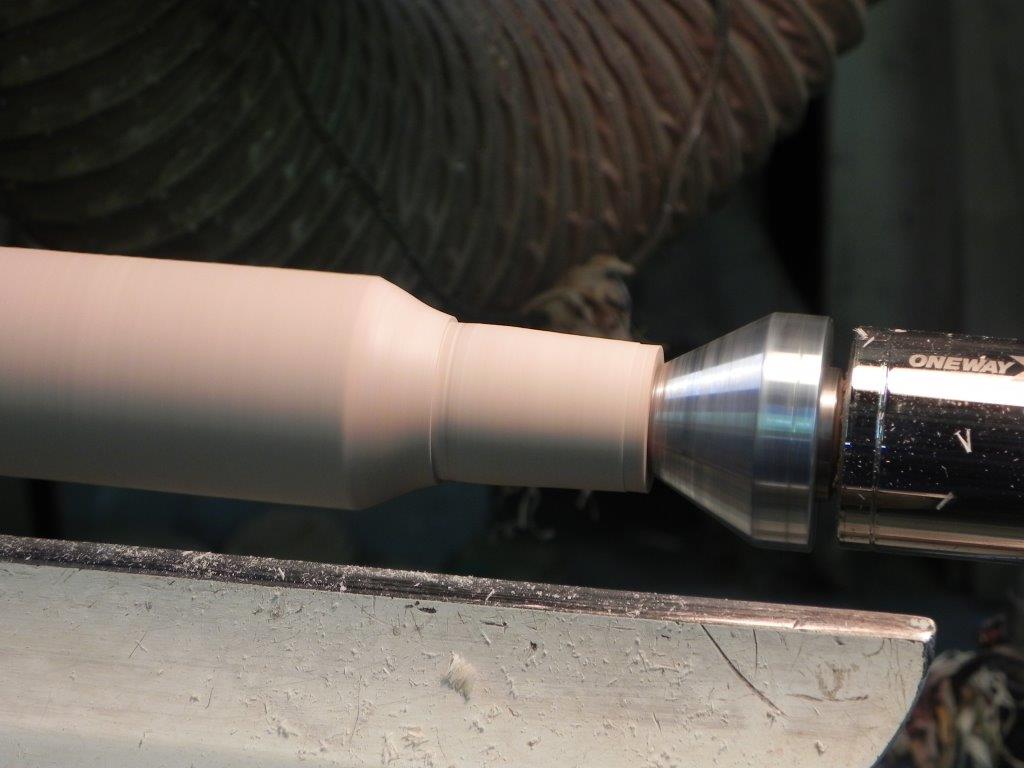
The “viewing hole” is drilled at the end of the hollow center of the ferrule. It is easy to see when the handle bottoms out in the hole and is time to trim the end.
I have found that the threads have seated permanently after trimming about 1/4″ off the taper. A small disadvantage of this type of handle is that the ferrule loosens up at times during use until the threads truly seat. Once seated, this occurs only very rarely and even then only on my 5/8″ gouge, which gets some serious torquing during use.

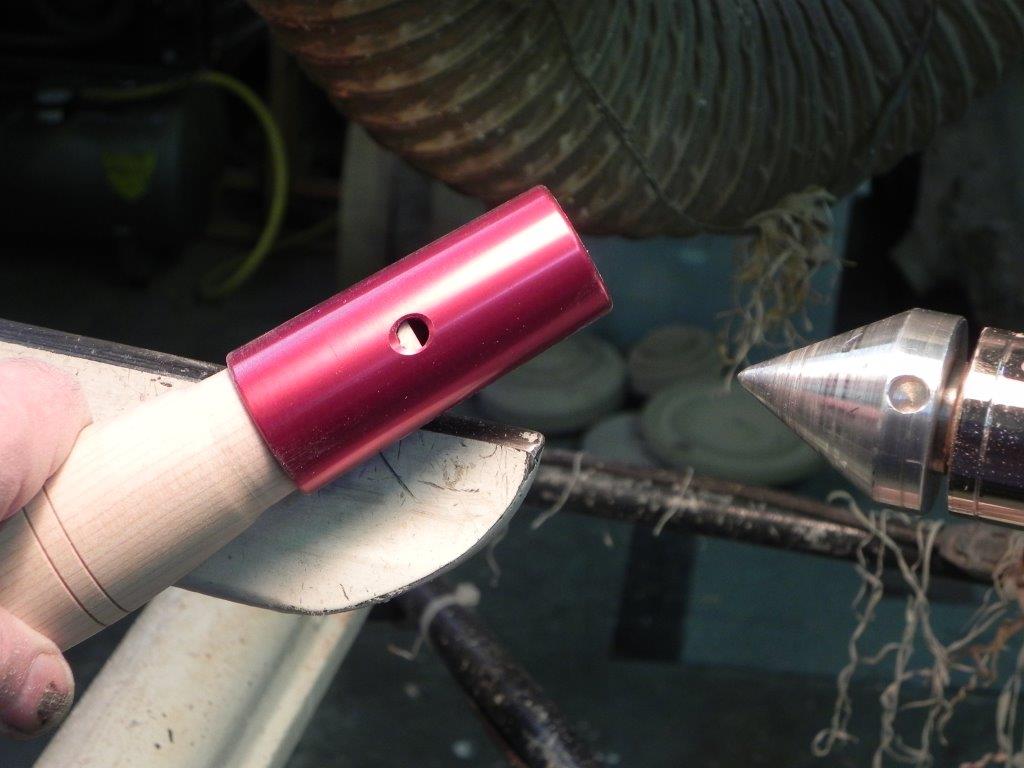
Fitting the ferrule. Note the “viewing hole” for checking the position of the handle in the ferrule.
After finishing
I don’t put a finish on my handles. This is for no particular reason other than they get a natural patina over time and have plenty of oil from my hands to feed the wood. I believe a smooth wooden finish is less likely to slip in your hand once it develops some wear. I have had to actually sand the finish on some commercial handles to take that initial slippery feel out of the lacquer finish.
A good handle is like any other quality item. It should do its job without fanfare and without complaint. It it is well made you should be able to use it without even noticing it and it should serve you well — probably for years.
Tips for turning wood handles
- Use dry wood. Shrinking due to drying after turning will cause ferrules to become loose, providing no support to the wood.
- If the tool is to be permanently mounted in the handle it should rely on a tight fit. I have glued the odd tool in an emergency, but it’s a sign that you need to make a new handle. Drill and form the hole for the tool (or tenon if it is a male fit) to fit the tool properly. Forcing the tool into a hole that is the wrong shape won’t make it fit tighter. It will likely become loose sooner. As a kid, I spent the winters with an old hand re-handling fire shovels, axes and mattocks for the next forest fire season. He never let me get away with anything other than a perfect fit.
- Pipe ferrules should be very tight. I turn the handle the same diameter or even a couple thousandths larger with a small entry taper to start the ferrule. Scrape a small chamfer on the ferrule to remove any burrs and further ease the entry. Lubricate the handle with oil where the ferrule slides on. Press the ferrule on in the lathe or in a hand or hydraulic press. Hammering it on is acceptable but would be my last choice.
- Wire wrapping makes an excellent ferrule, but is difficult to do well. Turn a slight depression where the wire is to be wrapped to prevent it from sliding. Use a fine wire — perhaps 18 gauge — so that it is easy to wind on smoothly. Start the wire in a small hole then put a few wraps over it to secure it. Tuck the wire under itself at the other end and bend the free end over the last wrap, trimming and hammering lightly to blend it in. Keep the wire tight the whole time. If you use copper wire you can put a drop of solder on the ends with an iron to secure the whole thing. If the wire is fine enough, you can whip it as described below (best). This actually makes a very attractive ferrule if neatly done.
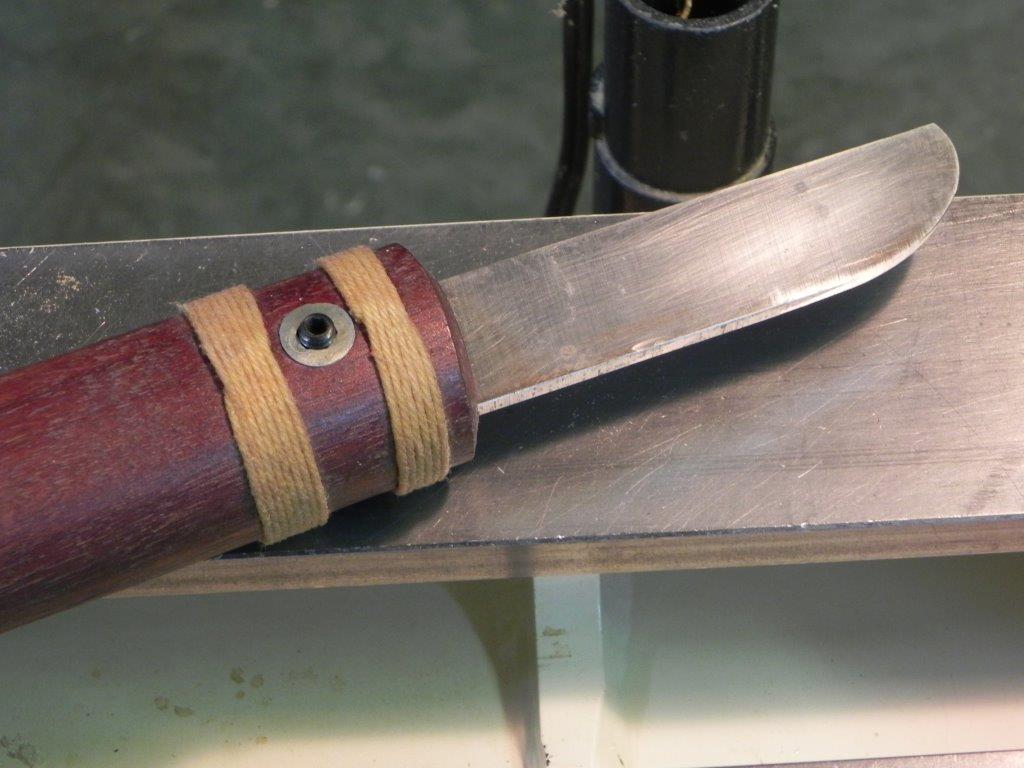
- String is a very suitable wrap but not really durable in rough use. It is, however , easy to reapply. The secret to a string ferrule is whipping the string so that there is no visible joint or knot. Lay a loop of string in line with the area to be covered then wrap the string toward the looped end. When you have applied enough string, pass the free end through the loop then pull the loop and free end under the wrapped string. This tightens and secures the string permanently. Trim the ends close to the last loops with a knife. You can further secure the wrap with glue, varnish or epoxy if you want. Both the string and wire wraps are an excellent way to secure a handle that isn’t round.
Turning my own handles gives me lasting pleasure. It shows my craftsmanship, a visual resume when demonstrating for another guild. They feel great to use and they all develop their own patina, telling the story of their use. I think I got that as a kid from gazing endlessly at my father’s and grandfather’s tools.
Share tips, start a discussion or ask one of our experts or other students a question.
No Responses to “Turn Your Own Turning Tool Handles”