
From the vast catalog of twill variants, sometimes the simplest can deliver the most visual impact. In this post, I’ll talk about two neat ways to vary the twill diet: changing direction and changing face.
Learn to weave on Craftsy!
Did you know Craftsy offers weaving classes? Browse our growing selection of online weaving classes today to find a one that’s perfect for you!
Changing direction
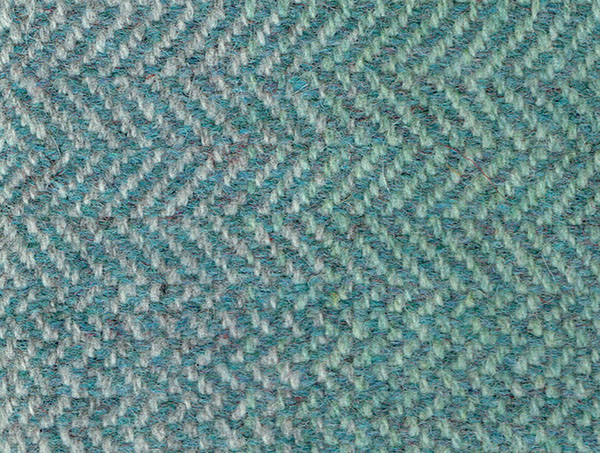
On a straight draw on four shafts you can easily weave either a left-leaning twill or a right-leaning twill. If you want to introduce some extra visual interest then zigzagging from left to right can be very effective. A point treadling is one option, but a herringbone is a crisply satisfying alternative.
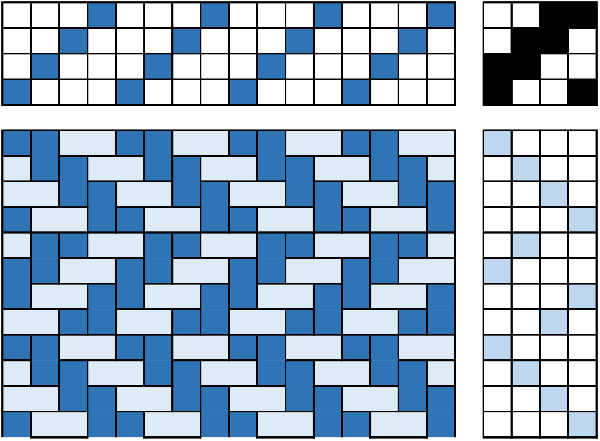
At the point where you wish to change direction, note which shafts are up and which are down and then change to the opposite combination. So if you finish with 1 and 2 raised (and 3 and 4 lowered), start the new section with 3 and 4 raised (and 1 and 2 lowered). Then proceed to weave the twill cycle in the new direction. This gives the clean break between the two twills, which makes herringbone so appealing.
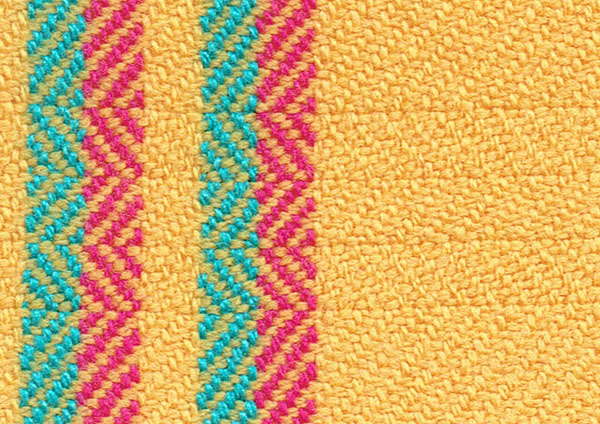
The traditional herringbone has a regular rhythm, typically 4 or 8 picks in each direction, producing equal-width stripes. However, you are free to proceed for as many (or as few) picks as you choose. The example below shows an 8-pick herringbone at the top and a 3-pick herringbone at the bottom.
Irregular bands of left- and right-leaning twills can be lively and fun. You just need to make sure that wherever the two twills meet you choose the opposite set of shafts to achieve that clean break.
Changing face
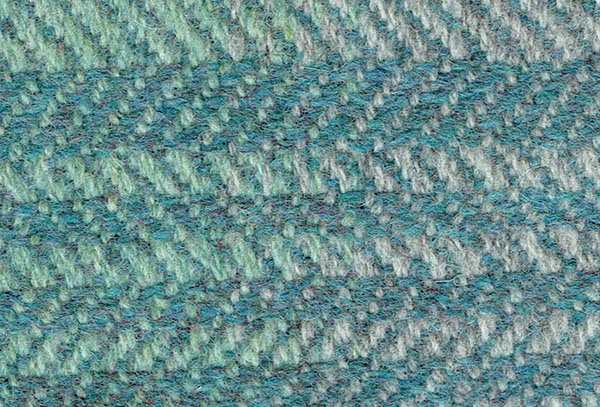
As well as a balanced (2/2) twill, on a straight draw you can also weave a warp-faced (3/1) or weft-faced (1/3) twill. Mixing warp- and weft-faced twills can produce a wonderfully three-dimensional appearance, and is a rich source of variety in the weaver’s repertoire.
The procedure for changing face is the same as before: note which shafts are up and which are down and switch to the opposite lift. So if you finish a block of weft-faced twill with shaft 1 raised (and shafts 2, 3 and 4 lowered), start your block of warp-faced twill with shafts 2, 3 and 4 raised (and shaft 1 lowered). This has the effect of pinning the longer weft float in place so that it is unable to slip over its shorter neighbor, giving you a clear, sharp transition between your twills.
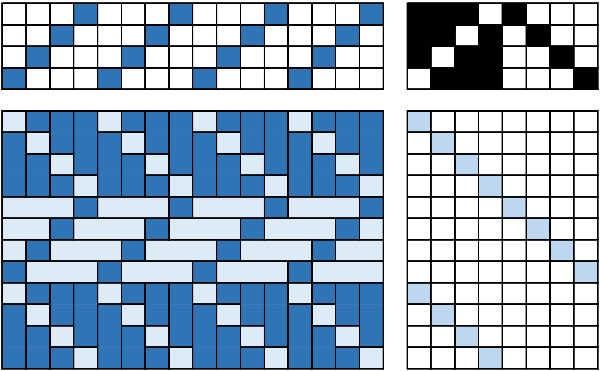
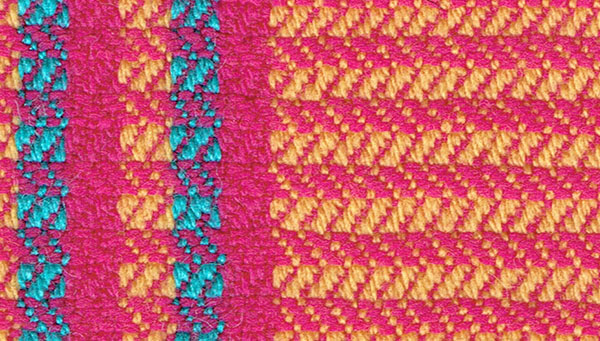
You can then set off weaving your warp-faced twill. Typically this is done by progressing in the opposite direction to your previous section, which enhances the three-dimensional effect, but again there is no need to do this. The example below shows a mix: I have changed the twill direction after each 8-pick block, but kept it the same for up to three of the shorter 4-pick blocks.
An interesting alternative is to continue in the same direction but to vary the weft color as you progress.
One of the reasons these methods appeal to me is that they allow me to start with a simple threading and improvise an interesting weave at the loom.
Share tips, start a discussion or ask one of our experts or other students a question.
No Responses to “Create Visual Impact Where Two Twills Meet”