
Elastic waistbands are a go-to for comfort, but just like there are different types of elastic, there are different kinds of elastic waistbands you can sew.
There are two general categories: cut-on casings and separate stitched-on casing waistbands. The casing is the “tunnel” that holds elastic in the sewn garment, whereas cut-on waistbands are folded down and topstitched from the right side.
This topstitching can be just along the bottom of the turned down edge for a single length of elastic, or you can stitch multiple rows and thread smaller lengths of elastic through each tunnel. You can also forgo the top stitching and stitch the elastic directly to the edge of your pants, then turn it inside and secure it in the side seams for an invisible look.
Whichever method you choose, here are the ways to sew every common type of elastic waistband.
1. Topstitched Casing
1. Finish the raw edge of your skirt or pants, or press it under ¼”.
2. Cut a piece of elastic to comfortably fit around your waist, plus 1″.
3. Fold down the top skirt or pant edge the width of the elastic, plus ⅛” – ¼” (slightly more if you plan to topstitch the upper edge of the casing as well).
4. If desired, topstitch the upper edge very close to the top edge fold of the garment.
5. Topstitch the lower edge of the waistline, leaving an opening about 2″.
6. Insert the elastic through the opening.
7. Overlap one edge of the elastic over the remaining end, and stitch a square or several rows of zigzag stitching to secure the elastic.
8. Complete the topstitching, being careful to avoid stitching through the elastic.
2. Casing With Several Rows of Topstitching
For this type of casing, you need to use elastic that is designed to be stitched on, or several pieces of narrower elastic inserted individually into each casing.
If you are using the wider elastic, follow the steps above, and after closing up the casing, add additional rows of topstitching.
If you plan to use narrower elastic, also follow the steps above and insert elastic through each channel and proceed with securing each elastic and closing each casing.
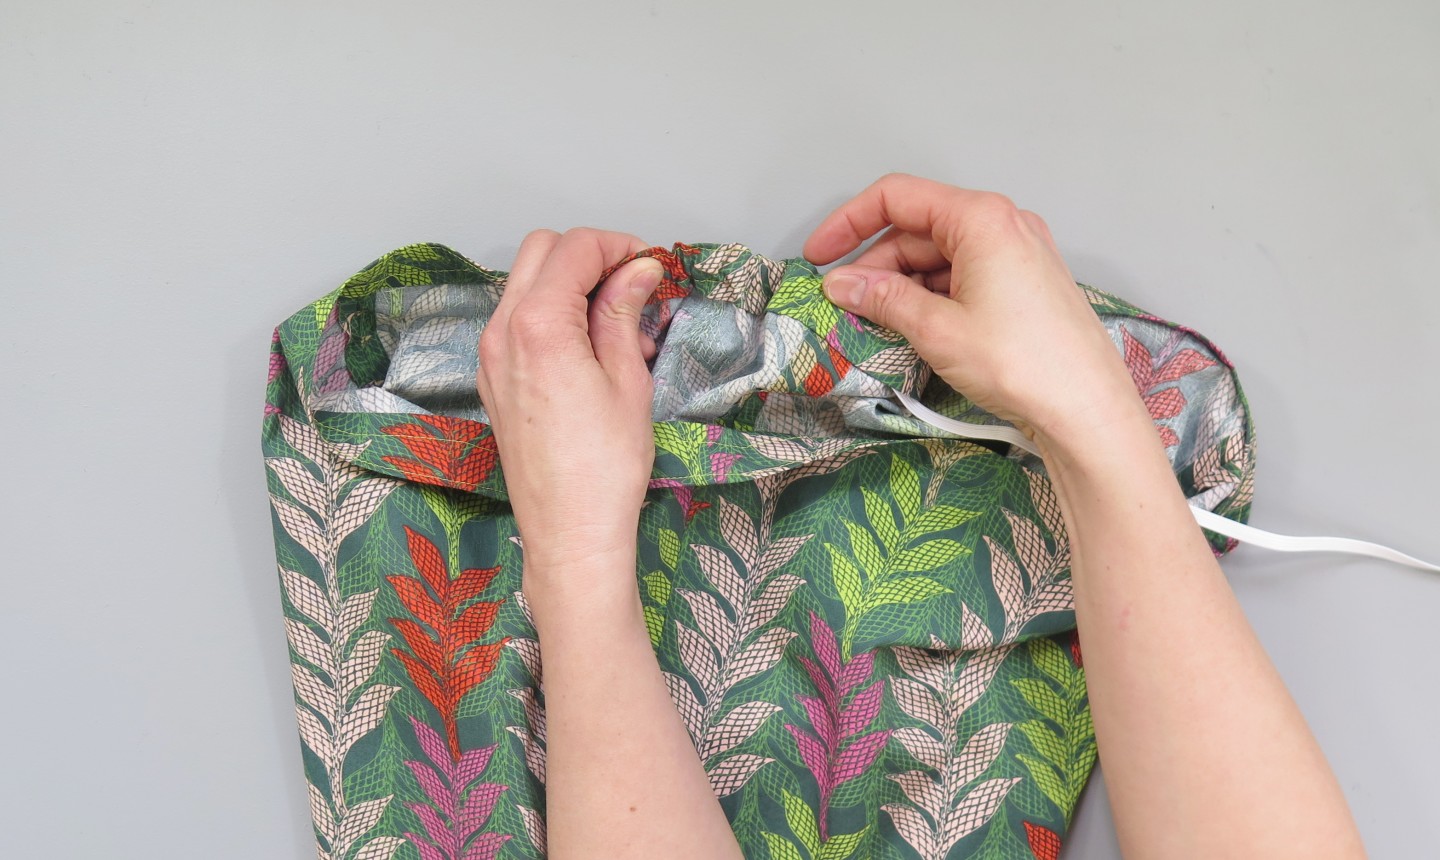
3. Casing With Elastic and Tie Cords
1. Finish the raw edge of your skirt or pants, or press it under ¼”.
2. Make two ties from garment fabric or use purchased cording or trims.
3. Cut a piece of elastic that’s about ¾ of the total waist measurement.
4. Stitch one tie to each end of elastic.
5. Stabilize the buttonhole area of the skirt or pants, and make two buttonholes on the front of the garment.
6. Fold down the casing and topstitch the entire casing around the waist.
7. Insert the elastic and ties through the buttonholes.
8. If desired, center the elastic in the casing and stitch in the ditch vertically along the side seams to secure the elastic.
4. Invisible Elastic Casing Waistband
1. Sew the side seams of your skirt or pants.
2. Cut a piece of elastic at least 1-2″ smaller than your waist measurement. (This varies by type of elastic.)
3. Butt the ends of the elastic together, and join using a small scrap of fabric, a wide triple zigzag, or a very wide zigzag stitch.
4. Divide your elastic and your garment each into quarters.
5. Pin the elastic to the wrong side of the garment, matching the quarter marks.
6. Using a medium zigzag, stitch the elastic to the wrong side of the garment at the waistline, stretching the elastic to fit the garment.
7. Stitch another row of zigzag stitches at the inner edge of the elastic.
8. Turn the elastic to the inside of the garment, and stitch in the ditch vertically along the side seams to secure the elastic.
5. Attached Waistband With Elastic
This waistband treatment will look the most like a waistband with a zipper, but it is a pull-on style that can work with both knits and woven fabrics. A key to all pull-on styles is ensuring the waist of the garment is large enough to pull over your hips.
1. Cut a piece of elastic the same size as your waist measurement.
2. Overlap one edge of the elastic over the remaining end, and stitch a square or several rows of zigzag stitching to secure the elastic.
3. Finish one edge of your waistband.
4. Pin and stitch the unfinished edge of the waistband to the garment, matching all notches and seams.
5. Divide your elastic and your garment each into quarters.
6. Pin the elastic to the garment seam allowance, matching the quarter marks.
7. Using a medium zigzag, stitch the elastic to the garment, keeping the elastic edge close to the garment stitching line, and stretching the elastic to fit the garment.
8. Fold the edge of the waistband over the elastic, and stitch in the ditch from the right side of the garment in the waist seam.
Very hard for a beginner to follow with a video or diagram. It says ‘ Finish one edge of your waistband’ . What does this mean?
This would be much more helpful to beginners with pictures.