
Photos and artwork via CakeSpy
Creating underwater patterns and textures with paint is easy, gratifying, and fun to do. It is also appropriate for a number of different types of media. While watercolor is used in the examples below, these methods can just as easily be used with acrylic or gouache, or even with colored pencil or drawing media as well.
With these patterns, you can explore and create underwater textures!
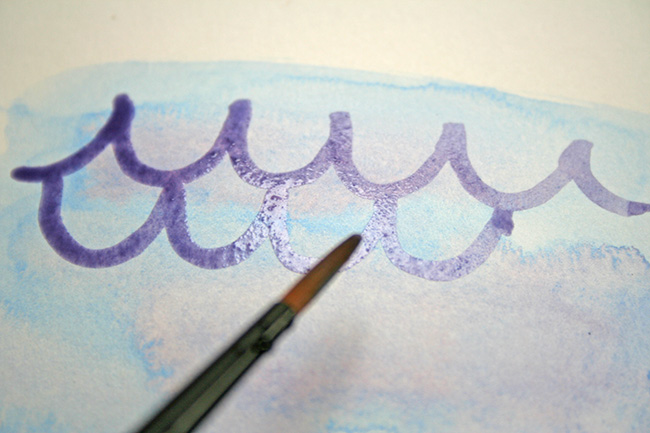
1. Choppy water
If you want a water texture that has a little bit more choppiness, it’s as simple as scalloped lines. Really!Step 1:
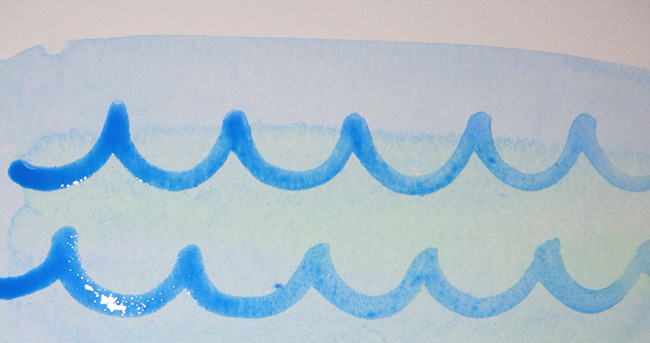 Paint a scalloped line or two.
Step 2:
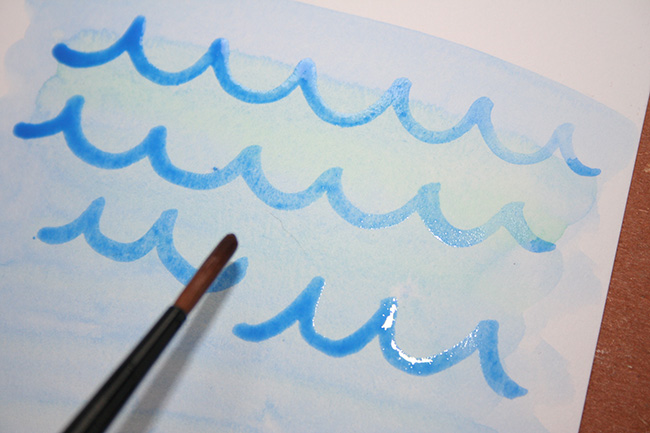 Continue to create even rows of scalloped lines with some negative space in between the rows, or break up the lines and create them in irregular formations to break up the space.
2. Calm waves
Want to paint a groovy wave pattern? Just paint some wavy lines.Step 1:
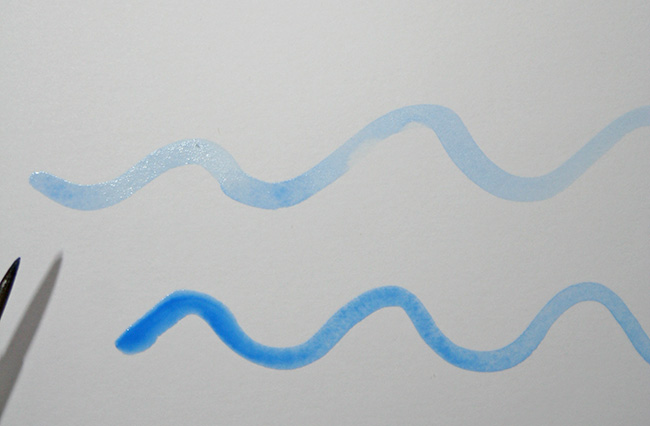 Paint a wavy line or two.
Step 2:
Continue to create even rows of wavy lines with some negative space in between the rows, or break up the lines and create them in irregular formations to break up the space. Experiment with the size of the waves or the width of the lines to customize this simple pattern!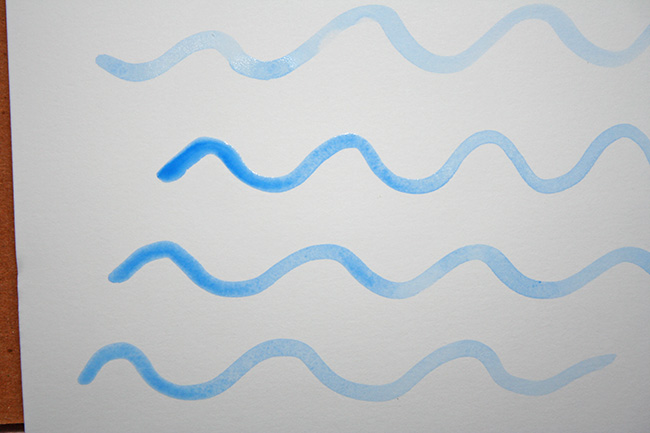 Note: With both of the above patterns, you can easily make them unique by playing with a background color, the thickness of lines or even the colors you use to paint. Explore and see how to make these simple patterns perfect for your project!
3. Seaweed
Creating a seaweed pattern makes for a great backdrop for an undersea painting, and it’s incredibly easy to do.Step 1:
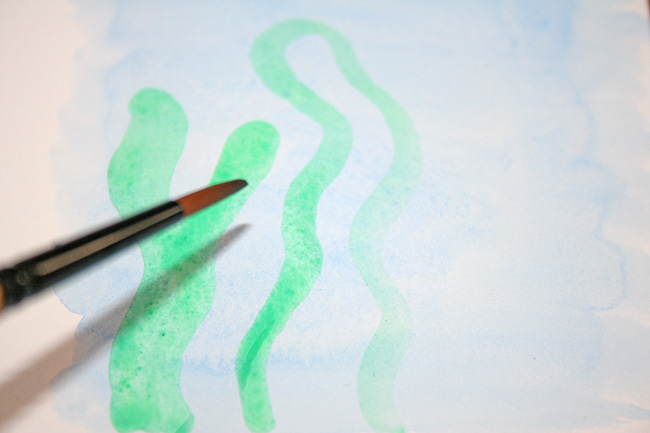 Paint a few wavy, freeform upright shapes; almost as if you’re painting a very wavy flower stems but not putting flowers on top.
Step 2:
Repeat, making wavy seaweed shapes of different widths and heights to create visual interest. Some may have multiple tendrils coming off of the same stalk.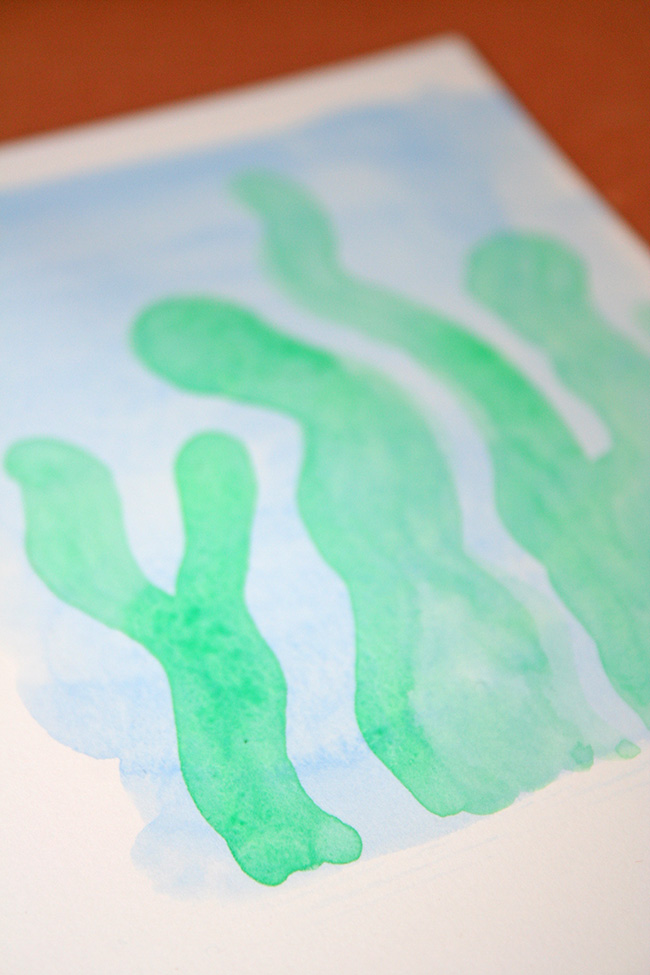
4. Coral
This simple coral shape is similar to making a seaweed shape, but with a few distinctions.Step 1:
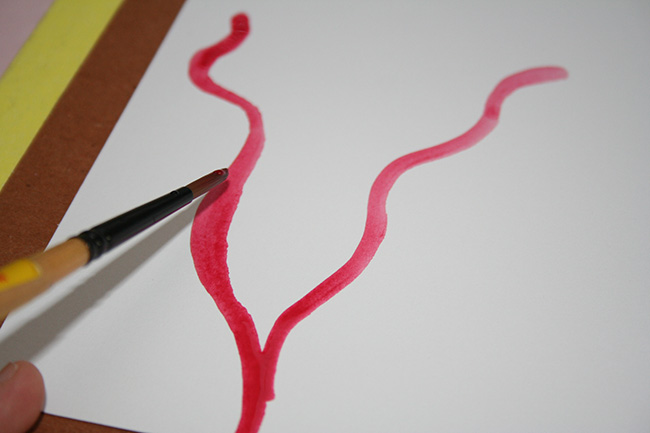 Start similarly to how you did making seaweed, by painting a few freeform stalks with rounded edges. In the case of coral, you can feel free to make the stalks more rounded. I prefer them thinner, but choose your own adventure!
Step 2:
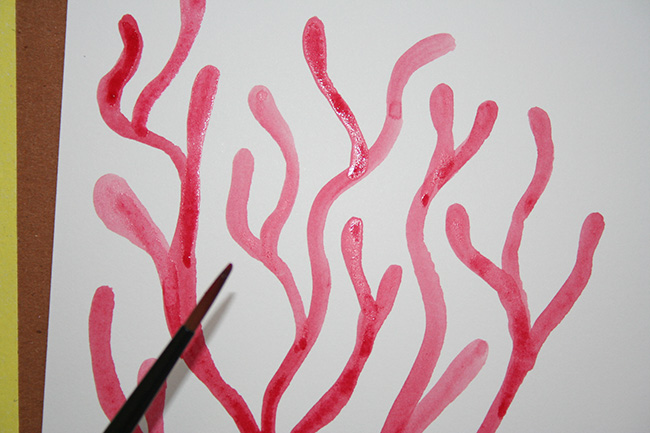 From the initial stalk, allow several other free form stalks with rounded edges to branch off of it. Make some shorter and some longer to create an interesting visual.
Step 3:
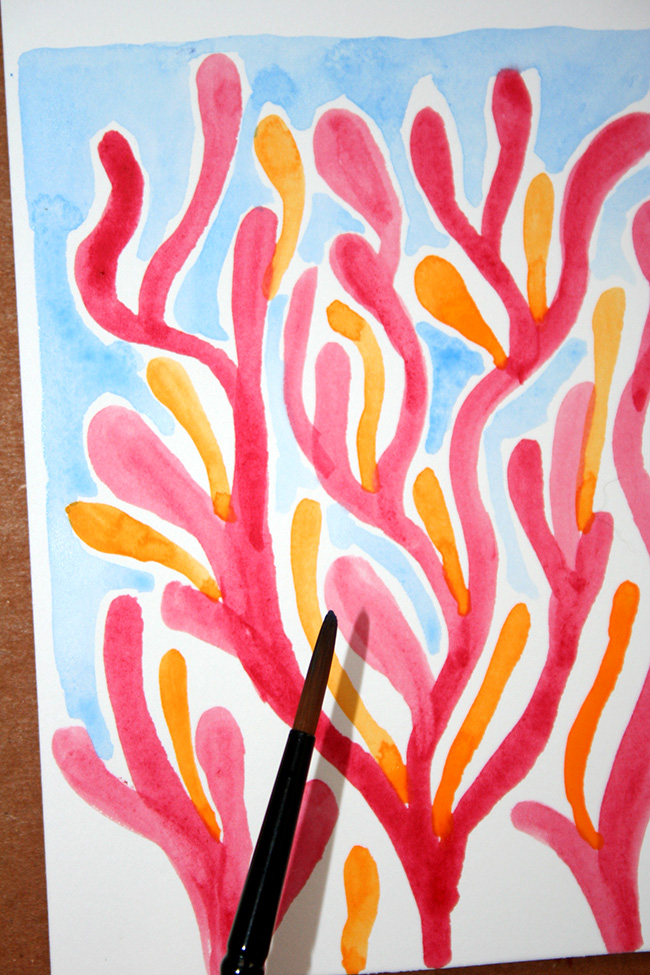 If desired, add a background color or additional colors to your coral pattern. Pretty!
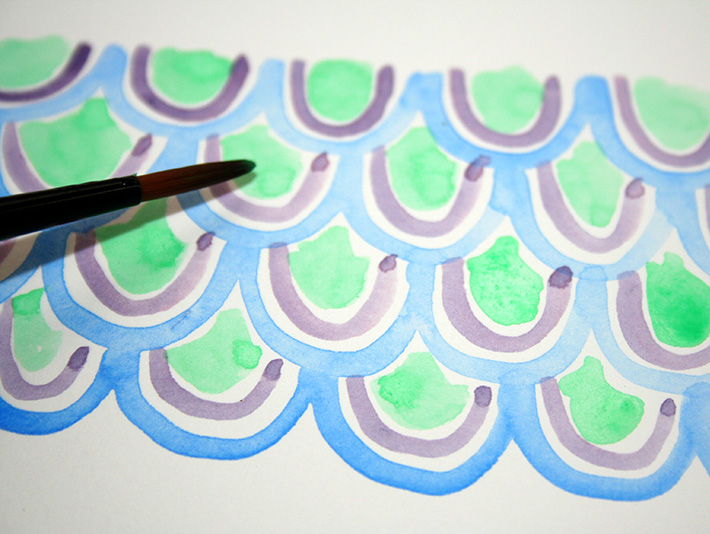
5. Scales
Whether you’re painting fish or mermaids, it’s handy to know how to paint scales.Step 1:
Create a scalloped line, just as you did to create choppy waves above.Step 2:
 Create a second scalloped line directly below the first, but stagger it so that the scallops have an alternating pattern.
Step 3:
Continue creating rows as detailed above. Adjust as you see fit! I like to fill in the lines with layers of color, or to use a background color below the scales to create more texture.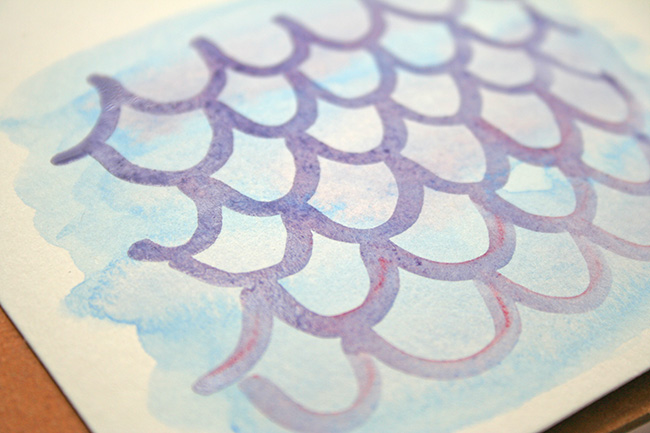
6. Starfish
I find this to be one of the easiest yet most gratifying underwater patterns to create. Do it like so:Step 1:
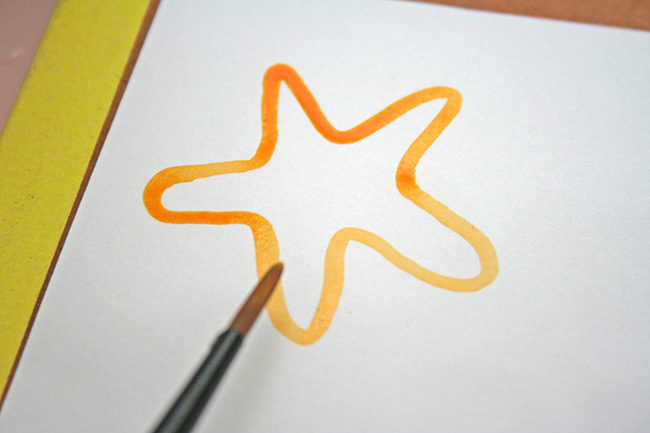 Paint a languid, rounded-edge star. Don’t worry about it being perfectly symmetrical. You may choose to leave it as an outline or to fill it in with paint. Just like that, you have a starfish!
Step 2:
You can add as many as you like to create a pattern. I like to use a few different colors and create the starfish in a few different sizes to create a more visually interesting pattern.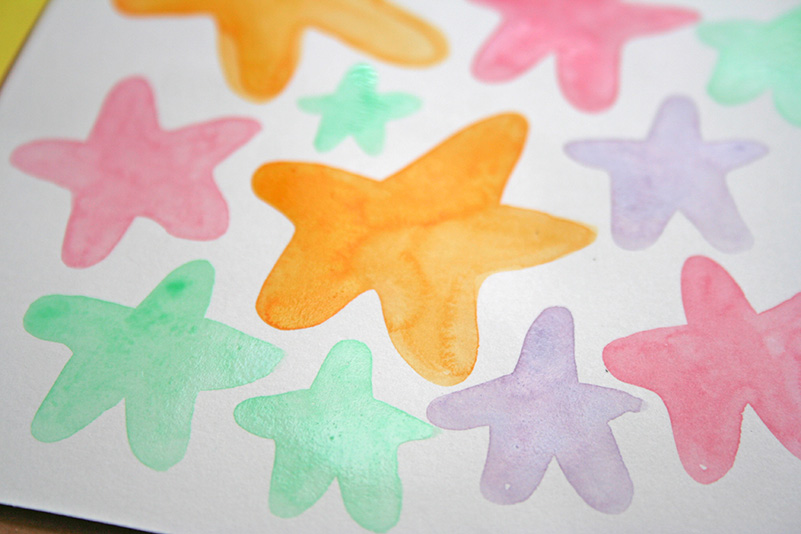
7. Sand dollars
Sand dollars make for a pretty pattern and build upon the same shape you used to create a starfish above. Here’s how to do it:Step 1:
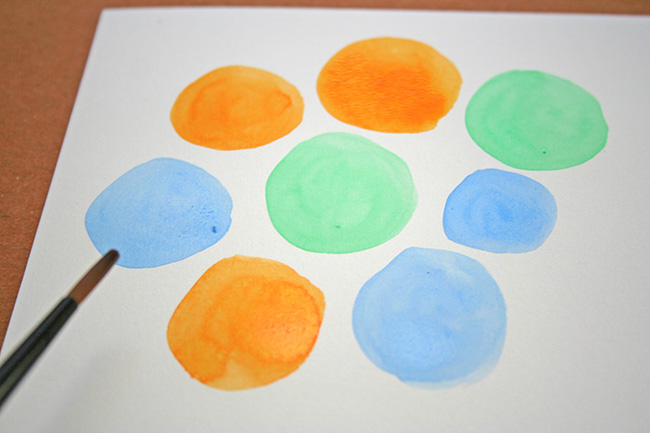 Paint a series of circles in whatever sizes and colors you’d like.
Set 2:
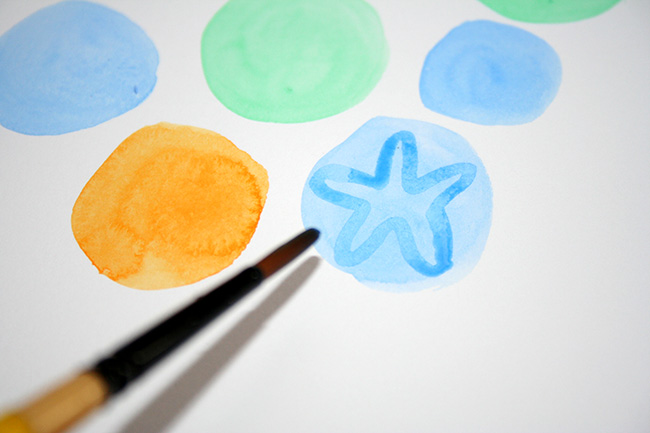 Within each circle, paint an outline of a starfish shape as detailed above.
Step 3:
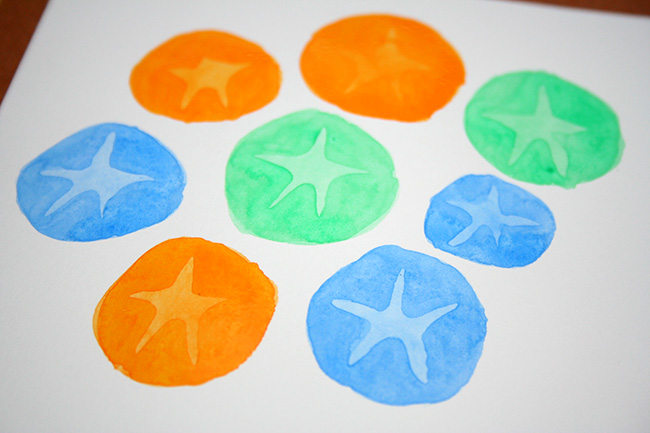 Paint the space outside of the starfish shape with a second coat of paint, so that the star shape is left slightly lighter than the rest of the sand dollar. Continue until you’ve finished all of the sand dollars.
Share tips, start a discussion or ask one of our experts or other students a question.
No Responses to “How to Paint 7 Easy Underwater Textures & Patterns”