
Do you like to make small boxes or picture frames with mitered corners? Have you tried to cut difficult bevels on a table saw?
Earlier this week, I showed you how to make a jig for cutting miters and bevels on the table saw. In this post, I’ll describe how to use the jig to make a box with mitered corners. To make things interesting, I will also join the bottom of the box to the sides with bevels. Well, bevels and miters. To establish some terms, a miter is an angled cut at the end of a board while a bevel is an angled cut on the edge of a board.
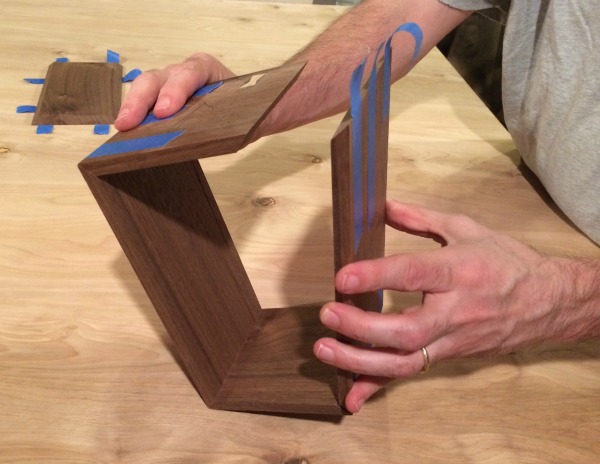
I used a jig for my table saw to cut perfect miters and bevels for this walnut box.
I’m going to make this inaugural box a rectangle. The long sides and bottom are the same length. The two short sides are squares, so their width and length are the same as the height of the long sides. For simplicity’s sake, I’m going to make my box 4” tall. I had a leftover piece of walnut a little less than ½” thick and long enough for all the parts. It had a crack, so I took that as an opportunity to make oak butterfly key inlays. (I’ll talk about those in a future post.)
Figure continuity
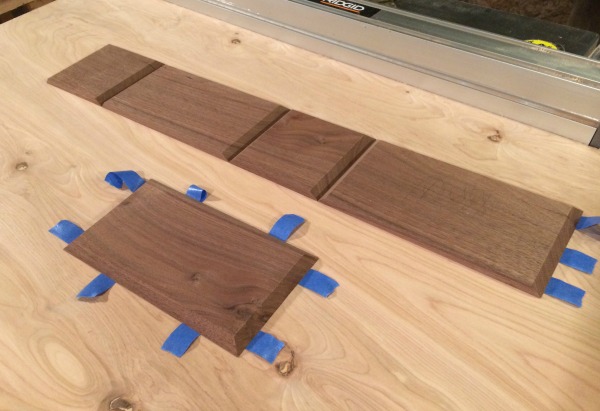
I love the figure of this walnut, so I want it to continue around the box. To achieve that effect, start with a board a bit wider than 4” and long enough for all four sides and the bottom. Before crosscutting the pieces to length, mark them to preserve their positions relative to each other. While you are marking them, draw an arrow pointing upward on all the pieces except the bottom.
This will help keep them oriented while they are being cut and will also indicate the outside face of each piece. Now crosscut them (at 90 degrees) a bit longer than the final dimension so that you end up with three pieces: one piece for the bottom and two others that each contain a long side and an adjacent short side.
Establishing the width
With the blade at 45 degrees and the jig on the table, set the table saw fence to cut the bevels on one edge of all the sides at the desired width (4” in my case). The edge of the rectangular fence should be 4” from where the board will touch the blade. The fence will not need to be adjusted again.
From here on, make sure the outside face of the pieces are facing up. Put the edge of one of the pieces against the small rectangle and move it down so that it butts against the hardwood fence. Turn the stop block on end and clamp it to the fence, making a solid place for the boards to register against. Make a cut on one long edge of all three pieces. Since the bottom needs bevels on all sides, rotate that piece 180 degrees, hold it against the jig and cut the bevel parallel to the first bevel. To avoid confusion, I mark an X on the edges that have already been cut.
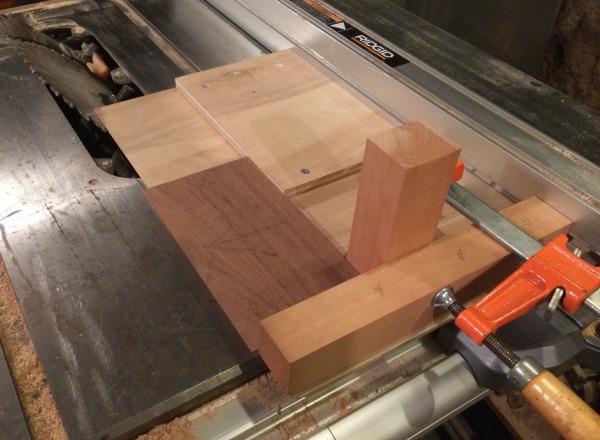
Using the jig to cut a bevel on the edge of this piece of walnut
Cutting to length
Now it’s time to cut the sides, ends and bottom to length. Remove the stop block from the jig. With the boards held against the hardwood fence, make a cut on both ends of all three pieces, remembering to keep the outside facing up. Now use the stop block to set the length for the bottom and two long side pieces. Clamp the stop block to the hardwood fence. Position the miter you’ve already cut against the stop block to cut the opposite end. After the three pieces have been cut in this manner, the bottom and two sides are finished so they can be marked and set aside.
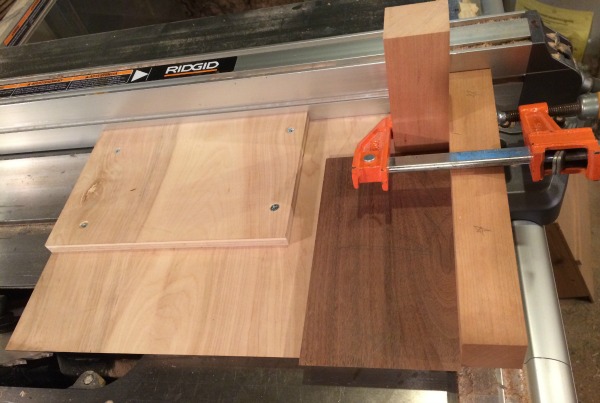
Crosscutting miters is easy with this table saw jig.
To cut the two short sides to length, put the stop block on end in the same place as earlier. Take a long, straight piece of wood (the mitered board used to set the table saw angle works perfectly) and put it against the rectangle fence so that it butts against the hardwood fence. Position the stop block snug against the edge and clamp it in place. Put the already cut miter of the small sides against the stop block and cut them both to length. With just a few cuts, all the parts are now at their final dimensions. Before gluing them up, I like to sand the inside faces of all the parts. To control glue squeeze out (as I discussed in my post on glue-ups), tape the inside edges of all the pieces.
Use tape instead of clamps
For gluing up small projects with bevels and miters, I like to use painter’s tape, which provides more than enough clamping pressure and makes assembly easy. Clamps would be difficult because the miters would slide against each other. Lay out the boards with the inside faces down on a flat surface protected from glue, making sure the pieces are in the correct order for grain continuity.
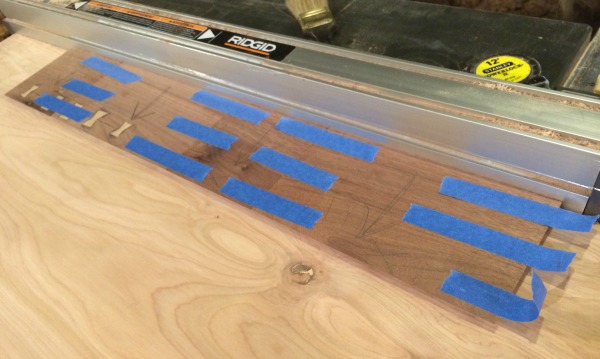
Box parts arranged with continuous grain
Line the four pieces (two sides and two ends) against a straight edge such as a table saw fence. Rip off 10 or 12 pieces of tape about 2” long and have them ready to go. Touch the tips of the miters together and connect each joint with three pieces of tape. For the bottom, which should also be taped along the inside edge to avoid problems with glue, turn it with the inside facing down and apply tape perpendicular to the edge on all sides.
Box parts taped up and ready to be glued
Wrap it up
Apply glue to the joints and on the ends, then wrap the sides together to form a rectangle. Tape the remaining joint. To attach the bottom, flip it over and apply glue to the miter and place it on the box, taping it down when everything is lined up. Check for squareness and reinforce with more tape. Once the glue dries, you’ll have a strong box. A standard miter joint is plenty strong for most applications without splines. Add keys only if you want them for decoration. Sand the outside faces, and you’re done.
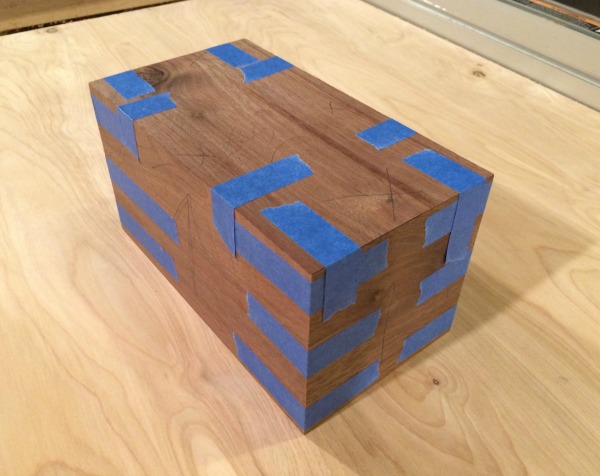
Pieces of painter’s tape serve as clamps to assemble this mitered box.
The great thing about this jig is that it requires so little material and comes together quickly and easily. You can make it in different sizes for different projects. As you will see, the joints will come together with no gaps. I hope you enjoy using this jig as much as I enjoyed designing it.
Share tips, start a discussion or ask one of our experts or other students a question.
No Responses to “Making a Jig for Cutting Miters and Bevels: Part 2”