
What exactly is washi tape and what can you do with it? Washi tape is basically patterned paper tape. It is widely used to quickly and easily add decorative touches to cards, scrapbook pages and much more. It is available in many patterns and colors as well as a variety of widths. It is fairly low-tack, can be repositioned on many surfaces and tears easily.

Following are several ideas for using washi tape in card making, and I’ve included a few of my favorite non-card making uses as well.
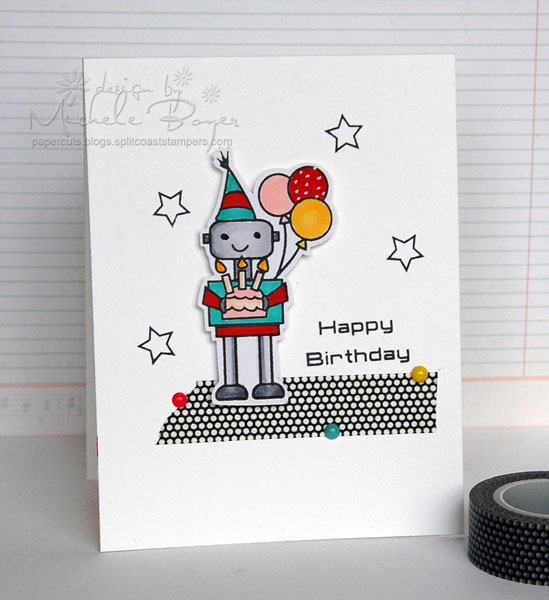
1. Ground an image
Use a partial strip of washi tape to provide simple grounding for a die-cut image. The cute robot is raised on clear foam squares to add a bit of dimension.
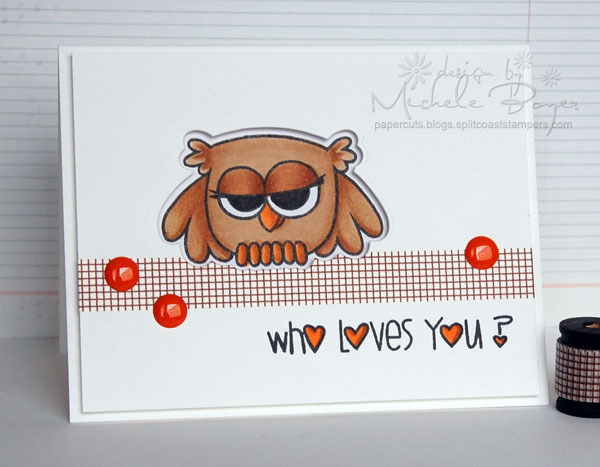
2. Add a stripe
On the sample above, I adhered a strip of washi tape across the width of a cardstock block then die-cut the owl shape, partially cutting through the top edge of the tape. The image was stamped onto a separate piece of cardstock, colored and adhered to the back of the washi tape panel using foam tape, centering the image in the opening. To adhere the completed panel to a card front, apply additional foam tape around the edges of the cardstock block and adhere to base.
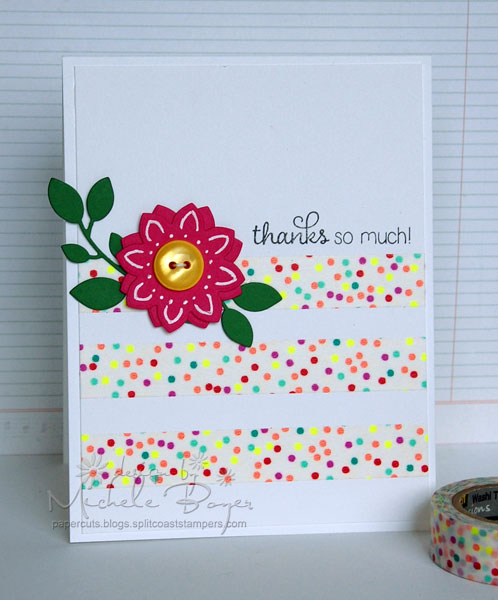
3. Multiple stripes
Use washi tape to create a stripe pattern. Tape cardstock to grid paper. Use grid lines for straight applications and equal spacing.
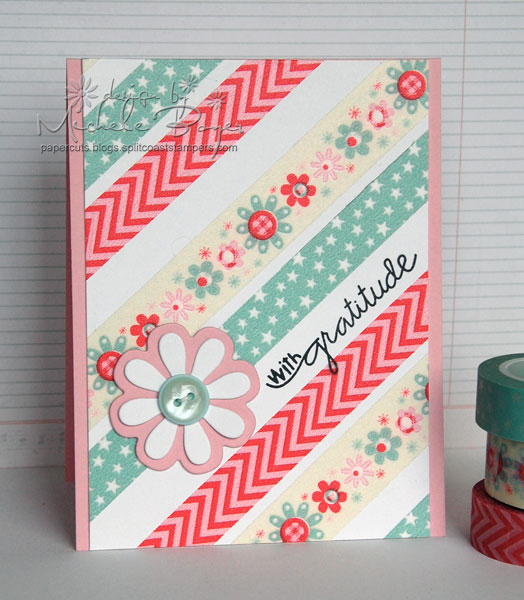
4. Stripes on the diagonal
To create straight lines and equal spacing on the diagonal, choose the desired angle of stripes, mark with a pencil then tape tilted cardstock to grid paper so that the pencil marks appear horizontally aligned with horizontal lines on grid. I started adhering tape at the top, stamped the sentiment then continued with the stripes. I used a marker to trace over the covered portion of the letter g.
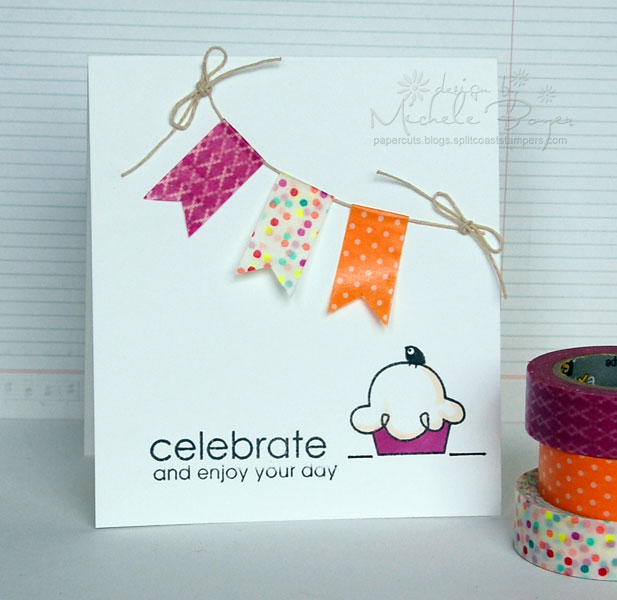
5. Quick and easy washi banner
To create a washi banner, lay hemp cord across a length of washi tape then fold tape in half over the string. Trim ends to flag shape.

6. Patterned pieces
There are two ways to create the appearance of patterned pieces. On my sample above, I adhered strips of washi tape to a block of printer paper. The balloon shape is die-cut from the card front with the washi tape showing through the opening. As an alternative option, after adhering strips to printer paper, die-cut the balloon and adhere over the front panel.
To create the side stripes, I adhered small pieces of tape on the diagonal (to match the direction of those on the balloon) and trimmed the ends along the left edge before adhering the stamped/die-cut panel.
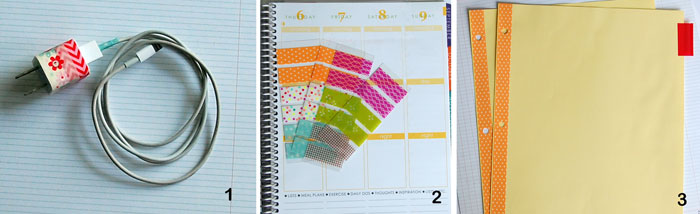
A few other fun ways to use washi tape
- I use washi tape to identify my phone/iPad charger by wrapping tape around the plug as well as the cord.
- To create labels for my planner, I adhere strips of tape to inexpensive (or scraps of) acetate then cut to the width of my planner blocks. I can easily write on each one and the acetate can be reused once labels are removed.
- Use washi tape to decorate/reinforce notebook dividers. After adhering strips of tape, use a hole punch to punch through the tape.
Share tips, start a discussion or ask one of our experts or other students a question.
No Responses to “Trend Alert! 6 Creative Ideas for Washi Tape Cards”