
Drawing and painting hair is notoriously tricky. Sometimes it moves in large sections while other times there are wispy strands. In other words, it’s simultaneously abstract and detailed. Hair can be wild and unpredictable, but this challenge also makes it fun to paint in watercolor.
Watercolor paint is the same way. By adding a little water or a lot of water, you can make your pigment rigid and controlled or free flowing. This makes it poised for painting hair. Using a variety of water and brushes, you can realistically create the look of your favorite hairstyle.
Read on to learn how to paint watercolor hair.
Supplies you’ll need:
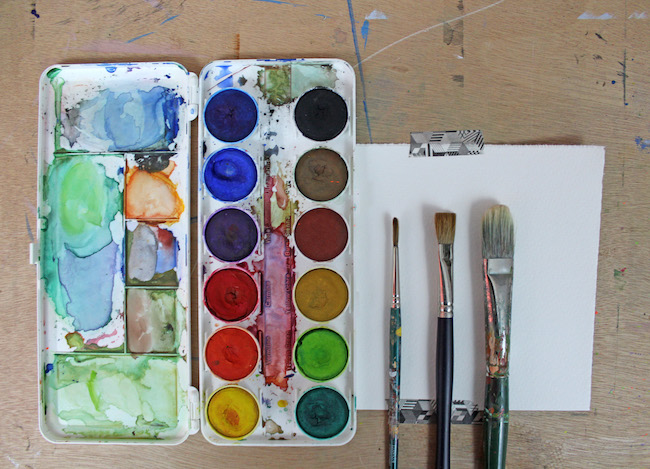
- Watercolor paper. There are three types of paper to choose from: hotpress, coldpress, and rough. Hotpress is a smooth, hard surface. Coldpress has a semi-rough surface and the most versatile. Rough is, well, rough, and best for washes.
- Watercolor paint. I have the traditional tray of watercolor pigments, but it is also sold in tubes.
- Watercolor brushes. Grab two or three types of brushes — one that’ll be use for washes in big areas as well as those for the finer details.
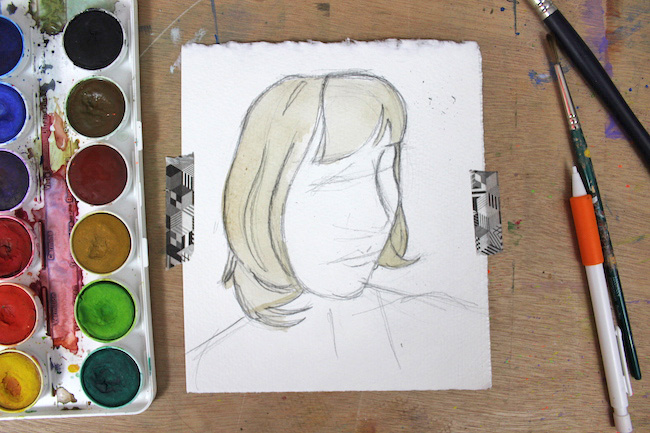
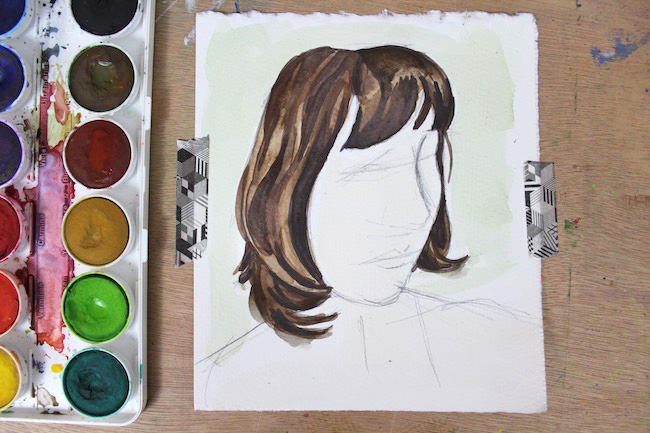
Step 1: Draw the hair silhouette (don’t worry about the face)
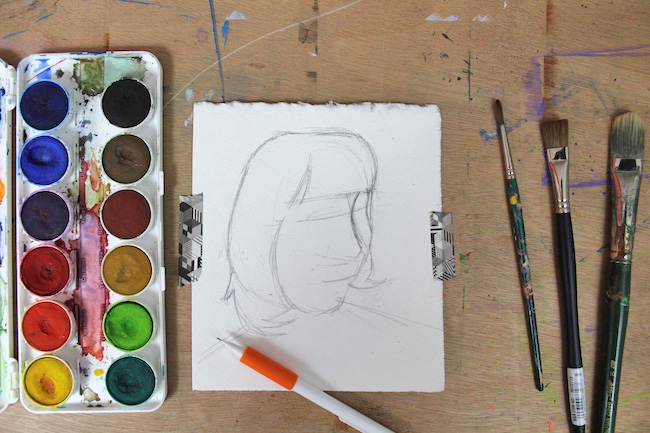
Since the focus of this painting is just the hair, I’m starting by just drawing a general shape for the head and neck. Feel free to get as detailed as you like with this part of your painting, but don’t worry too much about facial features. We’re here for the hair!
Using a reference — either yourself or a reference photo you own the rights to — draw the general shape of the hair. Think about it like a silhouette. What kind of shape does that make?
Step 2: Draw your guiding lines
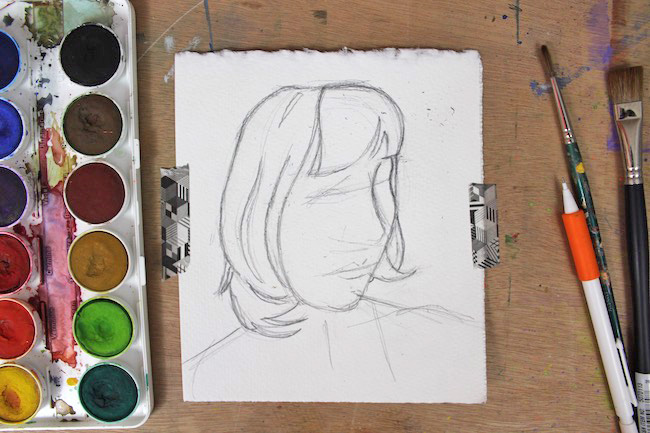
After you’ve got the shape of the hair drawn, look for several defining areas of the hair. Notice where there are big shifts in texture and direction, or look for layers that fall down the head. Draw those areas into the silhouette to give it more definition.
Once you’ve got these parts mapped, get even more detailed. If there are small sections of hair sticking out or especially curly, draw those. You’ll paint them later.
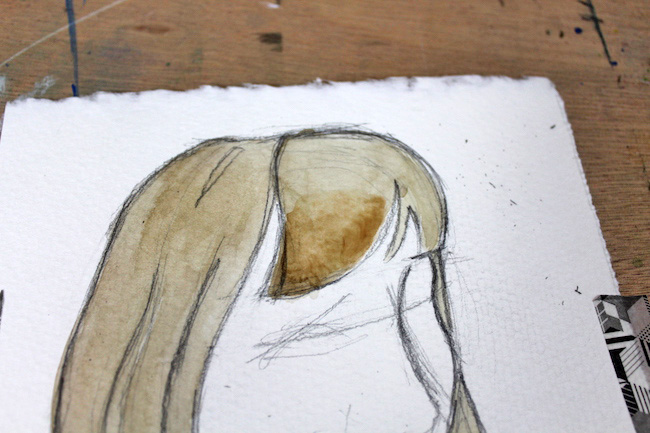
Step 3: Paint the first layer of hair color
Now it’s time to pigment to paper. Start with your largest brush. Begin mixing your paint and adding a lot of water to it — essentially, a light wash. If you’re already familiar with watercolor painting, you know you can’t go too dark too quickly. (In this way, watercolor paint is unforgiving.)
Step 4: Start defining sections of hair
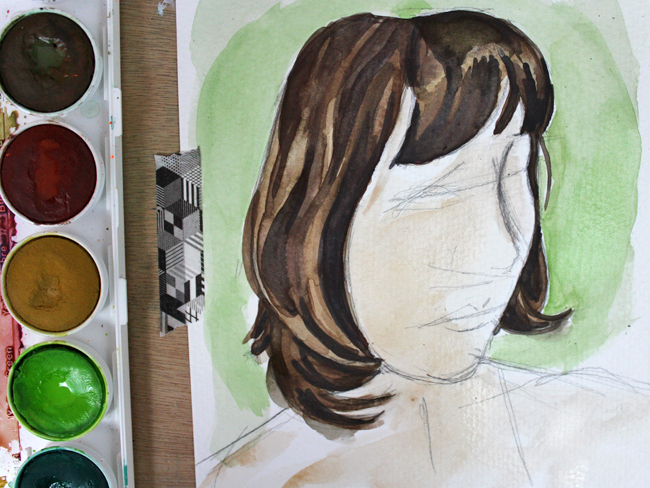
Once your first layer of pigment has dried, it’s time to bring the hair to life. You know those sections of hair that you mapped out earlier? Use those as guidelines for shading. With a mid-sized brush and large-to-medium washes, layer pigment to make some parts of the hair appear lighter and darker. Often, hair is shiny, so use this this glazing technique to depict the reflections of light.
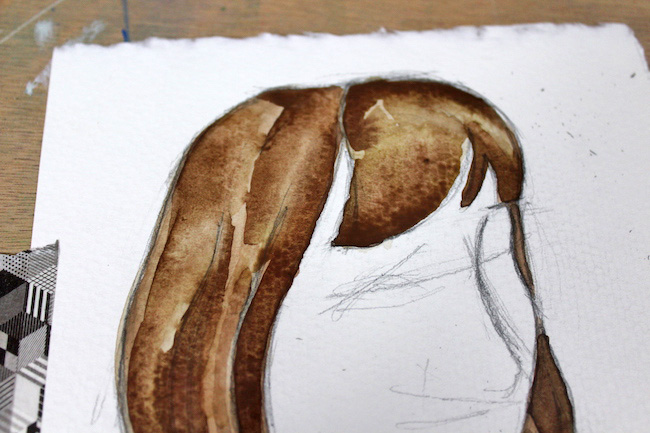
You can vary your approach with this step. If you want to try the wet-on-wet technique, add pigment to the paper while it’s still wet. For crisp lines, wait until the painting dries before adding more paint.
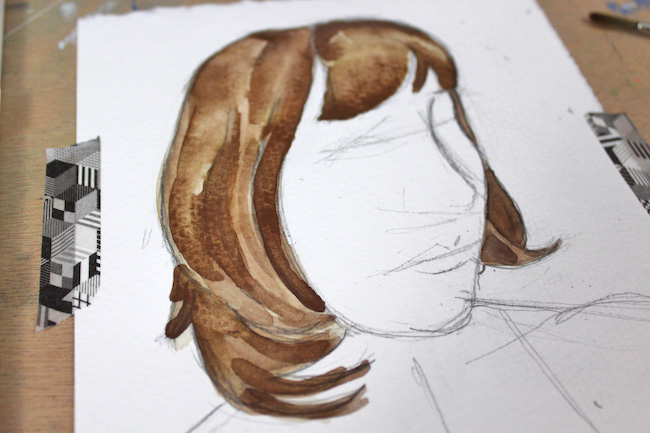
Step 5: Finish with the fine details
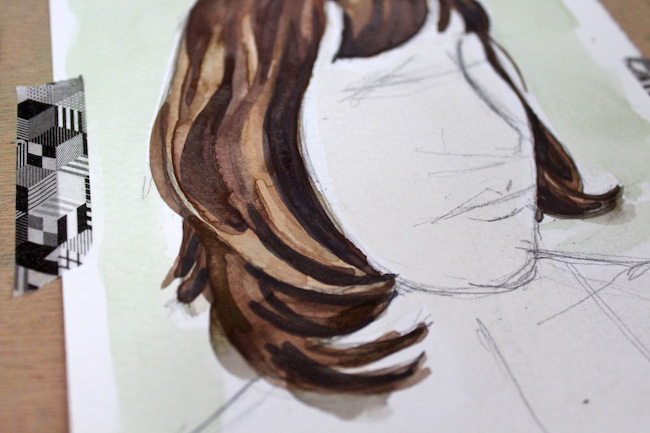
Here’s where a liner brush comes in handy. After everything is dry, use the fine-bristle brush to paint and define a few key areas of your artwork. Not individual strands, but small sections of hair. This will add the ultimate definition to your painting and give the feeling that countless strands are layered on top of one another.
But, be very strategic with this last step. If you paint too many fine lines, it will look like your subject has fine, wiry hair. We want to give the impression of a mass of strands rather than just a few left on someone’s head.
Drawing is fun