
First of all, let me extend a huge hello to everyone as I pen my first blog on this amazing site. I am very much looking forward to sharing my artsy knowledge with you!
Today, I am going to take you through the steps of painting a head and shoulders portrait of a short-haired pup. This is going to be a lesson in “how to easily photograph” and “how to creatively paint” your pet successfully with watercolors.
Follow along to learn how to paint artistic watercolor pet portraits.
Start with a photo
First off, you will need a quality photo where there’s plenty of light and reflection in the eyes. The subject should be well lit and have an interested and alert expression on her face.
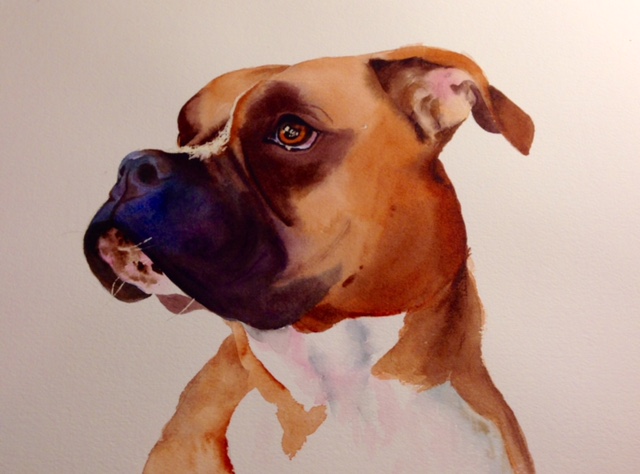
I would like to introduce our model for today. Her name is Roxy Marie and she is quite the glamour girl. Now, your photo shoot doesn’t have to be a cumbersome production. Just grab your camera and some doggie treats, and start snapping until you get a good pose.
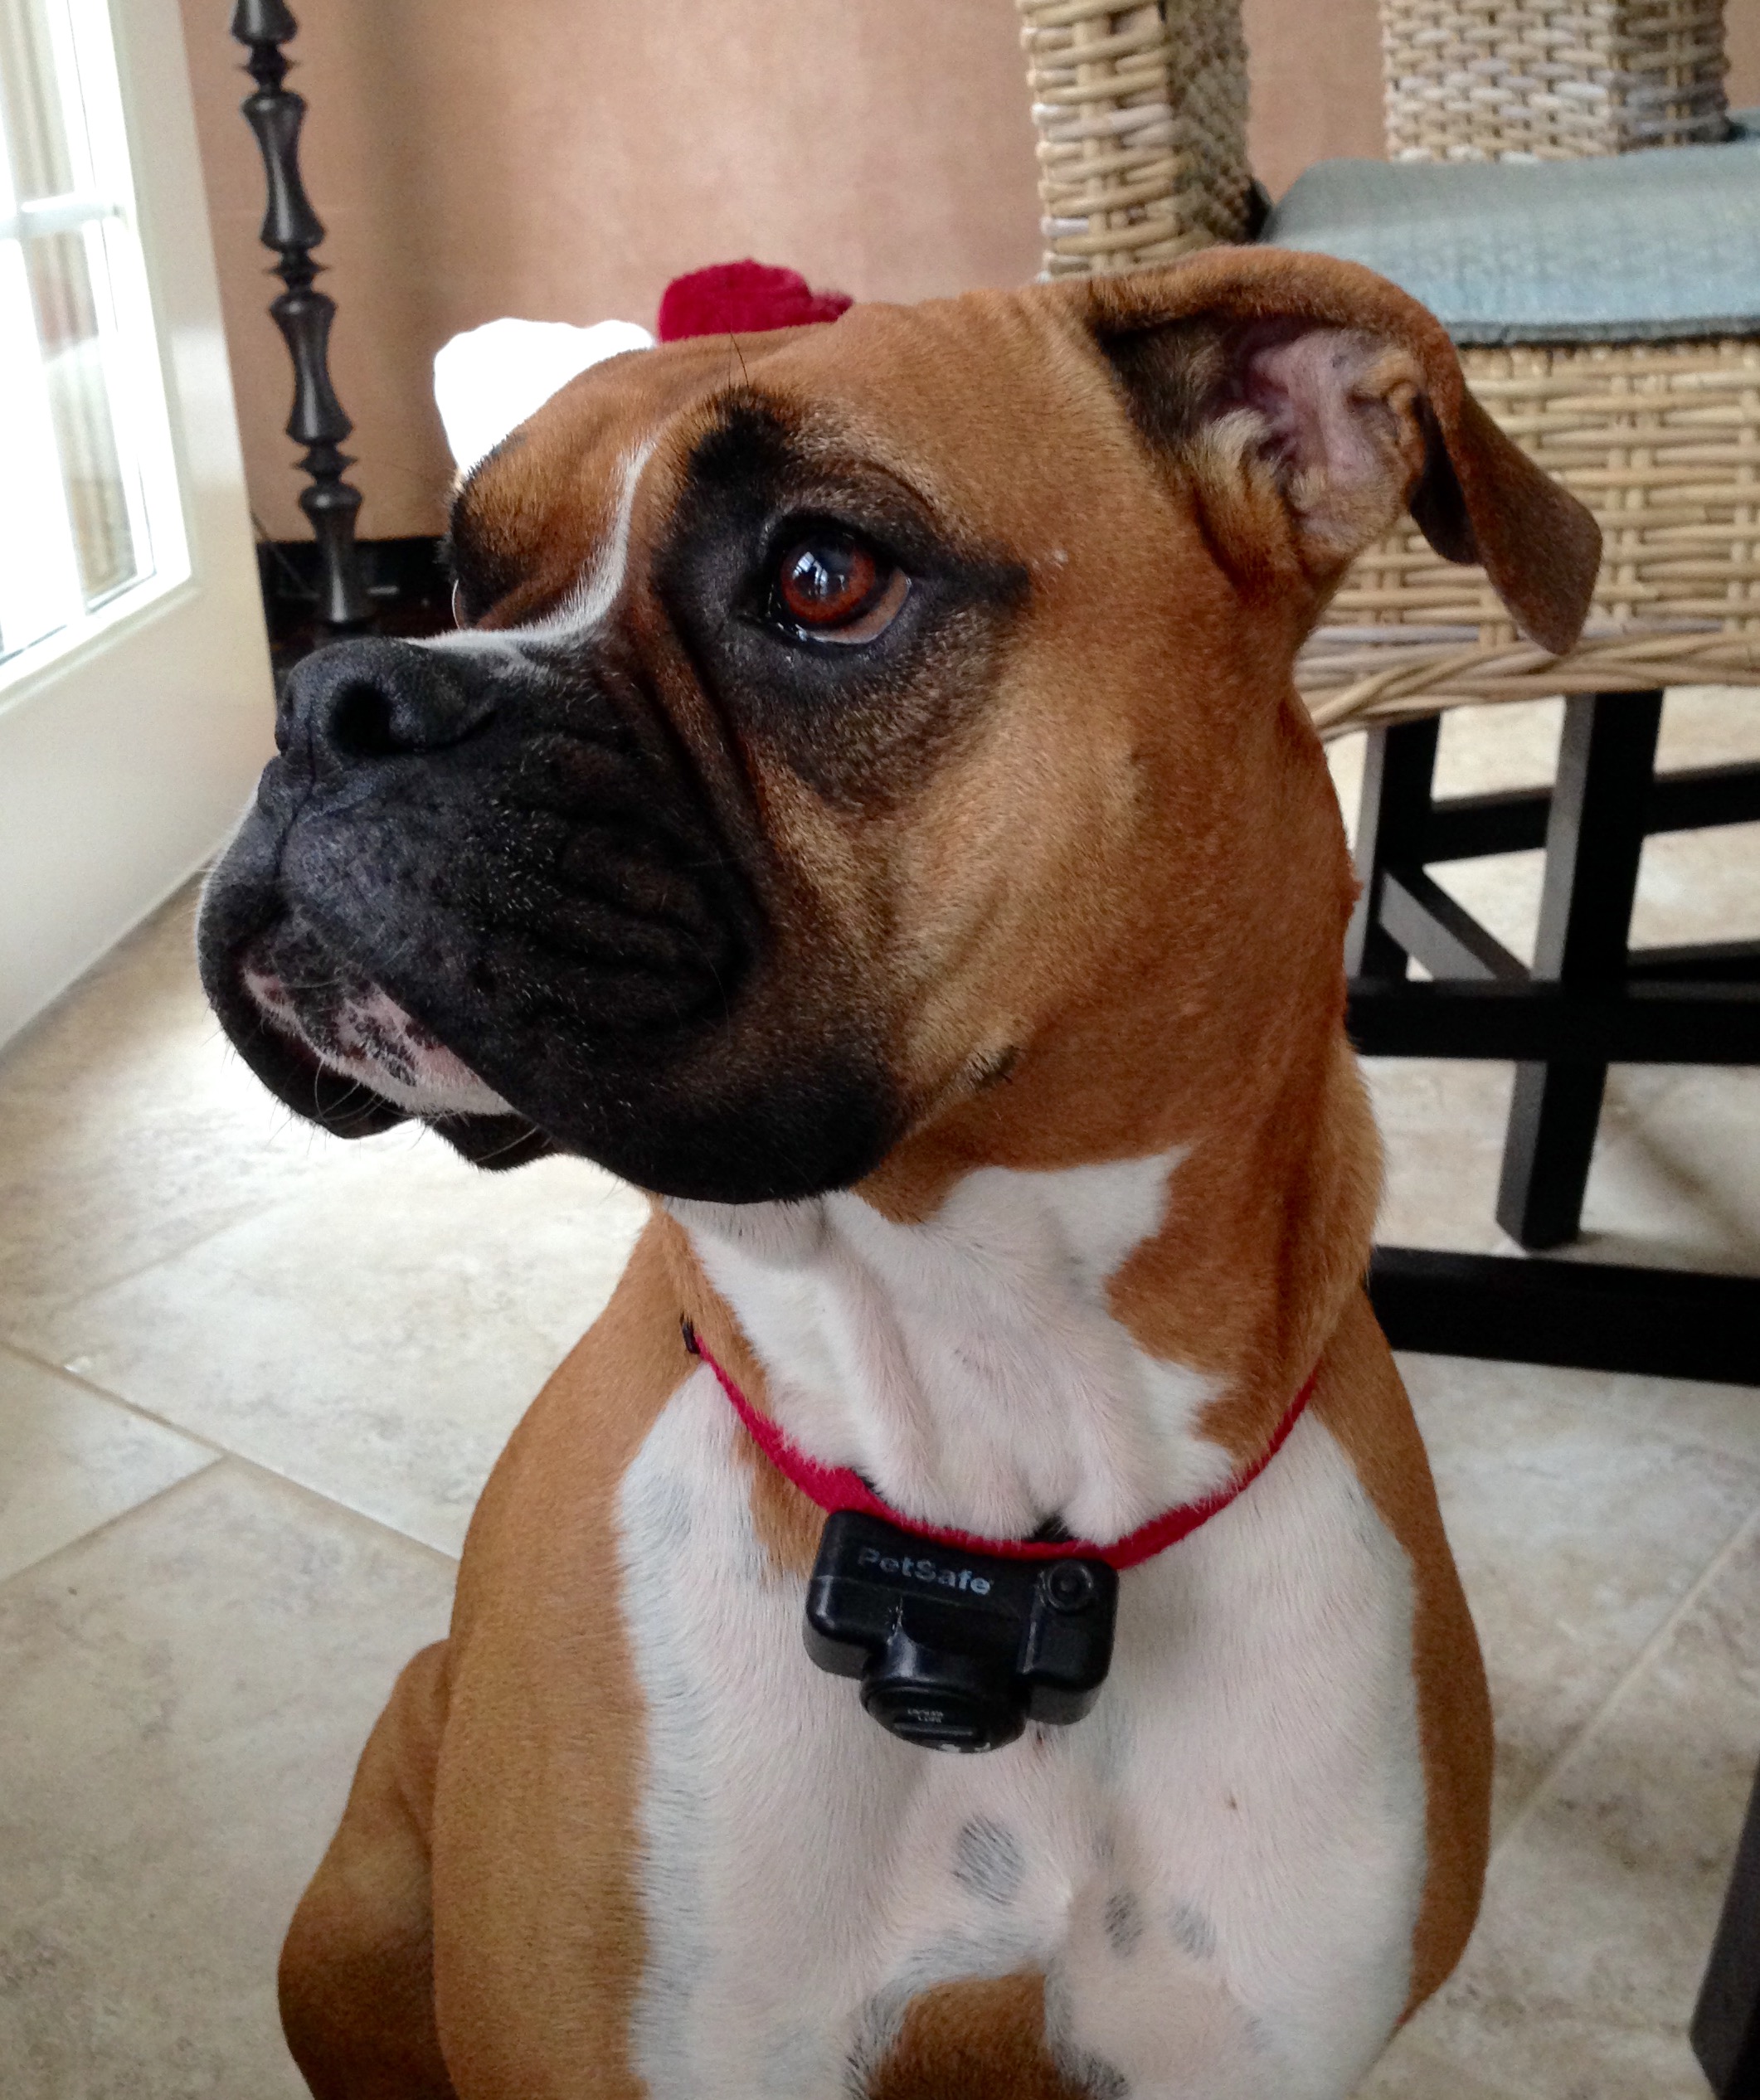
The photo I chose to paint from had a rather distracting background, so I chose to eliminate everything except for the head and shoulders. The reason I chose this photo is that there is a great reflection in the eye, and there are good light and dark contrasts in the ear and the mouth that I know will give lovely depth to the painting. Roxy’s pose is relaxed and the light on the eye and nose is clearly defined. Many canines have dark muzzles, so if you can get a photo where the light clearly defines the mouth and nostril area, it will assist you greatly with the details.
Start your painting
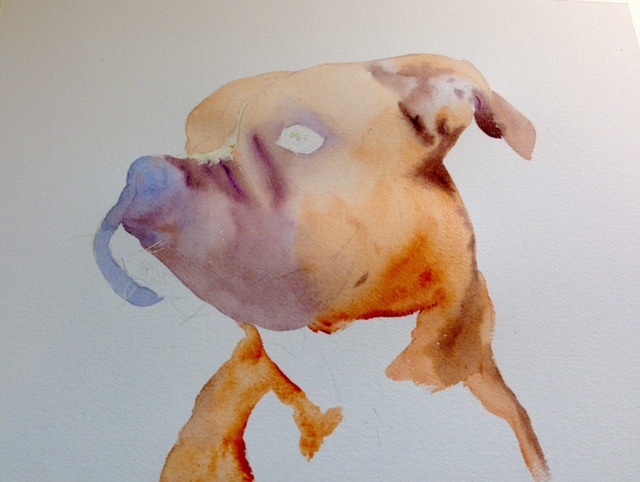
Once I’ve sketched it out to my satisfaction, I carefully put masking fluid on the reflection in the eye, the white on the top of her nose and a couple of little white specs that she has here and there. I did not mask the white of her chin because that will be fairly easy to paint around.
Using a number 12 round, I load the brush with Burnt Sienna and start working my way around the face, laying on a mixture of Van Dyke Brown and Windsor Violet for the darker areas and a French Ultramarine Blue on the nose area. I keep clear of the eye so that I can do small detail work on it later. This is the first wash. If it’s easier for you to wet the entire area of the first wash and then lay on the color so you don’t have hard edges, you may do so.

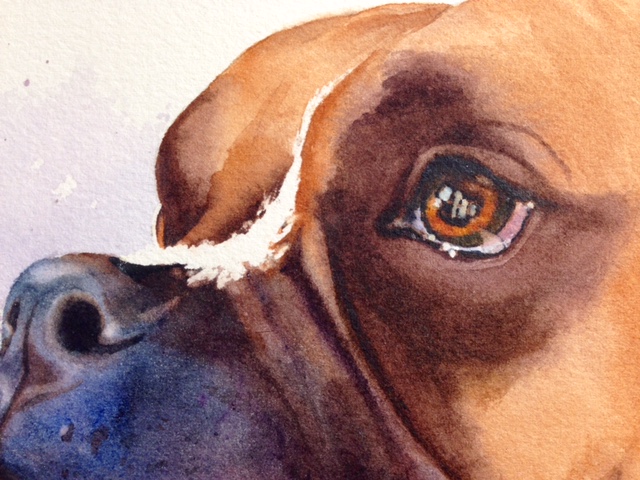
Painting the eyes
After the first wash is completely dry, I wet the entire pupil/iris area of the eye and using Burnt Sienna for the iris and the VanDyke Brown/Windsor Violet mix for the pupil and iris edge, I carefully start the first eye details. Here, I’m using a number 2 round brush for more control. I laid on the burnt sienna first and while it was still wet, I carefully painted on the darker areas with a thicker paint mixture on the brush so that it doesn’t turn the entire eye brown.
When painting small areas like eyes, you’ll need to carefully control the amount of water on your brush with a tissue before you touch the eye. I also lightly painted on some opera rose on the ear and under the chin. For under the chin, I wet the whole area, painting on a light wash of opera rose first and then using a heavier pigment of the brown mixture, I dotted in her spots. The pigment for the spots needs to be thick on the brush so that it doesn’t spread too much.
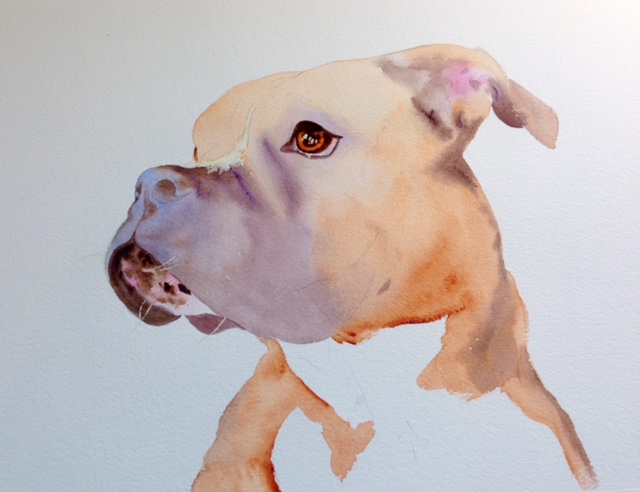
After the eye dried, I started a light wash of the brown mixture on the nose/nostril area, closely studying my photo for the small variations and shapes that will define this area. Once the eye was dry, I painted another wash on it, deepening the colors and defining the shapes more.

Tips for painting watercolor pet portraits
I always encourage my students to spend several minutes simply studying the subject, noticing shapes and shadows and subtle changes in color, before commencing to paint. Then, while you’re painting, you need to be constantly looking at your subject. Make it a habit for your eyes to be consistently glancing between your painting and your subject. This keeps your brain from filling in incorrect details, which our brains LOVE to do for us.
Another wash
I know this is a huge change, but it’s actually only one more wash over the head and neck area. I’m using the same colors as before, just deepening them through layering on the second full wash. I’m using my number 12 brush again, using a decent amount of water on the head area thereby preventing hard lines or blooms. I lay on the wash quickly and while it’s still wet, deepen the darker colors around the eye and nose. What a difference it makes! While it’s still wet, with a heavier Burnt Umber and Windsor Violet pigment on my #2 round brush, I quickly stroked on the “wrinkles” so that they are soft.
Perfecting the details
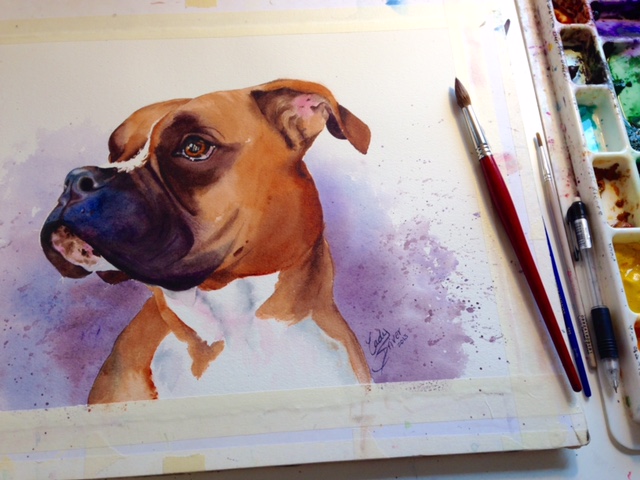
After the last wash COMPLETELY dried (don’t attempt another wash until your paper is really, seriously, without-a-doubt dry), I noticed that the nose was a little too blue for my taste. I washed a light layer of the VanDyke Brown over the nose area. I wanted a hint of blue on the snout, but not too much. I’ve also defined some shapes in the ear, painted on a bit more color on the cheek and neck area and I’ve added just a light touch of Opera Rose to the throat area of her white coat.
I darkened the nostrils a bit more and then, at the end, I just added touches here and there, seeing what she needed in the finishing details.
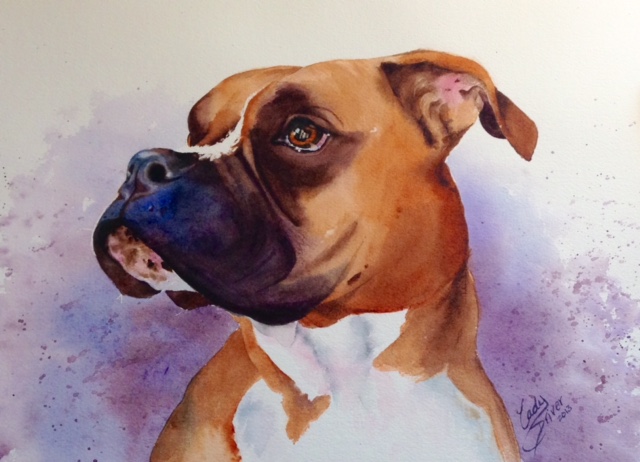
I decided to do a loose wet-on-wet violet background because that color contrasts with the Burnt Sienna in a lovely way. For the finishing touches, I’ve taken off the masking fluid and softened up some lines and spots with clean water, a tissue and my brush. When you splatter, lay tissues on the dog so that the splatter doesn’t get on her.
You now have a completed watercolor pet portrait that will now be a treasured piece of family art. I hope that this has been helpful to you in your watercolor journey! Feel free to ask questions anytime.
Happy painting, my friends!
Cady Driver
I'm new to watercolor painting. Do you suggest I start with a more basic class exploring techniques first? Also, is there a way to transfer the image on the photograph to the canvas? Thanks!