
Portrait painting can seem intimidating. But, as with many things, it’s easier to tackle if we break it down into small steps. So, watercolor painting fans, get ready your brushes and palettes ready.
Learn the basic steps of watercolor portrait painting!
1. Pick your subject and the tools you’ll use.
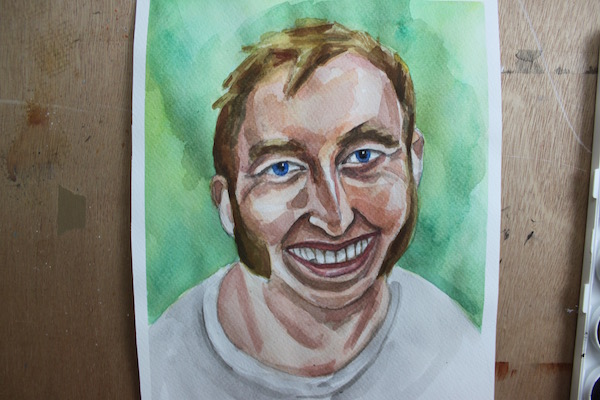
First, select someone that you want to paint. I picked my brother, who I happened to have a clear photo of. It’s well lit and not distorted, which is great for when you’re learning to paint.
I then cut down a sheet of cold-press watercolor paper to fit the format of my portrait. Feel free to use any type of paper you like, but I recommend painting on something that’s specifically for wet media. Often, this type of paper is thicker and won’t buckle as easy to moisture. In addition, I have my favorite set of paints plus a few brushes of varying sizes – one will allow larger washes while the liner is great for the details.
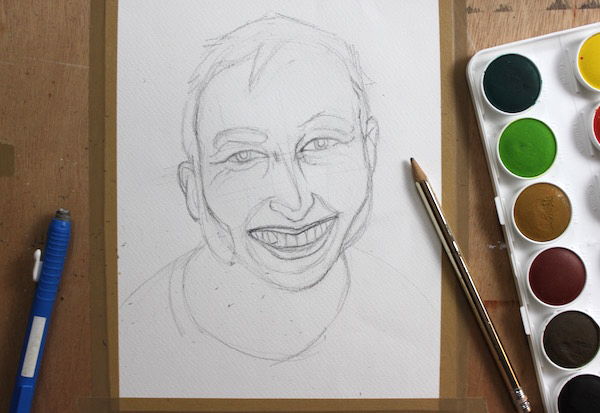
Once you have everything in place, start to draw the portrait in pencil. This part is very important to get right. You want to work out things like facial feature placement, hair and smile before painting. Otherwise, you might have to correct the flaw with paint, which is always harder to do. And, because watercolor is transparent, it might not cover up a mistake.
Tip for drawing: Focus only on the outlines and don’t bother shading. If there are any crease lines or wrinkles, draw them to give you a guide of where to add shadows and keep highlights.
2. Paint your first layer of colors.
The key to working in watercolors is layers. Layers will help you build a rich base of color and have a nice mix of dark and line tones. This builds forms and gives your work a three-dimensional feel.
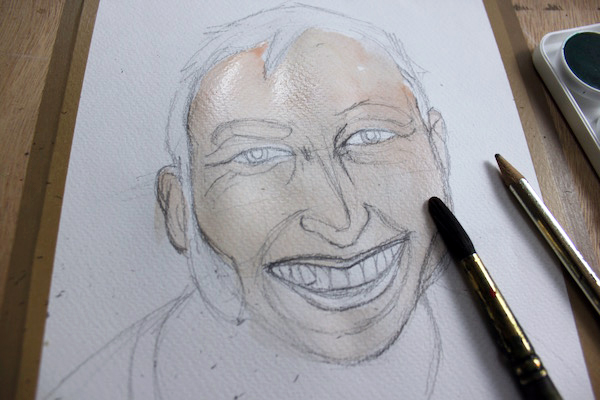
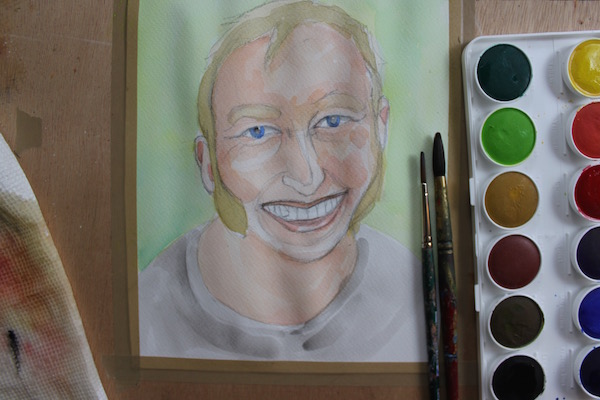
To begin, I mixed all of my paint and applied a thin layer of skin tone, hair color, background and clothing pigment to the paper. This gives me an idea of color relationships and a starting point for adding more hues.
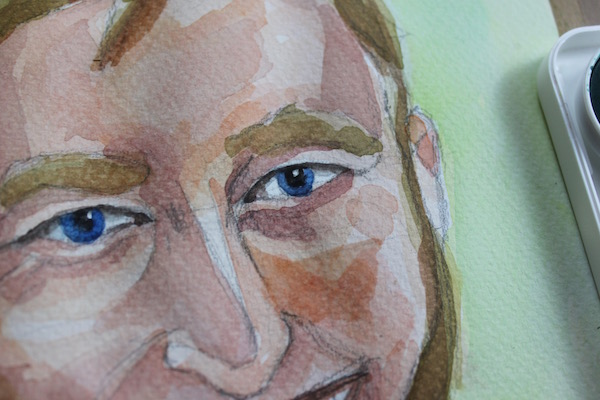
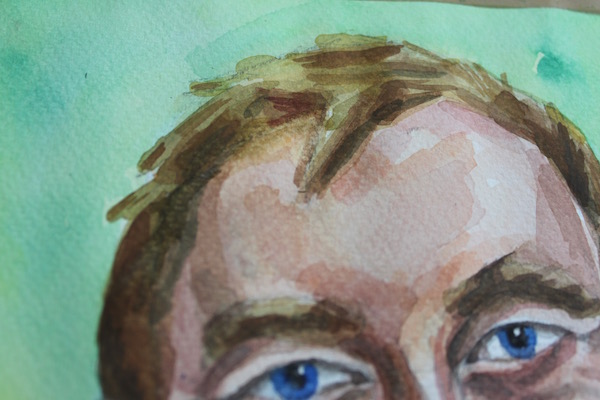
3. Focus on the face.
There’s a lot to paint, but for now, I’m going to focus on the facial features. I’ll work on the hair, clothing and background after I’m happy with the face.
To start this daunting part of the artwork, I worked in phases. The first layer of skin color serves as my highlights and the brightest part of the face. I’m not going to paint over that, but everything else will have more pigment applied to it.
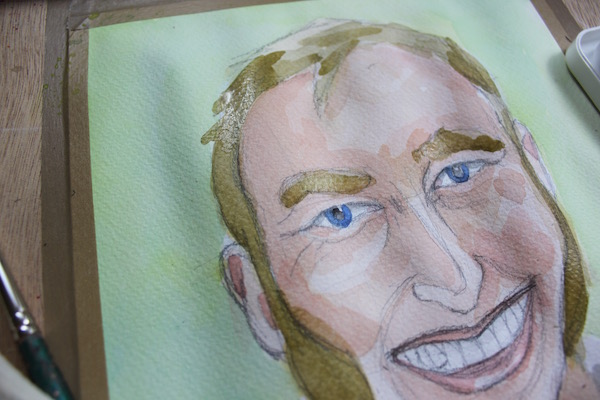
When crafting your painting’s form, start light and gradually go darker. Once you paint something dark it will stay that dark, so it’s very important to paint in thin layers. Here are some tips for adding form to the face:
- For areas that will remain light, simply layer your starting skin pigment on them to build darkness. With each multiple layer the color will appear darker.
- Once you start to mix darker pigments (by adding hues like blue and green to your skin color), continue to work in very light layers.
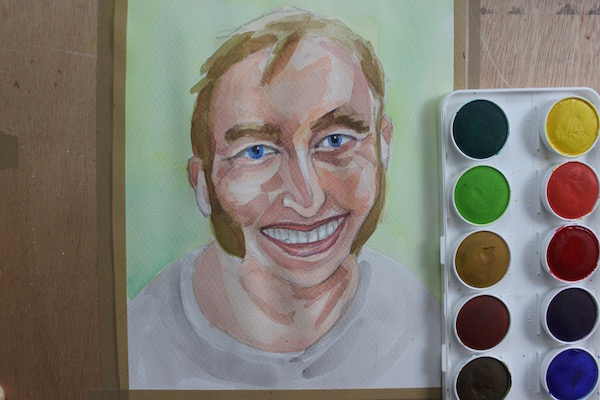
- After you have the large areas of the face painted, dip your line brush into the darkest skin pigment. Draw a faint outline to creases, eyelids, or anything else with fine lines on the face.
I followed these guidelines when painting my brother’s portrait. With watercolor, it just takes time and patience to build up the appropriate amount of layers.
Tip for shadows: Although your reference might appear dark, refrain from making your shadows too dark. It might make your subject look like they’ve got sunken-in features.
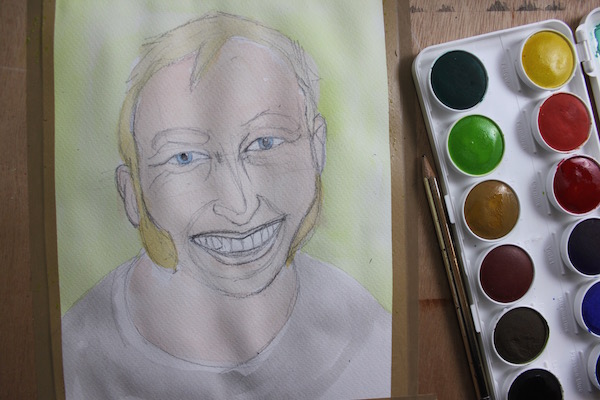
4. Paint the hair.
I was painting the hair a little as I worked on the face, but here’s where you’ll really start to focus on it. Using the same method for painting the fact, start out with the lighter colors. As you build the darks in the hair, create texture by being strategic with your strokes. Hair often moves en masse, so define strands using broad strokes rather than thin lines.
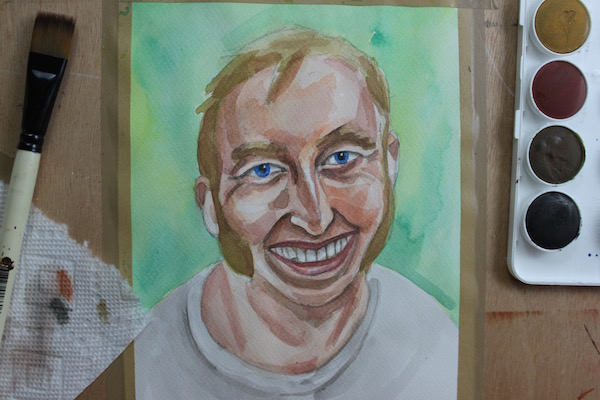
5. Finish with the background.
The hard parts are over! All that’s left is the background. Here, you can be as detailed as you like, but I chose to forgo the small trees and instead paint an abstract wash.
thank you ..very helpful...I enjoyed your lesson
not overly helpful. There is no mention of color mixes used to create skin tones. What colors? What techniques are used to create form or texture? Okay you work in layers, knew that much, but didn't really learn anything here