
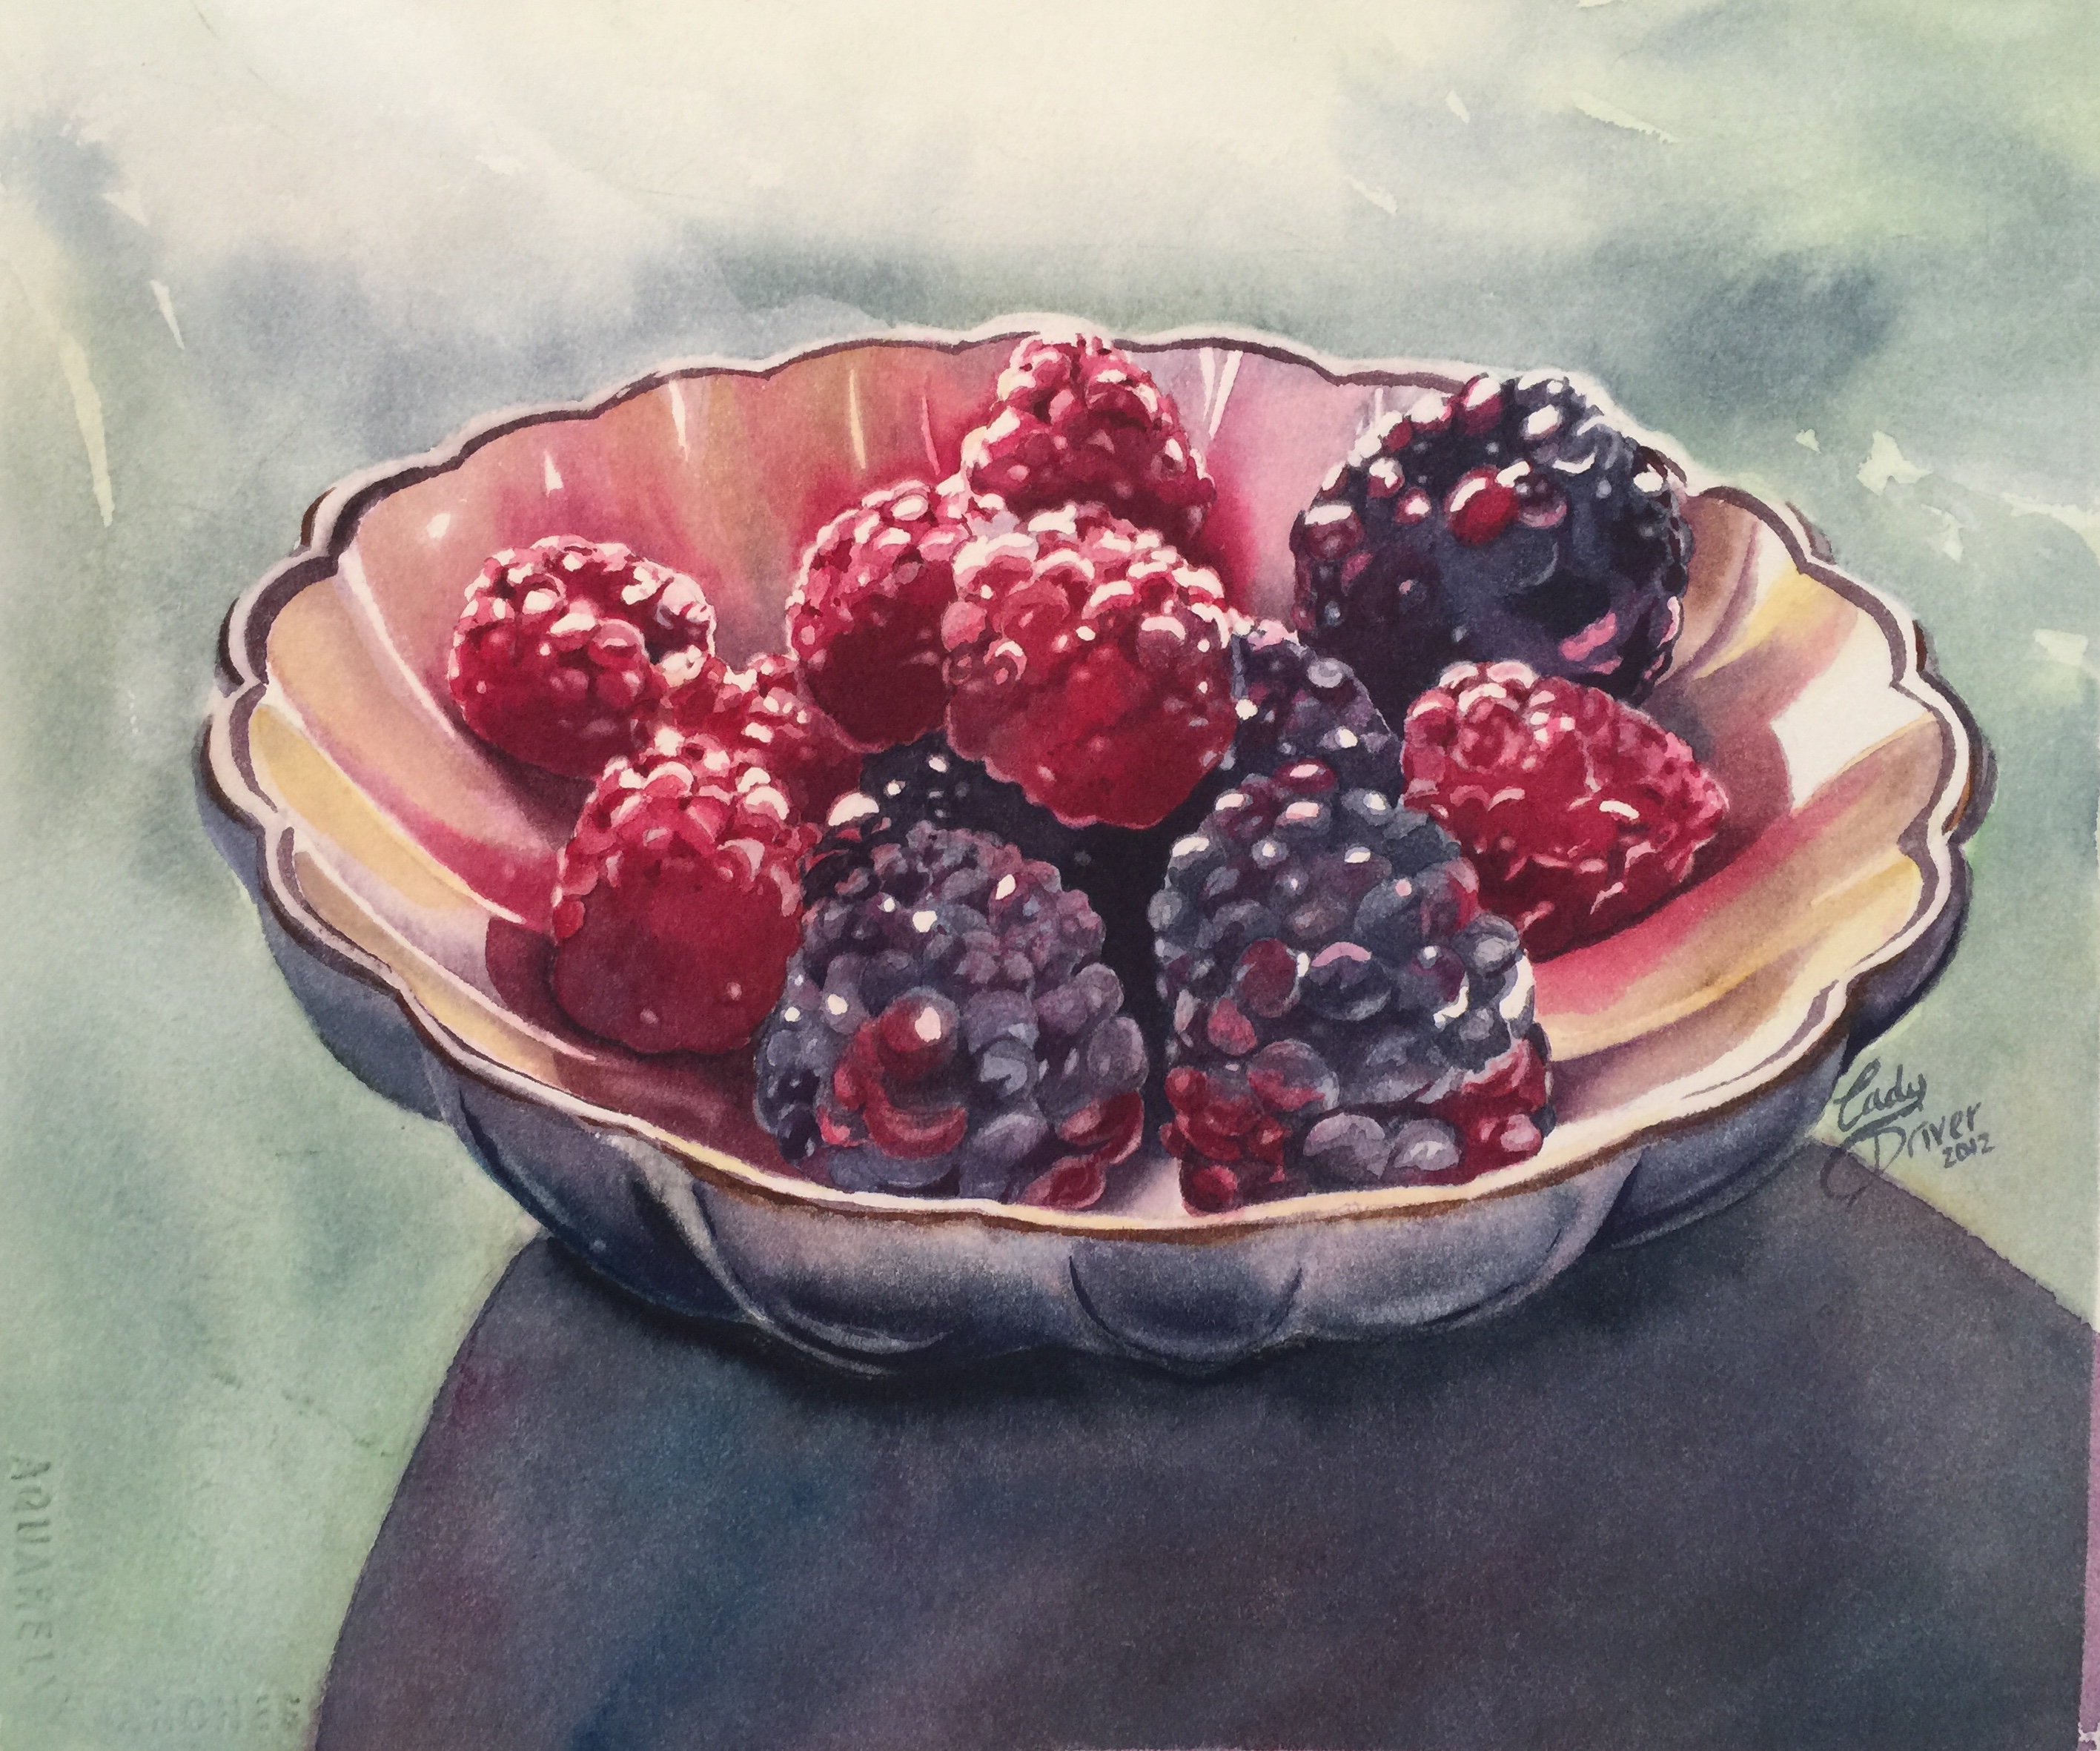
 One morning while eating this simple bowl of berries for breakfast, I couldn’t resist the sunshine streaming through the windows catching the light on the berries. It was screaming to be painted! I snapped a photo and went to town.
While you don’t need a bowl of berries to follow this tutorial, try to find a subject that has lots of extreme lights, deep shadows and contrast.
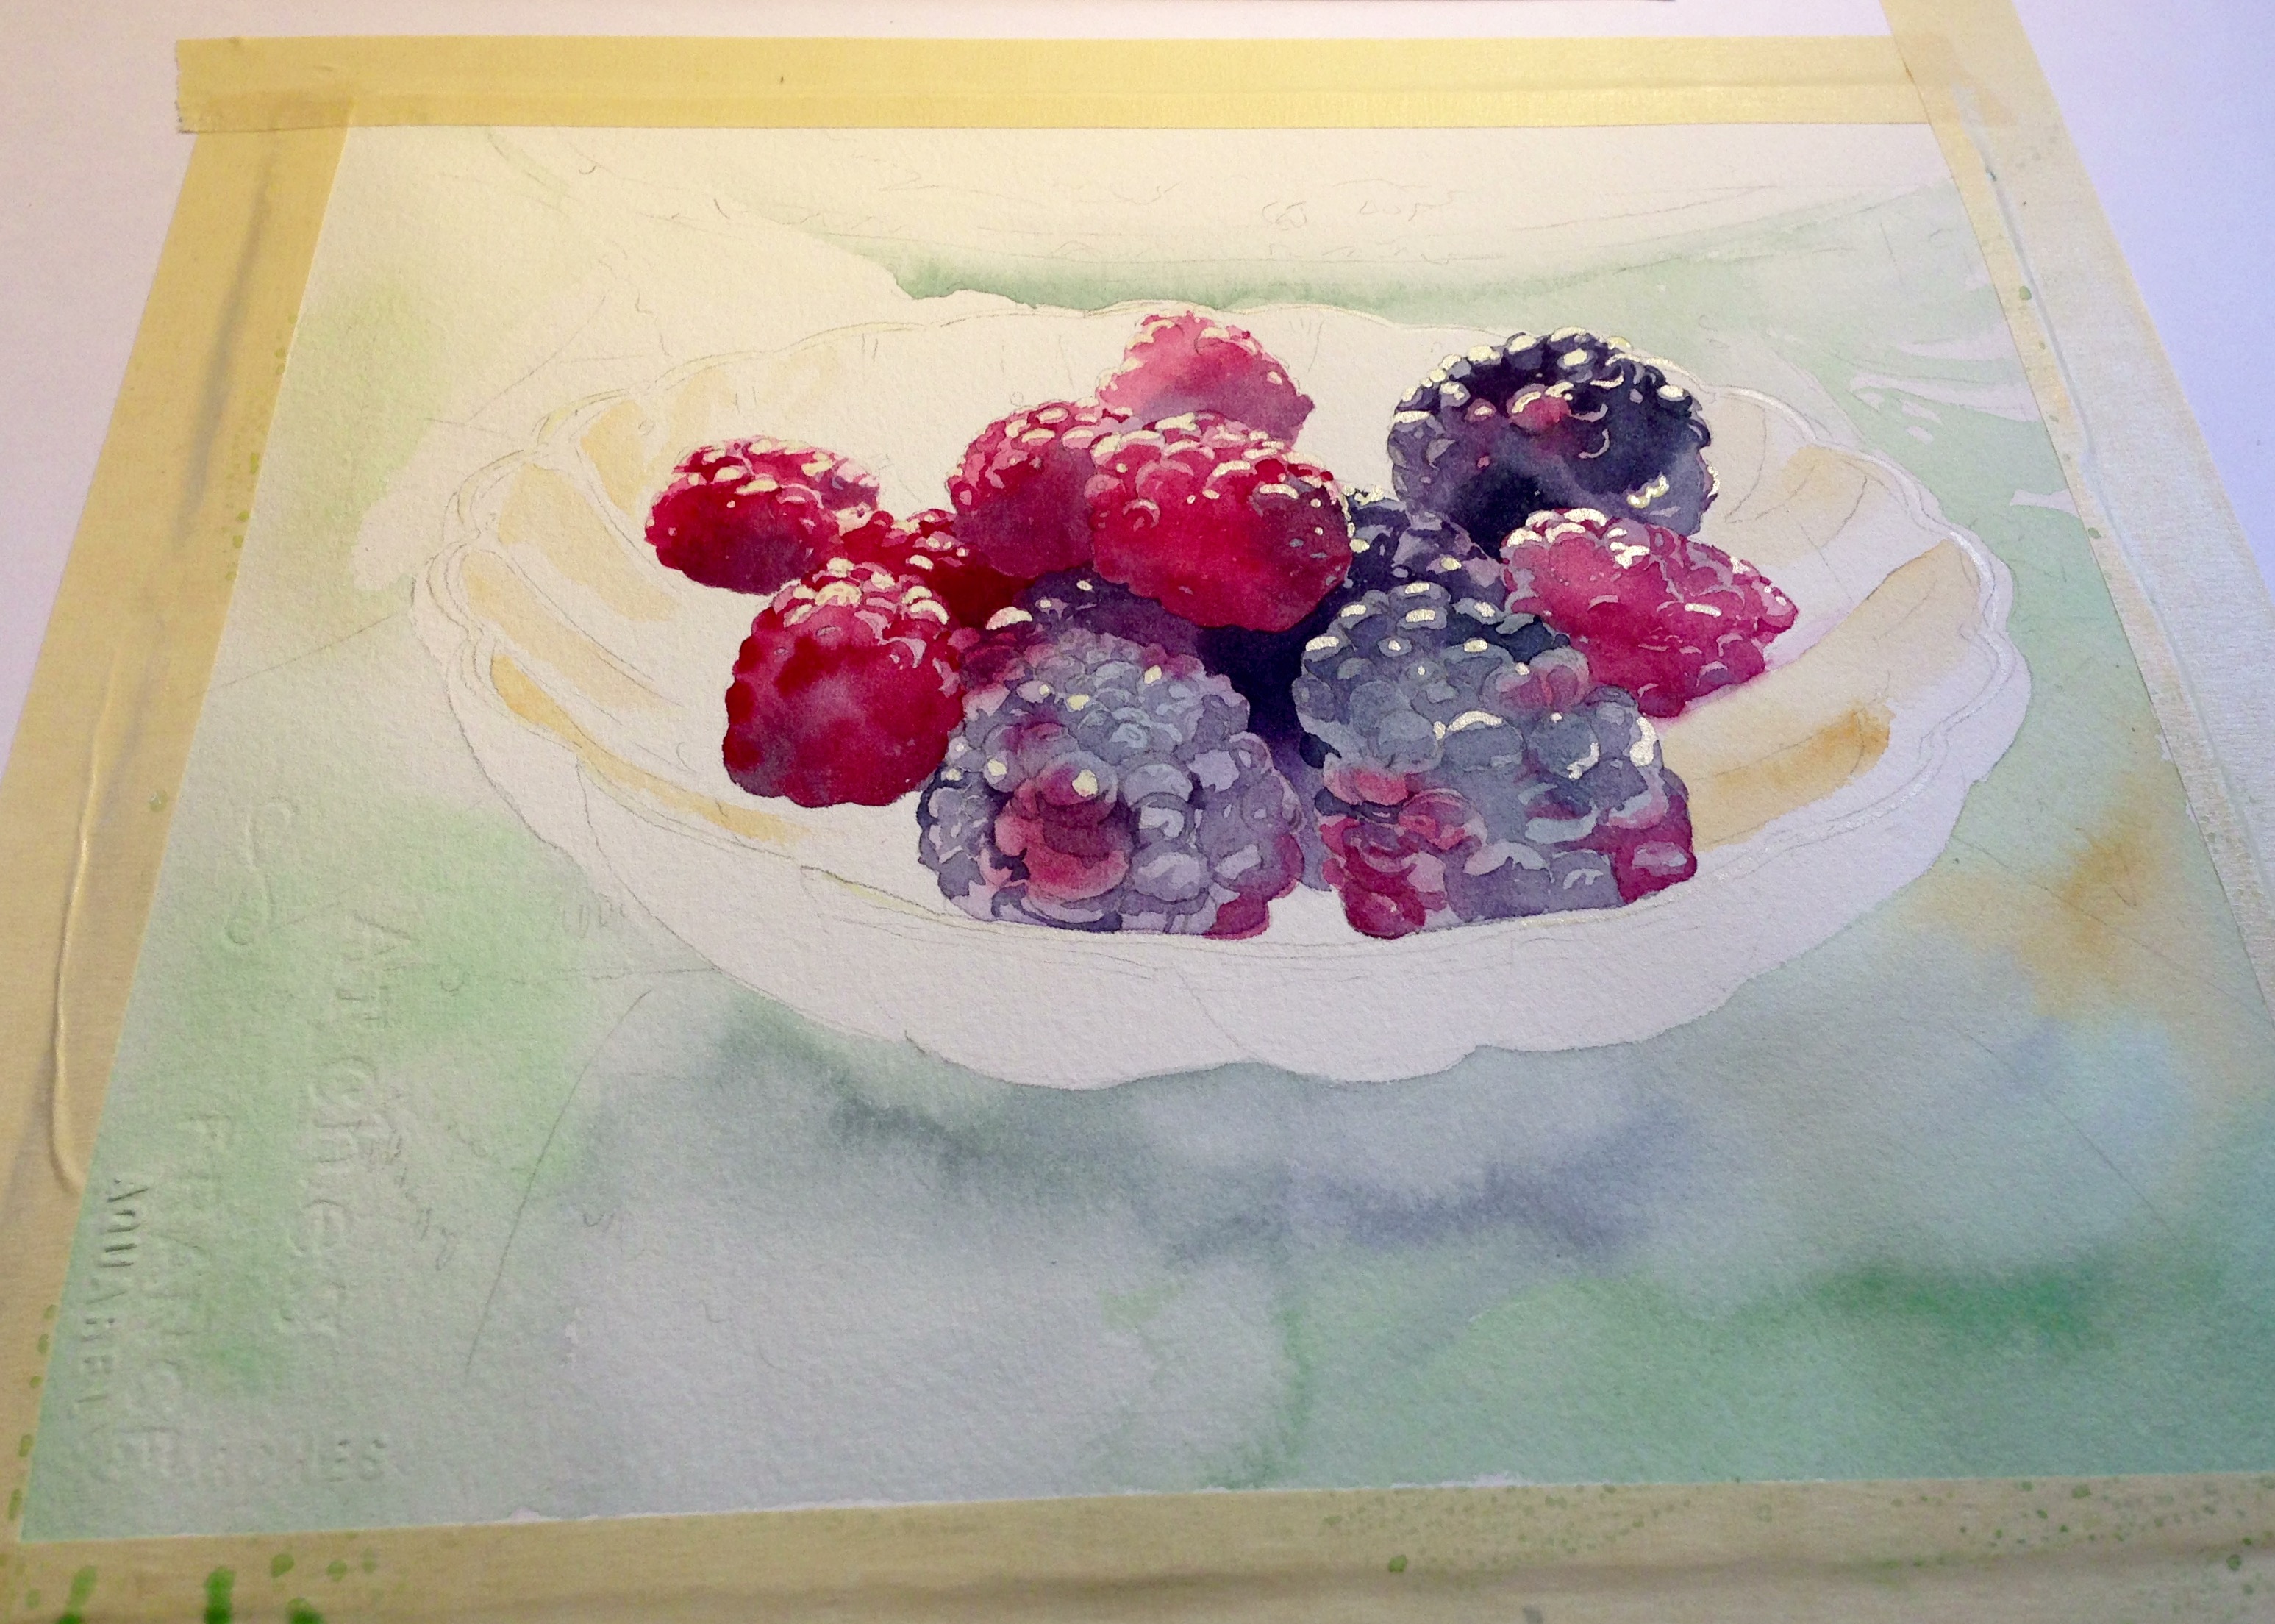
Start with a sketch, and then apply a mask on all of the highlights. It’s a huge pain to paint around the light spots, so masking is an absolute must. I used Winsor & Newton removable masking fluid. Don’t forget to coat your brush’s bristles in bar soap before dipping it into the masking fluid, and remember to wash your brush and reapply soap frequently while masking.
One morning while eating this simple bowl of berries for breakfast, I couldn’t resist the sunshine streaming through the windows catching the light on the berries. It was screaming to be painted! I snapped a photo and went to town.
While you don’t need a bowl of berries to follow this tutorial, try to find a subject that has lots of extreme lights, deep shadows and contrast.
Start with a sketch, and then apply a mask on all of the highlights. It’s a huge pain to paint around the light spots, so masking is an absolute must. I used Winsor & Newton removable masking fluid. Don’t forget to coat your brush’s bristles in bar soap before dipping it into the masking fluid, and remember to wash your brush and reapply soap frequently while masking.
Depth
 Using multiple washes to deepening the darkest of dark colors within your image adds depth and dimension.
After your fluid is dry, your first wet-in-wet wash should look like the berry on the bottom left of the image above. I used Alizarin Crimson, Violet and French Ultramarine with a bit of Payne’s Gray.
For the second and third washes on the middle and right berries, I started painting the details and shadows in more vibrant colors. Your painting may take a few washes to get the depth of color correct.
Notice how it’s almost black towards the center. Use your strongest mixtures of colors in the darkest sections of your painting.
Using multiple washes to deepening the darkest of dark colors within your image adds depth and dimension.
After your fluid is dry, your first wet-in-wet wash should look like the berry on the bottom left of the image above. I used Alizarin Crimson, Violet and French Ultramarine with a bit of Payne’s Gray.
For the second and third washes on the middle and right berries, I started painting the details and shadows in more vibrant colors. Your painting may take a few washes to get the depth of color correct.
Notice how it’s almost black towards the center. Use your strongest mixtures of colors in the darkest sections of your painting.
Light
Before moving onto the next step, be sure your previous work is completely dry.Establishing light in your painting starts with the background and cast shadows. For my painting, I quickly painted a wash of Hooker’s Green (with a slight mix of Burnt Umber) and Payne’s Gray into the shadow area of the bowl. I also charged on some Indian Yellow in places, while it was still wet, to brighten the background color. This starts to establish a light source.
I painted the bowl in two sections, starting with the bottom and them moving to the inside. I constantly referred back to my reference photo to accurately capture all of the little color nuances and shadow shapes. Make this a habit when you are painting. Know your subject and study it so thoroughly that it becomes second nature.
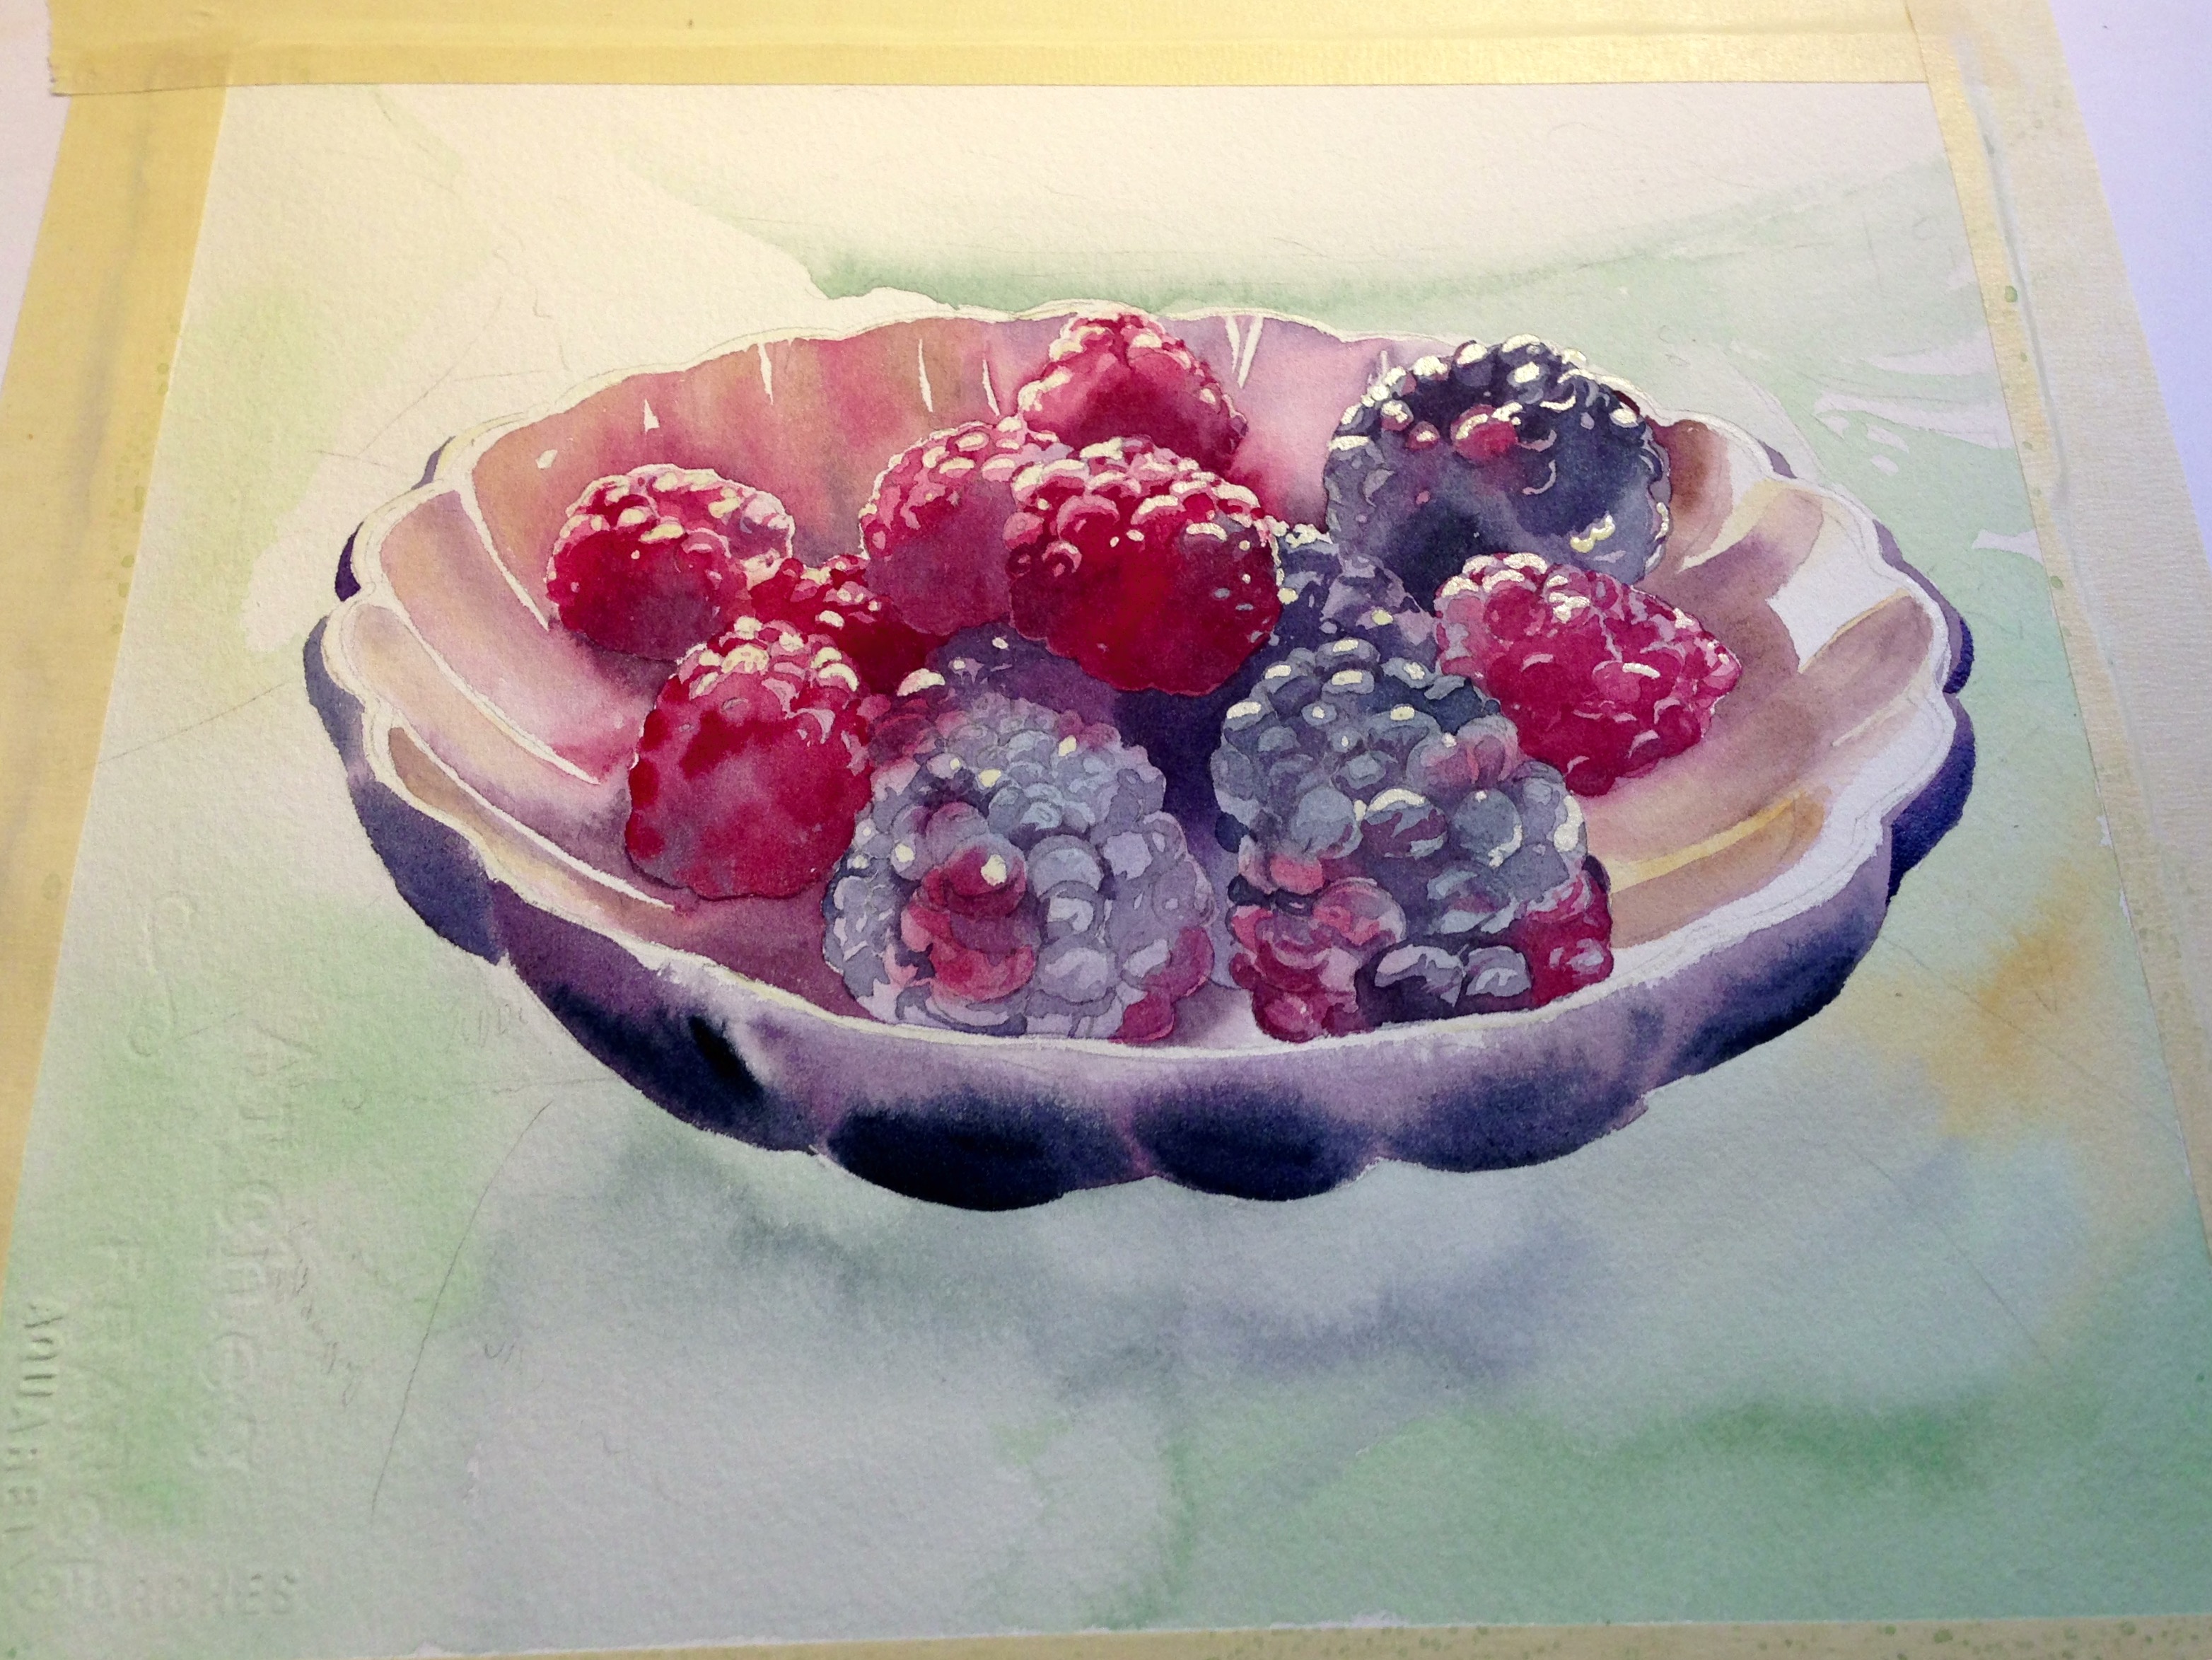 To further define the light in my painting, I added more of the Payne’s Gray color in the bowl’s shadow. Again, wet the whole shadow area and then quickly lay the color on. Don’t forget the smaller shadows in the image: At this point, I also used a number 2 round brush to paint on the shadows where the berries rested inside the bowl.
Your light should stand out once you place your shadows and reflections, with the majority of your light being the white of the page.
To further define the light in my painting, I added more of the Payne’s Gray color in the bowl’s shadow. Again, wet the whole shadow area and then quickly lay the color on. Don’t forget the smaller shadows in the image: At this point, I also used a number 2 round brush to paint on the shadows where the berries rested inside the bowl.
Your light should stand out once you place your shadows and reflections, with the majority of your light being the white of the page.
Color
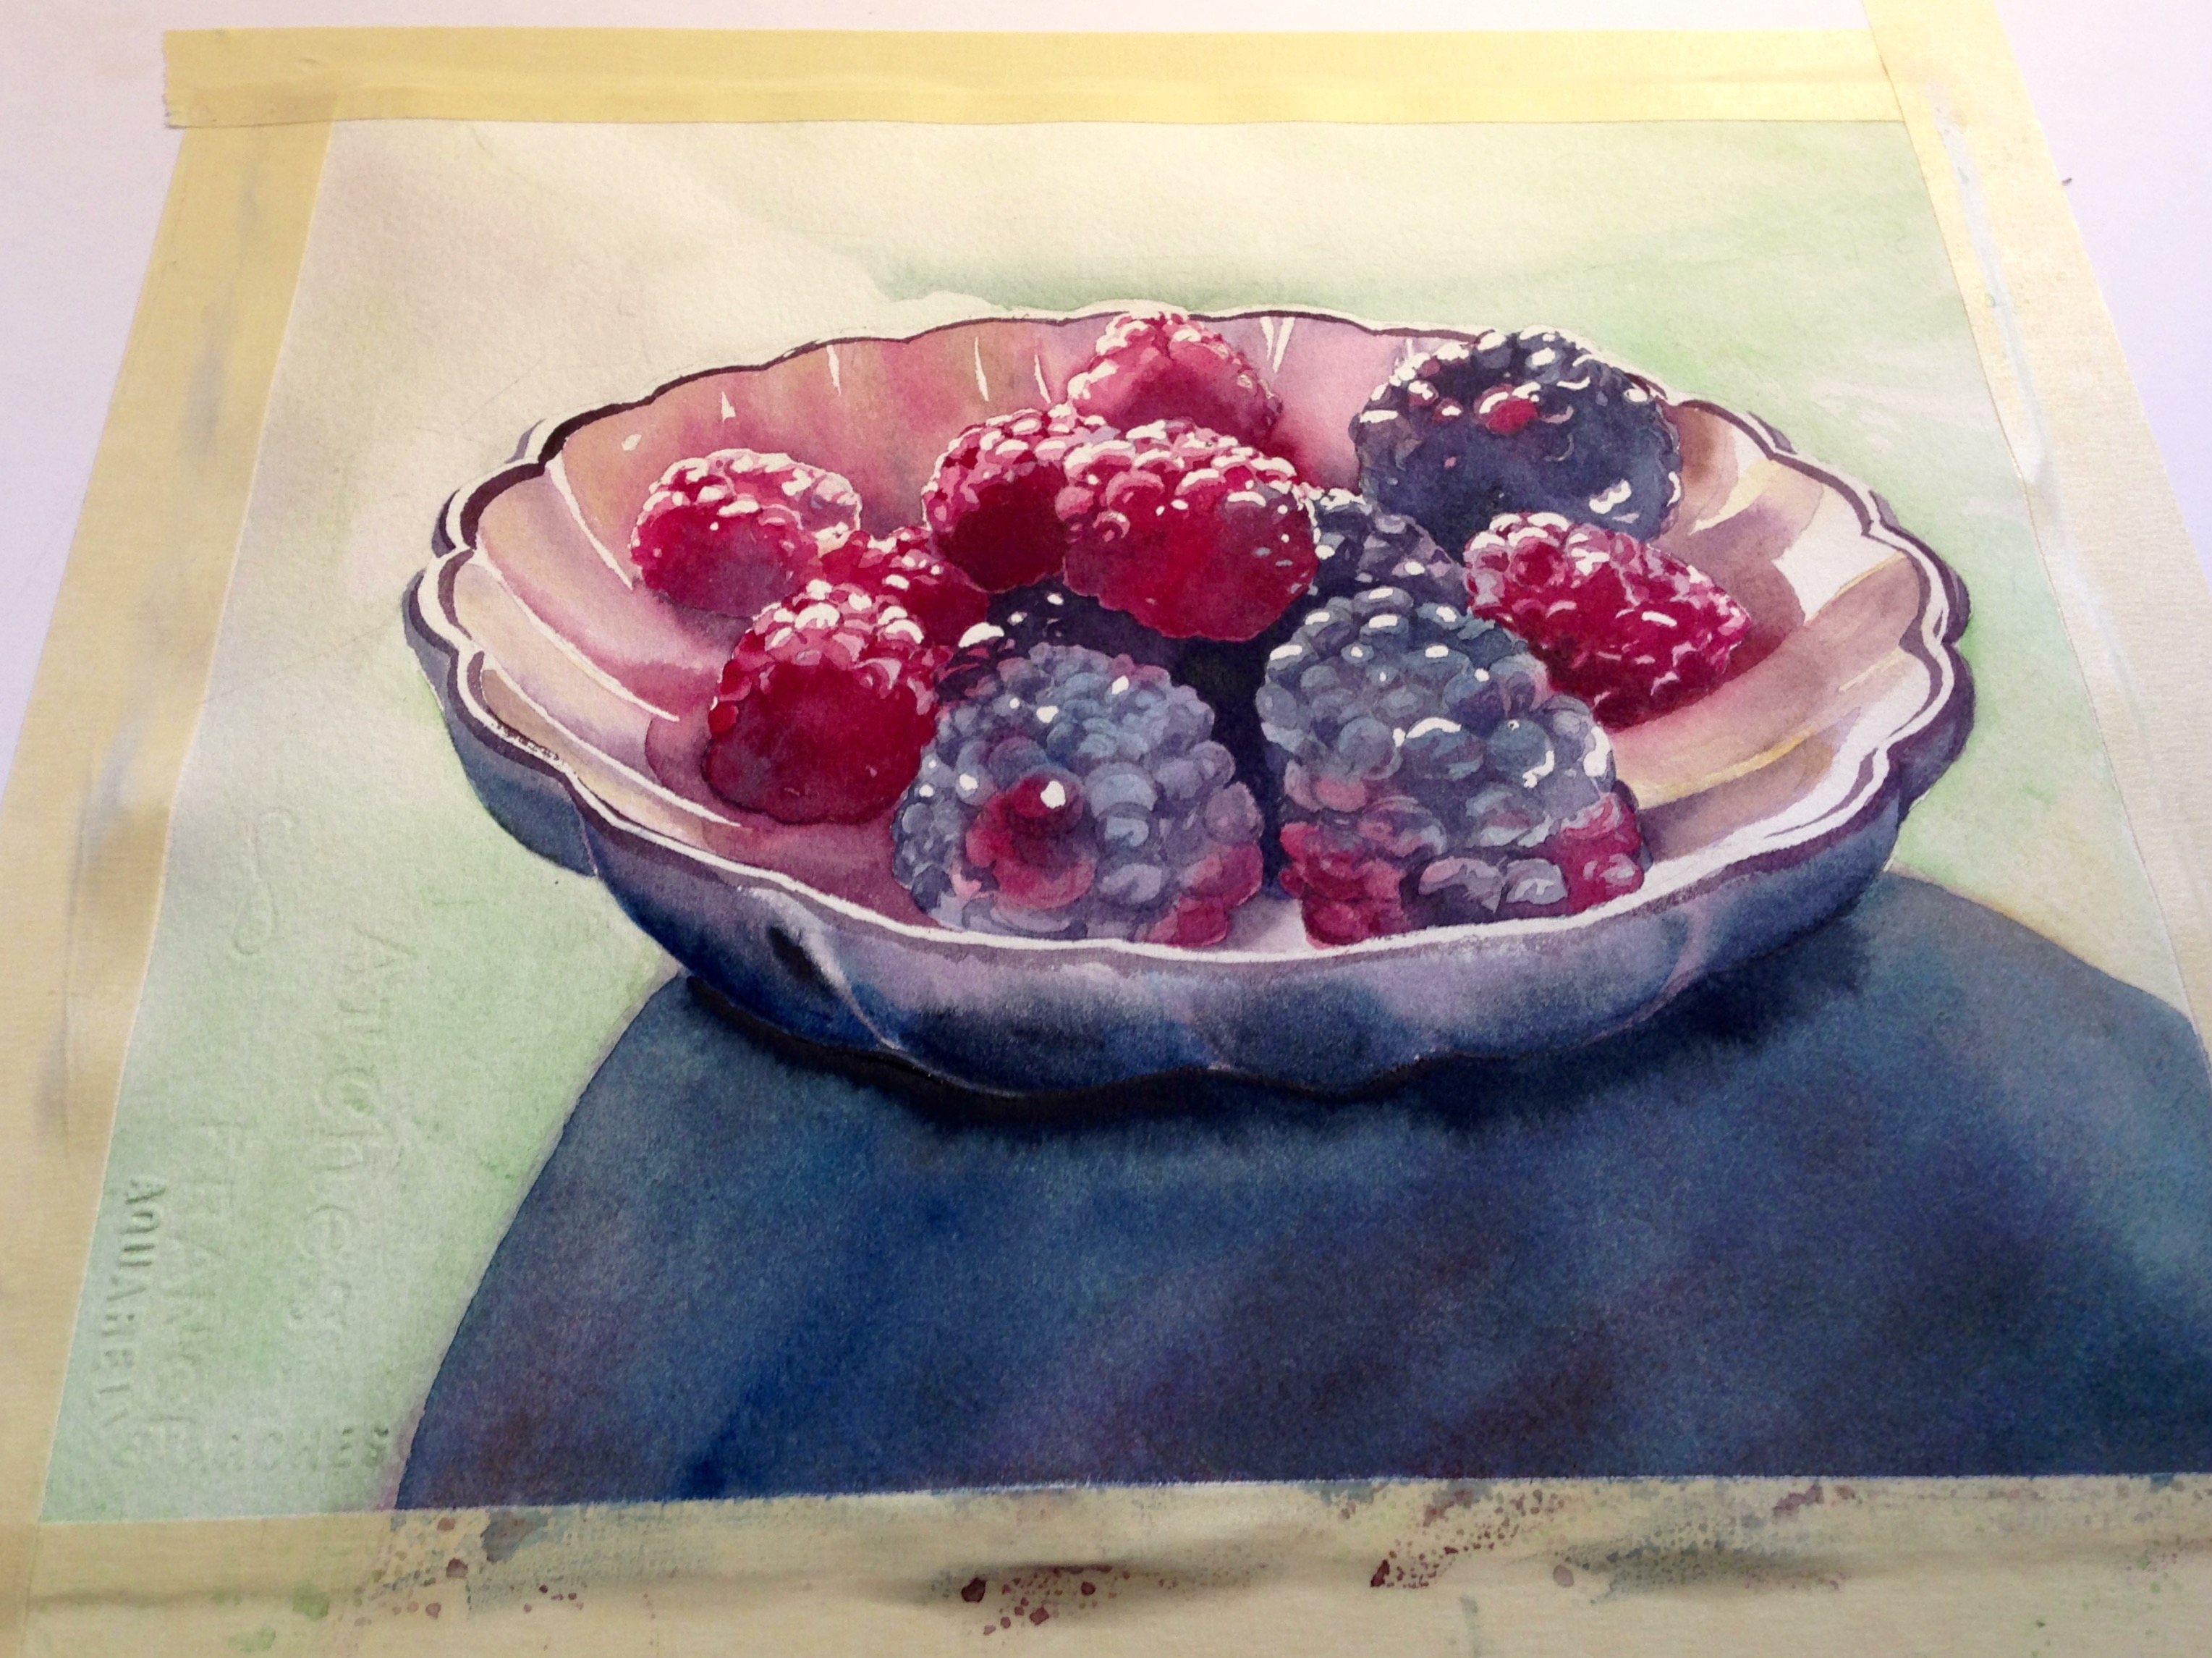
Toward the end of your painting, start glazing pure color in light washes over your brightest subject matter to really help the color pop. Do this as many times as you desire to get a great depth of color in your work. Note how dark I’ve gotten in the middle of the bowl. This depth draws the eye in for that 3-D effect — don’t be afraid to really work on the colors here. I wet the background one last time and slightly deepened the greens and blues around the bowl, not overworking the pigment, but allowing the water to do the work to see what interesting shapes emerge in the end.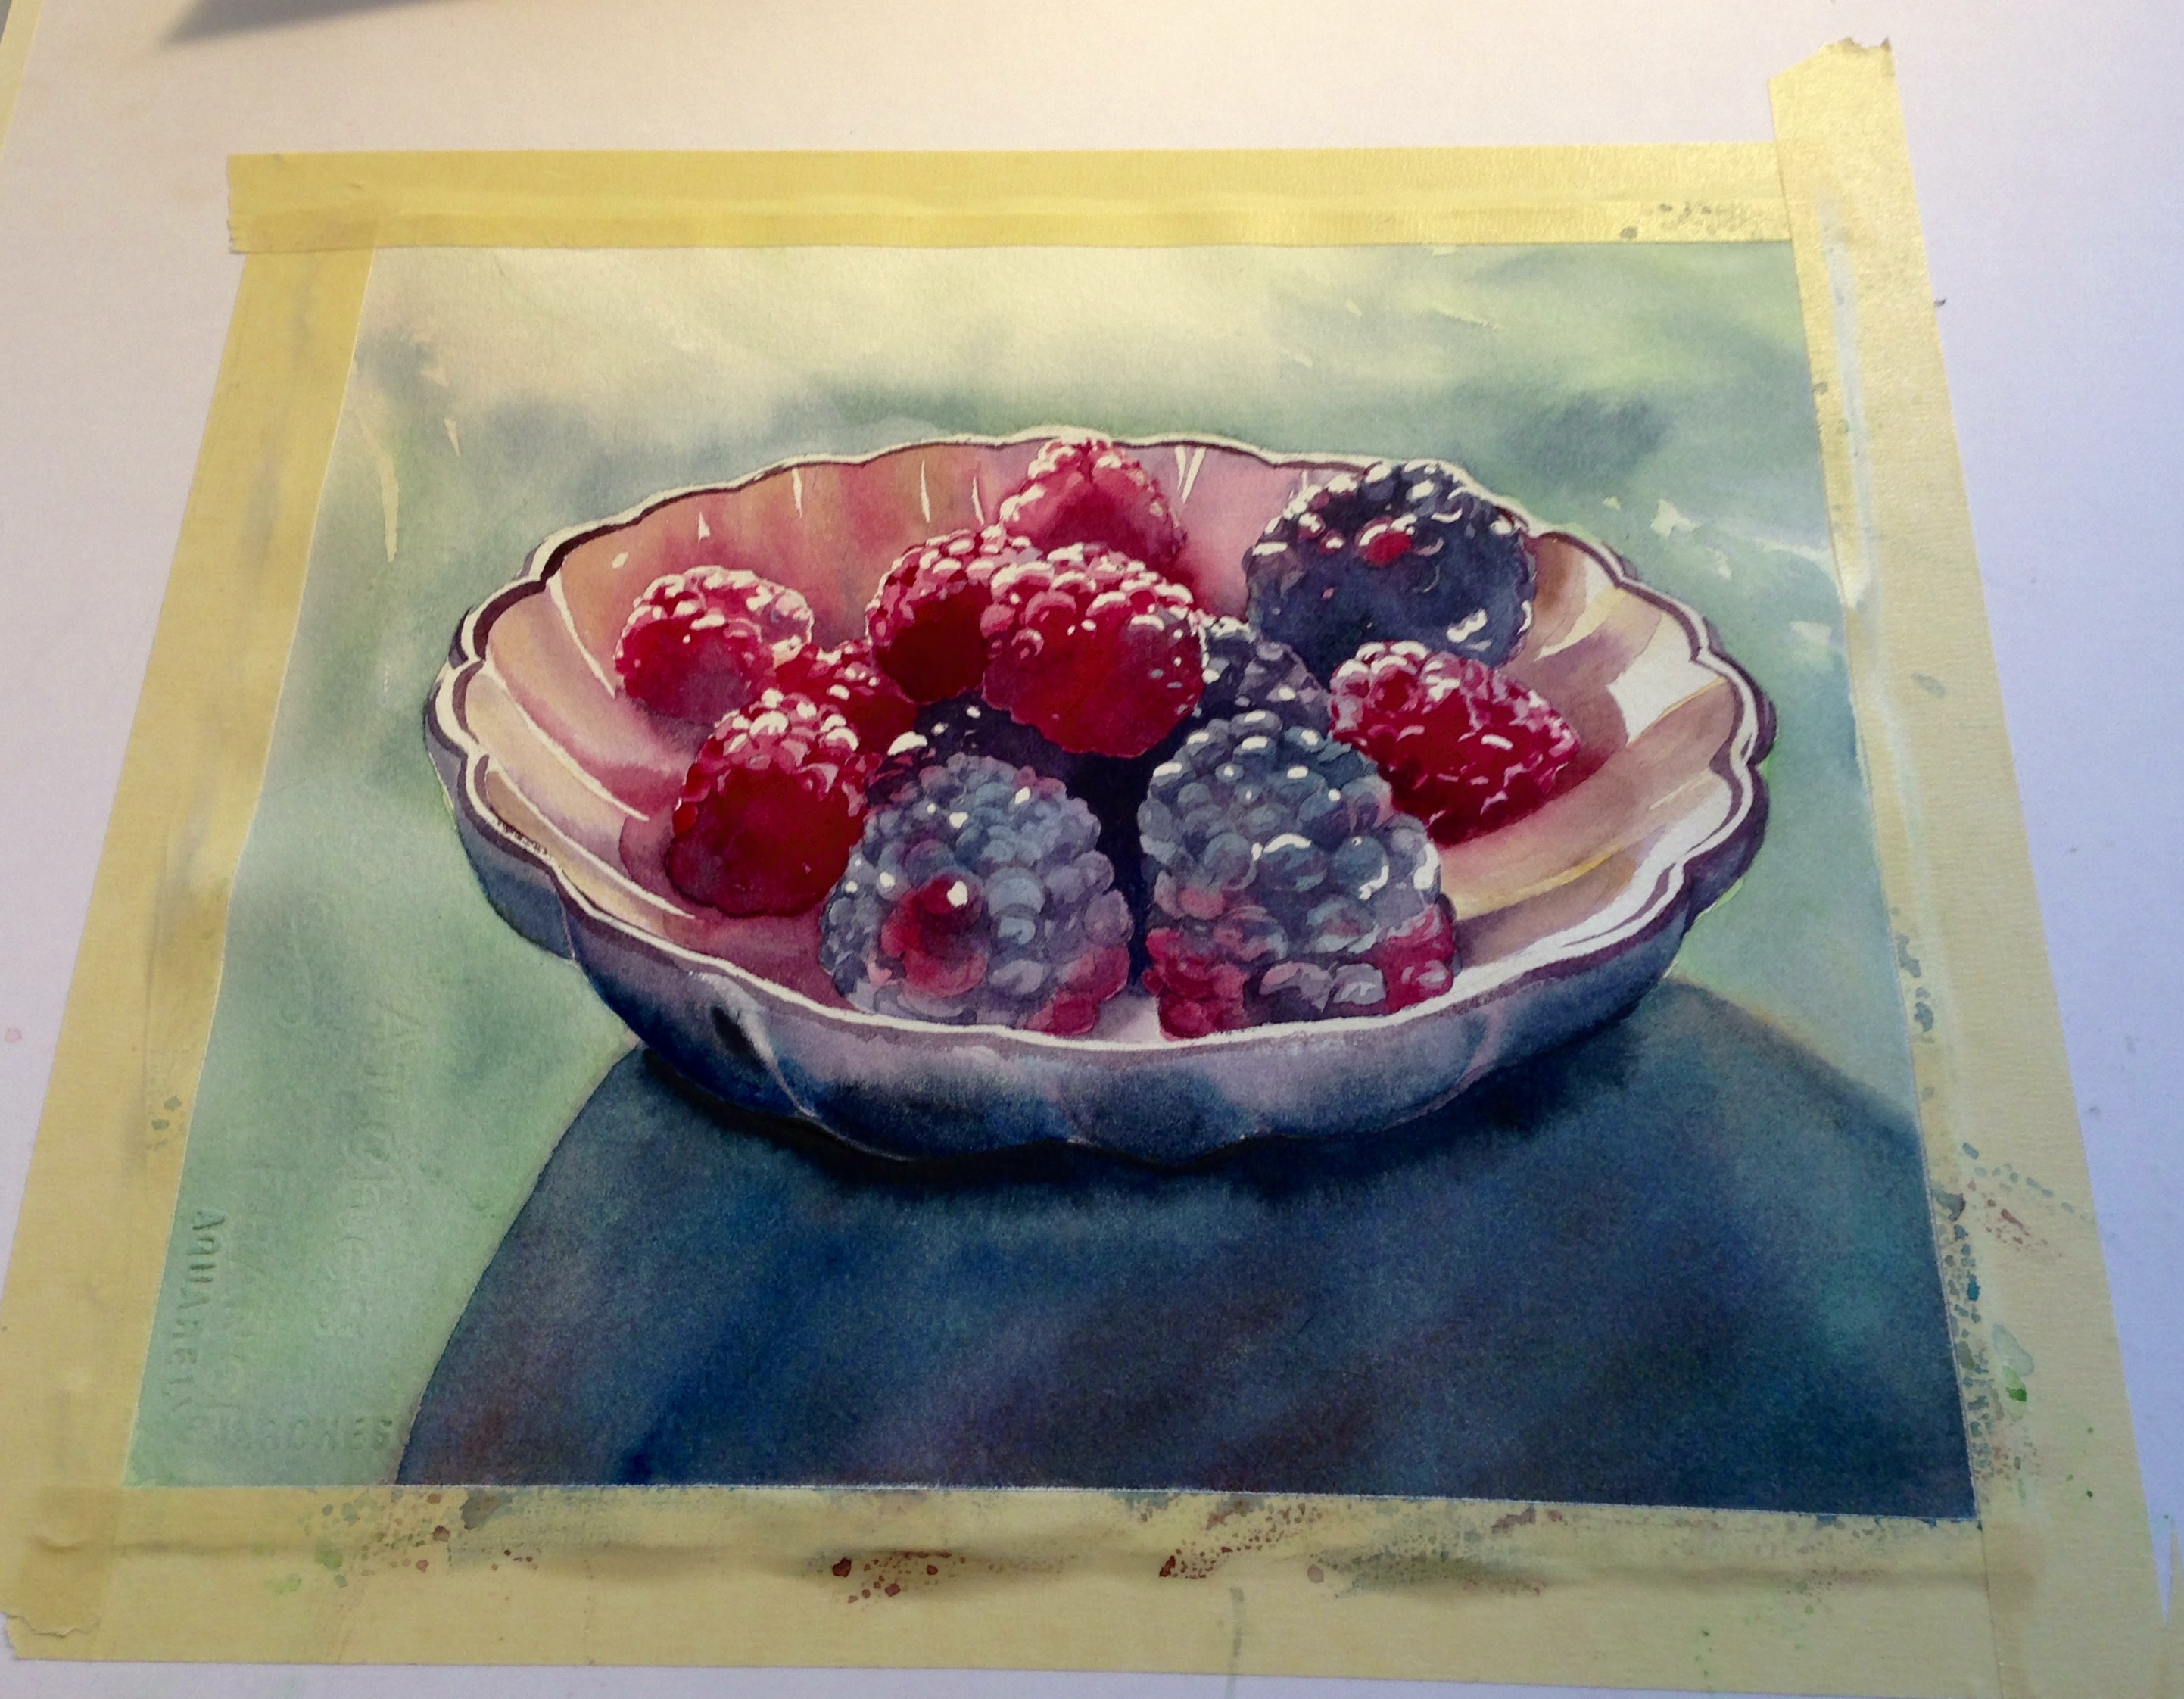
Then, I removed the masking fluid and softened the lighter spots by agitating the page with a clean brush and clean water, then dabbing the softened spot with a tissue.
This make the berries and bowl shine and helps the masking fluid spots not look so harsh.
When you’re finished painting, stand back and asking these three questions:
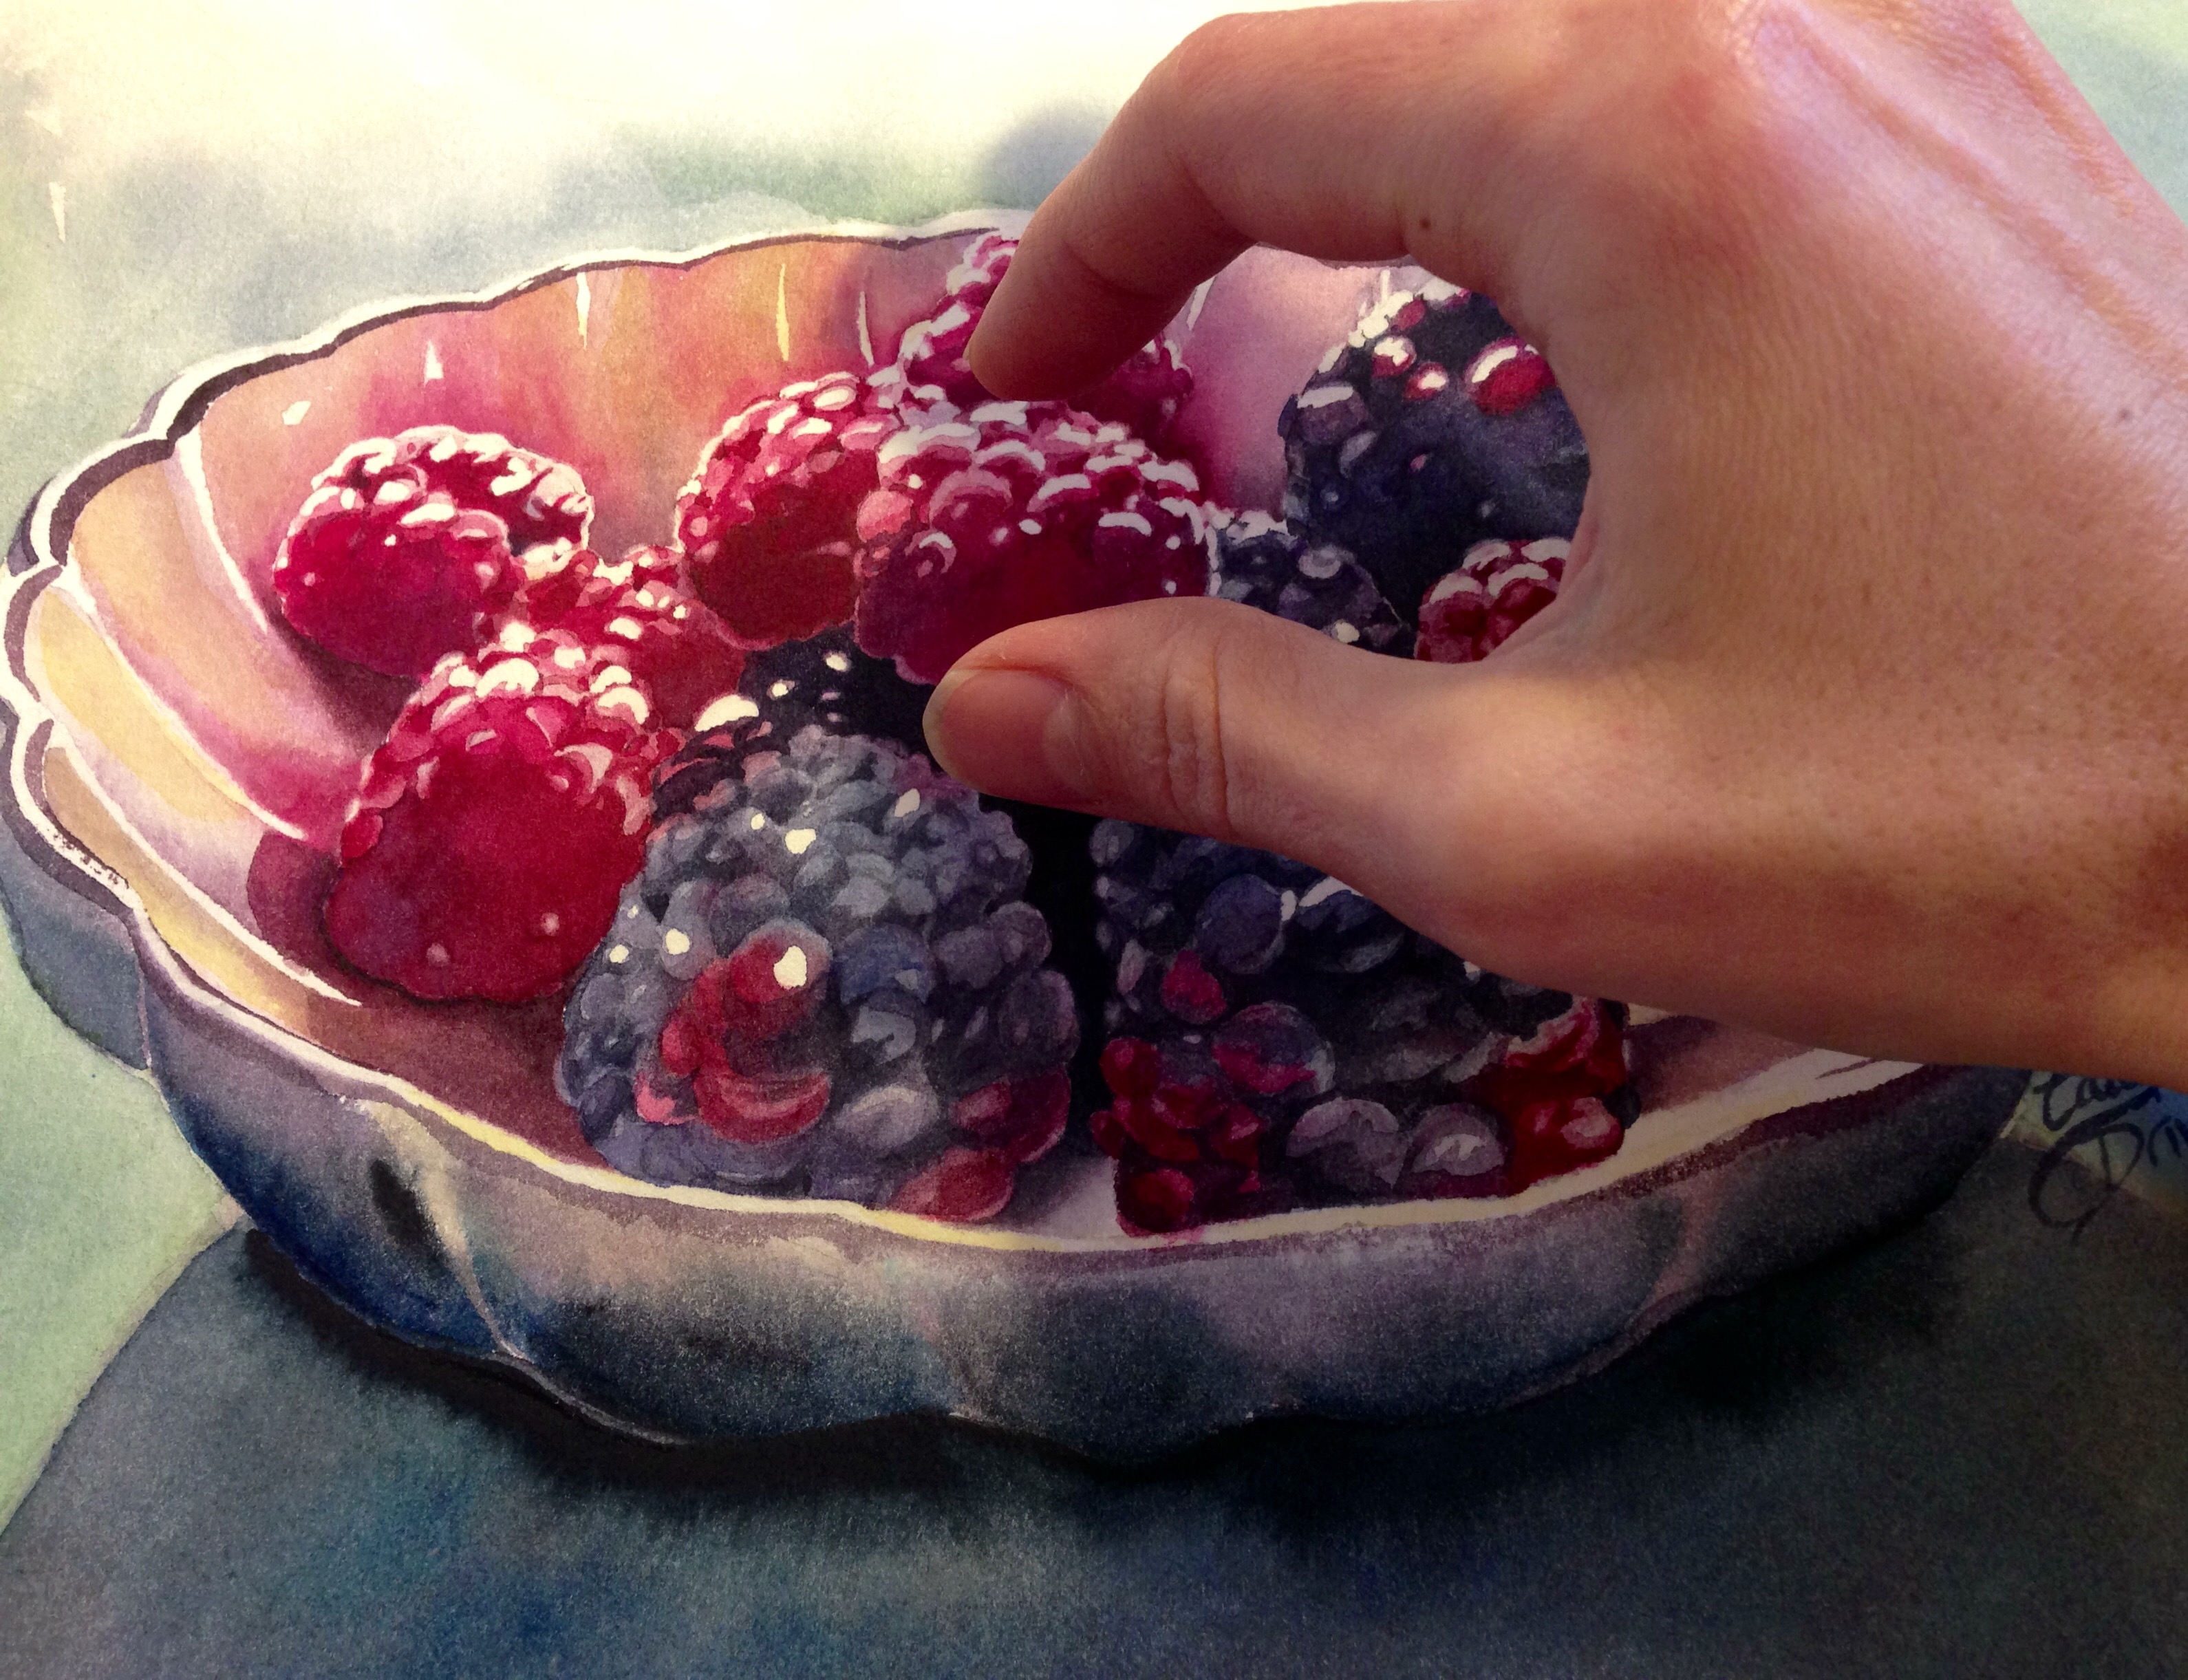
- Does it have depth? Like this fun photo below, does it seem that I can pluck a luscious berry up and eat it? If not, go back and adjust the darkest and lightest parts of the painting.
- Does it have light? Can you identify a strong light source and the lightest spots where the light hits?
- Does it have vivid, accurate colors? Are your reds really red? Are you blues murky, or are they vivid?
Depth, light and color are the three key essentials for a captivating still life, and if you can capture them all in your painting, you’ll successfully draw your viewer in with your realism.
Share tips, start a discussion or ask one of our experts or other students a question.
No Responses to “The 3 Elements Every Watercolor Still Life Needs”