
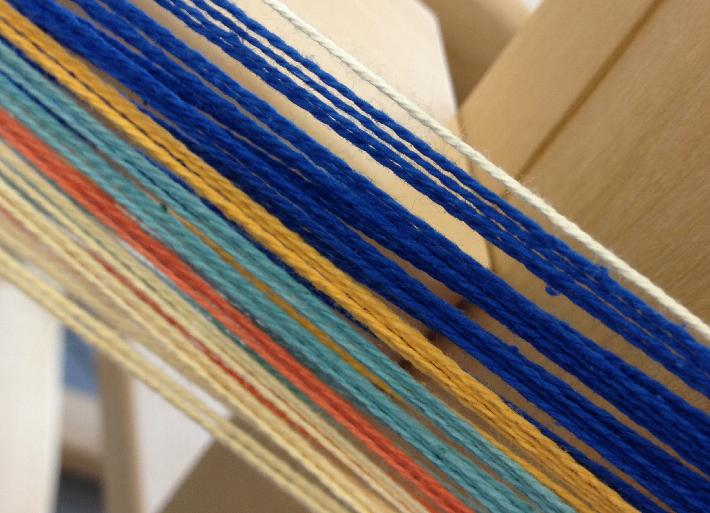
There are so many colors out there — who wouldn’t want to use more than a few at a time? Winding a striped warp is really no more difficult than winding a plain one, especially If you use a few tips to speed things up.
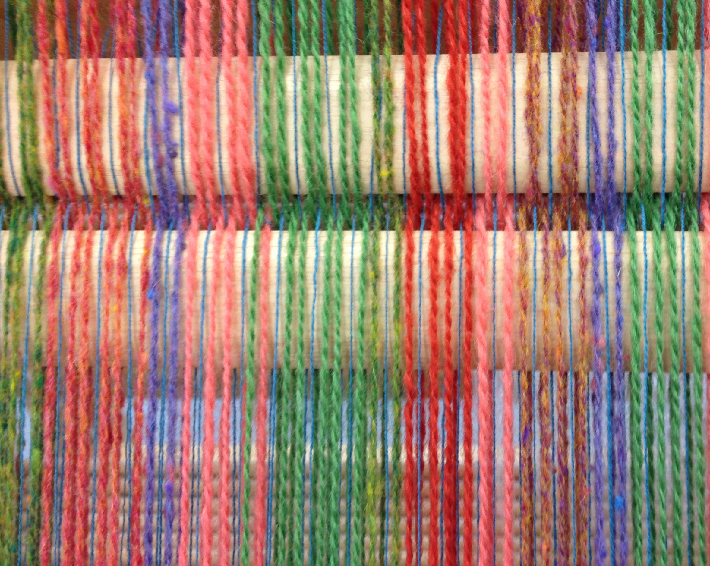
Follow these tips to wind a warp with clean, colorful stripes.
There are three different methods that I use to handle yarn changes in the warp, and which one is appropriate depends on the circumstances.
Tie-off and tie-on
Suppose you are winding a warp for a color gamp, in which each yarn is used only once in the warp sequence. The simplest thing to do when you reach the end of one color is to fasten it off with a slip knot around the end peg of your warping board and then start the next color in the same way.
Keeping several yarns in play
However, if you repeat the same two or three colors for several relatively narrow stripes, then all that tying off and tying on can quickly become annoying. The solution is to keep two or more yarns in play at the same time.
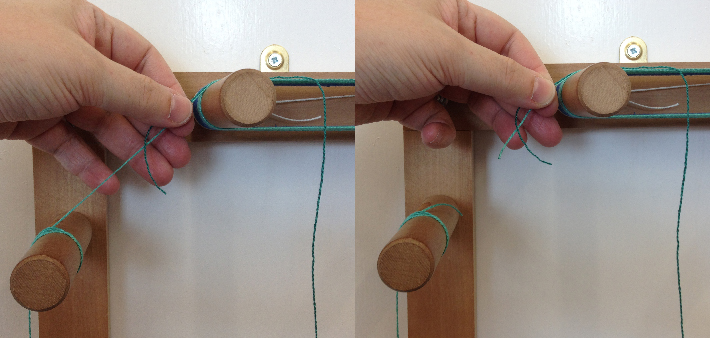
In the example below, I have started my warp with a stripe of dark blue and want to introduce a new color, a light turquoise.
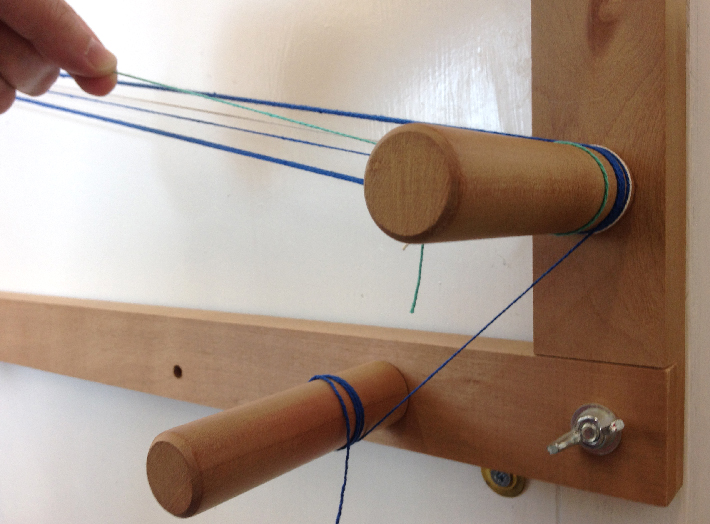
At the end of my warping circuit, I temporarily “parked” the dark blue by wrapping the loose end a few times round a nearby peg. Then, I started the new yarn with a slip knot.
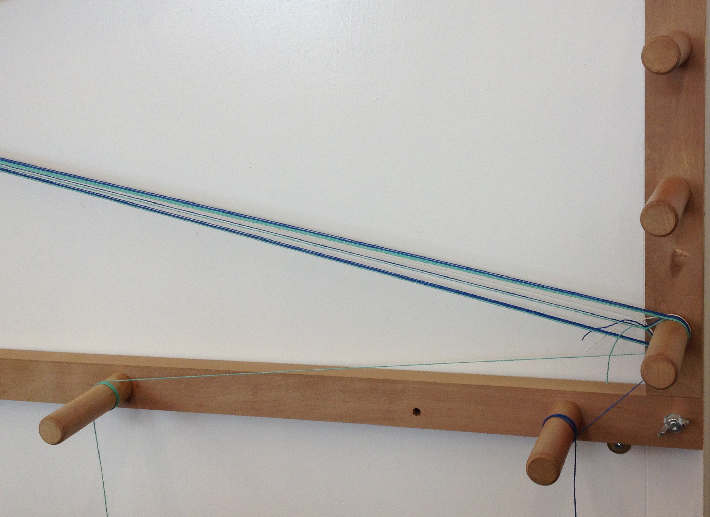
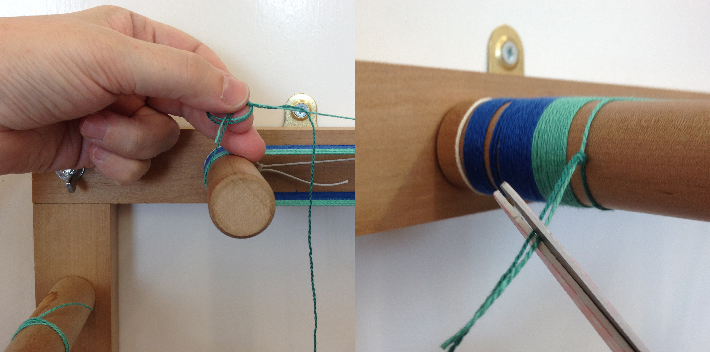
After winding enough of the second color, I wrap the turquoise around another spare peg and return to using the dark blue.
This method works best for up to three different warp yarns making fairly narrow stripes. You can manage four if you’re careful, but beyond that, the challenge of keeping everything in order seems to consume more time than it saves!
At the back of the loom
I always dress my loom from back to front, so I want to make sure there’s a set of loops at one end of the warp that can easily slip over the back apron rod. For that reason, I always start winding at the other end and try to make sure my yarn changes happen at that end, too. Any loose ends will then be destined for the front of the loom, where I’ll cut the loops to thread.
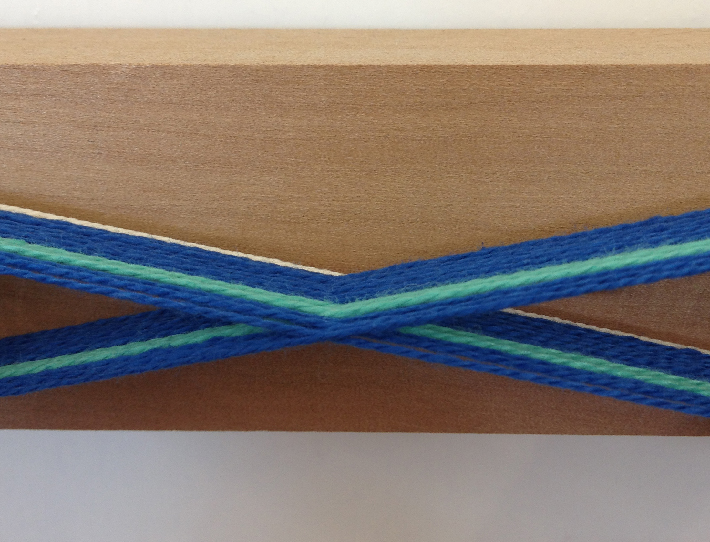
This makes me a big fan of stripes with even numbers of ends! As long as I am winding warp ends in pairs, then I can be sure of ending up where I started. Sometimes, though, design considerations trump convenience and I do want to make a yarn change at the back of the loom. In this case I will always tie the new yarn on to the old yarn to make a continuous thread.
To achieve this as neatly as possible, I anchor the first color of yarn around a spare peg. Then, I hold the first color and the new yarn together behind the last peg of the warp and cut the first yarn.
Keeping the warp yarn under moderate tension, I tie a simple overhand knot just above the end peg. Then, when the yarn is wrapped around the peg and taut once more, the knot will sit neatly behind the peg. Trimming the ends keeps everything neat and avoids tangles.
So there you have it: three simple ways to make a striped warp! Time to add another color!
Thank you! Super helpful.