
We’ve come to the big moment in building our Tage Frid-inspired three-legged stool — putting it all together. All the parts are shaped and sanded to 150 grit. The wedges are ready. The challenging part of this process is that you have to glue up the legs, stretchers and seat all in one go and most of this glue-up happens upside down (the stool, not you!). Bring it on!
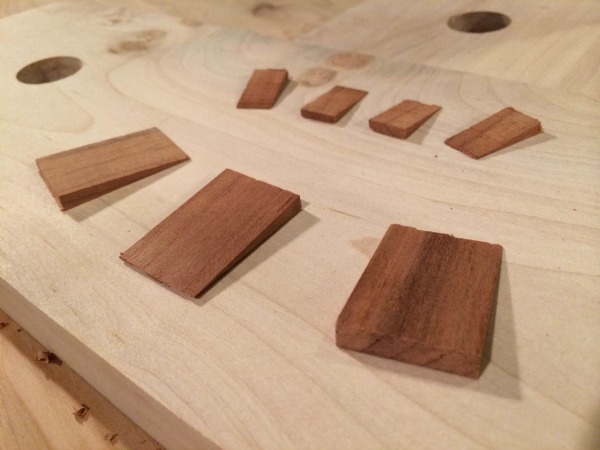
Cherry wedges sized for the large and small tenons for the stool
Go ahead and glue up the seat, seat extension and back in advance. Once you’ve done that, use a random orbit sander and sanding blocks to clean up the dovetails and the transition between the seat extension and the seat. It’s easier to sand the seat before gluing up the rest of the stool.
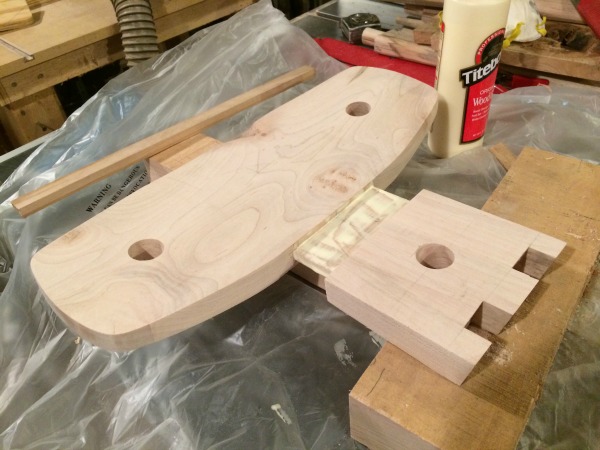
Slide the tenon in the seat extension into the mortise in the seat.
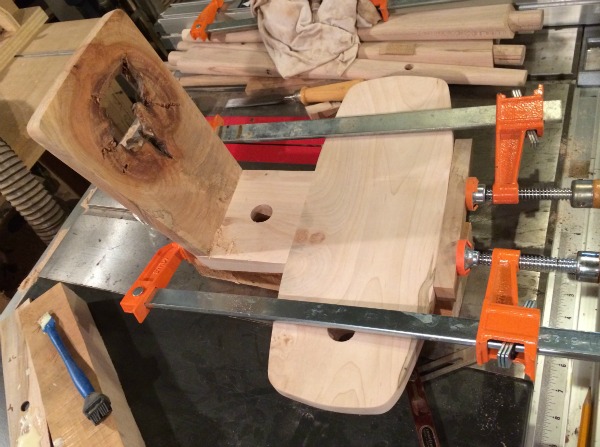
Clamp the back to the seat with an angled block to accommodate the angled dovetails.
Step 1: Prepare to glue-up the whole stool
I found a block that I could use as a rest for the seat during the glue-up and covered it with a thick towel to protect the surface of the seat. At this point it’s worth doing a rehearsal. Go through the whole procedure at least once. Mark your parts well so there is no confusion while you’ve got wet glue everywhere.
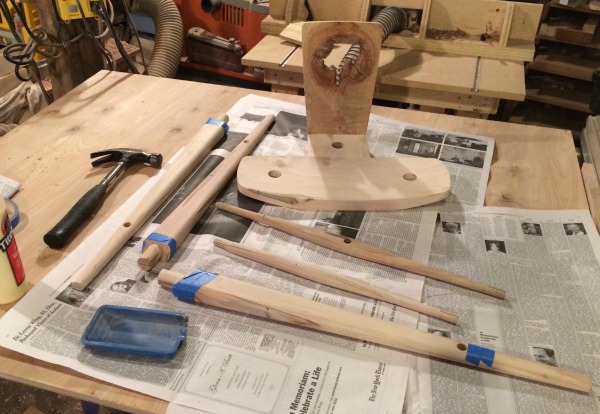
Set yourself up for success by preparing your space for the glue-up.
Step 2: Install the legs
Apply a thin coat of glue on the round tenons of the legs and on the inside of the holes in the seat. Since the glue up has to happen all at once, install the leg tenons only part of the way into the holes. This will allow some wiggle room when you add the stretchers.

With the seat upside down, you’re ready to install the legs.
Step 3: Add the stretchers
Apply glue to the tenons of the stretchers and the holes in the legs (and the hole in the front stretcher). Install the front stretcher first and do your best to center it between the front legs. Now add the cross stretcher. Before the glue sets up, the parts will be fairly flexible and will allow you to move everything into place.
The tenon for the stretcher protrudes through the leg and is locked in with a wedge.
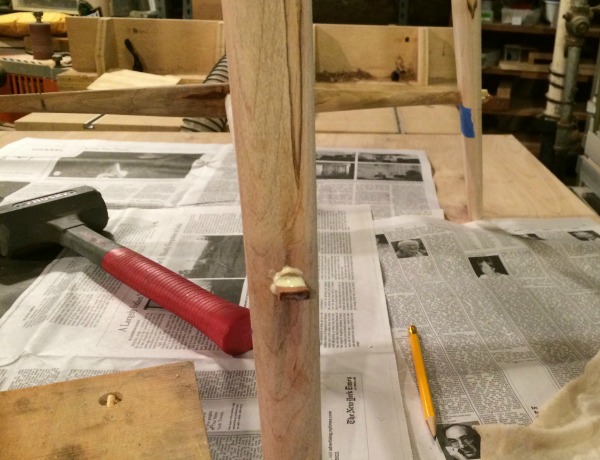
Step 3: Hammer in the wedges
With both stretchers in place, tap the legs deeper into the seat. It may be helpful to turn the stool right-side up and set it on the floor, making sure to protect the seat with a block. Hammer the seat down until the legs are fully seated and protrude up through the seat. Coat your large wedges with glue and insert them all. Don’t tap the wedges all the way in at first. Tap one wedge, then the next and the next so they all go in consistently. You may want to do some firm taps at the end to make sure the wedges are fully seated in their slots. Lift the stool onto your high surface and follow the same procedure with the smaller wedges: insert them all, then tap them home gradually.
You probably won’t need any clamps because the wedges draw the parts of the stool together. The one place where clamping might be necessary is between the front stretcher and the back leg. You’ll need an angled block to make sure you have lateral clamping pressure front to back.
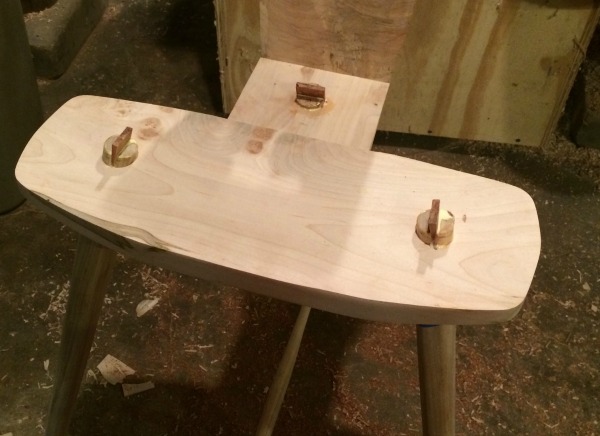
Cherry wedges lock the legs permanently into the seat.
Now stand back and look at your creation! It is officially a stool. In the next and final installment of this series, I will describe how to cut the through tenon joints flush with a Japanese flush-cut saw. After sanding the joints and any other places that need it, the last step is applying finish. The glue-up is one of the most difficult parts of building this project, so celebrate your accomplishment. You’ll have a stool to sit on soon.
Share tips, start a discussion or ask one of our experts or other students a question.
No Responses to “A Foolproof Method for Gluing Up a Three-Legged Stool”