
Make your favorite pie even sweeter by putting it in a chocolate crust! All you do is substitute a portion of flour that traditional pie dough recipes call for with cocoa powder. Seriously — it’s that easy.
Chocolate Pie Crust
Yield: Two 9″ round piesIngredients
Instructions
1. In a large bowl, combine the flour, cocoa powder and salt.
2. Add the cold, cubed butter to your dry mixture. Mix until well incorporated. The biggest crumbs should be no larger than the size of a pea.
Pro Tip: You can also use a food processor to pulse the cocoa-flour-salt mixture with half of the butter until the texture is slightly coarse. Add the remaining butter and pulse until the largest crumbs are the size of small peas.
3. Gently stir in the water a little at a time, until the mixture clumps together easily and minimal dough flakes off. (Some visible butter is fine.)
4. Divide your dough in half, shape it into balls and flatten each one into a disk. Wrap them in plastic and refrigerate for at least 30 minutes. You can refrigerate them overnight if you wish.
5. When you’re ready to bake, dust your work surface and rolling pin with cocoa powder. Place your dough on the cocoa-covered surface and roll it out until it’s a few inches wider in circumference than your pie plate.
Good to Know: You can absolutely dust your surface with all-purpose flour, but it will leave a white residue on your pastry. Cocoa powder gives a more consistent color.
6. Transfer the dough to your pie plate. Press it into the pan, allowing the edges to drape over the sides.
Pro Tip: Transferring your pie dough can be tricky. Make it easier by folding your rolled-out dough in half, then in half again. Then unfold it into your pie plate.
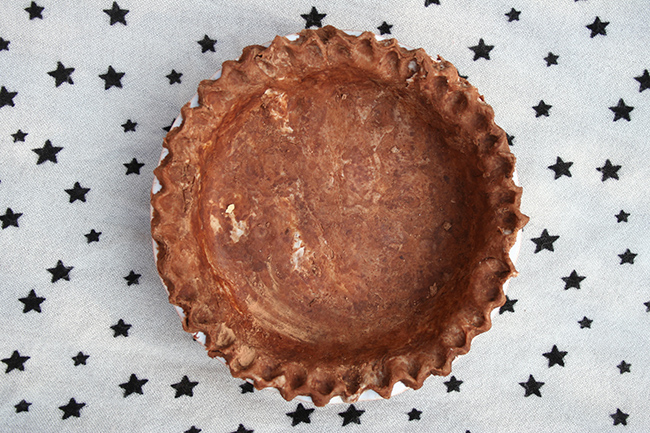
5. Trim or shape the edges of your pie crust as you like.
Your crust is done! Follow your chosen pie recipe from here, or freeze your dough until you’re ready to add the filling.
Pro Tip: Make sure to monitor your pie as it bakes, as the chocolate pie crust may take a few minutes less to bake than a traditional version. To avoid burning, wrap the edges in foil before putting the pie in the oven. This can also be a good recipe for blind baking!
Share tips, start a discussion or ask one of our experts or other students a question.
Already a member? Sign in
No Responses to “This Pie Crust Is Every Chocoholic's Dream”